Creating A USB Drive

This appendix describes how to create a bootable USB drive for installing Analytics.

Creating the USB Boot Drive

To install the Analytics software from a USB drive, you must copy the ISO image to the USB drive to make it a bootable disk. This can be done in Windows, MacOS, or Linux.

Creating the USB Boot Drive with MacOS X


To create a bootable USB drive on MacOS X, complete the following steps.

  1. Insert the USB drive into a USB port on the Macintosh.
    This automatically mounts the drive, but it must be unmounted to create a bootable disk.
  2. Open a Mac OS terminal window.
  3. Enter the diskutil command to list all the mounted disks, as in the following example:
    diskutil list

MacOS Disk Utility

You can also use the MacOS Disk Utility GUI application (applications/utilities) to identify the mounted disks and unmount the USB drive.

  1. Identify the /dev/disk<x> label for the inserted USB drive.
  2. Unmount the USB drive (this is different than ejecting), using the following command.
    diskutil unmountdisk /dev/disk<x>
    Replace <x> with the unique numeric identifier assigned by the system.
  3. Enter the sudo dd command in the terminal window to make the USB drive bootable.
    sudo dd if=<path to iso image> of=/dev/rdisk<x> bs=1024m
    Note: Using the dd command with the wrong disk name can erase the installed OS or other vital information.
    Use this command to copy the appliance ISO image to the USB drive. Using /dev/rdisk makes the copying faster (rdisk stands for a raw disk).
    Replace <x> with the drive identifier for the USB drive and replace <path to iso image> with the file name and path to the location where you downloaded the ISO image.
    the following command copies the file bmf-service-node.dmg to disk2:
    sudo dd if= bmf-service-node.iso of=/dev/rdisk2 bs=1024m
    It can take up to ten minutes to copy the image to the USB drive.
    To monitor the progress of the write operation, enter the following command in a separate terminal window.
    $ while sudo killall -INFO dd; do sleep 5; done
  4. Eject the drive by entering the following command:
    disk util eject
    Alternatively, select Eject from the File menu.

Building the USB Boot Image with Linux


To create a bootable USB drive on using Linux, complete the following steps.

  1. Insert the USB drive into a USB port on the Linux workstation.
  2. In a Linux terminal window, enter the following command to identify the USB drive.
    disk -lu
    On Linux, the USB drive is typically /dev/sdb.
  3. Verify that the USB drive is not currently mounted, or unmount it if it is. Use the mount command to list the currently mounted devices.
  4. Use the sudo dd command to make the USB drive bootable by copying the ISO image.
    # sudo dd if=<path to iso image> of=/dev/sdb bs=4096
    Note: Using the dd command with the wrong disk name can erase the installed OS or other vital information.
    Replace <path to iso image> with the file name and path to the location where you downloaded the ISO image. For example, the following command copies bmf-service-node.iso to the USB drive:
    # sudo dd if=bmf-service-node.iso of=/dev/sdb bs=4096
    It can take up to ten minutes to copy the image to the USB drive.
  5. Eject the USB drive from your Linux workstation.

Creating a USB Boot Image Using Windows


A number of Windows utilities are available for building a USB boot image from an ISO image. The following procedure uses the Rufus bootable image program.

To build a USB boot image using Windows, complete the following steps.

  1. Download the Rufus utility from https://rufus.akeo.ie/.
  2. After downloading the utility, double-click the rufus.exe file.
    The system displays the following dialog box
    Figure 1. User Account Control
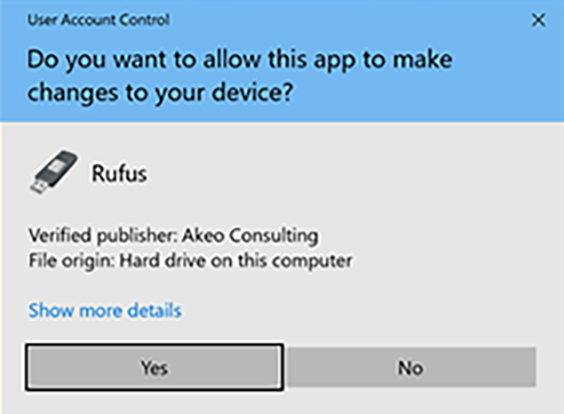
  3. Click OK to allow the changes required for installation.
    The system displays the following dialog box
    Figure 2. Rufus: Create an ISO Image Option
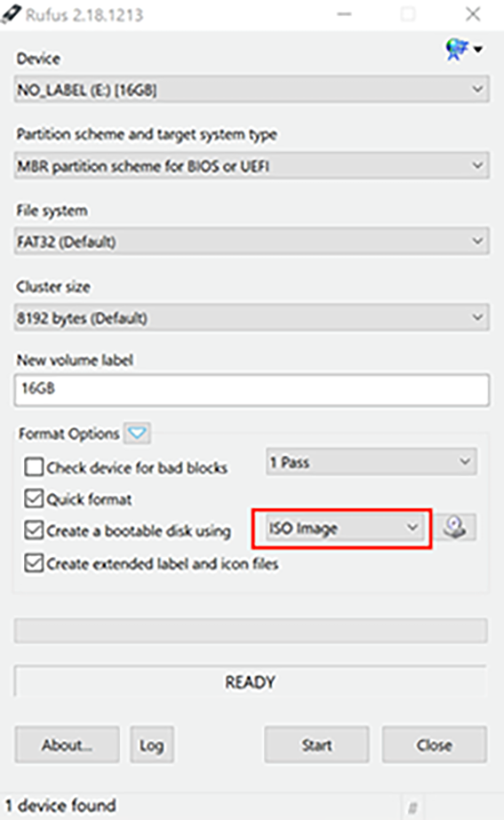
  4. To create a bootable disk select ISO Image.
    Figure 3. Rufus: Select ISO Image
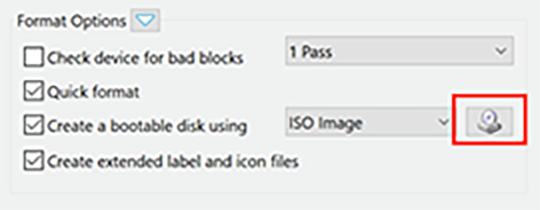
  5. Click the CD-ROM icon.
    The system displays the following dialog box.
    Figure 4. Open ISO Image File
  6. Select the file to use and click Open.
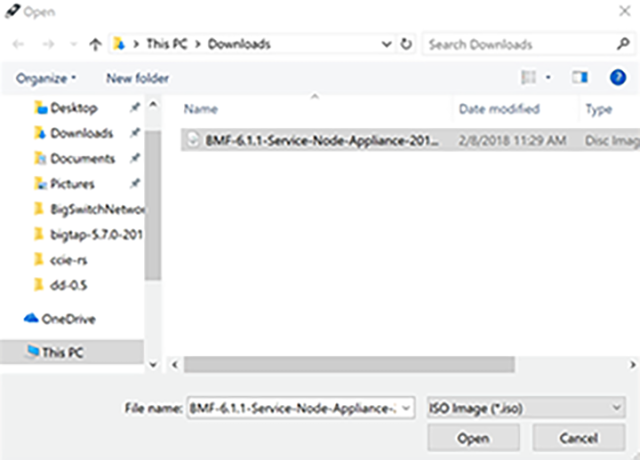
  7. Click Start to burn the ISO image to USB.
    Figure 5. Rufus: Start
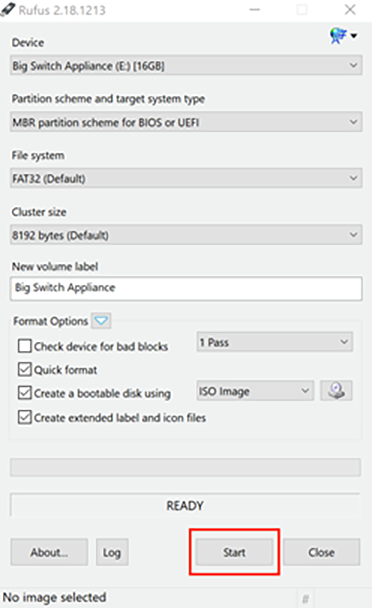
    If upgrade to syslinux is required, the system displays the following dialog box.
    Figure 6. User Account Control
  8. If this prompt appears, click Yes to continue.
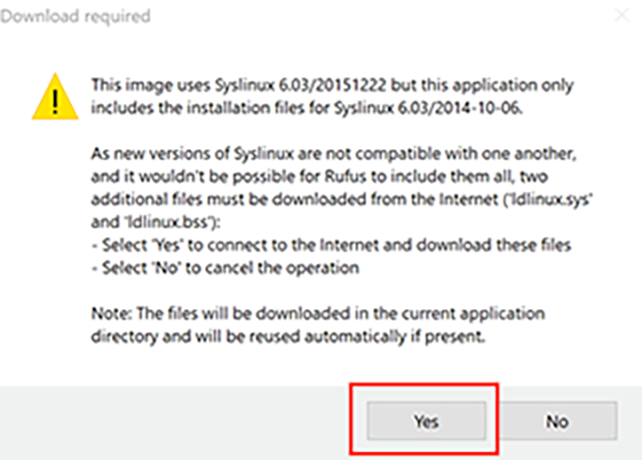
  9. When prompted to use DD mode or ISO mode, choose ISO.
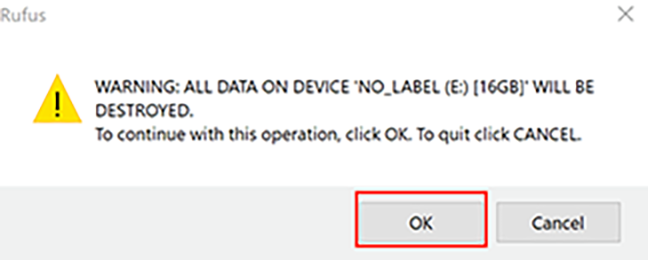
    The system displays a warning that the data on the USB drive is going to be destroyed and a new image is going to be installed
    Figure 7. Erasing Data Warning
  10. Click OK to confirm the operation.