Using Authentication, Authorization, and Accounting
This chapter describes how to manage administrative access to the DANZ Monitoring Fabric (DMF) Controller using local groups and users (RBAC) and AAA servers in general, and it also provides specific configuration for TACACS+ or RADIUS servers.
Overview
- Admin Group: Root privileges with access to all modes, including debug modes.
- Read-Only: Read-only administrative access.
- Local only: The accounts on the remote AAA server are ignored, using only the local database accounts.
- Local primary and remote backup: The accounts on the local database are used first. If the account is not found locally, DMF uses the database on the remote server.
- Remote only: Authentication and authorization do not fall back to local for users other than the admin and recovery accounts, no matter what happens.
- Remote primary and local backup: Uses the accounts on the remote AAA database first. If the remote server is unavailable, DMF uses the local database accounts.
- Accounting: local, local and remote, or remote.
- Authentication: local, local then remote, remote then local, or remote.
- Authorization: local, local then remote, remote then local, or remote.
For information about using AAA with remote servers to manage administrative access to the DMF Controller, refer to the Configuring AAA to Manage DMF Controller Access section.
Using Local Groups and Users to Manage DMF Controller Access
Administrative access to the monitoring fabric is managed by assigning interfaces to groups and then assigning user accounts to the group, which can then view and use the assigned interfaces.
Viewing Existing Groups and Users
To view the current allocation and assignment of groups and resources, enter the following command from any CLI mode on the active DANZ Monitoring Fabric (DMF) Controller.
To use the GUI to manage groups and users, select Security from the DMF GUI main menu.
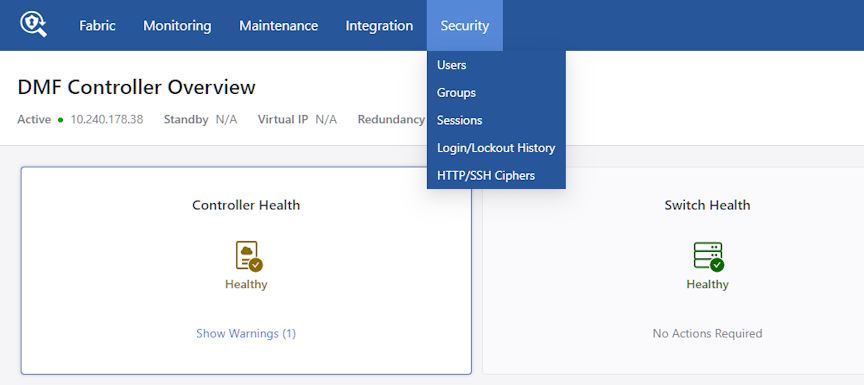
- Users
- Groups
- Sessions
- Login/Lockout History
- HTTP/SSH Ciphers
Groups
- admin group: Provides full administrative access to all interfaces. Global configuration options, such as assigning a role to a switch or interface, must be performed by the admin user.
- read-only group: Provides access to view and monitor fabric activity and switch configuration for all interfaces but does not allow changing configuration or clearing statistics.
All switch interfaces are assigned to both default groups. The admin user has read, use, and configure access to all the interfaces. Any user added to the read-only group has read-only access to all the interfaces.
You can define a new group, in which case a user added to the group will be a restricted user with privileges to view and use only the interfaces assigned to the group.
Using the GUI to Manage User Accounts & Security Groups
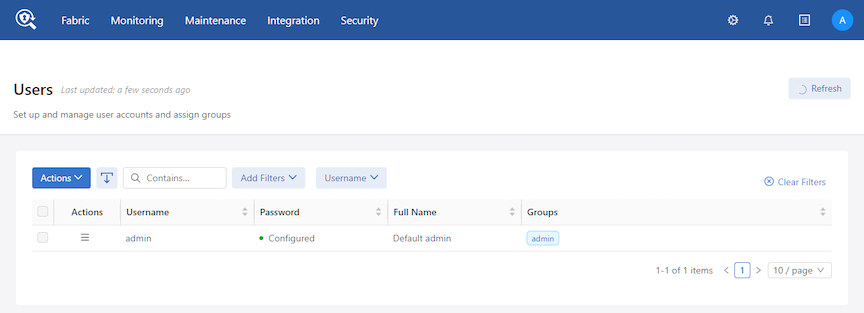
- Select in the Users section.
The system displays the Add User dialog.
Figure 3. Add User 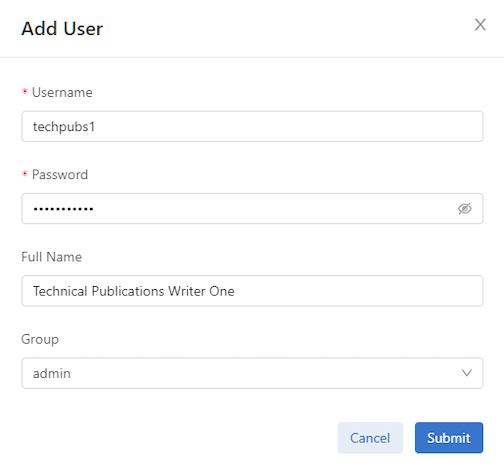
- To add a Security Group, select in the Groups section.
Figure 4. Security Groups 
- Select .
The system displays the Create Group menu.
Figure 5. Create Group 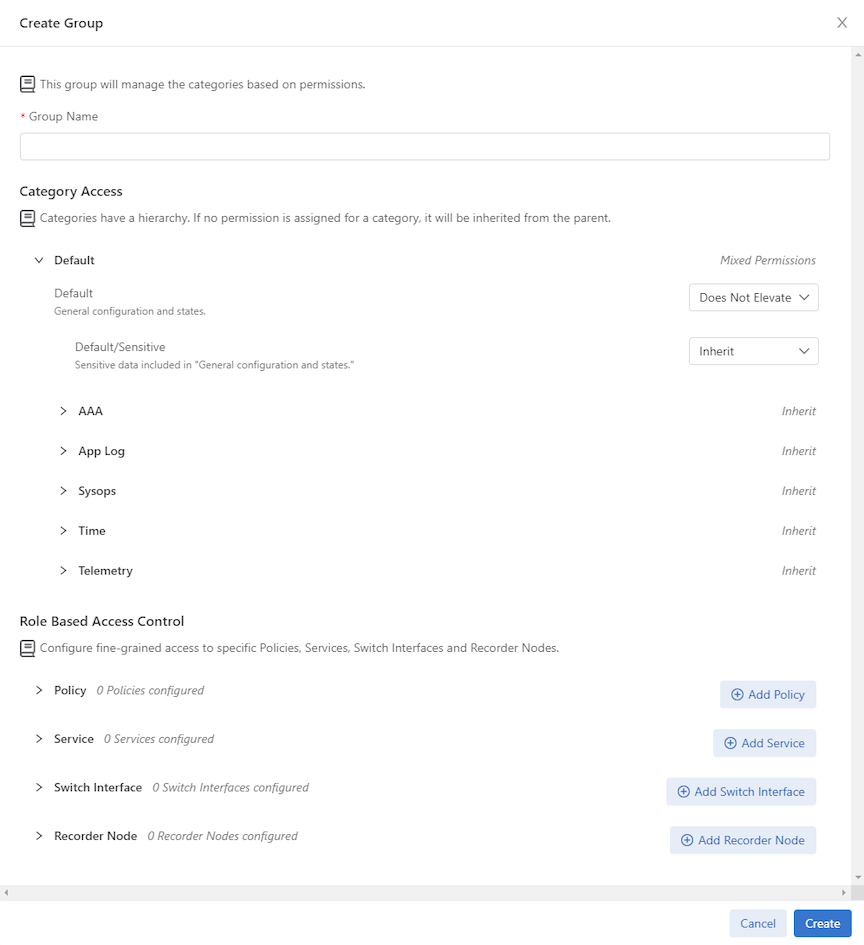
Using the CLI to Manage Groups and User Accounts
controller-1(config)# group dc-group
controller-1(config-group)# associate user bob
controller-1(config-group)# associate user susan
controller-1(config-group)# associate switch DMF-FILTER-SWITCH-1 interface TAP1-ethernet1
controller-1(config-group)# associate switch DMF-FILTER-SWITCH-1 interface TAP1-ethernet1
To associate other resources with the group, use the following options with the associate command:
[no]associate object{policy|service}<object-name>
[created-by<object-creator>[created-on<date-and-time>]]
Enter the show group command to display the currently configured groups and users.
controller-1# show running-config group
! group
group admin
associate user admin
group dmf-qa
associate switch DMF-FILTER-SWITCH-1 interface ethernet1
associate switch DMF-FILTER-SWITCH-1 interface ethernet2
associate switch DMF-FILTER-SWITCH-1 interface ethernet25
associate switch DMF-FILTER-SWITCH-1 interface ethernet26
associate user test1
group read-only
controller-1(config)# user bob
controller-1(config-local-user)# full-name Robert Smith
controller-1(config-local-user)# password
Password:
Re-enter:
controller-1(config-local-user)# group admin
controller-1(config-group)# associate user bob
controller-1(config-group)# show user
#  User name  Full name      Groups
- |--------- |------------- |--------- |
1  admin      Default admin  admin
2  bob        Robert Smith   admin
no user command from config mode to delete a user, as in the following example.
node1(config)# no user bob
controller-1(config)# show user
#  User name  Full name      Groups
- |--------- |------------- |------- |
1  admin      Default admin  admin
controller-1(config)# user john
controller-1(config-local-user)# full-name John Smith
controller-1(config-local-user)# password
Password:
Re-enter:
controller-1(config-local-user)# group read-only
controller-1(config-group)# associate user john
controller-1(config-group)# show user
#  User name  Full name      Groups
- |--------- |------------- |--------- |
1  admin      Default admin  admin
2  bob        Robert Smith   admin
3  john       John Smith     read-only
Changing User Passwords
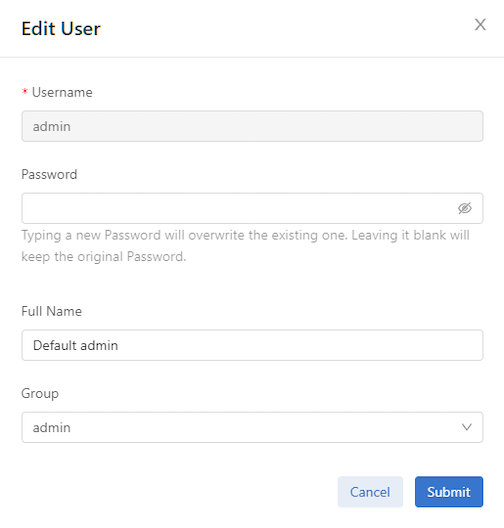
Type the new password, confirm it, and click Submit.
Password Reset
To reset the password for the recovery user, please follow one of the following procedures. Perform these steps on each cluster Controller as resetting the password of the recovery user on one Controller won't change it for the recovery user on the other Controller.
To reset the password for admin and other local users, log in to the Controller using recovery user credentials. Use the floodlight-reset-password command to reset the user’s password.
recovery@controller-1:~$ floodlight-reset-password --user admin
Enter new admin password:
Re-enter new admin password:
Password updated for user admin
recovery@controller-1:~$
recovery@controller-1:~$ floodlight-reset-password --user guest
Enter new guest password:
Re-enter new guest password:
Password updated for user guest
recovery@controller-1:~$
Authentication with a User Token and REST API
Use the access-token command to create a long-lived token for authentication with external scripting, such as RESTful API. The token can be deleted (repudiated) at any time. DMF preserves a hashed version of the token in the running-config.
controller-1(config)# user fred
controller-1(config-user)# access-token sam
access-token : Y9yVwLawjJ03lSthnBKVh3XeplaJ6sSE
The system replies with the session cookie for use in the REST API.
controller-1(config-user)# show this
! user
user fred
access-token sam 459d1d5e0bc42c5bbbee091a984e2807592d11d8a5d4cbac110d32da3f0e436c 2018-01-
08T15:44:02.353Z
hashed-password
method=PBKDF2WithHmacSHA512,salt=N9E9jaPIFTc_ZO9Oq0gd4A,rounds=25000,ph=true,
7eCf1PGAYqUw53vJ2bsGpSVEU5-D6ix5sHufFUi3gFr3AHB4Jqj2eLNZzoo66y_qIRFOOOL8nc5oG5i1gJ1FxA
controller-1(config-user)#
controller-1(config-user)# no access-token sam
Configuring AAA to Manage DMF Controller Access
Authentication, Authorization, and Accounting (AAA) is a general standard for controlling and auditing access to network resources. Various implementations are possible using technologies such as LDAP, RADIUS, Kerberos, TACACS+, or a local database.
Authentication and authorization occur only once, and whatever privileges are associated with the first account found are used. Configuring options separately for authentication and authorization is possible, but Arista Networks recommends using the same settings for simplicity.
DMF supports AAA services using RADIUS and TACACS+ servers using up to four servers of each type. The default timeout for each AAA server is five seconds, which was previously 30 seconds in earlier releases. The total aggregate timeout for all configured servers is 20 seconds.
By default, the Controller waits five seconds before trying the next server or falling back to the local services provided by the Controller database if that is the configuration. You can change the default timeout, but the maximum aggregated time for all the servers is 25 seconds. Five servers are supported only with a default timeout of five seconds or less.
Using the GUI - Enabling Remote AAA Services
GUI Procedure
- Accounting
- Authentication
- Authorization
- RADIUS
- TACACS+
- Audit Logging
This page supports identifying up to five destination TACACS+ or RADIUS servers, configuring the server secret, and specifying a timeout.
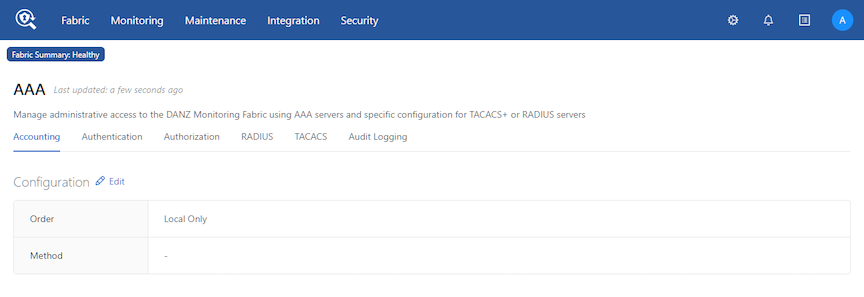
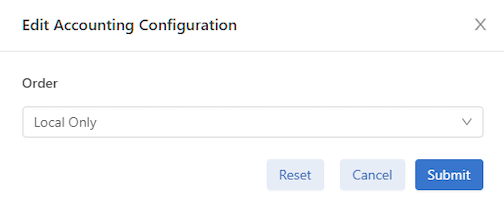
Accounting
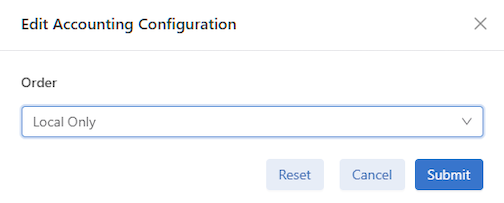
- Local Only - Default.
- Remote Only - Enter a Remote Method, TACACS or RADIUS from the drop-down list.
- Local Before Remote - Enter a Remote Method, TACACS or RADIUS from the drop-down list.
- Remote before Local - Enter a Remote Method, TACACS, or RADIUS from the drop-down list.
Authentication
To configure the authentication method, click in the Configuration section.
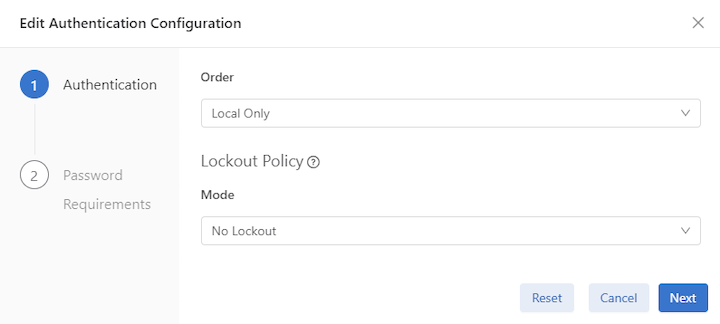
Select the Authentication Order preference:
- Local Only - Default.
- Remote Only - Enter a Remote Method, TACACS or RADIUS from the drop-down list.
- Local Before Remote - Enter a Remote Method, TACACS or RADIUS from the drop-down list.
- Remote before Local - Enter a Remote Method, TACACS or RADIUS from the drop-down list.
Lockout Policy Mode
Configuration for the time-based user lockout policy. In no-lockout mode, the configuration of this container is ignored, and lockout is disabled. In lockout-remote mode, this container's values (or, in their absence, the defaults) dictate the lockout behavior.
- No Lockout
- Lockout Remote
- None
- NIST-800-63B
- Custom-Check - Enter the requirements for the detailed password (min/max, etc.).
- No-Check
Click Submit.
Authorization
To use a remote server for authorization, click in the Configuration section.
Select the Authorization Order preference:
- Local Only - Default.
- Remote Only - From the drop-down list.
- Local Before Remote - From the drop-down list.
- Remote before Local - From the drop-down list.
Click Submit.
RADIUS
To configure RADIUS refer to the Using RADIUS for Managing Access to the DMF Controller section.
TACACS+
To configure TACACS+ refer to the Using TACACS+ to Control Access to the DMF Controller section.
Audit Logging
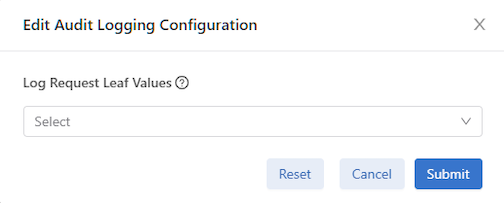
Set the type of audit logging of request leaf values; if no value is specified, request leaf values will not be audit logged.
- None - Default.
- Record All Request Values
Click Submit.
Using the CLI - Enabling Remote AAA Services
CLI Procedure
authorization role default admin command carefully because the effect is to provide every user account that authenticates successfully on a remote server with admin-level privileges unless the user account is specifically assigned to a different group.Time-based User Lockout
Starting in the DMF 8.0 release, DANZ Monitoring Fabric supports time-based user lockout functionality. Users are locked out for ‘t2’ time when attempting with ‘n’ incorrect passwords within ‘t1’ time.
Locked-out users must either be cleared of lockout or wait for the lockout period to expire before attempting another login with a correct password. The feature is disabled by default.
aaa authentication policy lockout failure <number of failed attempts> window <within t1 time>
duration <lockout for t2 time>
- The value range for ‘failure’ is 1 to 255.
- The value range for ‘window’ and ‘duration’ is 1 to 4294967295 seconds (2^32-1).
controller-1(config)# aaa authentication policy lockout failure 3 window 180 duration 900
- This feature affects only remote logins such as SSH/GUI/REST API using username/password. Console-based login and password-less authentications such as SSH keys, Single Sign-on, and access tokens are unaffected. Locked-out users can still access the Controller via console/password-less authentication.
- The feature is node-specific concerning the functionality, i.e., if user1 is locked out of accessing the active Controller in the cluster, they can log in to the standby Controller with the correct password and vice versa. Lockout user information is not persistent across Controller reboot/fail-over.
show aaa authentication lockout
controller-1# show aaa authentication lockout
User name Host           Failed Logins  Lockout Date                    Lockout Expiration
--------- |------------ |------------- |------------------------------  |------------------------------ |
admin     10.240.88.193  1              2020-09-08 16:07:36.283000 PDT  2156-10-15 22:35:51.283000 PDT
clear aaa authentication lockout user <username>
clear aaa authentication lockout
controller-1# clear aaa authentication lockout user admin
controller-1# show aaa authentication lockout
None.
A Recovery user will also be locked out if attempting with incorrect passwords.
admin@controller-1:~$ sudo pam_tally2 -u recovery
Login Failures Latest failure From
recovery 9 09/08/20 16:16:04 10.95.66.44
admin@controller-1:~$ sudo pam_tally2 --reset --user recovery
Login Failures Latest failure From
recovery 9 09/08/20 16:16:04 10.95.66.44
admin@controller-1:~$ sudo pam_tally2 -u recovery
Login Failures Latest failure From
recovery
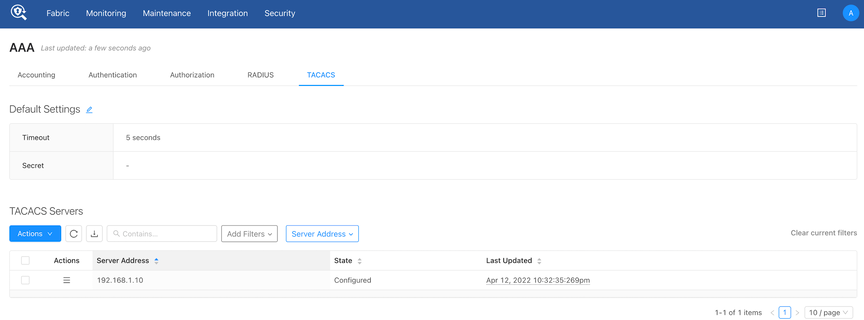
Using TACACS+ to Control Access to the DMF Controller
Use remote Authentication, Authorization, and Accounting (AAA) services employing a TACACS+ server to control administrative access to the switch CLI. The following table lists the accepted Attribute-Value (AV) pairs:
| Attributes | Values |
|---|---|
| BSN-User-Role | admin |
| read-only | |
| bigtap-admin | |
| bigtap-read-only |
A remotely authenticated admin user has full administrative privileges. Read-only users on the switch must be remotely authenticated. Read-only access is not configurable for locally authenticated user accounts on the switch.
- TACACS+, SNMP, and user configuration are not visible to the read-only user in the output from the show running-config command.
- show snmp, show user, and show support commands are disabled for the read-only user.
Note: Local authentication and authorization take precedence over remote authentication and authorization.
- Supported attribute name: BSN-User-Role
- Supported attribute values: admin, read-only, bigtap-admin, bigtap-read-only
Use the TACACS+ server to maintain administrative access control instead of using the Controller's local database. However, it is best practice to maintain the local database as the secondary authentication and authorization method in case the remote server becomes unavailable.
DANZ Monitoring Fabric requires the following configuration on TACACS+ servers in addition to the configuration required on the Controller.
- Configure the TACACS+ server to accept ASCII authentication packets. Do not use the single connect-only protocol feature.
- The DANZ Monitoring Fabric TACACS+ client uses the ASCII authentication method. It does not use PAP.
- Configure the TACACS+ server to connect to the device administration login service.
- Do not use a network access connection method, such as PPP.
- Create a bigtap-admin group. Make all DANZ Monitoring Fabric users part of this group.
- TACACS+ group membership is specified using the BSN-User-Role AVPair as part of TACACS+ session authorization.
- Configure the TACACS+ server for session authorization, not for command authorization.
BSN-User-Role attribute as Optional in the tac_plus.conf file to use the same user credentials to access Arista and non-Arista devices.Using the GUI to Add a TACACS+ Server
Procedure
- Click the Add TACACS Server from the Actions menu in the TACACS Servers table.
Figure 14. Create TACACS+ Server Dialog 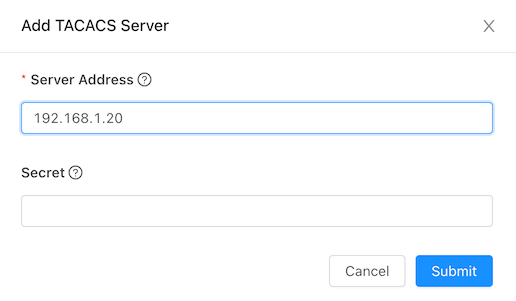 Note: Do not use the pound character (#) in the TACACS secret, as it will be interpreted as the start of a comment in the PAM config file.
Using the CLI to Enable Remote Authentication and Authorization on the DMF Fabric Controller
CLI Procedure
controller-1(config)# tacacs server host 10.2.3.201
controller-1(config)# aaa authentication login default group tacacs+ local
controller-1(config)# aaa authorization exec default group tacacs+ local
As a result, all users in the bigtap-admin group on TACACS+ server 10.2.3.201 have full access to the DANZ Monitoring Fabric Controller.
Using the CLI to Add a TACACS+ Server
show
running-config
tacacs command.
Complete the following steps to configure the DMF Controller with TACACS+ to control administrative access to the switch.
Setting up a Tac_Plus Server
Using the Same Credentials for DMF and Other Devices
BSN-User-Role attribute must be specified as Optional in the tac_plus.conf file, as shown in the following example.
group = group-admin {
default service = permit
service = exec {
optional BSN-User-Role = "admin"
}
}
RBAC-Based Configuration for Non-Default Group User
Using RADIUS for Managing Access to the DMF Controller
- admin: Administrator access, including all CLI modes and debug options.
- read-only: Login access, including most show commands.
- Accounting: local, local and remote, or remote.
- Authentication: local, local then remote, remote then local, or remote.
- Authorization: local, local then remote, remote then local, or remote.
| Supported attribute names | Supported attribute values |
|---|---|
| BSN-User-Role | admin
bigtap-admin read-only bigtap-read-only |
The BSN-AV-Pair attribute sends CLI command activity accounting to the RADIUS server.
Using the GUI to Add a RADIUS Server
GUI Procedure
- Select from the GUI.
Figure 15. Maintenance AAA: Radius Section 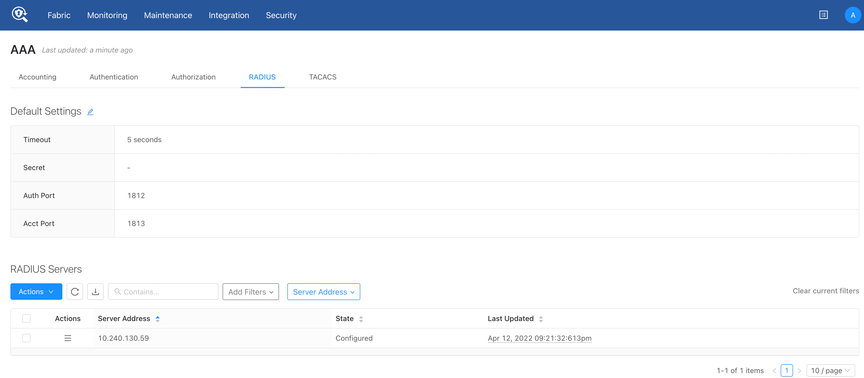
- Click the Add RADIUS Server from the Actions menu in the RADIUS Servers table.
Figure 16. Create RADIUS Server Dialog 
Using the CLI to Add a RADIUS Server
radius server host <server-address> [timeout {<timeout>}][key {{<plaintext>} | 0 {<plaintext>} | 7 {
<secret>}}]
controller-1(config)# radius server host 192.168.17.101 key admin
You can enter this command up to five times to identify multiple RADIUS servers. The Controller tries to connect to each server in the order they are configured.
Setting up a FreeRADIUS Server
Procedure
Custom admin role
Use the custom admin roles feature, which allows the definition of a group that grants the privilege to read or write like a built-in admin group, but only for specific use cases/categories. Configure the required privileges for each predefined set of categories.
This configuration allows a user to define a more flexible group role, such as a group that will enable its users to read and write most of the general configuration like admin, but not the AAA-related parts of the configuration.
This approach helps to create user profiles on DANZ Monitoring Fabric with limited admin access restricted only for the required features.
Categories
Users can be created and associated to groups with the following categories:
category:AAA
Controller-1> enable
Controller-1# configure
Controller-1(config)# group aaa-mgmt-group
Controller-1(config-group)# permission category:AAA privilege read-write
Controller-1(config)# user aaa-user
Controller-1(config-user)# password <user_configured_password>
Controller-1(config-user)# group aaa-mgmt-group
Controller-1(config-group)# associate user aaa-user
AAA group user sample configuration
AAA group user sample configuration
Controller-1(config)# aaa authentication login default local
Controller-1(config)# tacacs server host <REMOTE_TACACS_SERVER_IP>
Controller-1(config)# show group aaa-mgmt-group configured-permission
# Permission Privilege
1 category:AAA read-write
Controller-1(config)# show group aaa-mgmt-group effective-permission
#  Effective-permission       Inferred privilege
- |-------------------------- |------------------------- |
1  category:DEFAULT           inferred-does-not-elevate
2  category:DEFAULT/SENSITIVE inferred-does-not-elevate
3  category:AAA               read-write
4  category:AAA/SENSITIVE     does-not-elevate
5  category:APPLOG            inferred-does-not-elevate
6  category:SYSOPS            inferred-does-not-elevate
7  category:SYSOPS/SENSITIVE  inferred-does-not-elevate
8  category:TIME              inferred-does-not-elevate
9  category:TIME/SENSITIVE    inferred-does-not-elevate
When AAA group user tries to configure sensitive information
category:AAA/SENSITIVE:
Sensitive data included in configuration and state related to AAA, including but not limited to local user management, group management.
Controller-1> enable
Controller-1# configure
Controller-1(config)#
Controller-1(config)# group aaa-sen-mgmt-group
Controller-1(config-group)# permission category:AAA/SENSITIVE privilege read-write
Controller-1(config)# user aaa-sen-user
Controller-1(config-user)# password <user_configured_password>
Controller-1(config-user)# group aaa-mgmt-group
Controller-1(config-group)# associate user aaa-sen-user
Controller-1(config)# show group aaa-sen-mgmt-group configured-permission
# Permission Privilege
1 category:AAA/SENSITIVE read-write
Controller-1(config)# show group aaa-sen-mgmt-group effective-permission
# Effective-permission Inferred privilege
1 category:DEFAULT inferred-does-not-elevate
2 category:DEFAULT/SENSITIVE inferred-does-not-elevate
3 category:AAA read-write
4 category:AAA/SENSITIVE inferred-read-write
5 category:APPLOG inferred-does-not-elevate
6 category:SYSOPS inferred-does-not-elevate
7 category:SYSOPS/SENSITIVE inferred-does-not-elevate
8 category:TIME inferred-does-not-elevate
9 category:TIME/SENSITIVE inferred-does-not-elevate
Controller-1(config)#
AAA group user sample configuration
Controller-1(config)# tacacs server host 10.240.176.159 key 12323243
Controller-1(config)#
category:TIME:
Controller-1> enable
Controller-1# configure
Controller-1(config)#
Controller-1(config)# group time-mgmt-group
Controller-1(config-group)# permission category:TIME privilege read-write
Controller-1(config)# user time-user
Controller-1(config-user)# password <user_configured_password>
Controller-1(config-user)# group time-mgmt-group
Controller-1(config-group)# associate user time-user
Controller-1(config)# show group time-mgmt-group configured-permission
# Permission Privilege
1 category:TIME read-write
Controller-1(config)# show group time-mgmt-group effective-permission
# Effective-permission Inferred privilege
1 category:DEFAULT inferred-does-not-elevate
2 category:DEFAULT/SENSITIVE inferred-does-not-elevate
3 category:AAA inferred-does-not-elevate
4 category:AAA/SENSITIVE inferred-does-not-elevate
5 category:APPLOG inferred-does-not-elevate
6 category:SYSOPS inferred-does-not-elevate
7 category:SYSOPS/SENSITIVE inferred-does-not-elevate
8 category:TIME read-write
9 category:TIME/SENSITIVE does-not-elevate
TIME group user sample configuration
Controller-1(config)# ntp server <NTP_SERVER_IP>
Controller-1(config)#
category:TIME/SENSITIVE:
Sensitive data included in Configuration and state related to system time and NTP.
Controller-1> enable
Controller-1# configure terminal
Controller-1(config)#
Controller-1(config)# group time-mgmt-group
Controller-1(config-group)# permission category:TIME/SENSITIVE privilege read-write
Controller-1(config)# user time-user
Controller-1(config-user)# password <user_configured_password>
Controller-1(config-user)# group time-mgmt-group
Controller-1(config-group)# associate user time-user
Controller-1(config)# show group time-mgmt-group configured-permission
# Permission Privilege
1 category:TIME/SENSITIVE read-write
Controller-1(config)# show group time-mgmt-group effective-permission
# Effective-permission Inferred privilege
1 category:DEFAULT inferred-does-not-elevate
2 category:DEFAULT/SENSITIVE inferred-does-not-elevate
3 category:AAA inferred-does-not-elevate
4 category:AAA/SENSITIVE inferred-does-not-elevate
5 category:APPLOG inferred-does-not-elevate
6 category:SYSOPS inferred-does-not-elevate
7 category:SYSOPS/SENSITIVE inferred-does-not-elevate
8 category:TIME read-write
9 category:TIME/SENSITIVE read-write
Controller-1(config)# ntp key 5 sha1 0 abcdfa5cdfabcdfabcdfa3cdfabcdfabcdfabcdf
Controller-1(config)#
category:SYSOPS
Configuration and state related to system operation
Controller-1> enable
Controller-1# configure terminal
Controller-1(config)#
Controller-1(config)# group sysops-mgmt-group
Controller-1(config-group)# permission category:sysops privilege read-write
Controller-1(config)# user sysops-user
Controller-1(config-user)# password <user_configured_password>
Controller-1(config-user)# group sysops-mgmt-group
Controller-1(config-group)# associate user sysops-user
Controller-1(config)# show group sysops-mgmt-group configured-permission
# Permission Privilege
1 category:SYSOPS read-write
Controller-1(config)# show group sysops-mgmt-group effective-permission
# Effective-permission Inferred privilege
1 category:DEFAULT inferred-does-not-elevate
2 category:DEFAULT/SENSITIVE inferred-does-not-elevate
3 category:AAA inferred-does-not-elevate
4 category:AAA/SENSITIVE inferred-does-not-elevate
5 category:APPLOG inferred-does-not-elevate
6 category:SYSOPS read-write
7 category:SYSOPS/SENSITIVE does-not-elevate
8 category:TIME inferred-does-not-elevate
9 category:TIME/SENSITIVE inferred-does-not-elevate
Controller-1(config)# boot partition alternate
Controller-1(config)#
category:SYSOPS/SENSITIVE:
Sensitive data included in Configuration and state related to system time and NTP.
Controller-1> enable
Controller-1# configure terminal
Controller-1(config)#
Controller-1(config)# group sysops-mgmt-group
Controller-1(config-group)# permission category:sysops/SENSITIVE privilege read-write
Controller-1(config)# user sysops-user
Controller-1(config-user)# password <user_configured_password>
Controller-1(config-user)# group sysops-mgmt-group
Controller-1(config-group)# associate user sysops-user
Controller-1(config)# show group sysops-mgmt-group configured-permission
# Permission Privilege
1 category:SYSOPS/SENSITIVE read-write
Controller-1(config)# show group sysops-mgmt-group effective-permission
# Effective-permission Inferred privilege
1 category:DEFAULT inferred-does-not-elevate
2 category:DEFAULT/SENSITIVE inferred-does-not-elevate
3 category:AAA inferred-does-not-elevate
4 category:AAA/SENSITIVE inferred-does-not-elevate
5 category:APPLOG inferred-does-not-elevate
6 category:SYSOPS read-write
7 category:SYSOPS/SENSITIVE read-write
8 category:TIME inferred-does-not-elevate
9 category:TIME/SENSITIVE inferred-does-not-elevate
Controller-1(config)# connect switch filter-1
Controller-1(config)#
category:APPLOG:
Configuration and state related to appliance log level.
Controller-1> enable
Controller-1# configure terminal
Controller-1(config)#
Controller-1(config)# group APPLOG-mgmt-group
Controller-1(config-group)# permission category:APPLOG privilege read-only
Controller-1(config)# user APPLOG-user
Controller-1(config-user)# password <user_configured_password>
Controller-1(config-user)# group APPLOG-mgmt-group
Controller-1(config-group)# associate user APPLOG-user
Controller-1(config)# show group APPLOG-mgmt-group configured-permission
# Permission Privilege
1 category:APPLOG read-write
Controller-1(config)# show group APPLOG-mgmt-group effective-permission
# Effective-permission Inferred privilege
1 category:DEFAULT inferred-does-not-elevate
2 category:DEFAULT/SENSITIVE inferred-does-not-elevate
3 category:AAA inferred-does-not-elevate
4 category:AAA/SENSITIVE inferred-does-not-elevate
5 category:APPLOG read-write
6 category:SYSOPS inferred-does-not-elevate
7 category:SYSOPS/SENSITIVE inferred-does-not-elevate
8 category:TIME inferred-does-not-elevate
9 category:TIME/SENSITIVE inferred-does-not-elevate
Controller-1(config)# show logging controller
Controller-1(config)#
category:DEFAULT
General configuration and states
Controller-1> enable
Controller-1# configure
Controller-1(config)# group DEFAULT-mgmt-group
Controller-1(config-group)# permission category:DEFAULT privilege read-write
Controller-1(config)# user DEFAULT-user
Controller-1(config-user)# password <user_configured_password>
Controller-1(config-user)# group DEFAULT-mgmt-group
Controller-1(config-group)# associate user DEFAULT-user
Controller-1(config)# show group DEFAULT-mgmt-group configured-permission
# Permission Privilege
1 category:DEFAULT read-write
Controller-1(config)# show group DEFAULT-mgmt-group effective-permission
# Effective-permission Inferred privilege
1 category:DEFAULT read-write
2 category:DEFAULT/SENSITIVE inferred-read-write
3 category:AAA inferred-read-write
4 category:AAA/SENSITIVE inferred-read-write
5 category:APPLOG inferred-read-write
6 category:SYSOPS inferred-read-write
7 category:SYSOPS/SENSITIVE inferred-read-write
8 category:TIME inferred-read-write
9 category:TIME/SENSITIVE inferred-read-write
GUI
Navigate to the following page to create the custom admin groups from GUI.
- Login to DMF.
Figure 17. Group Creation 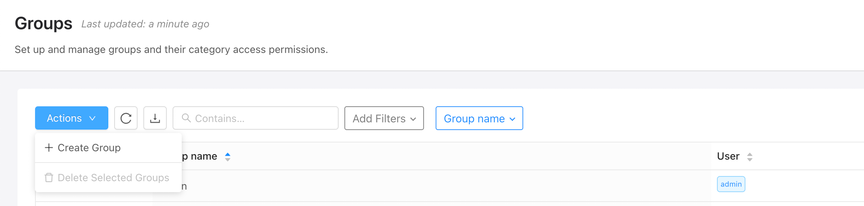
- Proceed to and add the required settings.
Figure 18. Custom Group 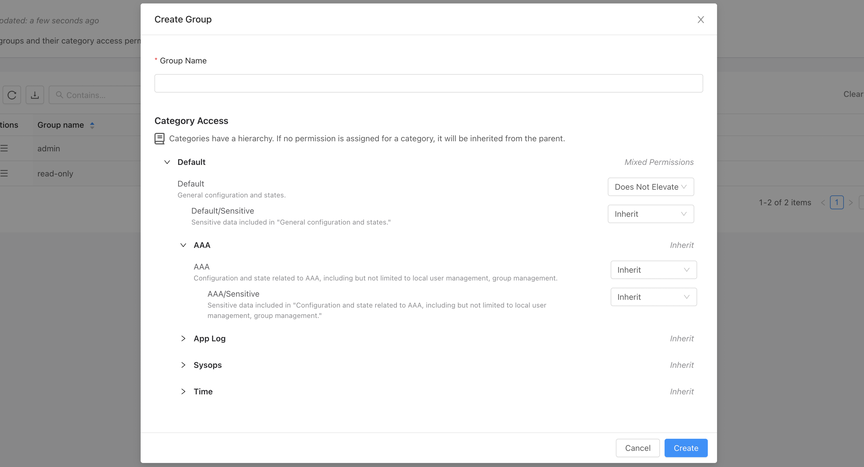
Permissions & Privileges
Privileges are the permissions set of each category.
- Read Only: Grants the user privileges to read only the configurations for the enabled category.
- Read-Write: Grants the user read and write privileges for configurations for the enabled category.
- Does Not Elevate: The user can neither read nor write configurations for that category. Any category, such as AAA, TIME, etc., configured with Does Not Elevate will not inherit from the parent category.
- Inherit: Categories will inherit their permission from their parent category. The DEFAULT category is considered the root of all categories.
For example, if TIME/SENSITIVE is set to inherit and TIME has read-only, then users associated with this group will inherit from the parent category, and it will effectively have the privilege of read-only for TIME/SENSITIVE.
Similarly, if AAA is set to inherit and DEFAULT has read-only, then users associated with this group can read all configurations related to AAA.
Category Identification
DMF helps identify which feature comes under what category, achieved using the following command.
Syntax: :: category <feature_name>
Controller-1# configure
Controller-1(config)#
Controller-1(config)# category aaa authentication login default local
syntax of variant:
aaa authentication login default {local | group {tacacs+ | radius} | local group {tacacs+ | radius}
| group {tacacs+ | radius} local}
no aaa authentication login default [local | group {tacacs+ | radius} | local group {tacacs+ |
radius} | group {tacacs+ | radius} local]
Configure authentication parameters
AAA "aaa authentication login default local"
Although the category can be configured, allow-all read access is enabled for the command
Exact matching commands: 1, similar commands (same prefix): 1
In the above output, the AAA "aaa authentication login default local" line signifies that the above feature comes under the AAA category.
Group Management
NS-178-37(config-group)# group aaa-user
Controller-1(config)# permission category:AAA privilege read-write
Controller-1(config)# show group aaa-user configured-permission
# Permission Privilege
1 category:AAA read-write
Controller-1(config)# show group aaa-user effective-permission
# Effective-permission Inferred privilege
1 category:DEFAULT inferred-does-not-elevate
2 category:DEFAULT/SENSITIVE inferred-does-not-elevate
3 category:AAA read-write
4 category:AAA/SENSITIVE inferred-read-write
5 category:APPLOG inferred-does-not-elevate
6 category:SYSOPS inferred-does-not-elevate
7 category:SYSOPS/SENSITIVE inferred-does-not-elevate
8 category:TIME inferred-does-not-elevate
9 category:TIME/SENSITIVE inferred-does-not-elevate
Controller-1(config)#
Summary:
Category: AAA is set as read-write privilege as per the user configuration Category: AAA/SENSITIVE is set as read-write since it inherits from the immediate parent, i.e., Category: AAA which is “read-write”.
Rest of the categories are set as does-not-elevate since they inherit from Category: DEFAULT
Controller-1(config)# group all-except-AAA-group
Controller-1(config-group)# permission category:DEFAULT privilege read-write
Controller-1(config-group)# permission category:AAA privilege does-not-elevate
Controller-1(config-group)# show group all-except-AAA-group configured-permission
# Permission Privilege
1 category:AAA does-not-elevate
2 category:DEFAULT read-write
Controller-1(config-group)# show group all-except-AAA-group effective-permission
# Effective-permission Inferred privilege
1 category:DEFAULT read-write
2 category:DEFAULT/SENSITIVE inferred-read-write
3 category:AAA does-not-elevate
4 category:AAA/SENSITIVE inferred-does-not-elevate
5 category:APPLOG inferred-read-write
6 category:SYSOPS inferred-read-write
7 category:SYSOPS/SENSITIVE inferred-read-write
8 category:TIME inferred-read-write
9 category:TIME/SENSITIVE inferred-read-write
Controller-1(config-group)#
Summary:
Category: DEFAULT is set as “read-write” privilege as per the user configuration. Category: AAA is set as “does-not-elevate” privilege as per the user configuration. Category: AAA/SENSITIVE is set as “does-not-elevate” since it inherits from the immediate parent, i.e., Category: AAA which is “does-not-elevate”. The rest of the categories are set as “read-write” since they inherit from Category: DEFAULT.
Remote Users
- Create a user
bns-user1and a desired password. - Create a group “BSN-User-Role with the required categories and privileges and associate the above user to the group.
- Configure the username and password, and the group created steps 1 and 2 on the TACACS+/RADIUS servers.
- Login to the DANZ Monitoring Fabric (DMF) Controller using the above credential.
Commonly Used Profiles
User Administration
Controller-1> enable
Controller-1# configure terminal
Controller-1(config)#
Controller-1(config)# group user-administration
Controller-1(config-group)# permission category:AAA privilege read-write
Controller-1(config-group)# permission category:DEFAULT: does-not-elevate
Controller-1(config)# user time-user
Controller-1(config-user)# password <user_configured_password>
Controller-1(config-user)# group time-mgmt-group
Controller-1(config-group)# associate user time-user
Controller-1(config)# show group user-administration configured-permission
# Permission Privilege
1 category:AAA read-write
2 category:DEFAULT does-not-elevate

Controller-1(config)# show group user-administration effective-permission
# Effective-permission Inferred privilege
1 category:DEFAULT does-not-elevate
2 category:DEFAULT/SENSITIVE inferred-does-not-elevate
3 category:AAA read-write
4 category:AAA/SENSITIVE inferred-read-write
5 category:APPLOG inferred-does-not-elevate
6 category:SYSOPS inferred-does-not-elevate
7 category:SYSOPS/SENSITIVE inferred-does-not-elevate
8 category:TIME inferred-does-not-elevate
9 category:TIME/SENSITIVE inferred-does-not-elevate
Network-admin
Controller-1> enable
Controller-1# configure terminal
Controller-1(config)#
Controller-1(config)# group network-admin
Controller-1(config-group)# permission category:AAA privilege does-not-elevate
Controller-1(config-group)# permission category:DEFAULT: read-write
Controller-1(config)# user time-user
Controller-1(config-user)# password <user_configured_password>
Controller-1(config-user)# group time-mgmt-group
Controller-1(config-group)# associate user time-user
Controller-1(config)# show group network-admin configured-permission
# Permission Privilege
1 category:AAA does-not-elevate
2 category:DEFAULT read-write
Controller-1(config)# show group network-admin effective-permission
# Effective-permission Inferred privilege
1 category:DEFAULT read-write
2 category:DEFAULT/SENSITIVE inferred-read-write
3 category:AAA does-not-elevate
4 category:AAA/SENSITIVE inferred-does-not-elevate
5 category:APPLOG inferred-read-write
6 category:SYSOPS inferred-read-write
7 category:SYSOPS/SENSITIVE inferred-read-write
8 category:TIME inferred-read-write
9 category:TIME/SENSITIVE inferred-read-write
Auditor
Controller-1> enable
Controller-1# configure terminal
Controller-1(config)#
Controller-1(config)# group auditor
Controller-1(config-group)# permission category:DEFAULT: read-only
Controller-1(config)# user time-user
Controller-1(config-user)# password <user_configured_password>
Controller-1(config-user)# group time-mgmt-group
Controller-1(config-group)# associate user time-user
Controller-1(config)# show group auditor configured-permission
# Permission Privilege
1 category:DEFAULT read-only
Controller-1(config)# show group auditor effective-permission
# Effective-permission Inferred privilege
1 category:DEFAULT read-only
2 category:DEFAULT/SENSITIVE inferred-read-only
3 category:AAA inferred-read-only
4 category:AAA/SENSITIVE inferred-read-only
5 category:APPLOG inferred-read-only
6 category:SYSOPS inferred-read-only
7 category:SYSOPS/SENSITIVE inferred-read-only
8 category:TIME inferred-read-only
9 category:TIME/SENSITIVE inferred-read-only
Filtered-auditor
Controller-1> enable
Controller-1# configure terminal
Controller-1(config)#
Controller-1(config)# group filtered-auditor
Controller-1(config-group)# permission category:DEFAULT: read-only
Controller-1(config-group)# permission category:AAA/SENSITIVE privilege does-not-elevate
Controller-1(config-group)# permission category:DEFAULT/SENSITIVE privilege does-not-elevate
Controller-1(config-group)# permission category:TIME/SENSITIVE privilege does-not-elevate
Controller-1(config-group)# permission category:SYSOPS/SENSITIVE privilege does-not-elevate
Controller-1(config)# user time-user
Controller-1(config-user)# password <user_configured_password>
Controller-1(config-user)# group time-mgmt-group
Controller-1(config-group)# associate user time-user
.
Commonly used Category-feature Matrix
| CATEGORY | FEATURE |
|---|---|
| AAA | TACACS |
| AAA/SENSITIVE | TACAS-PASSWORD |
| AAA | RADIUS |
| AAA/SENSITIVE | RADIUS-PASSWORD |
| AAA | ACCOUTING |
| AAA | AUTHENTICATION |
| AAA | AUTHORIZATION |
| AAA | USERS |
| AAA | CLEAR AAA parameters |
| AAA | CLEAR SESSION parameters |
| TIME | TIME-Time Zone |
| TIME | TIME-NTP-servers |
| TIME/SENSITIVE | TIME-NTP-KEYS |
| APPLOG | Show logging commands |
| SYSOPS/SENSITIVE | connect |
| SYSOPS | boot |
| SYSOPS | clear async |
| SYSOPS | Delete dump files |
| SYSOPS | Reload Controller |
| DEFAULT | auto-vlan-mode |
| DEFAULT | auto-vlan-range |
| DEFAULT | Clear debug counters |
| DEFAULT | Clear statistics |
| DEFAULT | Policy |
| DEFAULT | System restart local-node |
| DEFAULT | filter-interface-group |
Known Limitations
- Viewing audit logs is only possible through the built-in admin user.
- There must be a built-in admin user to upgrade the DMF Controller and managed appliances.
- RBAC has a higher preference over custom admin groups.
- The custom group feature doesn't apply to DMF Managed Appliances.