Deploying Virtual Edge with CloudFormation
The following are required before you begin to deploy the Virtual Edge with CloudFormation templates:
- AWS account and login information
- Familiarity with AWS networking concepts (see: https://docs.aws.amazon.com/vpc/latest/userguide/VPC_Networking.html)
- RSA Public Key (see: https://docs.aws.amazon.com/AWSEC2/latest/UserGuide/ec2-key-pairs.html)
- CloudFormation Template (one of the following):
- Orchestrator target and admin account to login
Instructions on how to deploy a Virtual Edge with CloudFormation templates are described below. However, make sure to adhere to the prerequisite requirements prior to deployment.
As part of the VeloCloud SD-WAN solution, Customers deploy the VeloCloud Virtual Edges in AWS, typically in a VPC. Edge(s) can be deployed via few methods, namely AWS console and Cloud Formation Template. Total provisioning time typically takes around ~30 minutes.
Available Regions
Basic Topology
The VeloCloud Edge AMI is available in all AWS commercial regions with EC2 service, with China being the exception.
In a basic topology example, the AWS VPC (10.0.0.0/16) is divided into a Public subnet (10.0.0.0/24) and a Private subnet (10.0.1.0/24). The Virtual Edge routes between the two subnets. The Public VPC Routes will forward all offnet traffic to the Internet Gateway. The VPC Router in the Private subnet will forward all traffic to the LAN facing interface on the Virtual Edge (ENI of GE3). In this example, a default route is used to forward all traffic from the workloads, but is not necessary. RFC1918 summarization or specific branch/hub prefixes can be used to narrow what is sent to the Virtual Edge. For example, if the workloads in the Private Subnet need to be accessible via the SSH from publicly sourced IPs, then the VPC Router could be configured to point the default route (0.0.0.0/0) to the Internet Gateway and RFC1918 summarization to the Virtual Edge.

- Add the Virtual Edge to the Enterprise via the Orchestrator
- Go to from the navigation panel, and select the Add Edge button. The Provision an Edge screen appears.
Figure 2. Provision an Edge 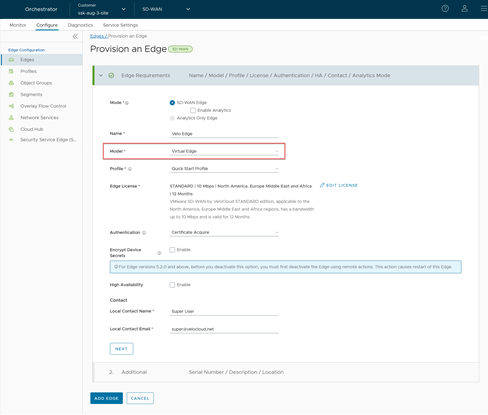
- The Virtual Edge is provisioned with an activation key. Make a note of the activation key, as it will be used when you deploy the CloudFormation template.
Figure 3. Activation Key 
For more information, see the topic Provision a New Edge in the Arista VeloCloud SD-WAN Administration Guide.
- Go to from the navigation panel, and select the Add Edge button. The Provision an Edge screen appears.
- Add VLAN IP: The VLAN configuration must have an IP address assigned to it in order to save the Device Settings, but the IP address will not be used. For example, use IP address 169.254.0.1. Follow the steps below to add the VLAN IP address.
- Scroll down to the Configure VLAN section, and select the Add VLAN button.
The Add VLAN dialog box displays.
Figure 4. Add VLAN 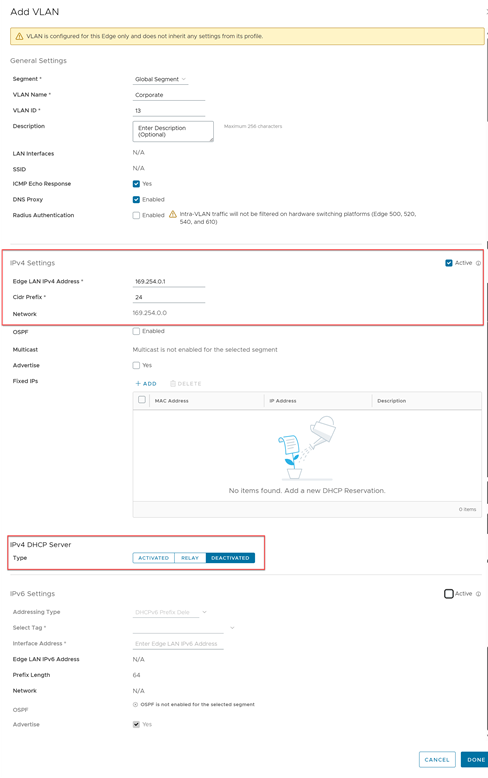
For additional information, see the topic Configure VLAN for Edges in the Arista VeloCloud SD-WAN Administration Guide.
- Scroll down to the Configure VLAN section, and select the Add VLAN button.
- Configure Virtual Edge Interfaces
Warning: The Device Settings must be configured first in the Orchestrator first before Edge activation. If you skip this step, the Virtual Edge will activate, but will go offline a few minutes later.
- Scroll down to the Interfaces section.
Figure 5. Configure Virtual Edge Interfaces 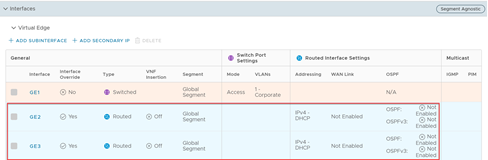
- Scroll down to the Interfaces section.
- Launch Virtual Edge via CloudFormation
Note:
- If this is the first deployment of the Virtual Edge, you may need to “Subscribe” to the Edge version in the AWS Marketplace before deploying from the CloudFormation Template.
- For additional information on how to configure AWS specific components, please refer to the AWS documentation.
- Create or Import a Key Pair.
Figure 6. Create or Import Key Pair  Note: For additional information regarding AWS EC2 Instance Keys see: https://docs.aws.amazon.com/AWSEC2/latest/UserGuide/ec2-key-pairs.html.
 - Navigate to CloudFormation.
Figure 7. CloudFormation 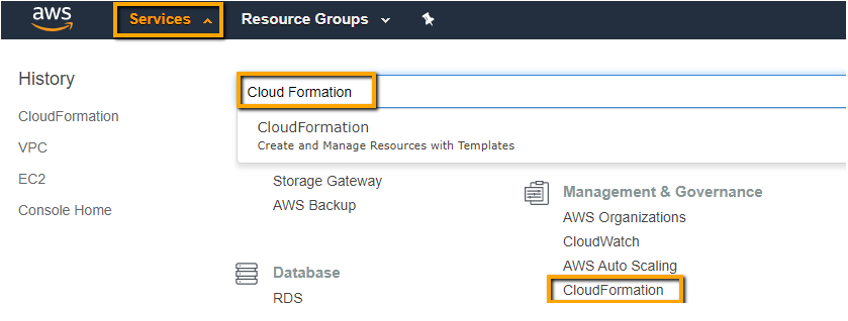
- Create a CloudFormation stack.
Figure 8. CloudFormation Stack 
- Upload the CloudFormation template.
Figure 9. Upload CloudFormation Template 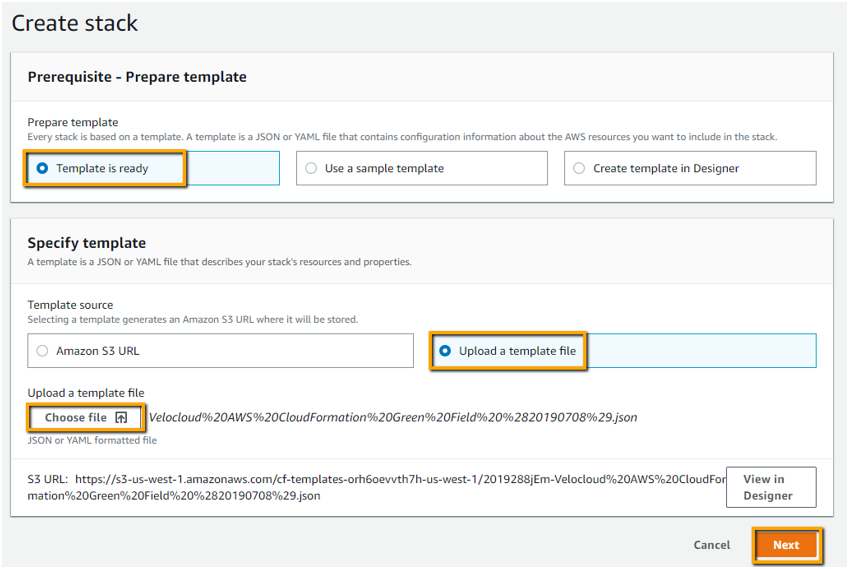
- Specify the stack details as indicated in the image below:
Figure 10. Specify Stack Details 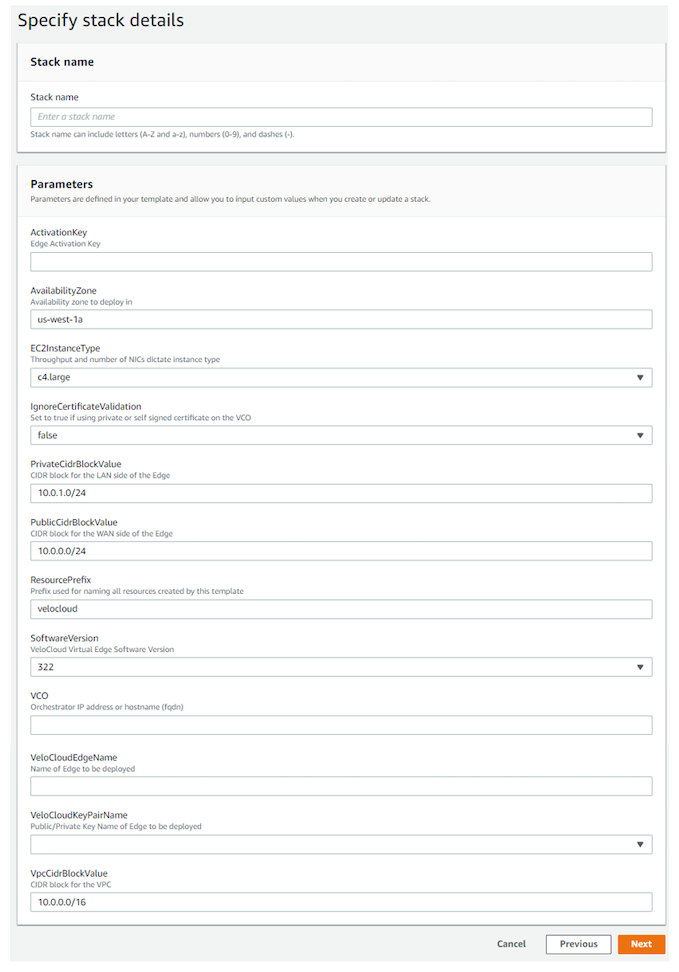
For the few remaining screens, you can leave those parameters, fields, or text boxes as default settings unless you have a specific need to change them. The final step is to create the stack.
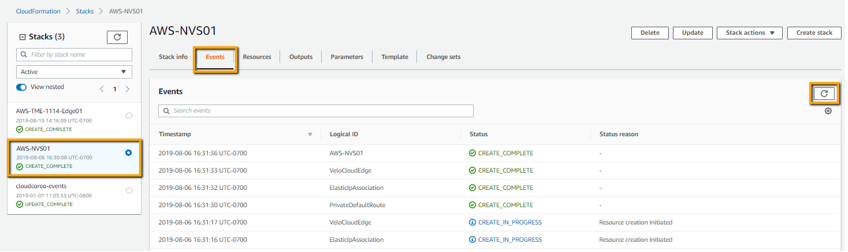
- Monitor your deployment progress.
Figure 11. Monitor Deployment