Rack Mounting the Switch
This section provides instructions on how to rack mount the switch.
This section discusses the following topic:
Wall Mount
This section provides instructions for wall mounting the switch.
L-Bracket Wall Mount (Default)
This section provides instructions for wall mounting the switch using an L-Bracket.
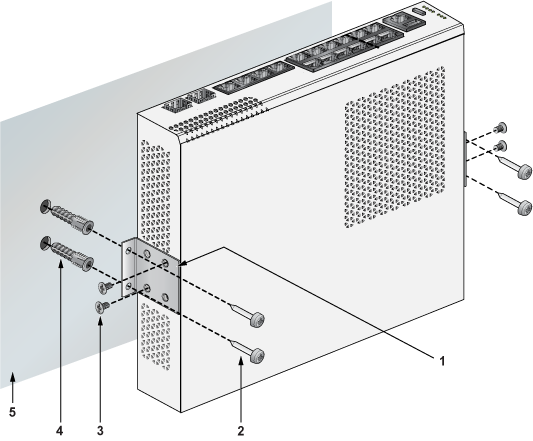
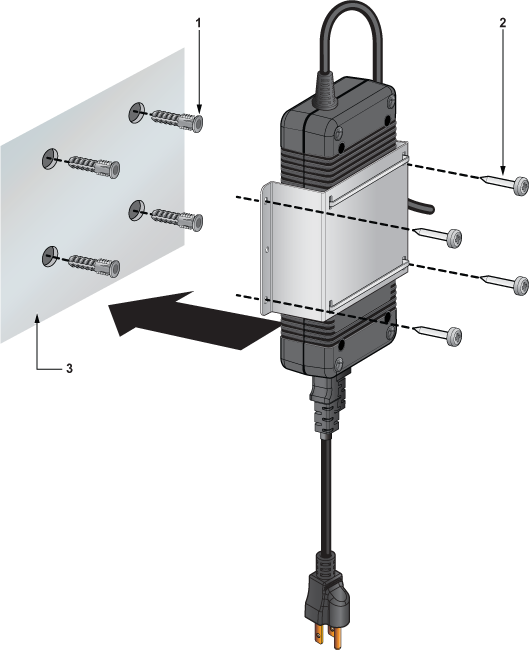
| 1 | L-Bracket (Left and Right) | 4 | Screw anchor M4 |
| 2 | Screw M4x25mm | 5 | Flat surface |
| 3 | Flat head screw M4x6mm |
- Position the L-Bracket aligning with the chassis holes on the side of the switch and fix it with M4x6mm flat head screws. The L-Bracket is attached to the chassis.
- Attach the remaining L-Bracket on the other side of the chassis and fix it with M4x6mm flat head screws.
- Determine the mounting position to attach the switch to the wall.
- Drill four holes (two on each side) 7x25mm deep on the wall. Refer to the L-Bracket for detailed hole locations.
- Insert M4 screw anchor to the four holes drilled on the wall.
- Place the chassis, attached with an L-Bracket, on the wall, aligning with the mounting holes, and secure the device with M4x25mm screws.
- Tighten the screws to fix the device firmly to the wall.
3-in-1 Bracket Wall Mount (Optional)
This section provides instructions for wall mounting the switch using a 3-in-1 mounting bracket.
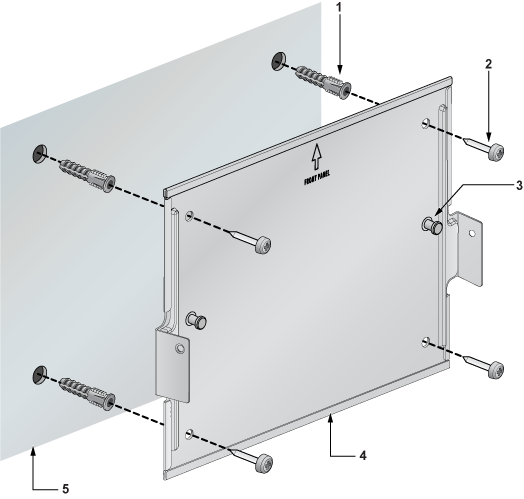
| 1 | Screw anchor M4 | 4 | 3-in-1 bracket |
| 2 | Screw M4x25mm | 5 | Flat surface |
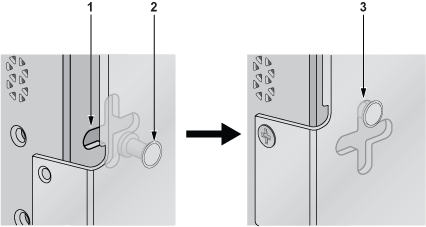
| 3 | Cross hole stud |
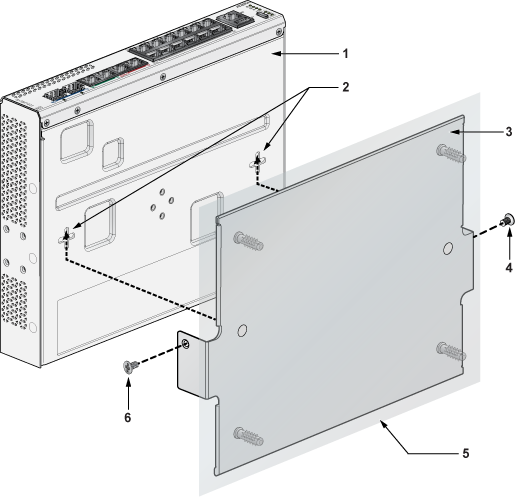
| 1 | Chassis | 4 | Flat head screw M4x6mm |
| 2 | Cross hole | 5 | Flat surface |
| 3 | 3-in-1 bracket | 6 | Flat head screw M4x6mm |
Under Table Mount
This section provides instructions for mounting the switch under the table/desk.
L-Bracket Under Table Mount (Default)
This section provides instructions for mounting the switch under the table/desk using an L-Bracket.
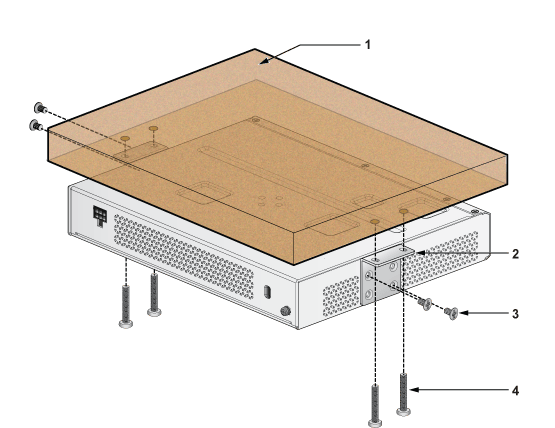
| 1 | Flat wooden surface | 3 | Flat head screw M4x6mm |
| 2 | L-Bracket | 4 | Screw M4x25mm |
- Position the L-Bracket aligning with the chassis holes on the side of the switch and fix it with M4x6mm flat head screws. The L-Bracket is attached to the chassis.
- Attach the remaining L-Bracket on the other side of the chassis and fix it with M4x6mm flat head screws.
- Determine the mounting position to attach the switch under the table.
- Place the chassis, attached with L-Bracket, under the table and secure the device with M4x25mm screws.
- Tighten the screws to fix the device firmly under the table.
3-in-1 Bracket Under Table Mount (Optional)
This section provides instructions for mounting the switch under the table/desk using a 3-in-1 mounting bracket.
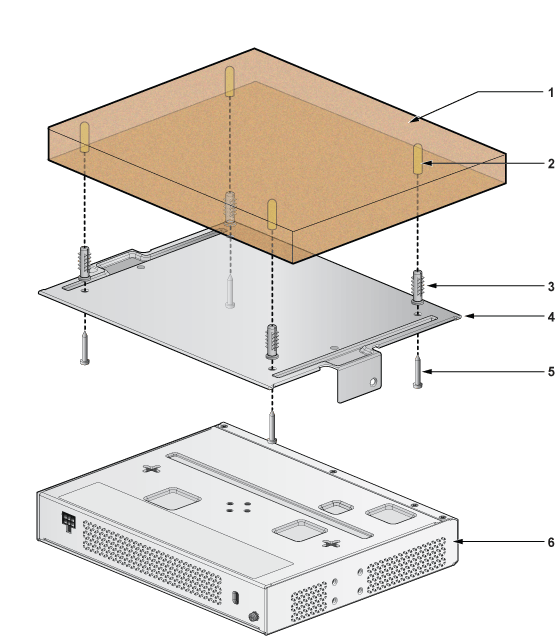
| 1 | Flat wooden surface | 4 | 3-in-1 bracket |
| 2 | Screw hole | 5 | Screw M4x25mm |
| 3 | Screw anchor M4 | 6 | Device |
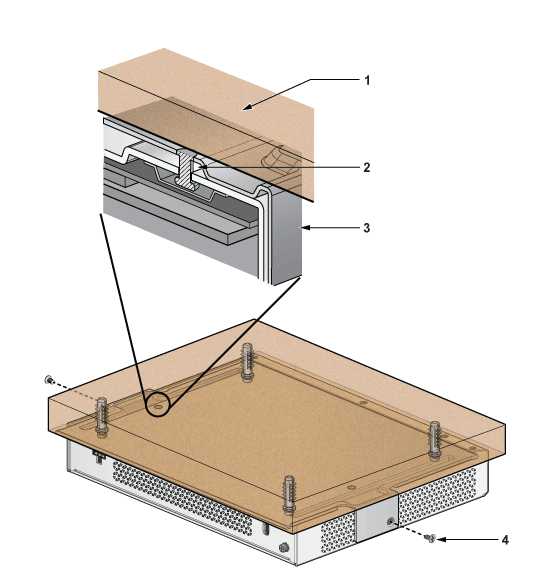
| 1 | Flat wooden surface | 3 | 3-in-1 bracket |
| 2 | Cross hole | 4 | Flat head screw M4x6mm |
- Determine the mounting position to attach the switch under the table.
- Place the 3-in-1 bracket under the table and mark the mounting holes on the four corners, aligning with holes on the 3-in-1 mounting bracket. Figure 5 - 3-in-1 Bracket Under Table Mount
- Fix the 3-in-1 bracket under the table using the M4x25mm screws on the four corners.
- Attach the switch to the 3-in-1 bracket by aligning with the chassis holes.
- Tighten the screws to fix the device firmly under the table.
Desktop Mount (Default)
This section provides instructions for mounting the switch on the desktop or any flat surface.
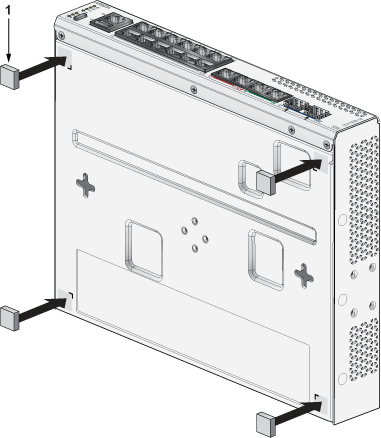
|
1 |
Rubber feet |
Magnetic Mount (Optional)
This section provides instructions for magnetically mounting the switch.
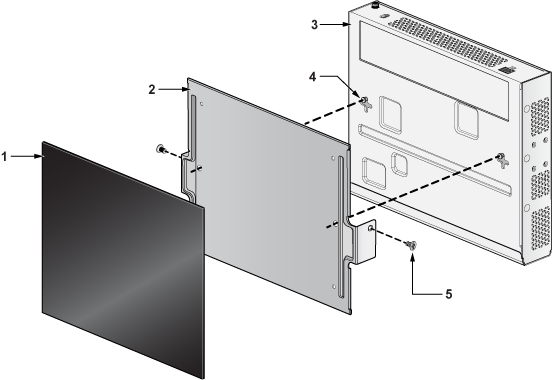
| 1 | Rubber Magnet | 4 | Cross hole |
| 2 | 3-in-1 bracket | 5 | Flat head screw M4x6mm |
| 3 | Switch facing downwards |
DIN Rail Mount (Optional)
This section provides instructions for mounting the switch using a DIN rail.
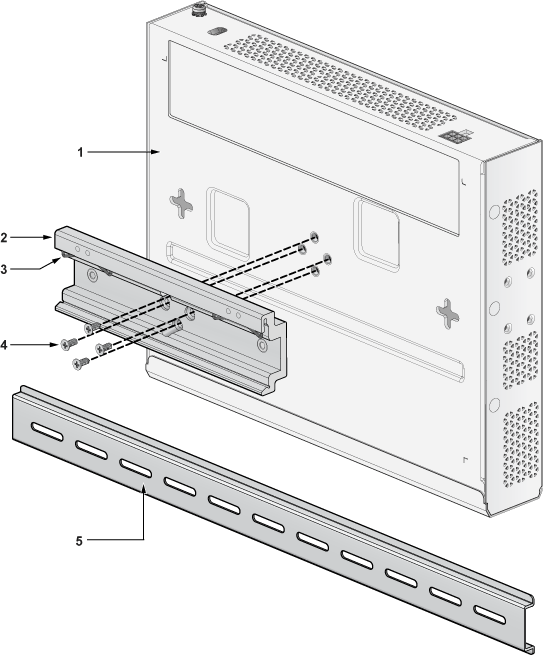
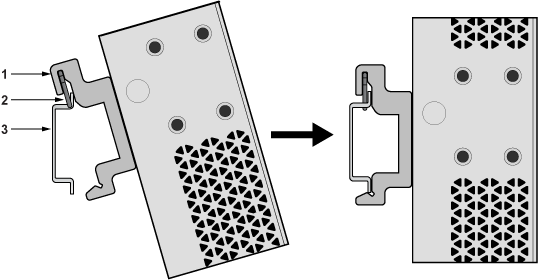
| 1 | Chassis | 4 | Flat head screw M4x6mm |
| 2 | DIN mount bracket | 5 | DIN rail |
| 3 | DIN rail hook |
1RU Rack Mount (Optional)
This section provides instructions for rack mounting the switch.
Attaching Mounting Brackets to the Chassis
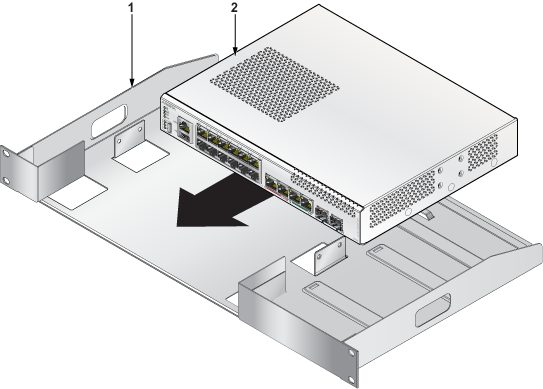
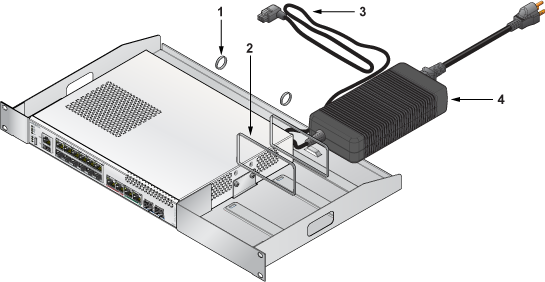
| 1 | 1RU Rack | 2 | Device |
- Align the rack mounting brackets with the chassis holes at the front of the switch.
- Secure the mounting brackets using the screws provided in the rack mounting kit.
Inserting the Switch into the Rack
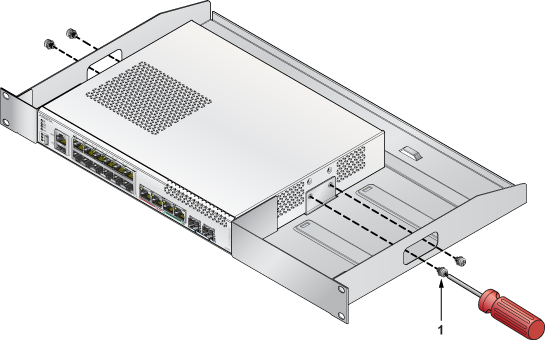
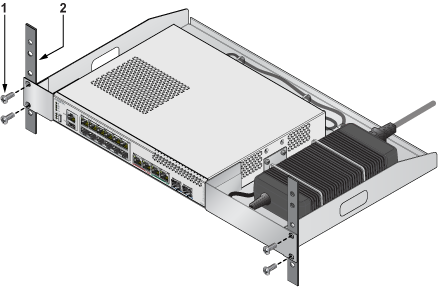
|
1 |
Thread screw M4x6mm |
