印刷

Connecting the Access Point to the Network

To connect the AP to the network, perform the following steps:
  1. Be sure you have an available DHCP server on the network to enable network configuration of the AP.
  2. Add the DNS entry wifi-security-server on all DNS servers. This entry must point to the IP address of the server.
  3. Be sure you have DHCP running on the subnet to the connected AP.
  4. Insert the SPF+ optical cable in the SPF+ port. Alternatively, you can also use the LAN Port to connect to the Internet. If LAN Port and SFP+ Port both are connected, then the LAN Port is used to power the AP and the SFP+ port is used to provide Internet connection to the AP.
  5. Check the LEDs on the AP to ensure that it has a server connection.
  6. Log on to the server using SSH and run the get sensor list command.

    The command returns a list of all Arista devices recognized by the server. Single Sign-On users can go to the Monitor tab in CloudVision Cognitive Unified Edge (CV-CUE) and check if the access point appears on the Monitor tab.

Note:If zero configuration fails, you must configure the AP manually.
Important:If you do not have DHCP enabled on a subnet, the AP cannot connect to that subnet with zero-configuration. If the DNS entry does not exist on the DNS servers, or if you do not have the DHCP server running on the subnet, you must manually configure the AP.

Connecting the Access Point using PoE
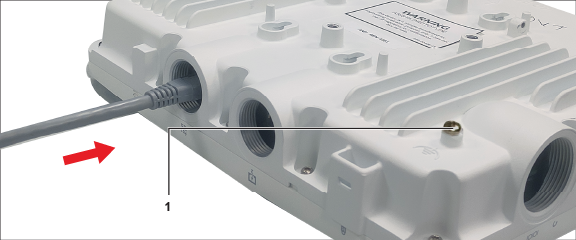
If you are using a PoE injector, make sure you plug the data connection into a suitable switch port with proper network connectivity.
Figure 1. LAN Port


The figure shows the LAN cable inserted to the LAN1 Port. Label l points to the relative position of the grounding screw on the AP.

For PoE port details, see the Rear Panel section.

..