Provision Edge Threat Management
Provisioning the ETM security configuration is independent of SD-WAN configuration. This enables security administrators to assign and activate Security Policies independently of SD-WAN Policies.
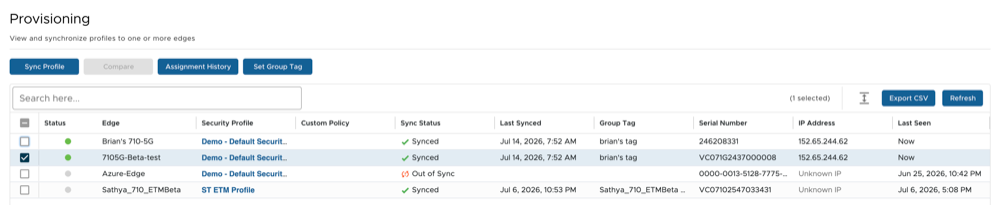
Perform the following steps to provision Edge Threat Management:
- After creating a Security Profile, assign it to the SD-WAN Profile.
- Under Policy Manager, select ETM Next-Gen Firewall.
Figure 2. Firewall Policy Management  Selecting ETM Next-Gen Firewall introduces a new section, ETM Next-Gen Firewall Security Profile, on this screen.
Figure 3. ETM Next-Gen Firewall Security Profile 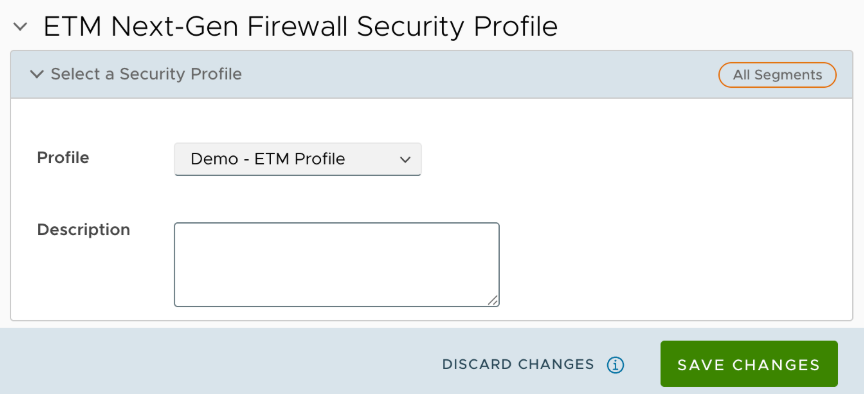
Note: Assigning a Security Profile does not immediately apply it to Edges. Users must synchronize the Security Policy with Edges, as explained in the next step. - Under Policy Manager, select ETM Next-Gen Firewall.
- To synchronize Security Profiles, go to the ETM Next-Gen Firewall Enterprise Application, and click Provisioning on the ETM Dashboard.
- Clicking Assignment History displays the following screen. Select at least one Security Profile to compare with the current Edge settings.
Figure 4. Assignment History 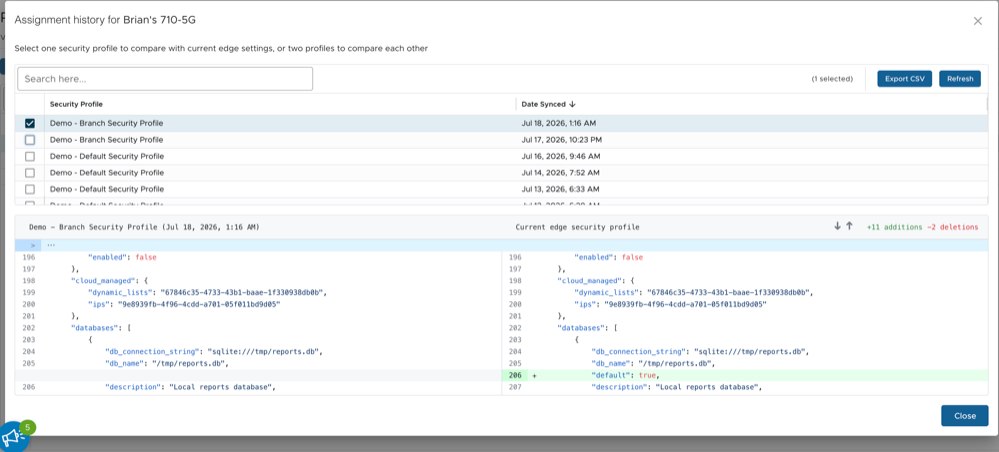
- To set a Group Tag for an Edge, click Group Tag.
Figure 5. Set Group Tag 
Note: Synchronizing Security Profiles may take approximately 1 minute. Click the Refresh button to confirm the synchronization status. To review the active tasks, click the Tasks button at the top right of the Provisioning screen. - Clicking Assignment History displays the following screen. Select at least one Security Profile to compare with the current Edge settings.