Power on the Access Point
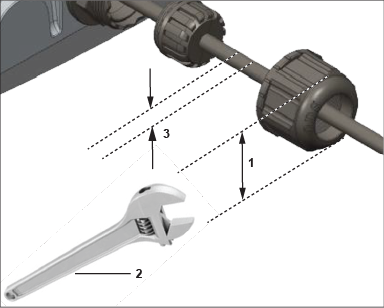
| 1 | The width of the LAN port cap is 27mm. | 2 | Use an active wrench to open the LAN port cap. | 3 | LAN cable of 6 ~ 8mm width. |
Earthing or Grounding: The AP must be properly grounded using a copper grounding wire (12 ~ 10 AWG) and a tin-plated lug as shown in the following image. The wire and the lug must be tightened at the grounding screw on the AP.
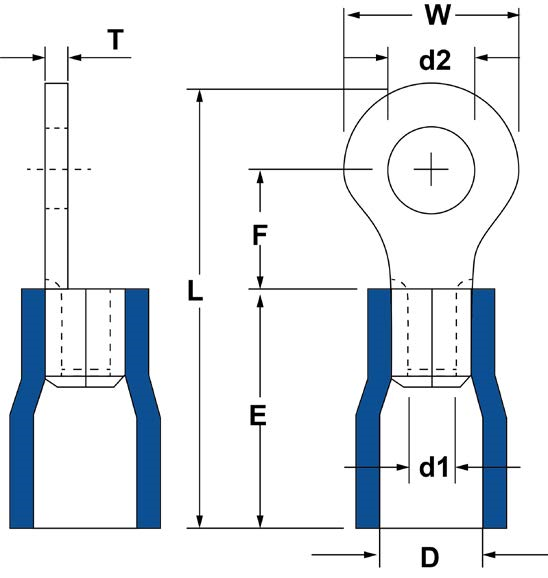
The following two images show the position of the grounding screw on the AP (shown as serial number 1 in the image) and the dimension of the lug that attaches to the grounding screw.
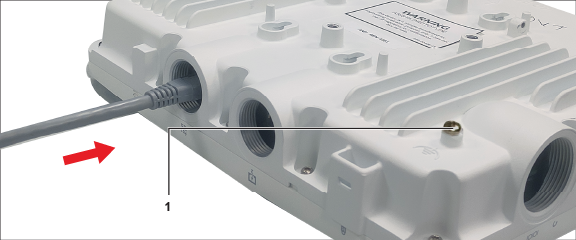
Note: The O-405 APs are intended to be supplied with UL-listed PoE+ power source suitable for use at 65 degree Celsius, and whose output meets LPS requirements or PS2, with a rating of 54V DC (0.8A or 800mA minimum).
The following table shows the dimension of the earthing screw and lug.
| Item | 1 | 2 | 3 | 4 | 5 | 6 | 7 | 8 |
|---|---|---|---|---|---|---|---|---|
| Tolerance | W: ± 0.5 | d2: ± 0.2 | L: ± 0.5 | F: ± 0.5 | E: ± 0.5 | d1: ± 0.2 | D: ± 0.2 | T: ± 0.5 |
| Size | 7.20 | 4.30 | 21.50 | 5.90 | 13.00 | 3.40 | 6.70 | 1.00 |