Palo Alto Networks Strata Cloud Manager Configuration
Before configuring the Security Service Edge (SSE) automation, you must first configure IKE and IPsec profiles to be used by the SSE automation. This is required for initiating the tunnel from the Edge to Prisma Cloud. This is a one-time manual configuration that must be performed in the Palo Alto Networks Strata Cloud Manager portal.
There is no dedicated location in the Palo Alto Networks Strata Cloud Manager portal to configure the IKE and IPsec profiles. Hence, this configuration must be done in the Remote Networks configuration section.
- AES 128 CBC
- DH Group 14 (IKE Crypto Profile)
- PFS configured (same as the DH Group value)
- SHA 256
- IKE SA Lifetime 1440 min
- IPsec SA Lifetime 480 min
Follow the below steps to configure IKE and IPsec profiles:
- Log into the Palo Alto Networks Strata Cloud Manager portal. The following screen is displayed:
Figure 1. Dashboards 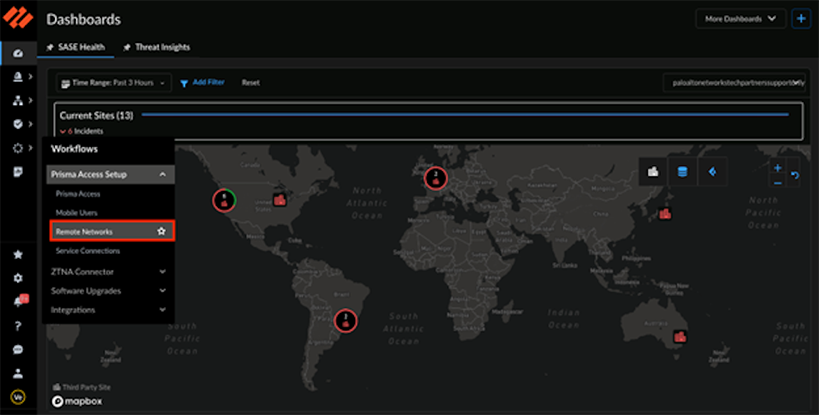
- Click Add Remote Networks in the top right corner of the Remote Networks Setup screen.
Figure 2. Remote Networks Setup 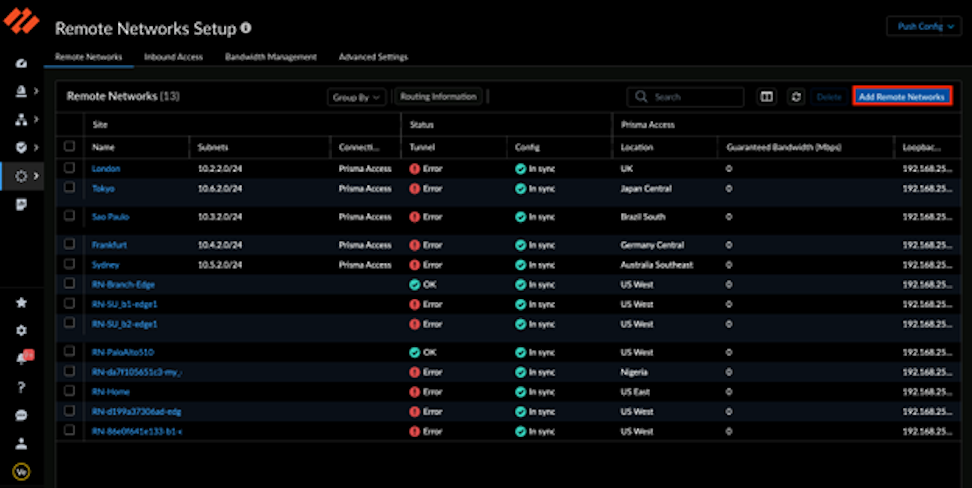
- In the Add Remote Networks screen, ignore the mandatory fields and directly go to the IKE and IPsec profile configurations, by clicking Set Up in the Primary Tunnel section as shown below:
Figure 3. Add Remote Networks 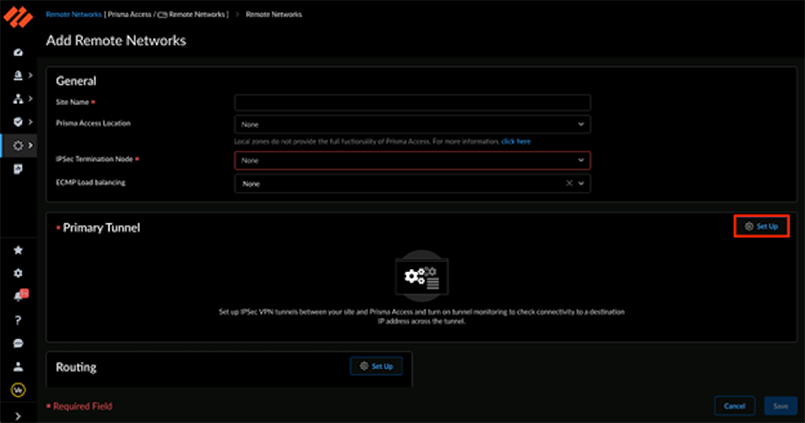
- In the Create IPsec Tunnel screen, click Create New.
Figure 4. Create IPsec Tunnel 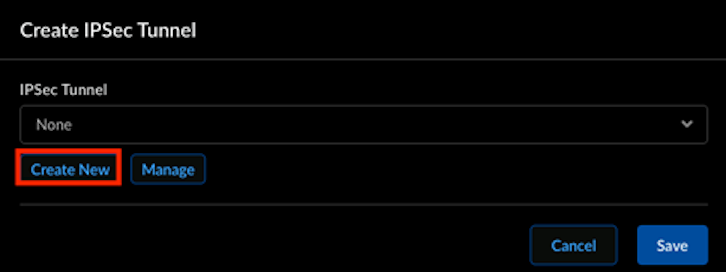
- Ignore all the mandatory fields and scroll down to the bottom of this screen. Click IKE Advanced Options.
Figure 5. Scroll to IKE Advanced Options 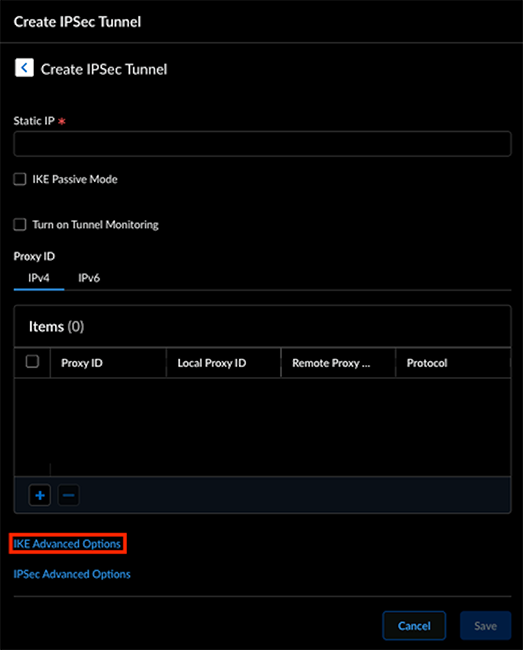
- Click Create New on the IKE Advanced Options screen.
Figure 6. IKE Advanced Options 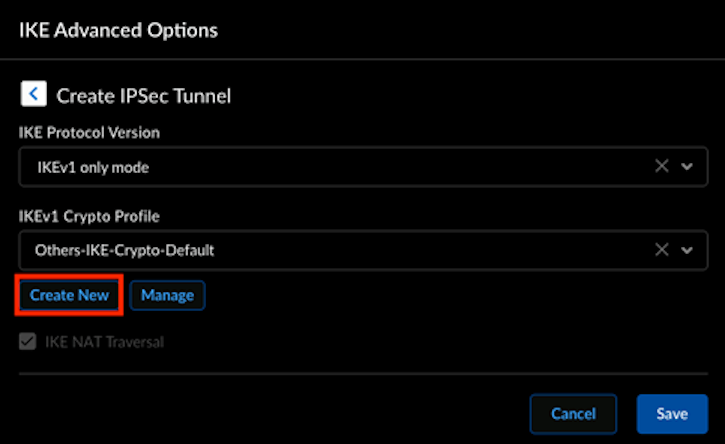 Note: Ignore all the pre-configured options. You must create a new IKE profile to be used for the VeloCloud SSE automation.
 - Clicking Create New displays the following screen:
Figure 7. Create IKE Crypto Profile 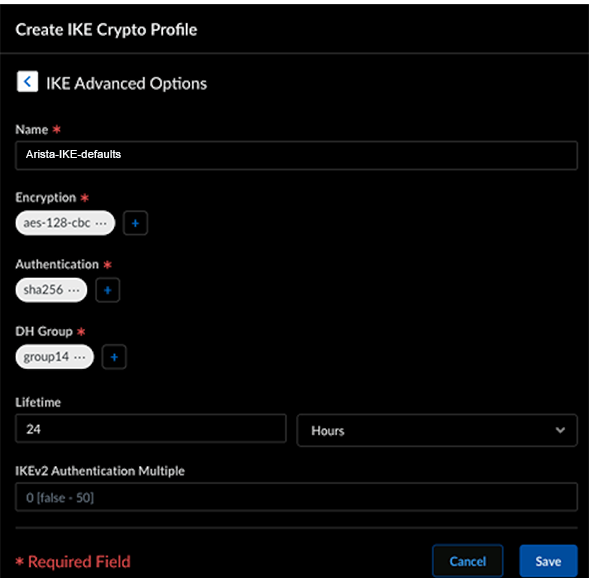
- On the Create IPsec Tunnel screen, click IPsec Advanced Options as shown below:
Figure 8. Scroll to IPsec Advanced Options 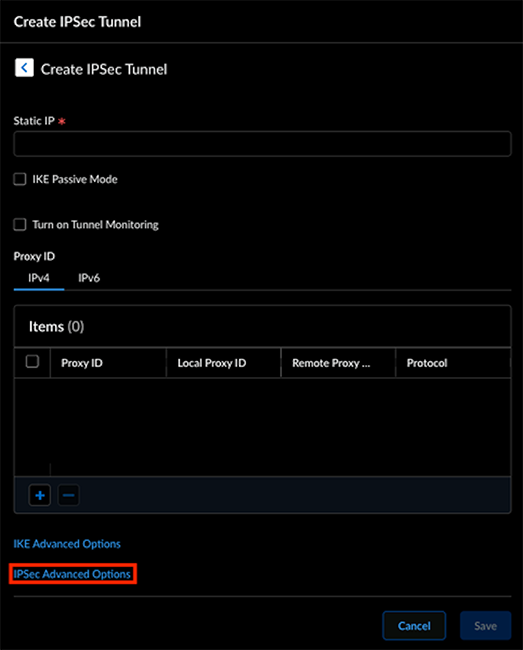
- Click Create New on the IPsec Advanced Options screen.
Figure 9. IPsec Advanced Options 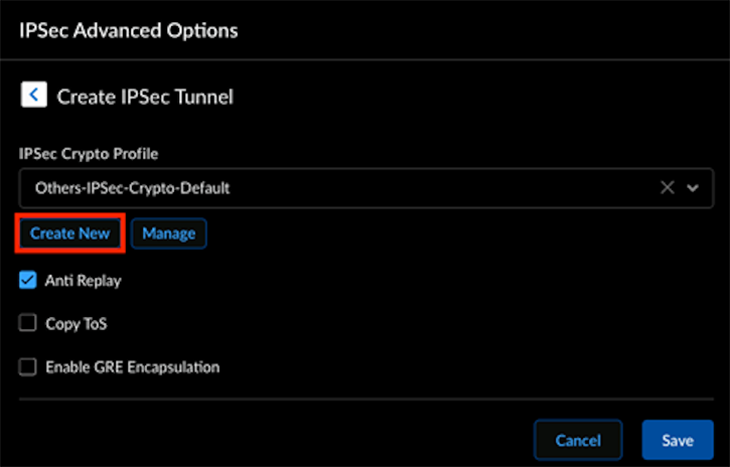 Note: Ignore all the pre-configured options. You must create a new IPsec profile to be used for the VeloCloud SSE automation.
 - Clicking Create New displays the following screen:
Figure 10. Create IPSec Crypto Profile 
You may now log into the Orchestrator to configure the Security Service Edge (SSE) and initiate the automation. For more information, see the topic Security Service Edge (SSE).