Configure SSE for Symantec
Prerequisites
- For the Symantec integration, the Enterprise user must first create username and password for an API credential configured in the Symantec Cloud portal. For more information, see Configure Symantec API Credentials.
- To trigger the Symantec Web Security Service (WSS) automation, see Symantec WSS PoP to PoP Integration.
Follow the below procedure to configure SSE Subscription and SSE Integration for Symantec:
- Click the SSE Subscriptions tab on the Security Service Edge (SSE) screen.
Figure 1. SSE Subscriptions for Symantec 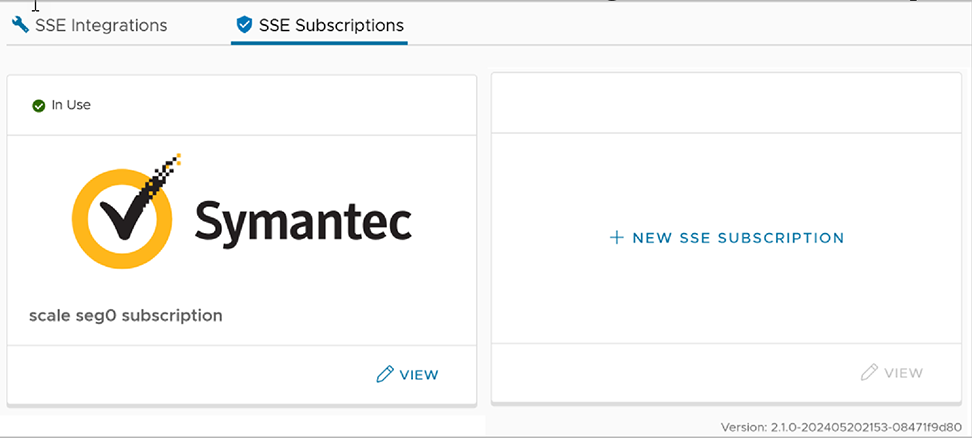
- To create a new subscription, click + New SSE Subscription. The following Configure SSE Subscription window appears on selecting the Subscription Type as Symantec:
Figure 2. Configure a new SSE Subscription for Symantec 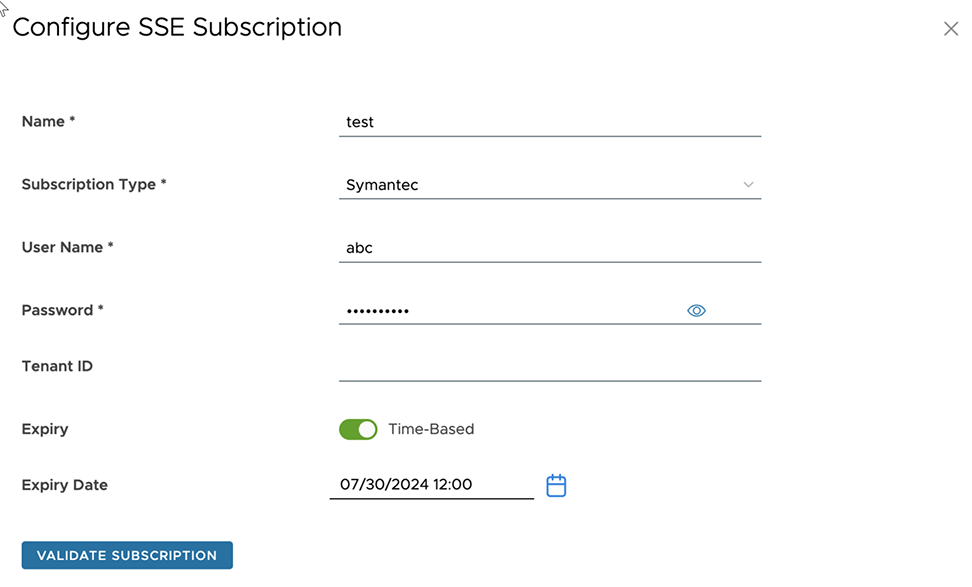 Note: The fields displayed on the screen vary depending on the selected Subscription Type.
 - Navigate to . By default, the SSE Integrations tab is displayed.
Figure 3. SSE Integrations for Symantec 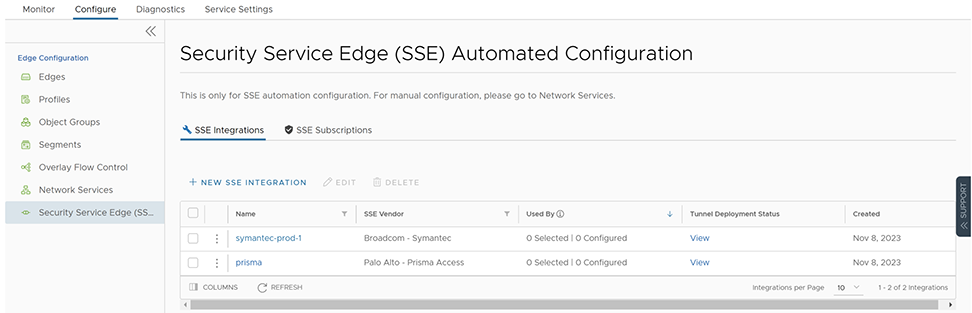
- To create a new SSE integration, click + New SSE Integration.
Figure 4. Configure a new SSE Integration for Symantec  Note: The fields displayed on the screen vary depending on the selected Subscription Type.
 - Click Next Step to activate the Create Network Service section.
Note: The fields displayed on the screen vary depending on the selected Integration Type.
- When you select the Integration Type as Via Edge, the following screen appears:
Figure 5. Create Network Service - Via Edge 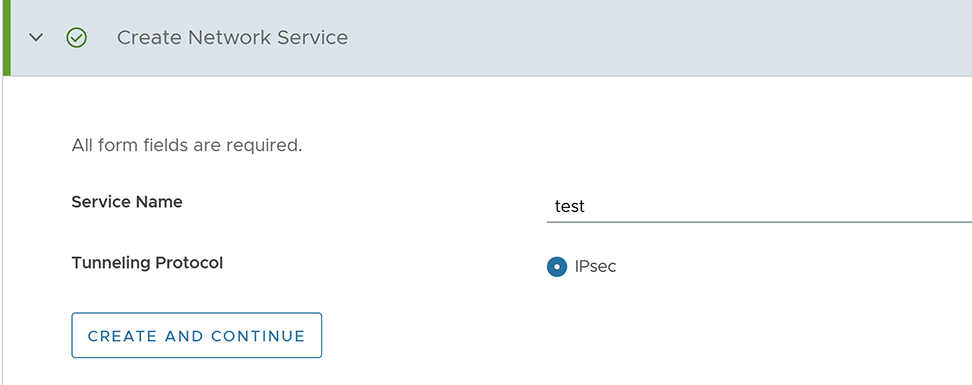
Option Description Service Name Enter a unique service name. Tunneling Protocol This field is set to IPsec, which is the only supported protocol. Click Create and Continue. The Select Profile/Edges section appears. See step 14.
- When you select the Integration Type as PoP to PoP, the following screen appears:
Figure 6. Create Network Service - PoP to PoP 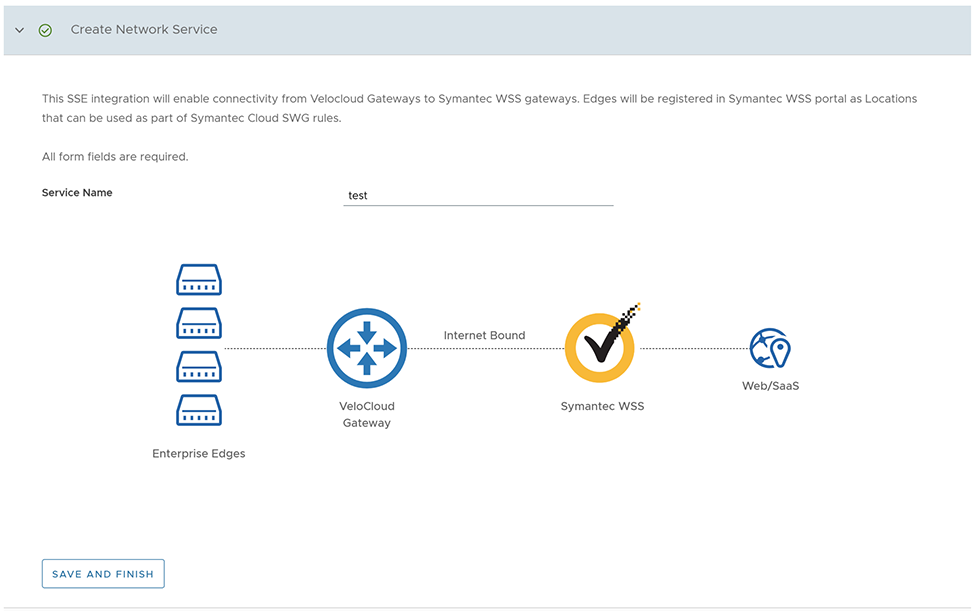
Enter a unique Service Name, and then click Save and Finish.
- When you select the Integration Type as Via Edge, the following screen appears: