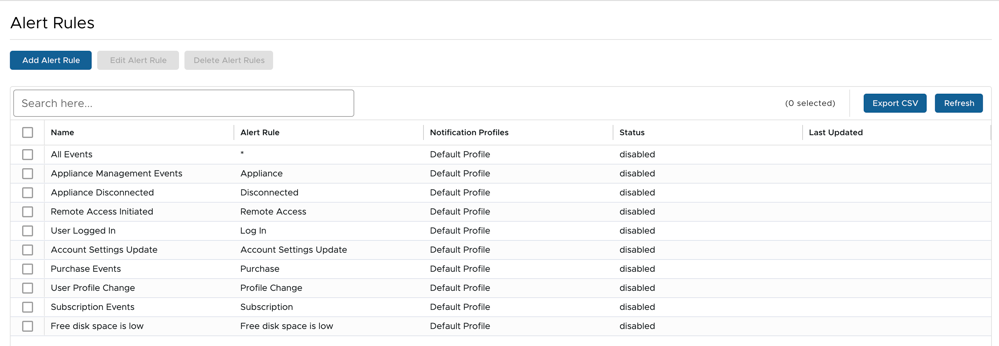
Alert Rules determine which events flow through Notification Profiles.
To access this screen, go to Service Settings > Alert Rules.
Figure 1. Alert Rules
To create a new Alert Rule, click Add Alert Rule.
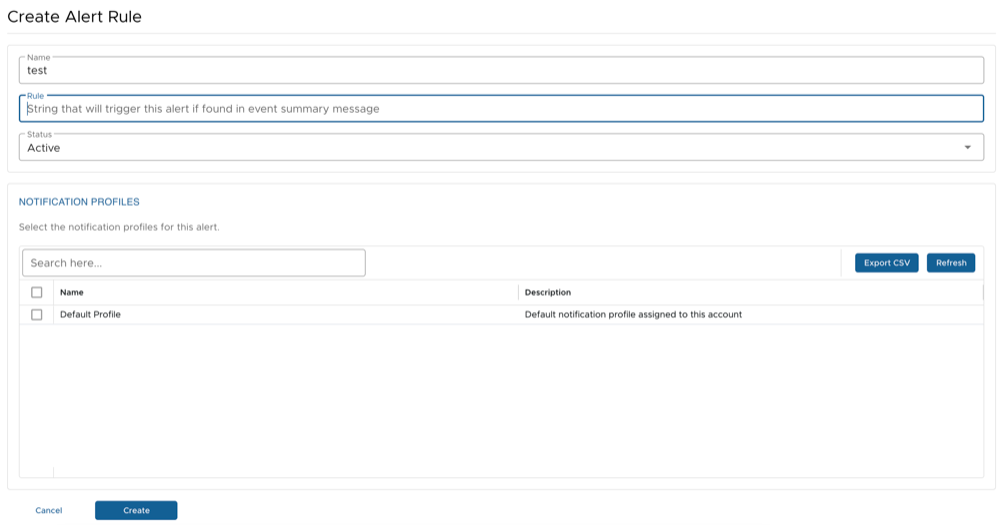
Figure 2. Create Alert Rule
Enter a name for the new Alert Rule.
Specify the Rule. This is the text string the Alert Rule looks for to trigger the Alert.
Select the Alert Status as either Active or Disabled.
Note: All default rules are set to Disabled to prevent excessive email notifications from the ETM Dashboard.
Select an existing Notification Profile from the list or create a new one. For more information, see Notification Profiles.
Click Create.
To edit an existing Alert Rule, click Edit Alert Rule and edit the required fields. Click Update.
To delete Alert Rules, select one or more Alert Rules, and then click Delete Alert Rules. On the delete confirmation screen, click Yes.
Notification Profiles
Notification Profiles specify the delivery methods for Alerts. All Alert Rules require a Notification Profile to send alerts. The Notification Profile specifies how users receive alerts and view information.
To access this screen, go to Service Settings > Notification Profiles.
Figure 3. Notification Profiles
Note: Every account in the ETM Dashboard has a default Notification Profile that delivers alerts via email to the email address associated with the account. The default set of Alert Rules uses this Profile to send alerts.
To create a new Notification Profile, click Add Notification Profile.
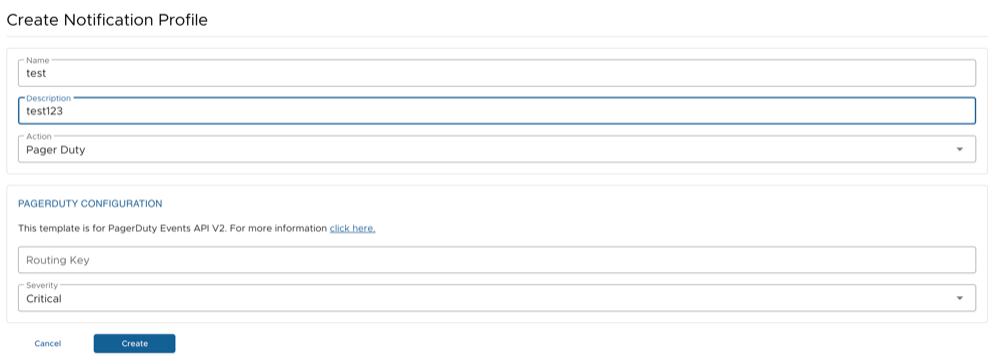
Figure 4. Create Notification Profile
Type a name for the new Notification Profile.
Enter a description.
Select an appropriate action from the Action drop-down menu to define alert delivery preferences.
The available options are Email, Webhook, Slack, Pager Duty, VictorOps, and Untangle Go (Mobile). The configuration options vary depending on the selected action.
Table 1. Actions
Option
Description
Email
Enter the To, CC, and BCC addresses separated by commas.
Note: Only the From and To addresses are required
Enter a Subject and Body.
Note: The area above these options displays usable message variables. Refer to the default Notification Profile for formatting.
Webhook
Enter the Endpoint URL designated for ETM Dashboard notifications.
Click Add Header and enter a Name and Value if the custom integration requires custom headers.
Select an HTTP Method: GET, POST, or PUT.
Slack
Enter the target Endpoint URL to connect the application.
Pager Duty
Enter the Routing Key designated for ETM Dashboard notifications.
Select a severity level: Critical, Error, Warning, or Info.
VictorOps
Enter the Endpoint URL designated for ETM Dashboard notifications.
Select a Message Type: Critical, Warning, or Info.
Untangle Go (Mobile)
From the list, select the Untangle Go application target for notifications. Connecting Untangle Go from multiple mobile devices displays a list of all available options.
Click Create.
Note: After creating a Notification Profile, users can assign it to Alert Rules. For more information, see Alert Rules.
To edit an existing Notification Profile, click Edit Notification Profile and edit the required fields. Click Update.
To delete a Notification Profile, select it and then click Delete Notification Profile.
Note: Notification Profiles that are associated with Alert Rules cannot be deleted.