Rack Mounting an Arista NDR Appliance
This section discusses the rack mounting procedure identical to all Arista NDR appliances covered by this guide. Illustrations in this section depict the mounting of1RU and 2RU appliances.
The following sections provide instructions for mounting 1RU and 2RU appliances:
Installing 1RU Arista NDR appliances
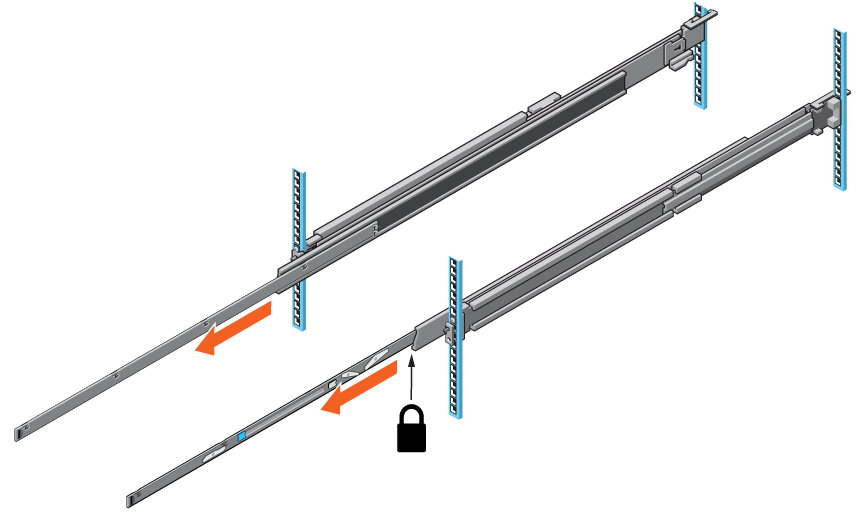
- Position the alignment pins in the rear rail (2) with the hole at the end of the slot in the front rail (1), and slide the front section into the rear section (3).
Figure 1. Installing Rails 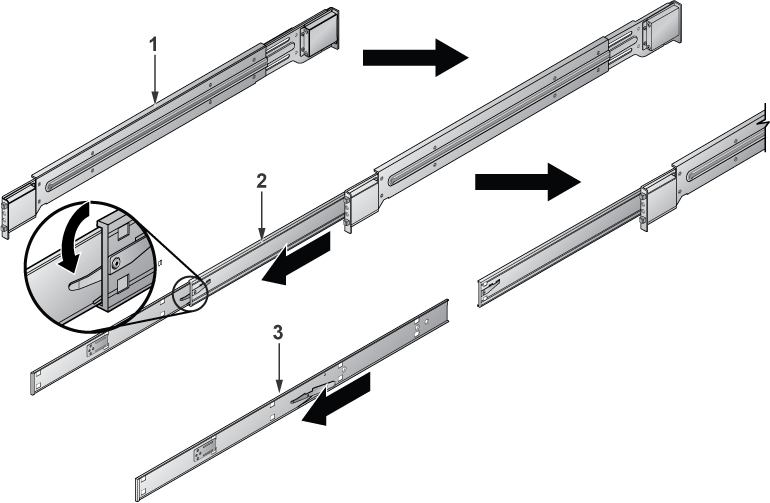 Note: Each end of the assembled outer rail includes a bracket with alignment pins to fit into your rack holes.
 - Repeat the procedure for the other outer rail assembly.
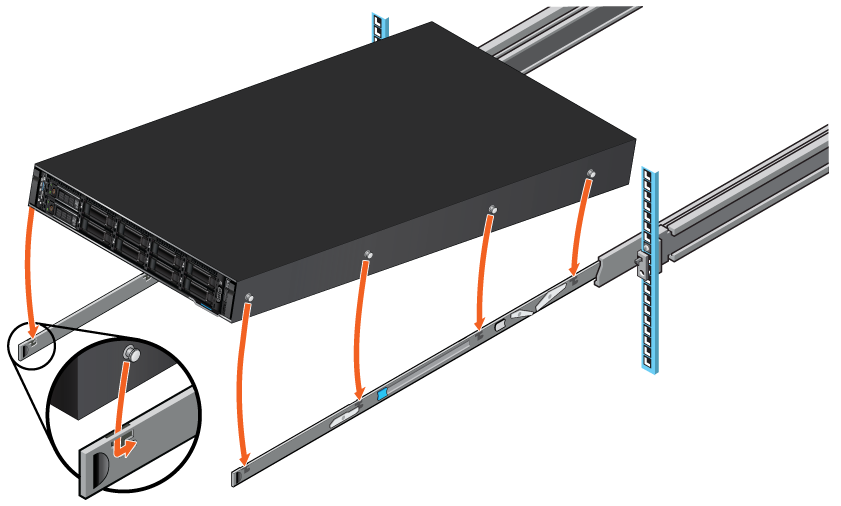
Figure 2. Rack Rails Installed 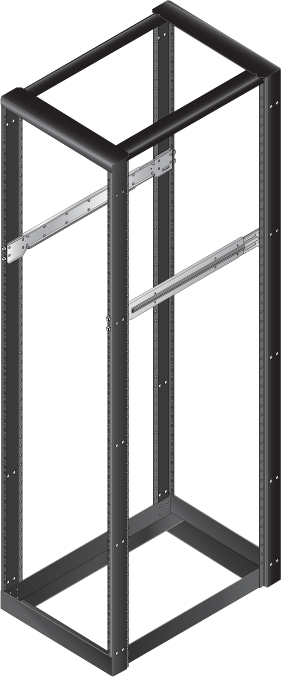 Note: Ensure that the appliance includes the inner rails and inner rail extensions and that the outer rails are installed on the rack.
 - Slide the appliance rails into the rack, keeping the pressure even on both sides.
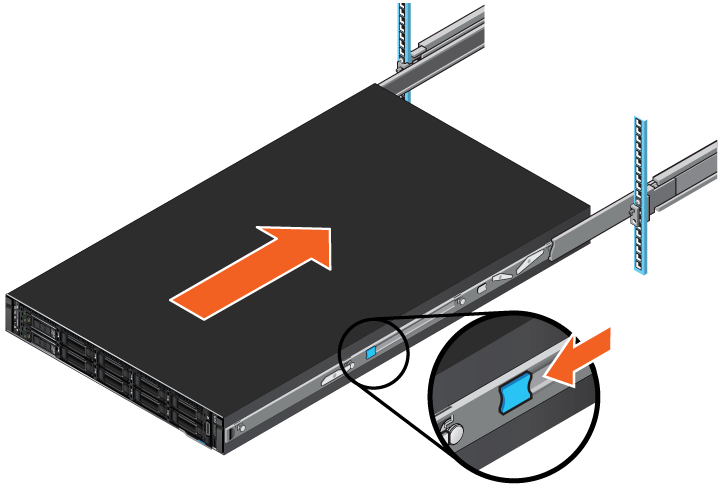
Figure 3. Installing the Appliance into a Rack 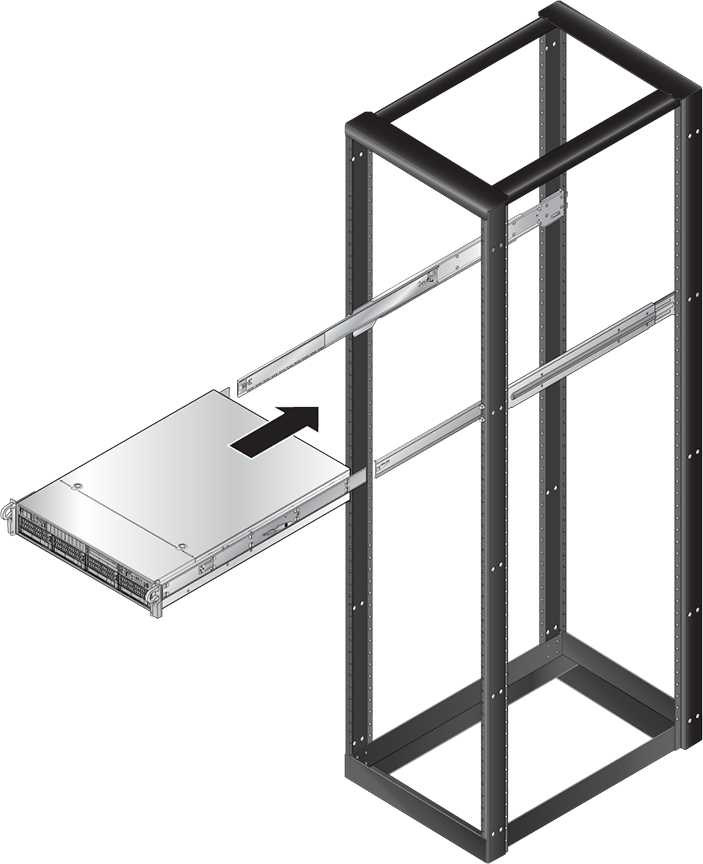 Note: You may have to select the bracket clips while inserting the appliance. When you fasten the server into the rack, ensure you hear the bracket clip engage with an audible click.
Installing 2RU Arista NDR Appliances
- Detach the inner rails from the outer rails.
Figure 4. Detaching Rails - Install the inner rails to the side of the appliance.
Figure 5. Install inner rails 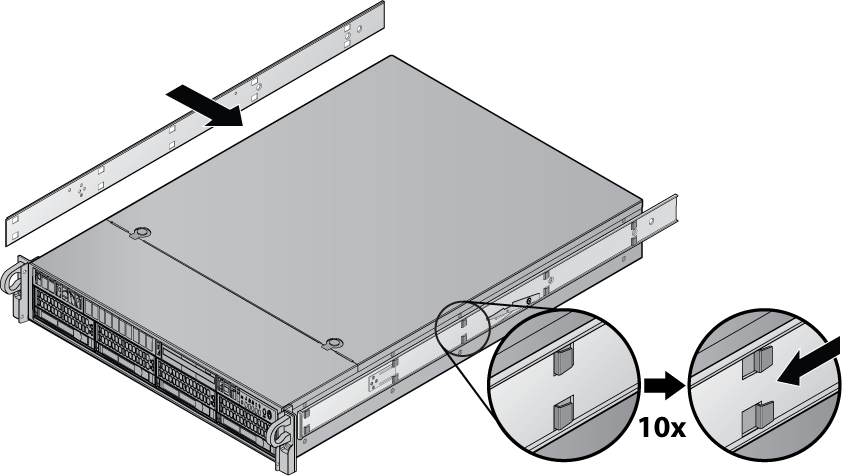
- Press the button to slide the rail in.
Figure 6. Slide the Rail in 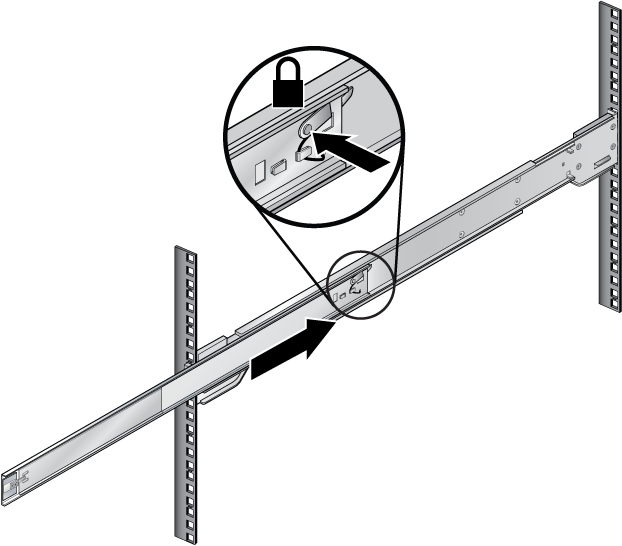 Note: Ensure the rails are attached to the same rack position number in all four corners.
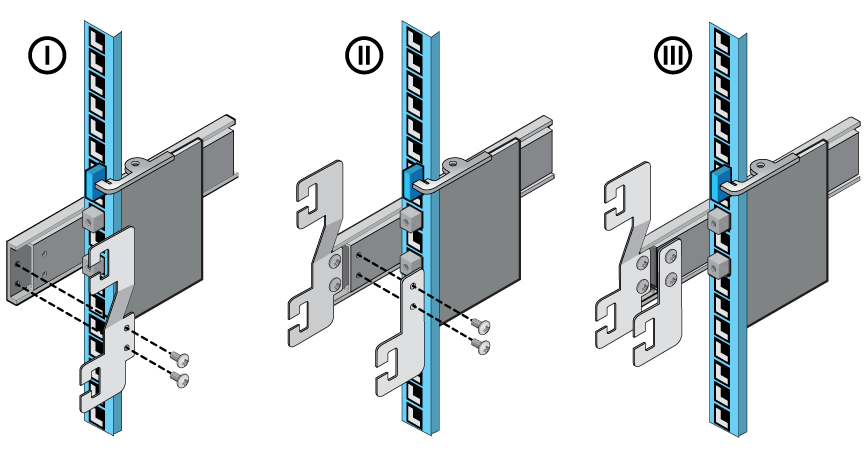
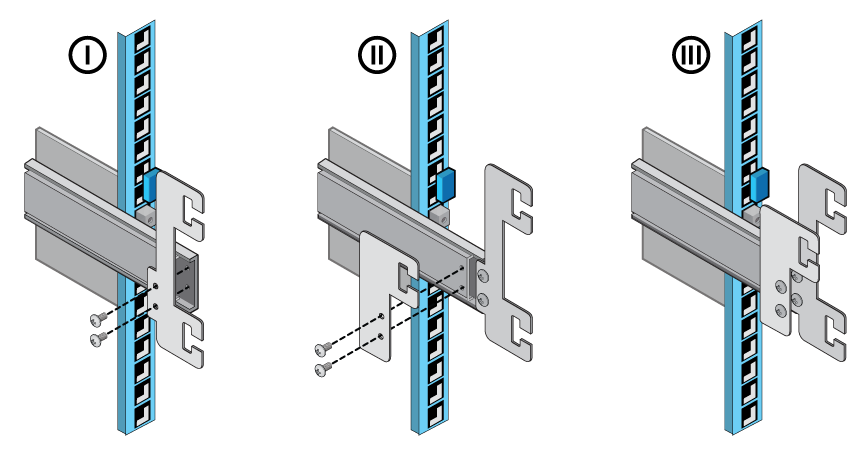
 - Slide the outer rail into the front rack.
Figure 7. Assembling Outer Rails 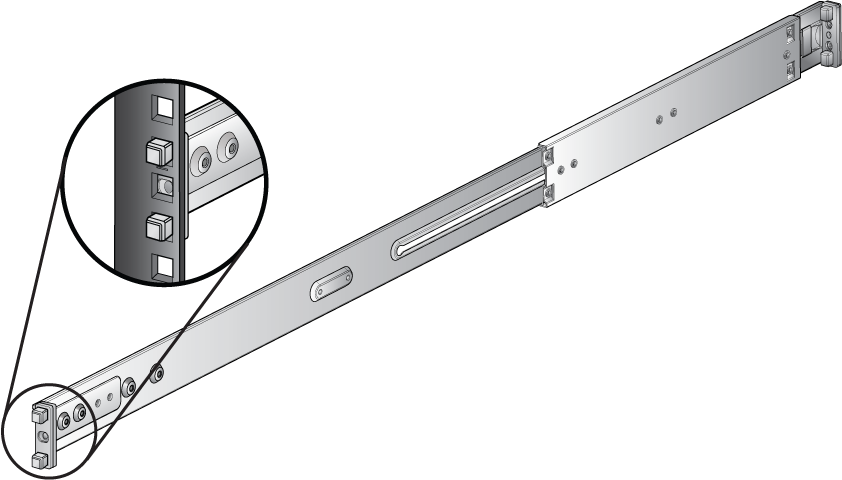
- Secure the rack to the rail with screws.
Figure 8. Screw in the rails 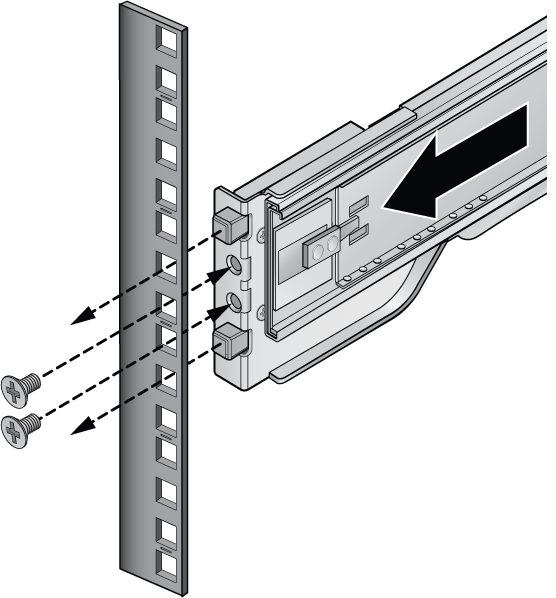
- Repeat the previous step to mount four corners.
Figure 9. Mount all Four Corners 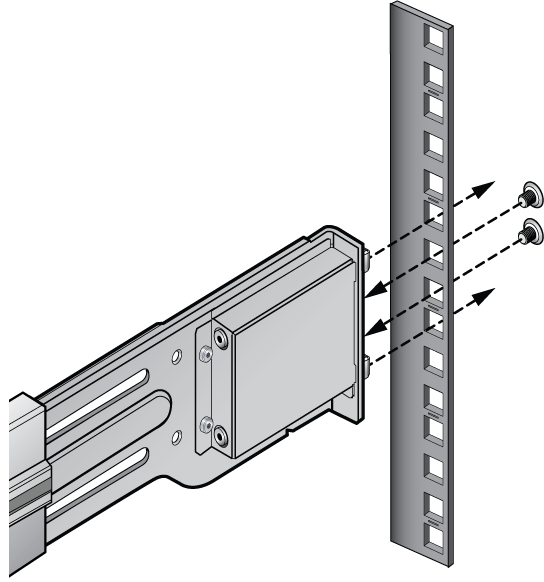
- Insert the appliance rails into the rack rails and slide the appliance in.
Figure 10. Positioning the Appliance 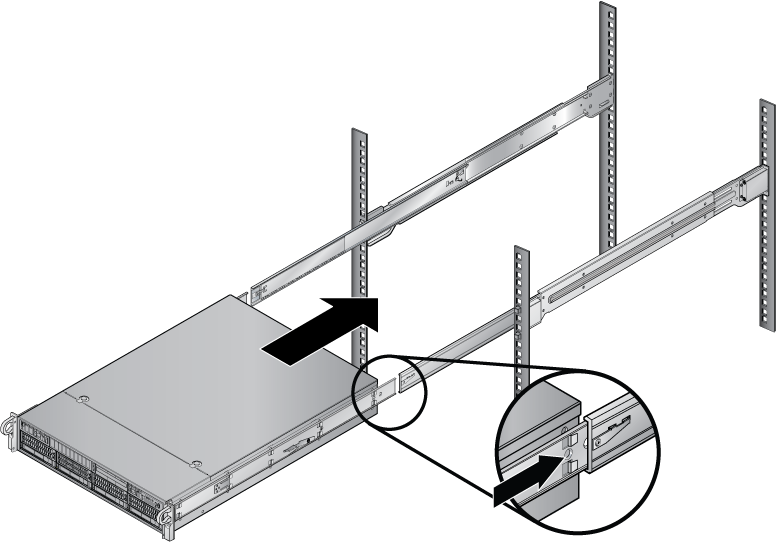
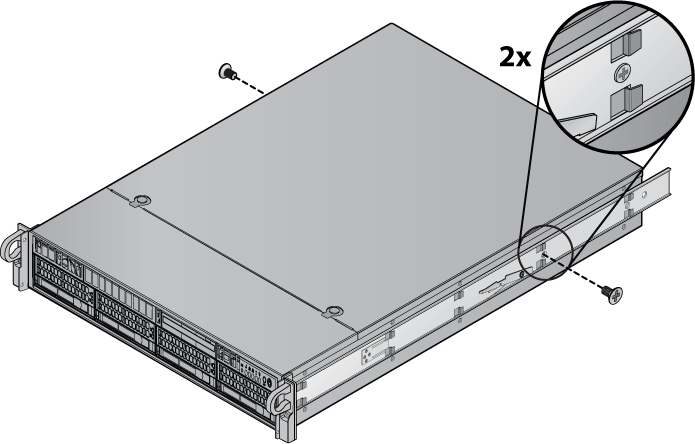
- Install screws into the handles to secure the appliance.
Figure 11. Securing the Appliance 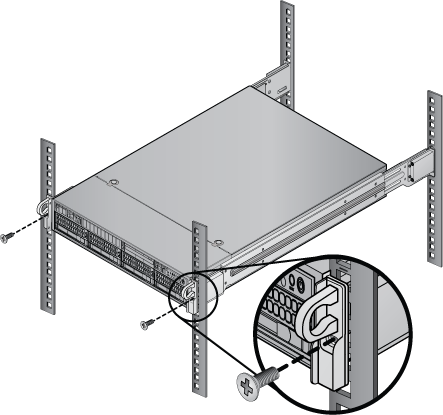
Installing S40 1RU Arista NDR Appliances
- Pull the inner rails out of the rack until they lock into place.
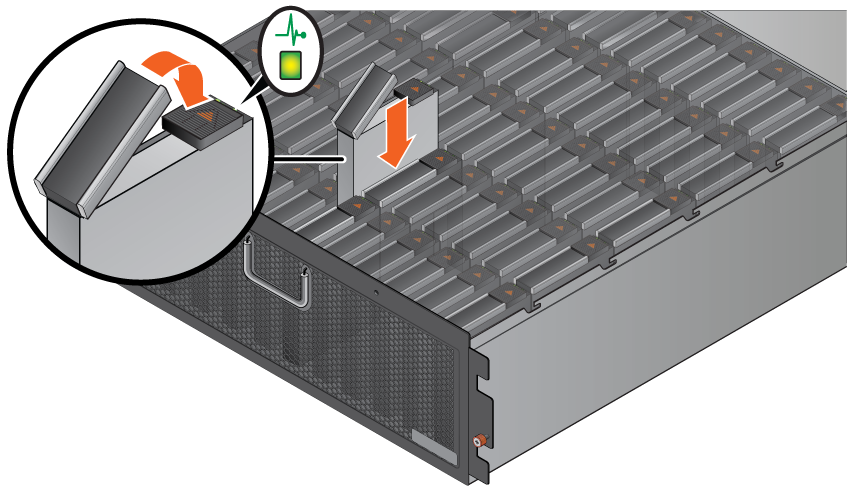
- Rotate the system downward until all the rail standoffs are seated in the J-slots.
- Pull the blue slide release lock tabs forward on both rails and slide the system into the rack until the system is in the rack.
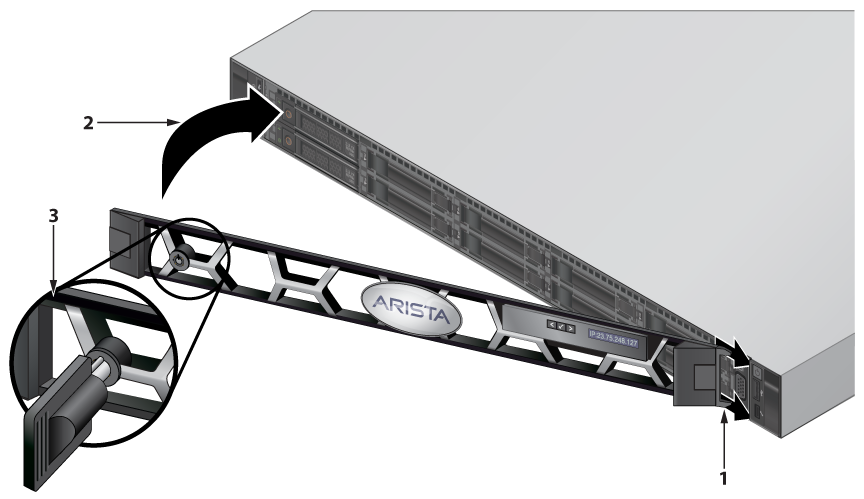
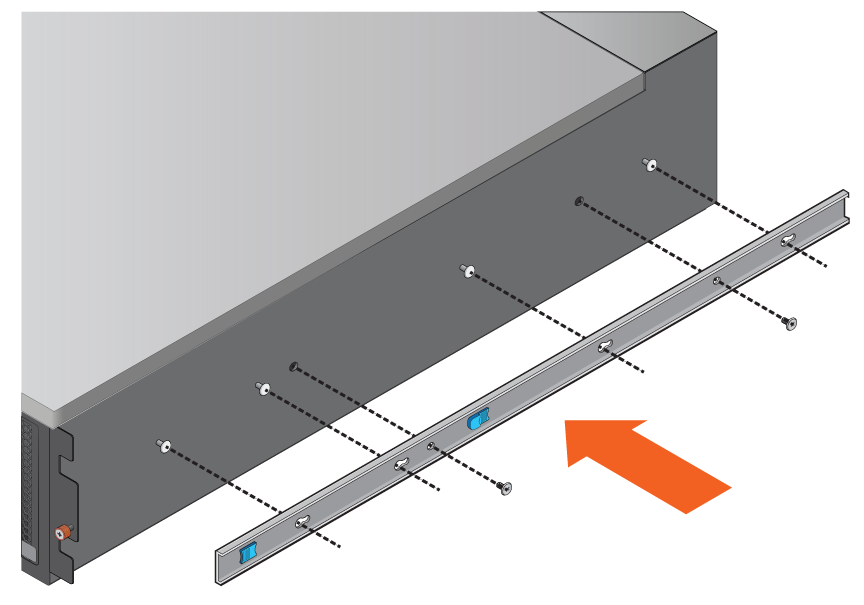
Installing the S40 Arista NDR Appliance Bezel
Perform the following steps to attach the Arista bezel to the front of the enclosure.
- Align and insert the tabs on the bezel into the slots on the system.
Installing the Cable Management Arms
If you plan to use the Cable Management Arms (CMA), install the CMAs after installing the enclosure in the rack.
Perform the following steps to install the CMAs:
- Install two CMA attachment brackets on the left rails.
- Install two CMA attachment brackets on the right rails.
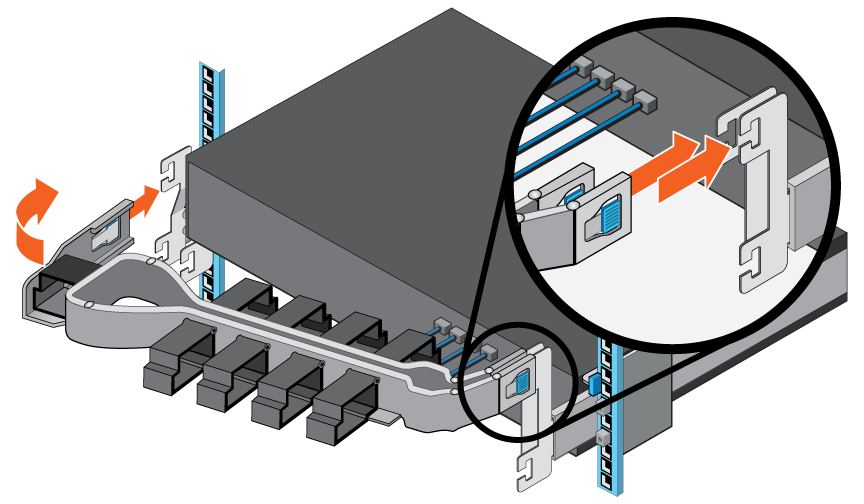
- Perform the following steps to install the upper CMA:
- On the right side of the rear of the enclosure, align the two connectors on the CMA with the attachment brackets on the rails.
- Insert the CMA connectors into the brackets until you hear an audible click.
- Swing the extension arm and align it with the left rail bracket.
- Insert the connector on the CMA to the attachment bracket on the left rail.
Installing STR 4RU Arista NDR Appliances
- Pull the inner rails forward and remove it out from the rail kit.
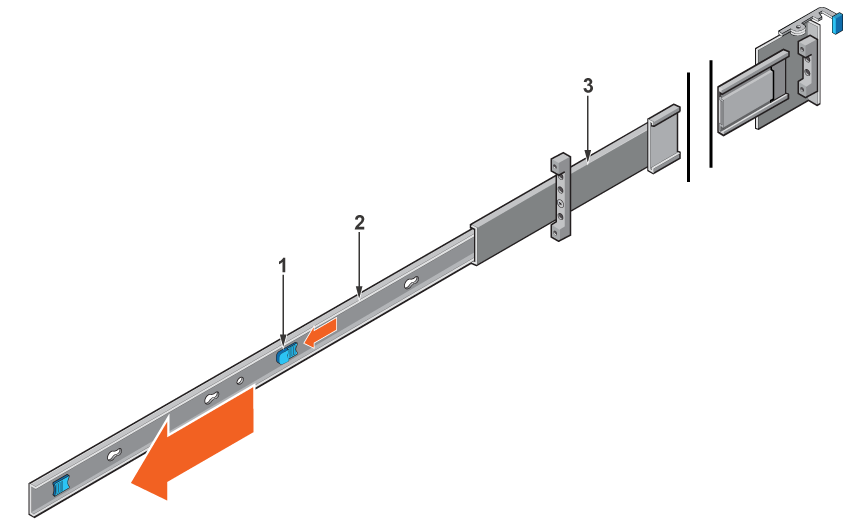
1 Tab 2 Inner rails 3 Outer rails - Attach the inner rails to the chassis by aligning the keyhole on the rail with the standoffs on the chassis and sliding forward until they lock into place.
 Note: Verify all the keyholes on the rails are aligned with the rail standoffs on the chassis. Improper installation of the rails may damage the rails or cause the chassis to fall when extended.
 - Secure the rails by installing two screws on each side of the enclosure.

- Identify the rack holes for installing the rails and install the provided nuts on them. Use square or circular nuts depending on the type of rack post. Attach the right rail to the back post of the rack.
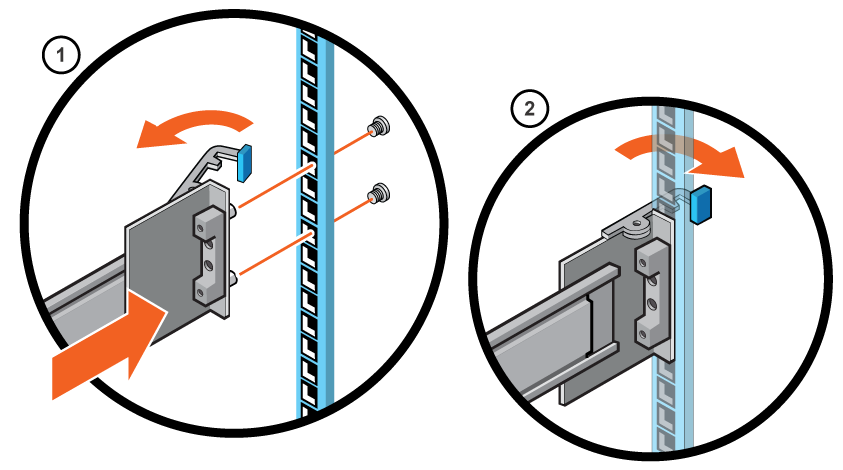
- Align the right rail with the holes on the back post of the rack.
- Push the rail back while holding the latch open.
- Once the rail engages to the rack post, release the latch to lock the rail in place.
- Insert the screws and secure the rail to the back post.
- Attach the right rail to the front post of the rack.
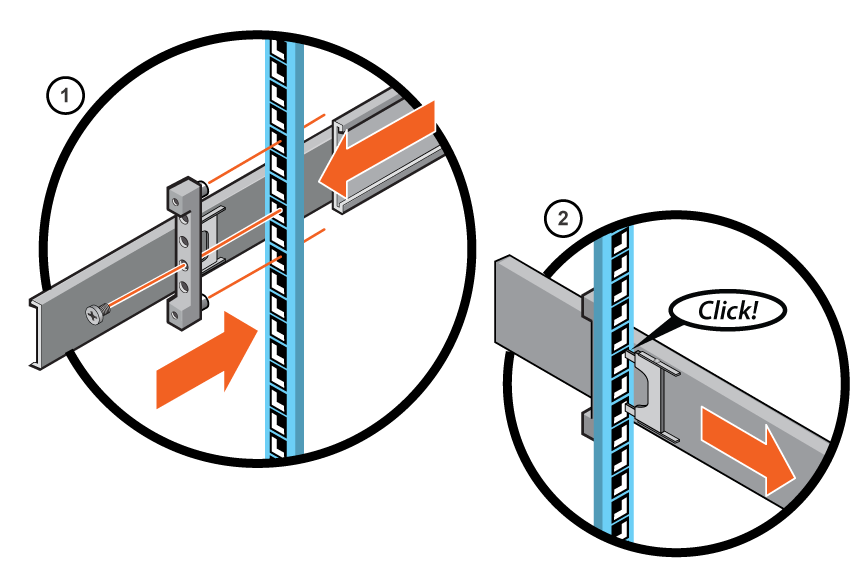
- Extend the rail to fit between the front and rear rack posts.
- Pull the rail backward to engage the rail to the rack post.
- Insert the screws and secure the rail to the front post.
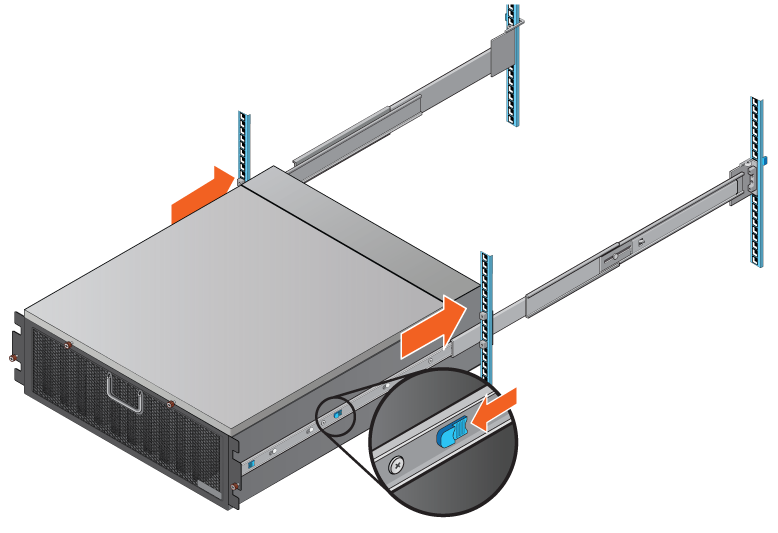
- Lift the enclosure and slide it onto the rails.
Installing STR Arista NDR Appliances Hard Disk Drives
Perform the following steps to install hard disk drives:
- Insert the drive into the drive carrier with the connector end of the drive at the back.
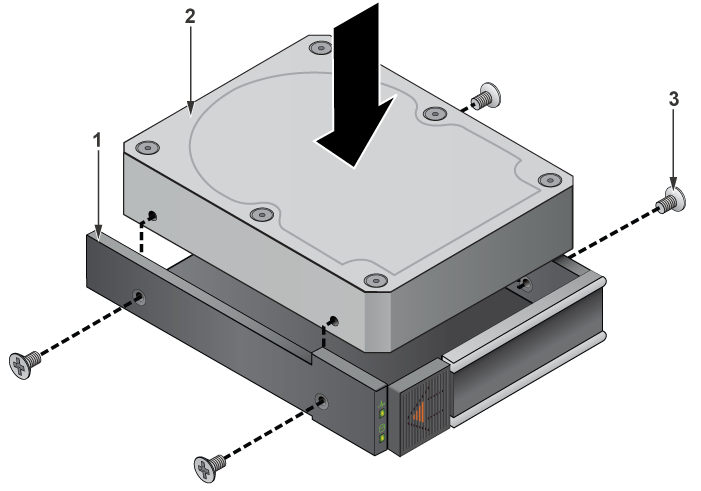
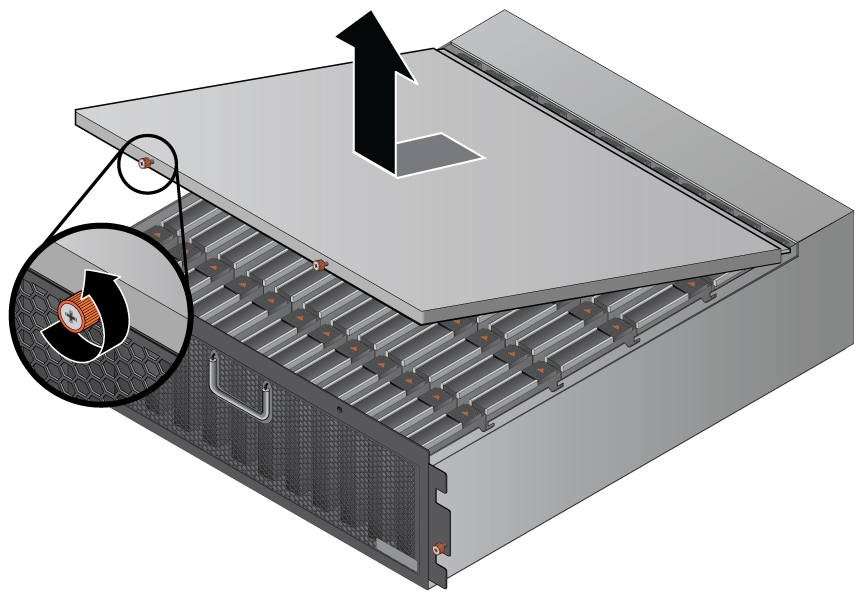
1 Drive carrier 2 Drive 3 screws - Pull the system cover forward and lift it out of the enclosure.
- Verify that the activity light flashes to indicate that the spin-up sequence has begun.