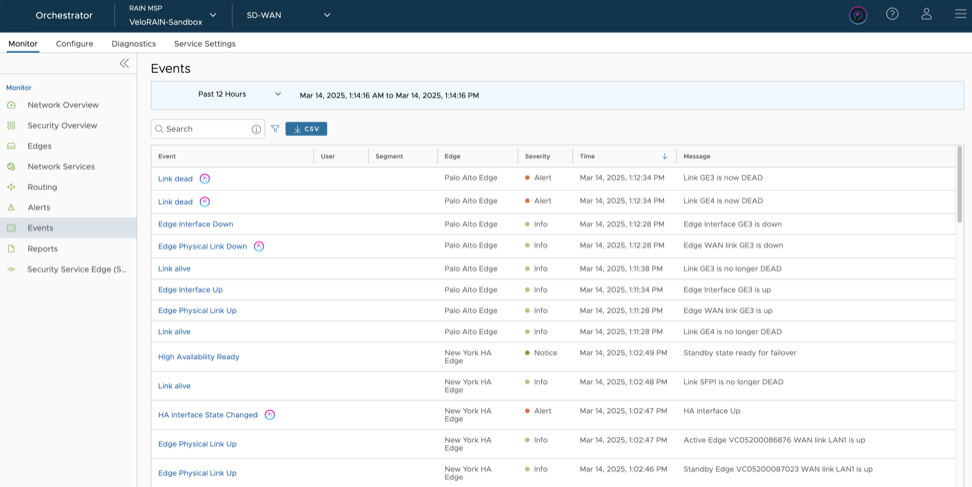
The VeloBrain Troubleshooting Assistant helps validate events and provide root causes and remediations. Users can launch it from the Events screen of the Orchestrator.
Currently, VeloBrain provides troubleshooting assistance for the following events:
Link Dead
Edge Physical Link Down
DNS Cache Max Limit Reached
Edge Tunnel CAP Warning
HA Interface State Changed
To launch the VeloBrain Troubleshooting Assistant, follow the steps below:
Log in to the Orchestrator.
Navigate to Monitor > Events.
The VeloBrain icon appears next to the Event names, as shown below:
Figure 1. Monitor Events
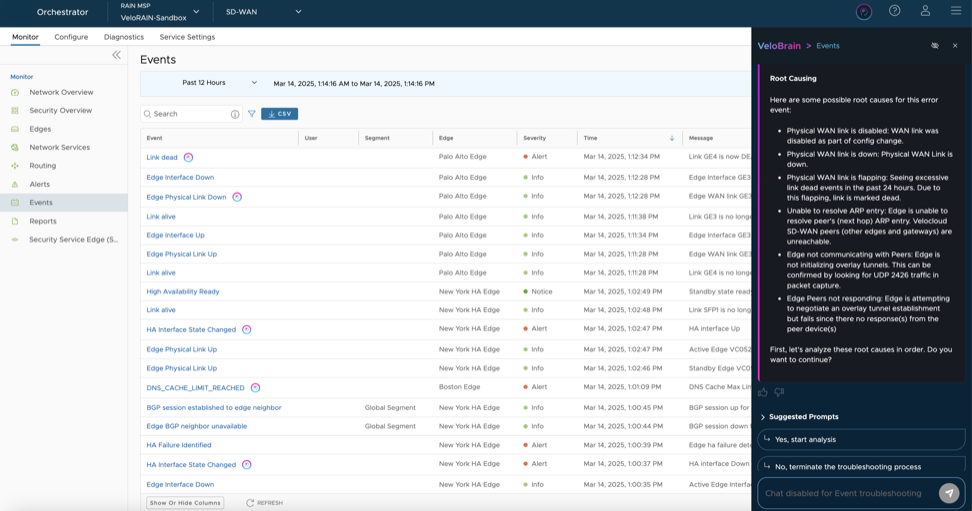
Select the icon. The VeloBrain Troubleshooting Assistant appears on the right side of the screen. It first displays a legal disclaimer and then the Event text along with the date and time of occurrence.
Figure 2. VeloBrain Troubleshooting Assistant
Note: Launching the VeloBrain Troubleshooting Assistant from the Events screen always creates a new chat session.
The VeloBrain Troubleshooting Assistant analyses the Event and displays the following information:
Event Description: Provides a brief description of the Event that includes information related to what might have triggered the Event and its possible impact.
Activity Status Check: Checks the following:
Edge Status: If Edge is active, user can proceed with the next step. If the Edge is inactive, it displays appropriate escalation steps.
Event Status: If the Event is active, user can proceed with the next step. If Event is inactive, it prompts the user to either ignore the Event or get escalation steps.
Background Checks: Checks past occurrences of Events and correlates with existing Events. It also checks configuration changes.
Root Causing: VeloBrain displays all the possible root causes.
To continue, select Yes, start analysis.
VeloBrain analyzes each root cause individually and displays the corresponding remediations.
Note: To end the troubleshooting, select No, terminate the troubleshooting process.
For a helpful remediation, select Yes, the issue is now resolved.
For the VeloBrain Troubleshooting Assistant to continue analyzing other root causes and remediations, select No, I need more assistance. Select this option repeatedly until the remediation is satisfactory.
Note: This activity may sometimes take longer than expected. In such cases, it prompts the user to either ignore the Event or proceed to determine the next steps.
If assistance is still required after all root causes and remediations are displayed, select Get escalation steps. The VeloBrain Troubleshooting Assistant then displays steps to contact the Support team.
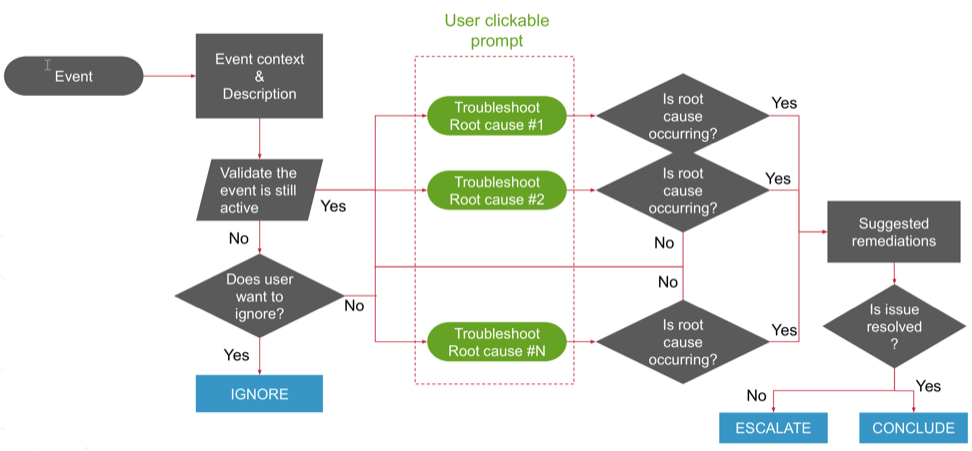
The following flowchart depicts the troubleshooting process:
Figure 3. Troubleshooting Events Flow Diagram
 Note: Launching the VeloBrain Troubleshooting Assistant from the Events screen always creates a new chat session.