Print

Create Elastic IP and Assign it to Public Interface of the Edge

Elastic IP Addresses (EIPs) are public IP address resources that you can purchase and hold independently. You can create an EIP or reinstate a released EIP through the console. This topic describes how to create an EIP and bind it to the secondary (public) interface.
  • Ensure you have an AliCloud account and login information.
  • Ensure you have an Elastic Network Interface (ENI) to assign the Elastic IP. For steps to create ENI, see Create an Elastic Network Interface.
  1. Log on to the VPC console.
  2. In the left-side navigation pane, select Elastic IP Addresses. The Elastic IP Addresses page appears.
  3. Select Create EIP. The Elastic IP page appears.
  4. Configure EIP.
    1. Select the region of the EIP to be created. Ensure that the EIP and the cloud instance to be associated with the EIP belong to the same region.
    2. Set the maximum bandwidth for the EIP to be created, depending on the requirement.
    3. Select the number of the EIPs that you want to create with the same configurations. The default value for Quantity is 1.
  5. Select Buy Now. The Confirm Orderpage appears.
  6. Select Elastic IP Agreement of Service check box and select Activate. On the Elastic IP Addresses page, select Refresh to view the newly created EIP instance.
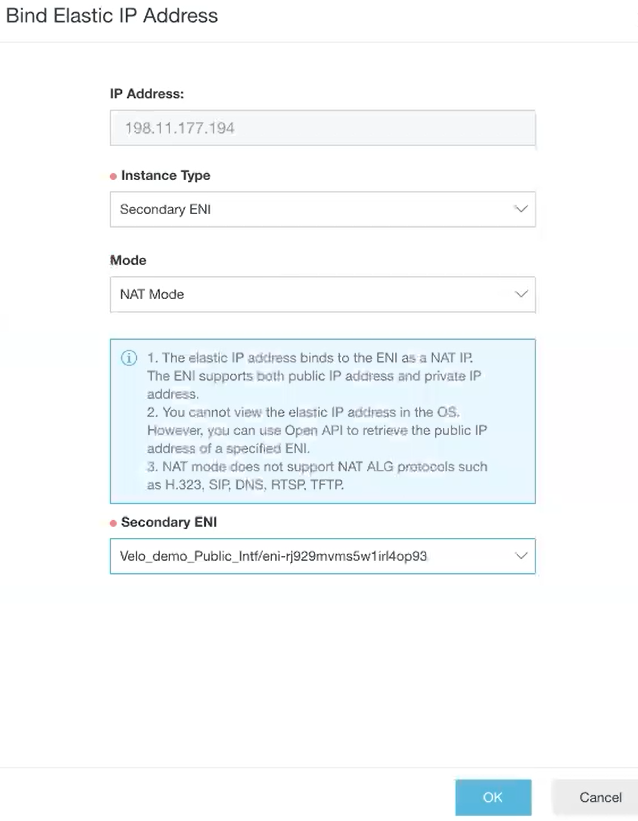
  7. To associate the EIP instance to a secondary (public) Elastic Network Interface (ENI) of the Edge, select Bind under the Actions column. The Bind Elastic IP Address page appears.
    Figure 1. Binding an Elastic IP Address
  8. From the Instance Type menu, select secondary ENI.
  9. From the Secondary ENI menu, select the interface to which you want to bind the EIP.
  10. Select OK.
..