Prepare GCP Environment
Create a VPC Network
Ensure you have a Google account and access/login information to the Google Cloud Platform (GCP) Console.
You can choose to create an Automatic mode or Custom mode Virtual Private Cloud (VPC) network. Automatic mode networks create one subnet in each Google Cloud region automatically when you create the network. For Custom mode VPC networks, you have to create a network and then create subnets that you want within a region. You can create subnets when you create the network or you can add subnets later, but you cannot create instances in a region that has no subnet defined.
- Select Create VPC network.
The Create a VPC network page appears.
Figure 1. Create a VPC network 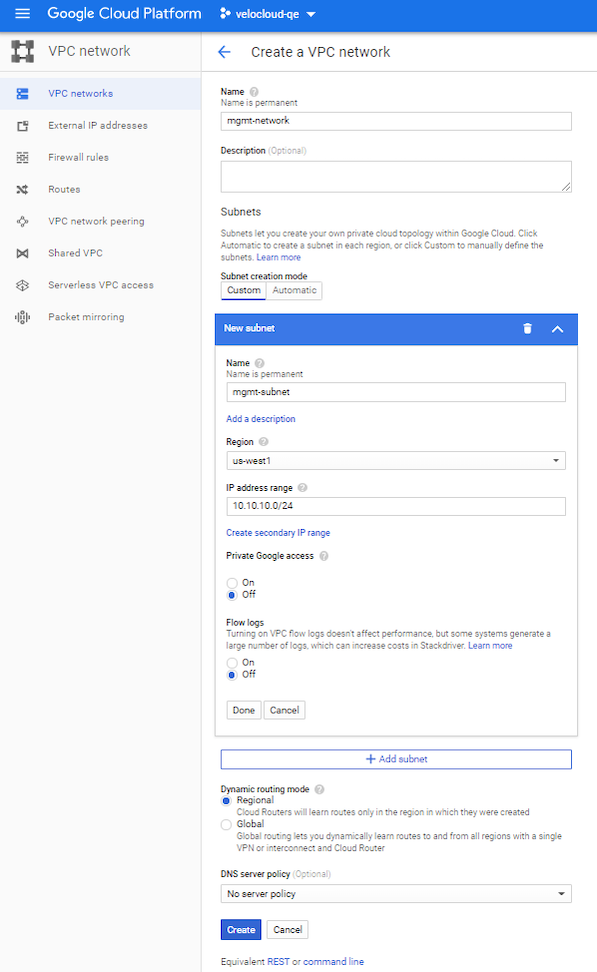
Create Inbound Firewall Rules
- Ensure you have a Google account and access/login information to the Google Cloud Platform (GCP) Console.
- Ensure you have created the VPC networks.
- Review the firewall rule components and ensure to become familiar with firewall configuration components as used in Google Cloud.
Firewall rules are defined at the network level, and only apply to the network where they are created. To create inbound firewall rules for a VPC network, perform the following steps:
- Go to the Firewall rules tab and select Add firewall rule. The Create a firewall rule page appears.
Figure 2. Create a firewall rule 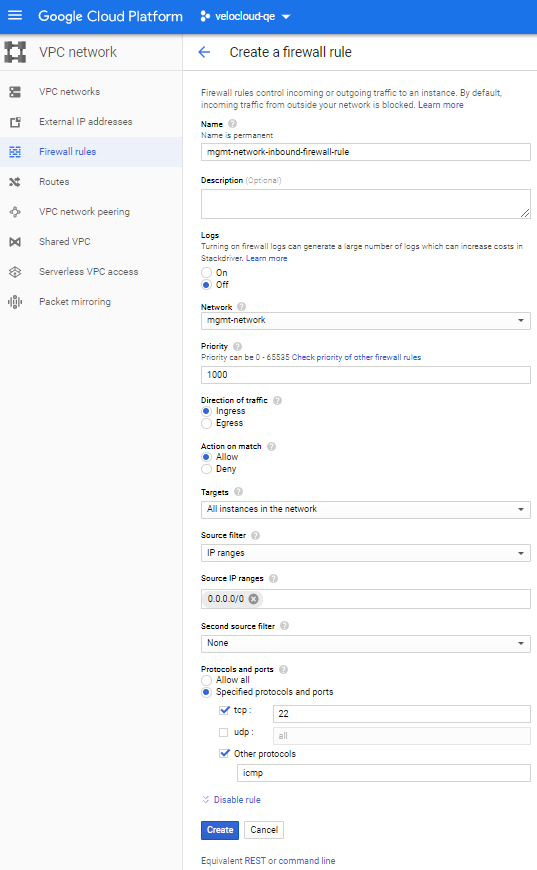
Create Routes in a VPC Network
- Ensure you have a Google account and access/login information to the Google Cloud Platform (GCP) Console.
- Ensure you have created VPC networks.
Describes how to add a new default route in a Private Virtual Private Cloud (VPC) network pointing to an Edge as illustrated in topology diagram.
- Select Add route.
The Create a route page appears.
Figure 3. Create a route 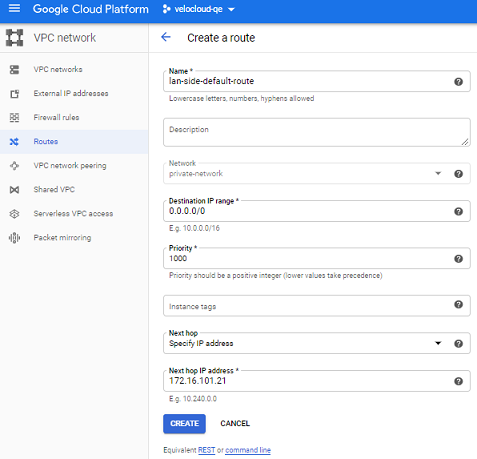
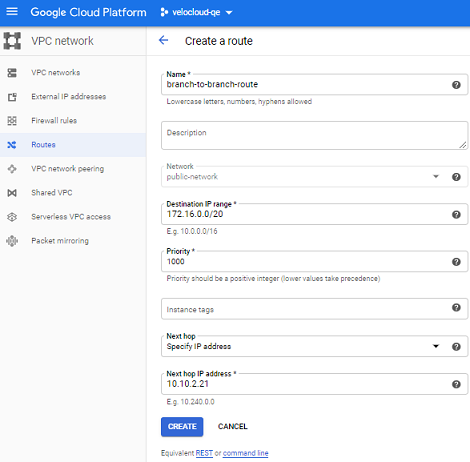
Add a Branch-to-Branch Route in a VPC Network
- Ensure you have a Google account and access/login information to the Google Cloud Platform (GCP) Console.
- Ensure you have created VPC networks.
Describes how to add a branch-to-branch route in a Public Virtual Private Cloud (VPC) network pointing to an Edge as illustrated in Single-Arm Topology.
- Go to the Routes tab and select Add route.
The Create a route page appears.
Figure 4. Create a route