Configuring Profiles
Profiles define a template configuration that can be applied to multiple Edges. A default profile, the Quick Start Profile, is available when you install Orchestrator.
Configure the Profiles by performing the following steps:
- Select Profiles to display the Profiles page.
Figure 1. Configure Profiles Page 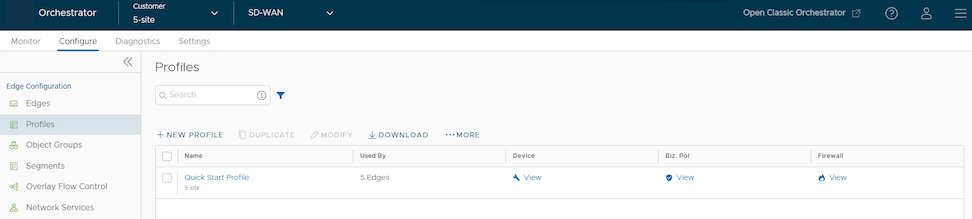
Table 1. Profiles Page in Orchestrator Option Descriptions Option Description Name Displays the name of the Profile. Select the link to modify the configurations. See Configure Profile settings. Used By Displays the number of Edges associated with the Profile. Biz. Pol Select the View link to modify the configurations. See Configure Profile settings. Firewall Select the View link to modify the configurations. See Configure Profile Firewall.
Creating a Profile
After installing Orchestrator, a default profile becomes available. If required, create additional Profiles.
To create a Profile, perform the following steps:
- On the Profiles page, select New Profile.
Figure 2. Configuring a New Profile 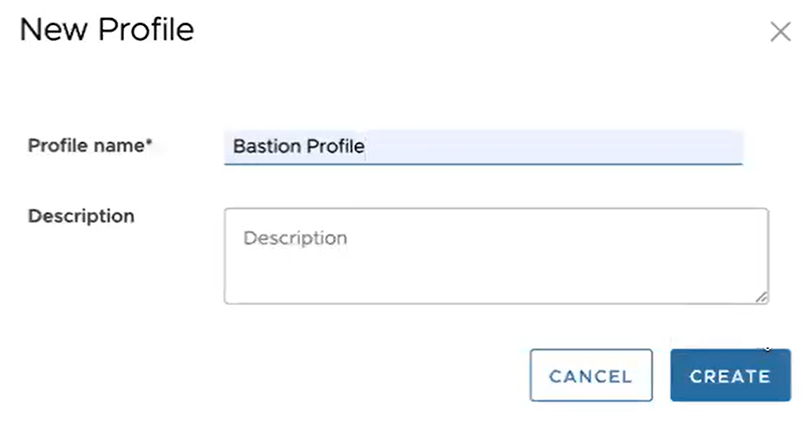
Configuring Profile Settings
Profiles provide a composite of the configurations created in Segments and Network Services.
To configure a specific Profile, perform the following steps:
- Select the link to a Profile or select the View link in the Device column of the Profile. The configuration options display in the Device tab.
Figure 3. Configuring Profile Settings 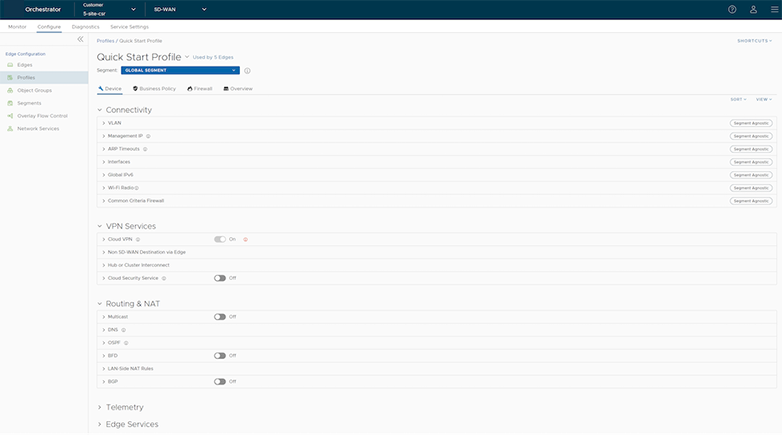
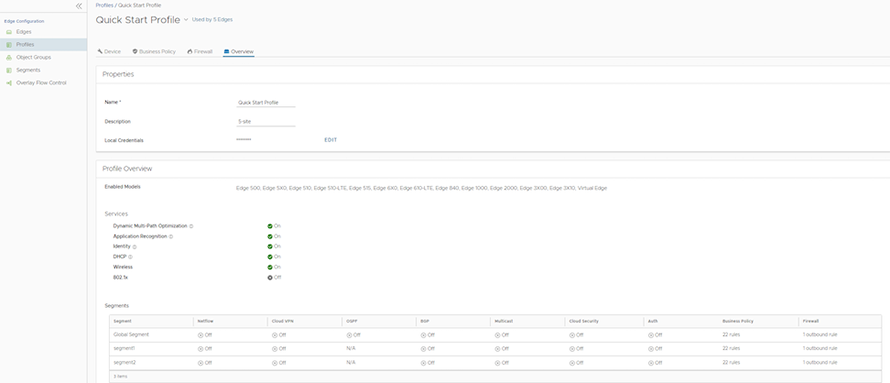
Viewing Profile Information
The Profile Overview page provides complete view of all the configurations of a specific profile. You can also modify the name, description, and the local credentials of the selected profile.
To access the Profile Overview page in New Orchestrator UI:
- Select the link to a Profile and then select the Overview tab. Edit the Profile Name, Description, and Local Credentials by selecting EDIT. For more information, see Configure Local Credentials information in Step 3.
Figure 4. Viewing Profile Information