using the cloudeos and veos router Appliance on microsoft azure
the cloudeos and veos router Appliance, which is based on the Arista EOS, runs as a virtual machine instance on azure. Use the cloudeos and veos router Appliance to create the various types of virtual machine router instances you need for your azure deployment. For example, gateway routers and transit routers.
cloudeos and veos router Appliance Image Updates
the process you use to update cloudeos and veos router Appliance images is the standard update process used for EOS images.
For details on the steps to use, refer to the Arista EOS User Manual, see https://www.arista.com/en/support/product-documentation.
System Requirements
Describes the cloudeos and veos router Appliance azure minimum support requirements.
the cloudeos and veos router Appliance azure instance supports the following instance types:
- D2_v3 with 2 cores, 8.0GiB RAM, 2 NICs (1,000 Mbps), and a 4GB OS disk.
- D4_v3 with 4 cores, 16.0GiB RAM, 2 NICs (2,000 Mbps), and a 4GB OS disk.
- D8_v3 with 8 cores, 32.0GiB RAM, 4 NICs (4,000 Mbps), and a 4GB OS disk.
- D16_v3 with 16 cores, 64.0GiB RAM, 8 NICs (8,000 Mbps), and a 4GB OS disk.
Launching the cloudeos and veos router Appliance azure Instance
there are two methods which can be used to launch a cloudeos and veos router Appliance instance.
Below is a summary of each method.
- Portal Marketplace: This method launches an instance using the azure Portal Marketplace UI.
- azure CLI 2.0: This method launches an instance using a custom template through the azure CLI 2.0. the primary advantage of a CLI deployment is the ability to include custom-data and customize your deployment.
Do not deploy the same template twice into a single resource group, because this creates name conflicts. To deploy multiple instances into the same resource group, modify the template, so all resources are renamed, and all IP addresses are unique.
Creating an Instance using the Portal Marketplace
To create an instance using the Portal Marketplace, complete the following steps.
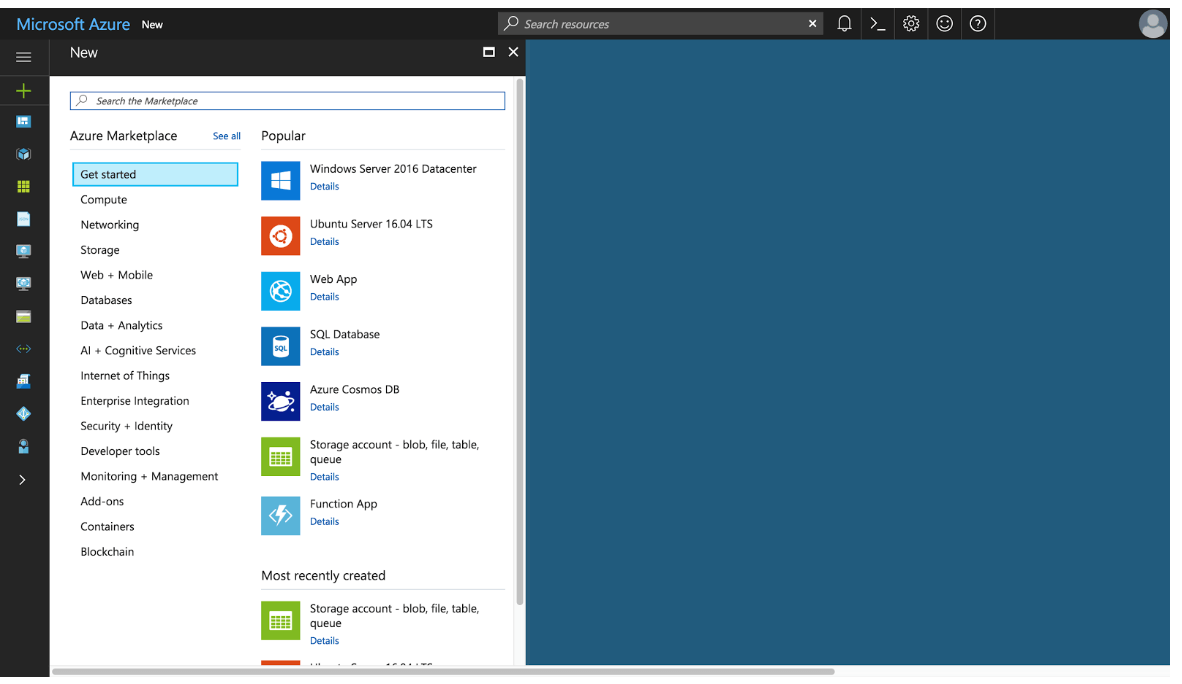
- In the search bar, type "Arista" and press enter.
Figure 1. Type '"Arista"
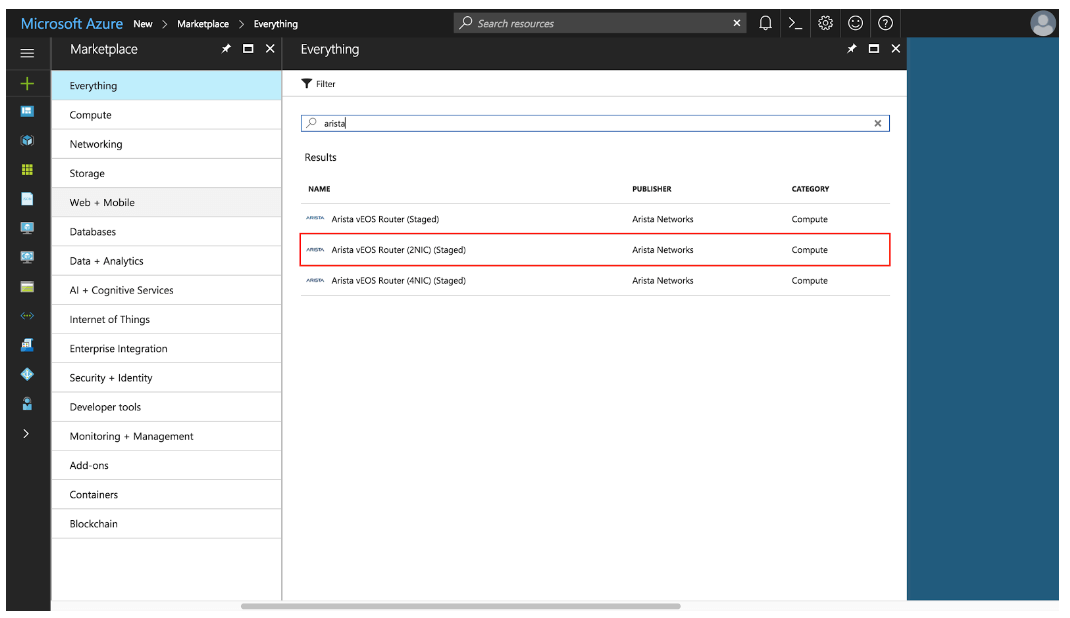
- Select the Arista offer you are interested in.
Figure 2. Arista Selection
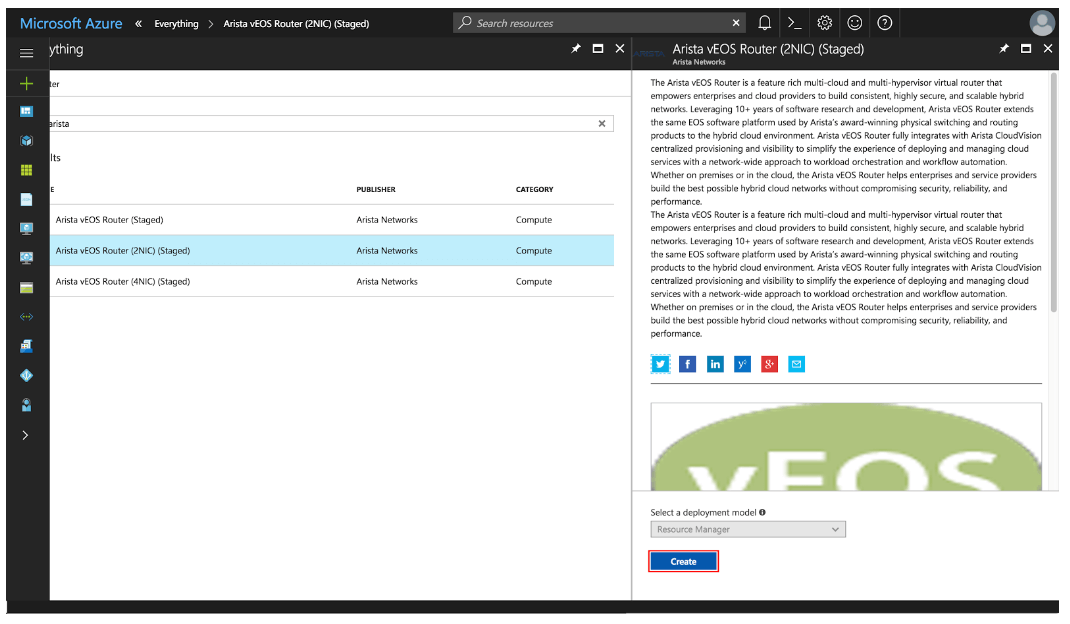
- Select "Create".
Figure 3. Select "Create"
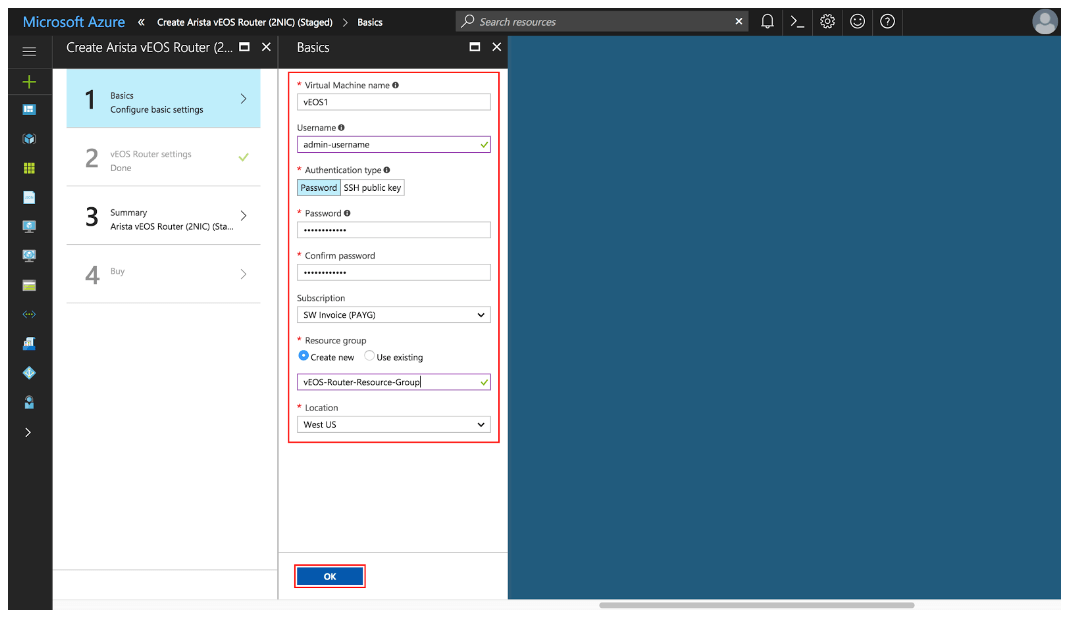
- Fill out the required information and press "OK".
Figure 4. Required Information
- Configure the VNet and press "OK".
Figure 5. Configuring the VNet
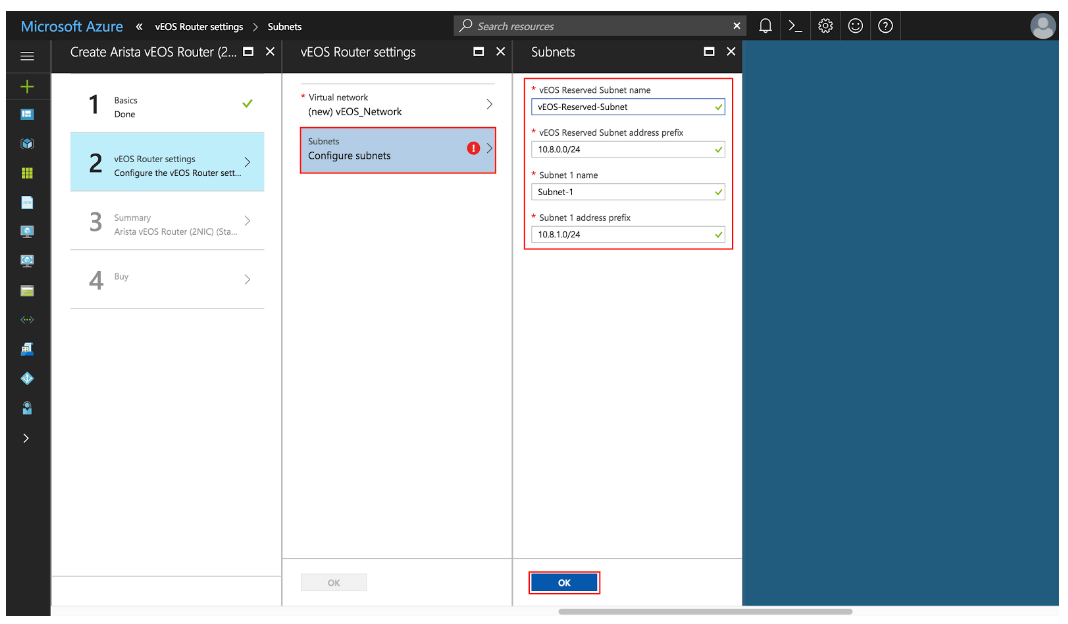
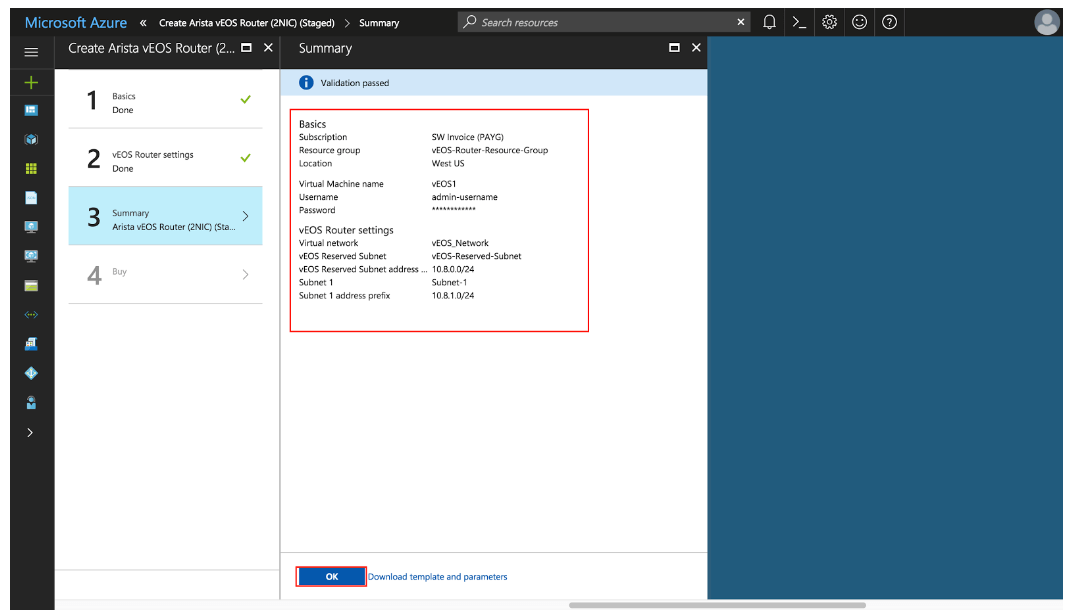
- Configure the subnets and press "OK".
Figure 6. Verification
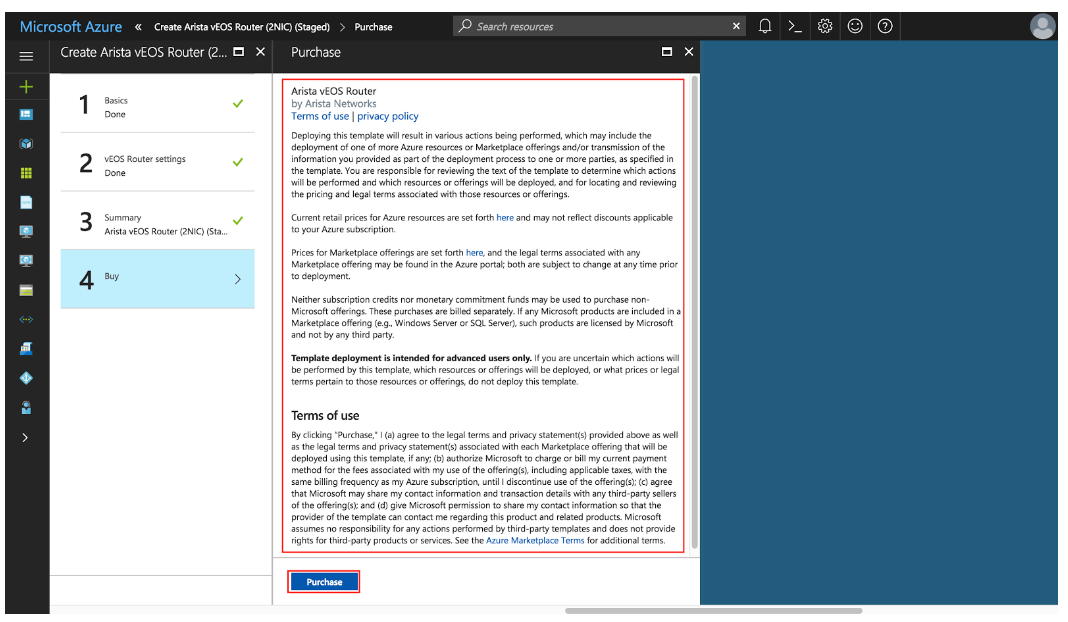
- Read the Terms and Conditions, then press "Purchase".
Figure 7. Terms and Conditions
Creating an Instance under azure CLI 2.0
To create an instance under azure CLI 2.0, complete the following steps.
- Install azure CLI 2.0 (https://docs.microsoft.com/en-us/cli/azure/install-azure-cli?view=azure-cli-latest).
- Run az login and follow the prompts to authorize the machine.
- Download the template and parameters files from the GitHub repository. https://github.com/azure/azure-quickstart-templates.
- Open <prefix>-parameters.json:. Locate the ./single_line_json.sh user_data.txt script.
- Copy and paste the generated output into the customData value field of the JSON parameters file.
- Use the script as in the following example:
#!/usr/bin/bash cat $1 | python -c 'import json, sys; print( json.dumps( sys.stdin.read() ) )' - Use the template and parameters JSON files to launch a veos router instance in azure using the azure CLI 2.0.
$ az group create --name ExampleGroup --location "Central US"Note: You must use the same location as the storage account where the VHD image is uploaded.$ az group deployment create \ --name ExampleDeployment \ --resource-group ExampleGroup \ --template-file <prefix>-template.json \ --parameters @<prefix>-parameters.jsonNote: If you are using a newer version of the azure CLI 2.0, you may encounter a parameter file parsing bug. To fix this, remove the @ symbol before the parameters filename.
Logging into an Instance
To log into an instance, complete the following steps.
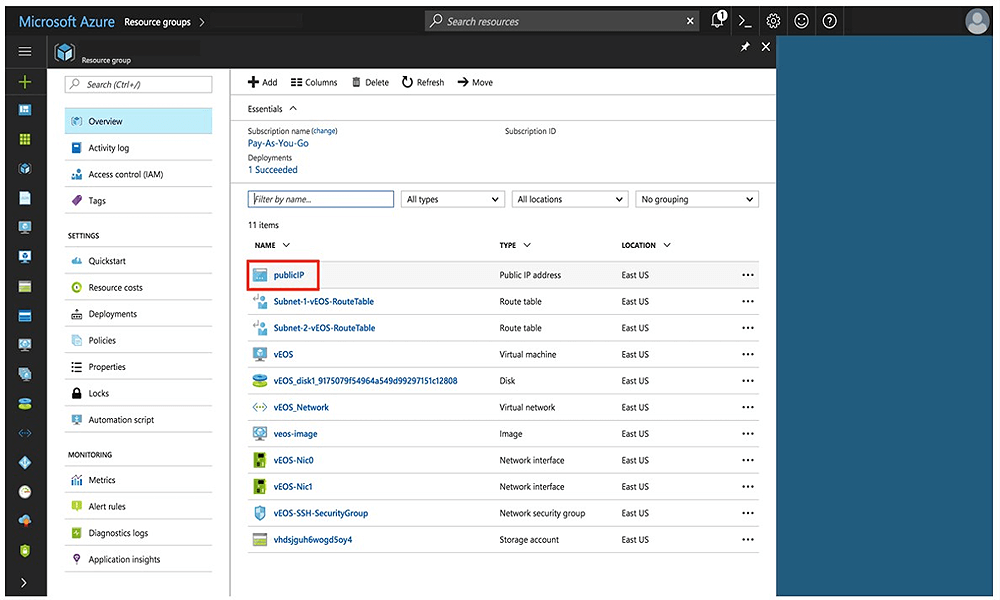
- Select the item publicIP.
Figure 8. Selecting the PublicIP
- Locate the IP address and DNS name found on the Overview page.
Figure 9. Locating the IP address and DNS
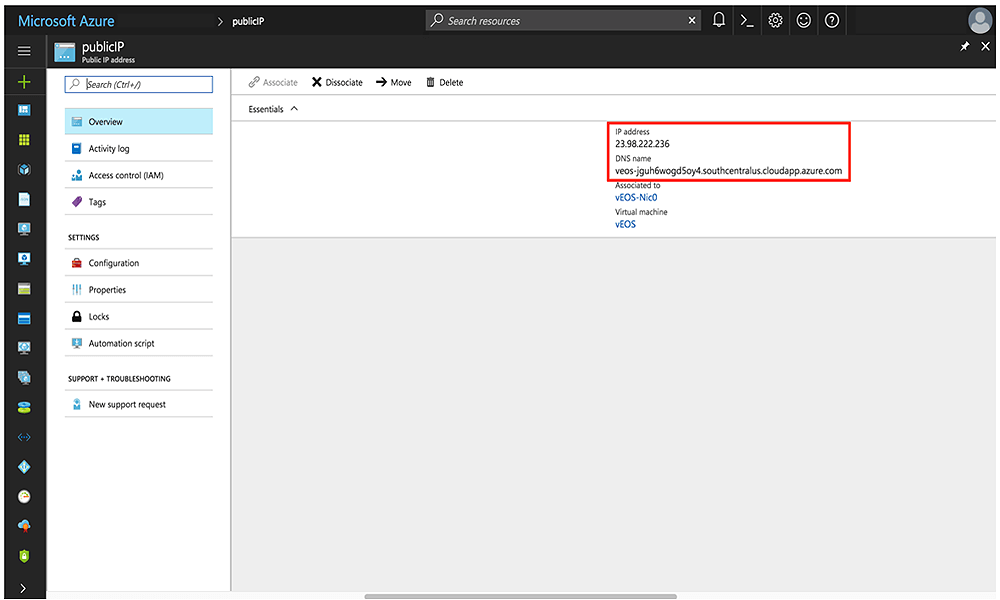 Note: If either of these fields is not populated, your instance still deploys. Refresh the page after a couple of minutes.
cloudeos and veos router Startup-Configuration using Instance Custom-Data
Describes launch employing custom-data information.
During the initial launching of the cloudeos and veos router Instance, azure provides a feature to upload custom-data. the administrator can upload the cloudeos and veos router configuration using custom-data at the time of the launching of the cloudeos and veos router Instance.
Custom-data can be used to pass in configuration for multiple entities. This configuration must be separated by start and end markers.
| Entity | Markers | File Path |
|---|---|---|
| cloudeos and veos CLI configuration file |
|
N/A |
| Cloud HA configuration file |
|
/mnt/flash/cloud_ha_config.json |
Note, the following regarding the custom-data.
- Markers must be at the beginning of the line.
- the user is expected to have tested the configurations on a live system before using the configurations to deploy the new cloudeos and veos router. Mis-configuration may result in an unrecoverable instance.
- the cloudeos and veos router configuration for all interfaces can be passed in during deployment. the configuration takes effect as the new instances attach to the cloudeos and veos router.
Sample Instance Custom-Data
Illustrates a sample Instance with custom-data.
%EOS-STARTUP-CONFIG-START%
! EOS startup config
username admin nopassword
username admin sshkey file flash:key.pub
%EOS-STARTUP-CONFIG-END%
Providing Startup-Configuration using azure Custom-Data
Adding custom-data to an instance.
Currently, custom-data can only be used on instances deployed using the azure CLI 2.0.
In order to add custom-data to an instance, the custom-data must be provided as a single-line value with '\n' delimiting newlines.
Use the single_line_json.sh script to convert your custom-data into this format.
#!/usr/bin/bash
cat $1 | python -c 'import json, sys; print( json.dumps( sys.stdin.read() ) )'
Usage of the script is as follows:
./single_line_json.sh user_data.txtCopy and paste the generated output into the customData value field of the JSON parameters file.
Troubleshooting Instance
To troubleshoot the instance, complete the following steps.
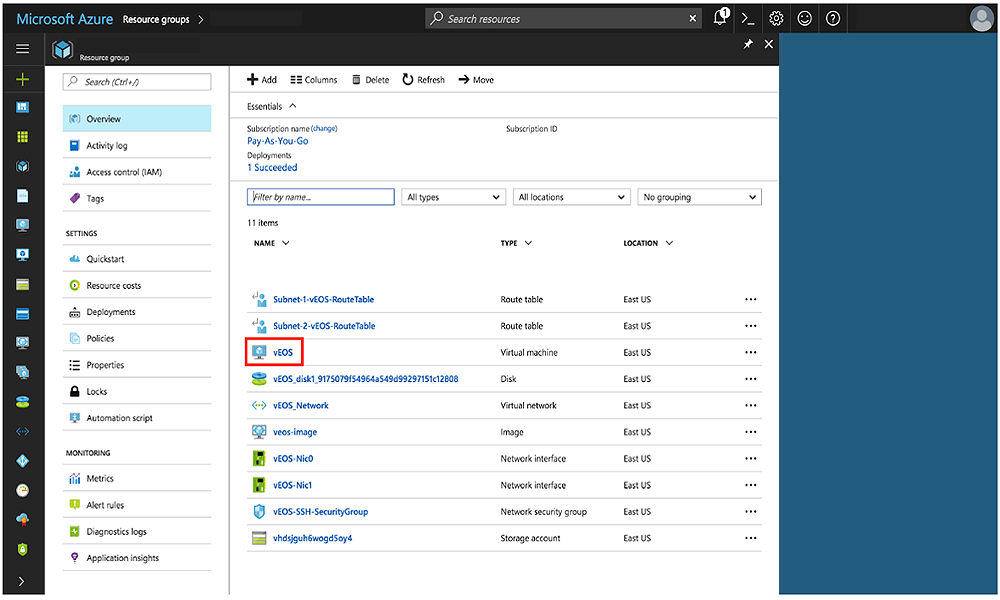
- Select the item cloudeos and veos router.
Figure 10. Select the cloudeos and veos router
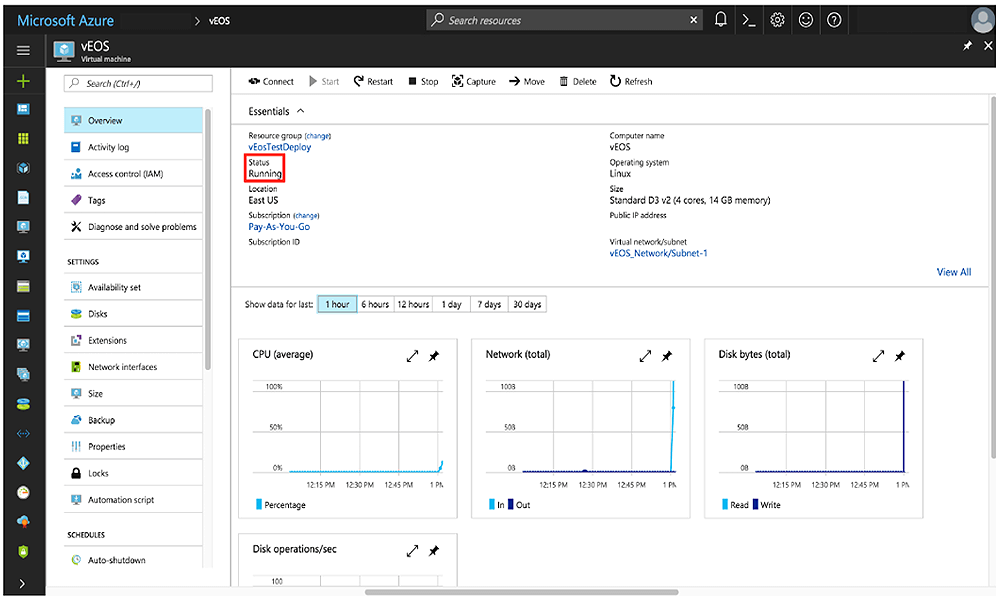
- Note the status of the VM. It should either be "Creating", "Starting", or "Running".
Figure 11. Status of the VM
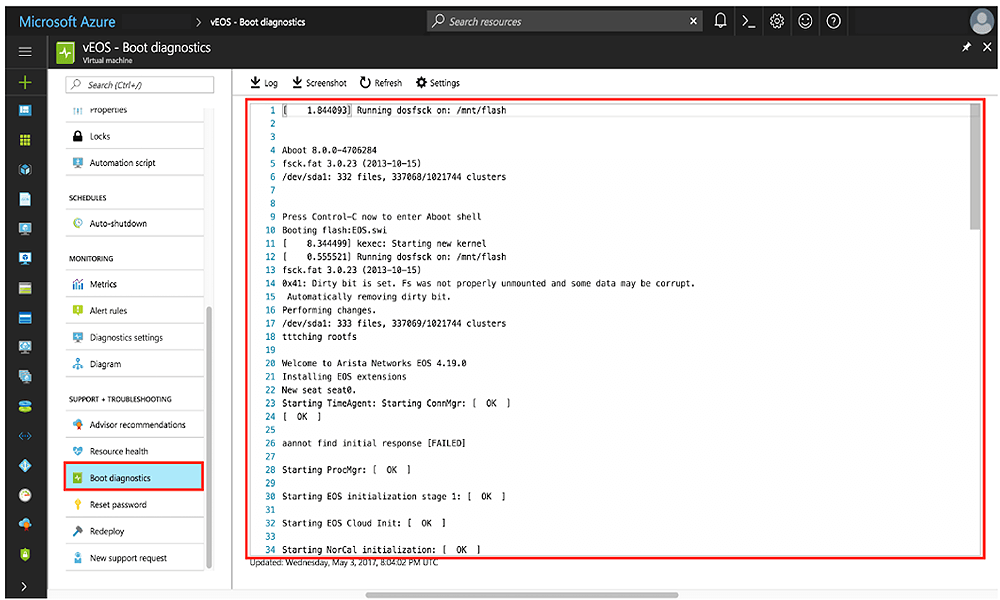
- Check the boot diagnostics for any error messages or warnings.
Figure 12. Error Messages and Warnings
Resources
Additional resources.
- How To: Deploy azure Virtual Machines With An azure Resource Manager (ARM) Template https://www.youtube.com/watch?v=wi74jR0MRLg.
- How To Deploy Resources https://docs.microsoft.com/en-us/azure/azure-resource-manager/resource-group-template-deploy-cli.