Installing the W-118
This chapter contains the stepwise procedure to install the W-118 device.
Zero-Configuration of W-118 as Access Point
Zero-configuration is supported under the following conditions:
-
The device has no SSID configured.
-
A DNS entry wifi-security-server is set up on all the DNS servers. This entry should point to the IP address of the server. By default, the device looks for the DNS entry wifi-security-server.
-
The device is placed on a subnet that is DHCP enabled.
Take a configured W-118, that is, ensure that a static IP is assigned to the device or the settings have been changed for DHCP. Note down the MAC address and the IP address of the device in a safe place before it is installed in a hard-to-reach location. The MAC address of the device is printed on a label at the bottom of the product.
The steps to install the device with no configuration (zero-configuration) are as follows:
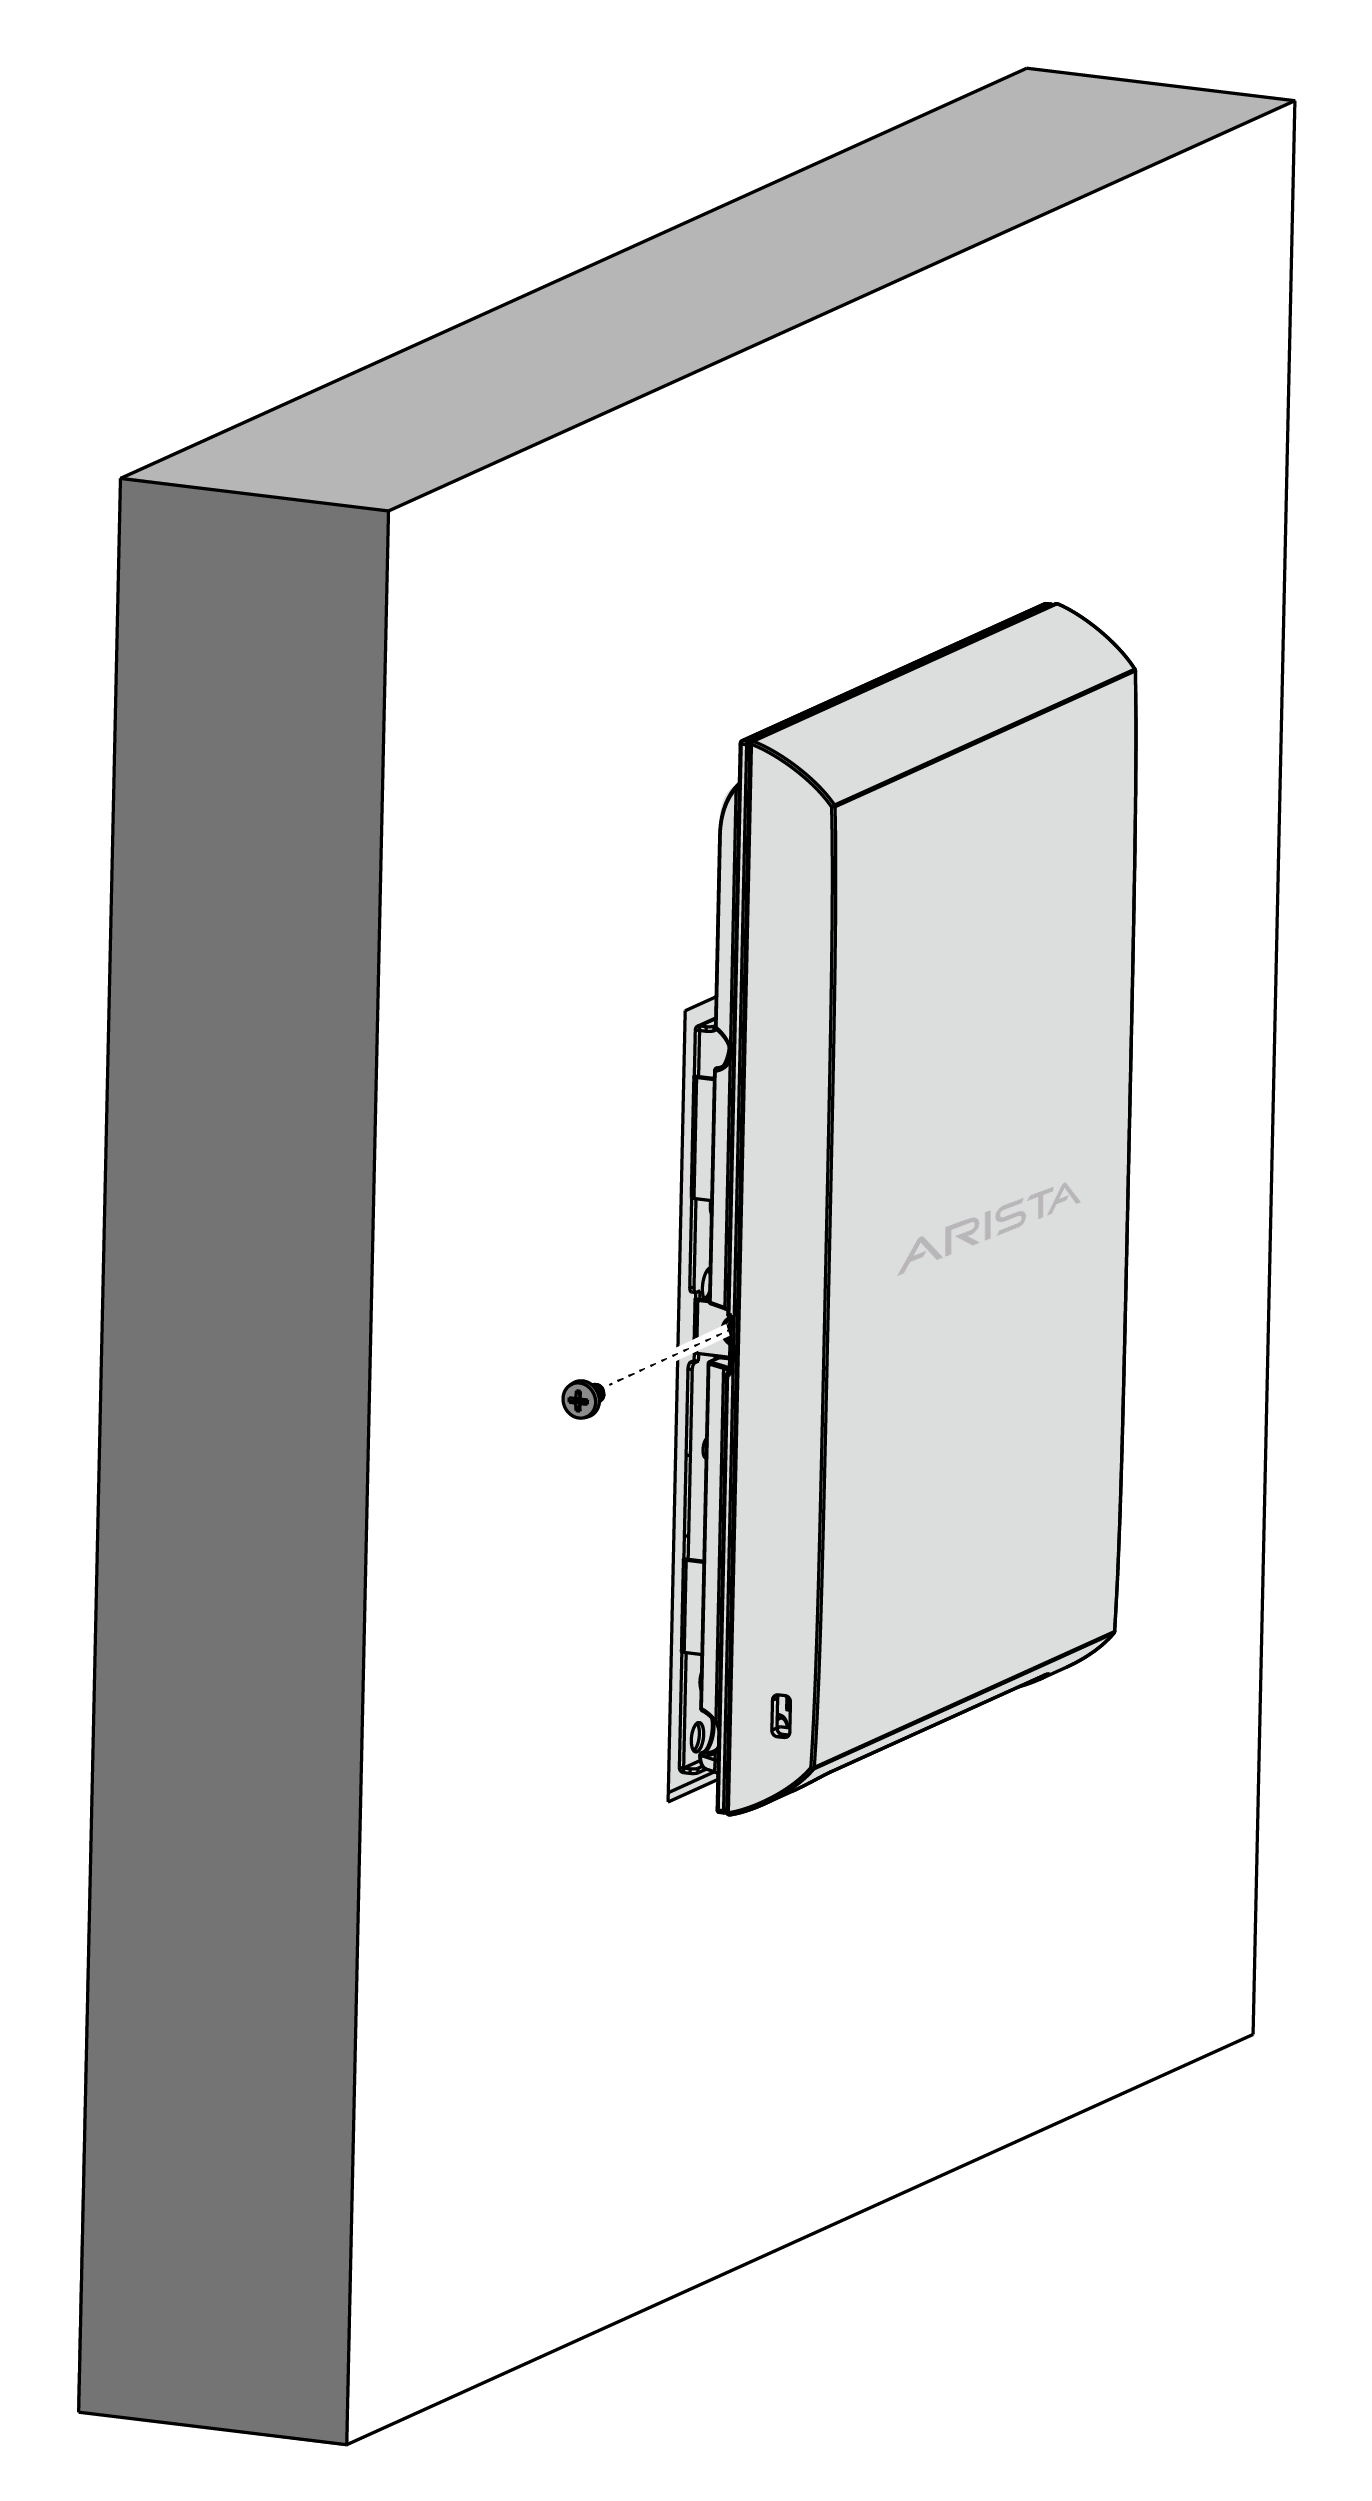
Mount the W-118
The steps to mount the W-118 are as follows:
- Attach the mounting bracket to the wall by using the mounting hardware kit as shown in the image below.
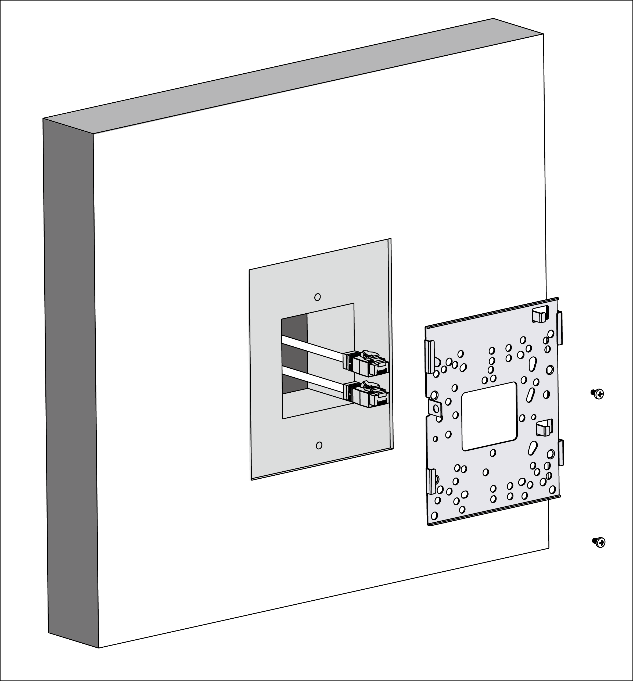
- Affix the mounting bracket on to the wall using the appropriate screws from the mounting accessories included in the package.
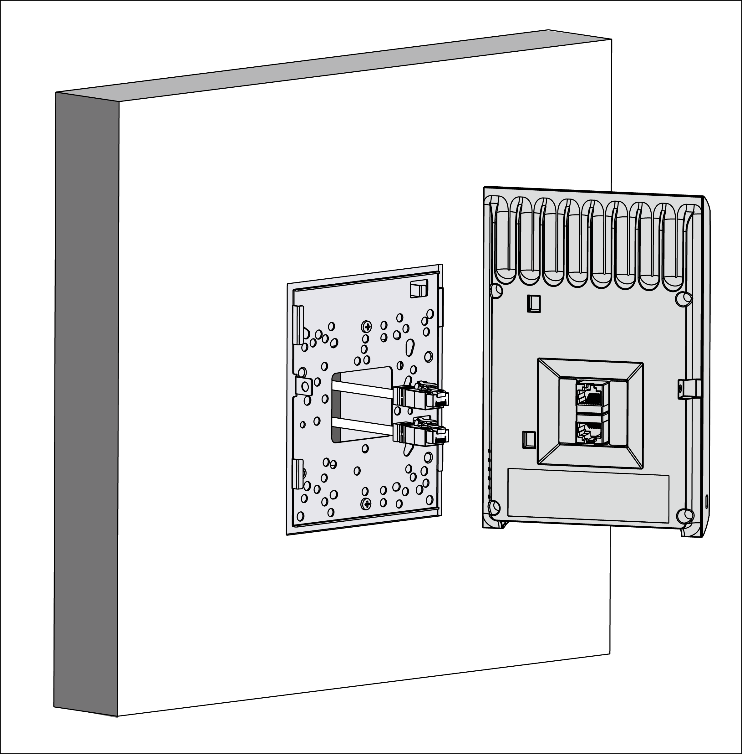
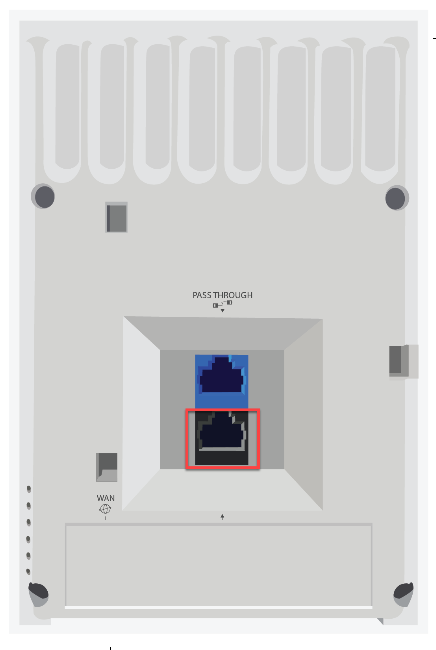
- Connect the cables to the appropriate ports in the rear-side of the device.
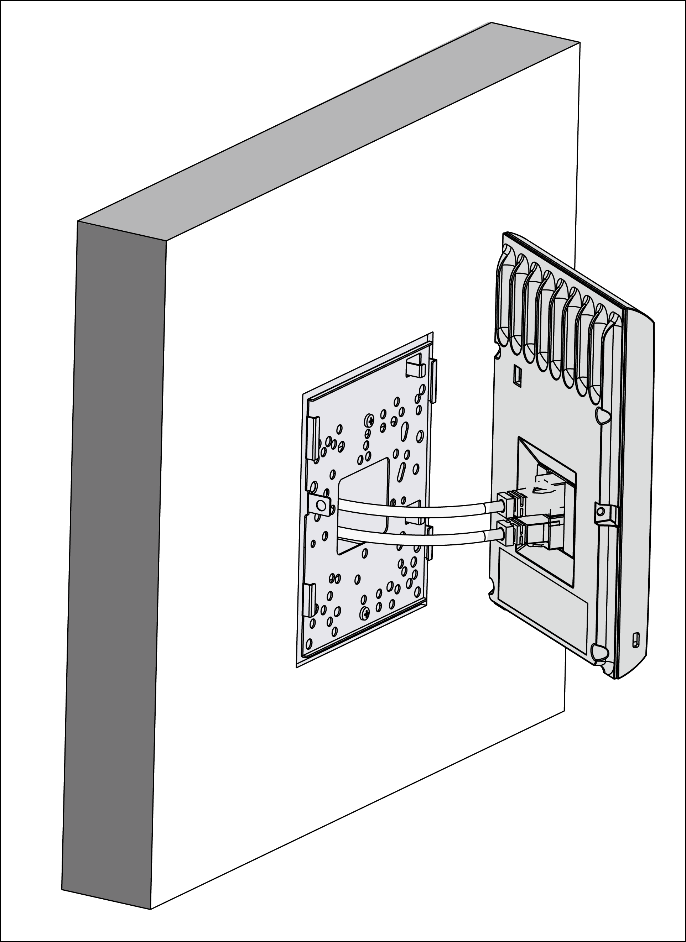
- Mount the device on the bracket by aligning the two notches on the bracket with the two grooves on the rear panel of the device. Slide the device and tighten it onto the bracket with the screw provided in the package.
 Important: To prevent disconnection or tampering by unauthorized personnel, it is extremely important to install the device such that it is difficult to unplug the device from the network or from the power outlet.Note:You should label the devices using MAC addresses or at least your own convention. For example, use serial numbers, so that you can easily identify the devices.
Power On the W-118
The W-118 device can be powered on by plugging one end of the Ethernet cable into the PoE (802.3af) switch or injector and the other end into the Ethernet/PoE port on the W-118. Ensure the PoE source you are using is turned ON.
As an alternative to PoE, you can insert a compatible power adaptor plug into an AC power outlet and the other end into the power input port on the W-118.
Using the W-118 with Power Adapter
- Plug the power cable into the DC power receptacle at the rear of the device.
- Plug the other end of the power cable into an 110V~240V 50/60 Hz AC power source.
- Wait until the device is ready. Refer to the LED details table.
Connect the W-118 to the Network
Connect the W-118 using PoE
If you are using a PoE injector, make sure the data connection is plugged into a suitable switch port with proper network connectivity.