Maintenance and Field Replacement
This section discusses the process for replacing components.
Considerations
Review the following considerations when installing the device:
- All fans and power supplies are hot-swappable.
- The appliance can be running while a power supply is being installed or removed, but the power supply being replaced must not be connected to a power source.
- Before you begin, refer to the Arista Networks document Safety Information and Translated Safety Warnings at https://www.arista.com/en/support/product-documentation.
- All slots must be filled or covered with a blank for operation (even though the power supply or fans may not be functional).
- The openings on the enclosure are for air convection. Protect the equipment from overheating. DO NOT COVER THE OPENINGS.
- Do not leave this equipment in an environment where the storage temperature may go below ‐20° C (‐4° F) or above 80° C (167° F). This could damage the equipment. The equipment should be in a controlled environment.
- Laser device modules (LDMs) (plug‐in type) confirmed and complied with the following:
- The CDRH Laser Class emitted by the Fiber Optic Laser Module Component is Class I or 1 when installed in the end‐product with the fiber‐optic cable removed.
- The Fiber Optic Laser Module Component is CDRH certified. Laser class 1 optical transceiver shall be used only.
- Disconnect this equipment from any AC outlet before cleaning. Use a damp cloth. Do not use liquid or spray detergents for cleaning.
- Keep this equipment away from humidity.
- Make sure the voltage of the power source is correct before connecting the equipment to the power outlet.
- Position the power cord so that people cannot step on it. Do not place anything over the power cord.
- If the equipment is not used for a long time, disconnect it from the power source to avoid damage by transient overvoltage.
- Never pour any liquid into an opening. This may cause fire or electrical shock.
- This set of instructions is given according to IEC 704‐1. Arista disclaims all responsibility for the accuracy of any statements contained herein.
- The equipment is not suitable for use in locations where children are likely to be present.
- To disconnect power, remove both power cords from the unit.
- If one of the following situations arises, have the equipment checked by service personnel:
- The power cord or plug is damaged.
- Liquid has penetrated into the equipment.
- The equipment has been exposed to moisture.
- The equipment does not work well, or you cannot get it to work according to the user's manual.
- The equipment has been dropped and damaged.
- The equipment has obvious signs of breakage.
Power Supplies
The following steps are required when removing and replacing power supplies from the appliance.
Note: The Front Panel shows the power supply locations for your device.
- Connect at least one of the chassis grounding pads located on the front and rear panels of the chassis to the data center ground as needed to ensure that the appliance is grounded.
- Put on an anti-static ESD wrist strap and connect it to one of the attach points on the appliance.
- To add the new power supply, remove the power supply to be replaced (Removing a Power Supply) for the slot.
Removing a Power Supply
- Push the power supply release lever and remove the power supply.
Figure 1. Removing a Power Supply 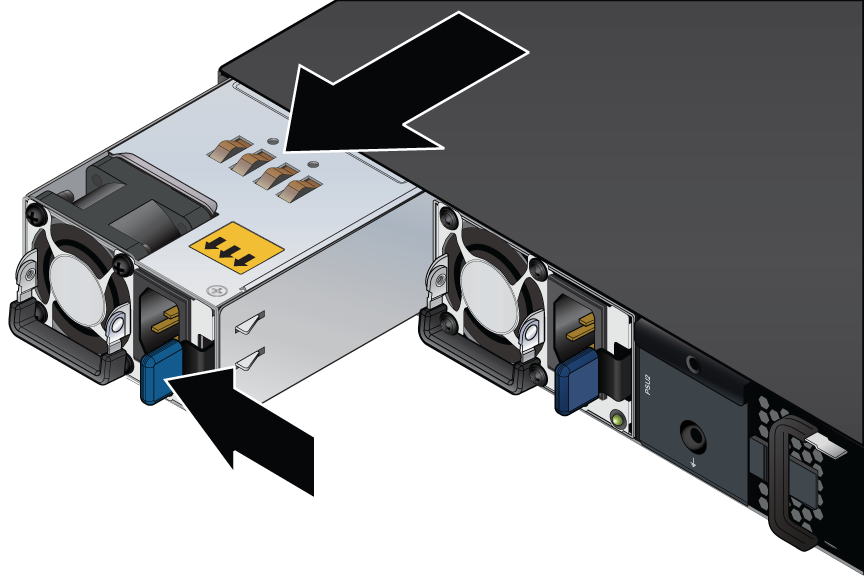
Installing a Power Supply
- The command output will list the power supplies in operation and should include the one you replaced.
Figure 2. Installing a Power Supply 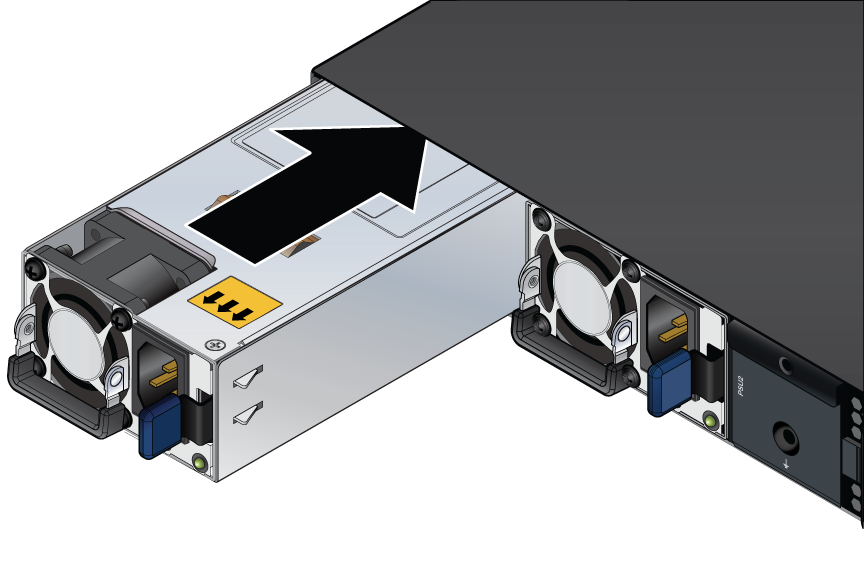
Fan Modules
Note: Hot swap fans within 30 seconds to prevent the appliance from overheating. Ensure that the module you are replacing matches those already installed in the appliance.
Removing a Fan Module
- Pull the handle to release the fan from its slot and slide the fan module out of the appliance.
Figure 3. Removing a Fan Module 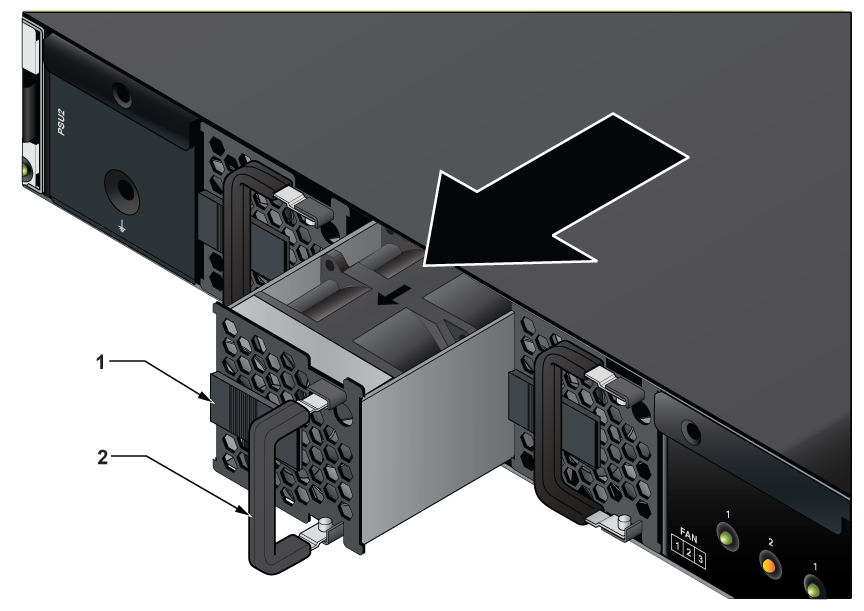
1 Release Lever 2 Handle
Installing a Fan Module
- Push the ejector handle back.
Figure 4. Installing a Fan Module 