Rack Mounting the Appliance
This section discusses the details of the rack mounting.
The rack mounting procedure is identical for all Appliances covered by this guide.
Les procédure de montage du bâti est identique pour tous les commutateurs visés par ce guide.
After completing the instructions for your rack type, proceed to the section, Cabling the Appliance.
Four-Post Rack Mount (1RU)
The appliance mounts onto a four-post rack by assembling two rails onto the rear posts, sliding the appliance onto the rails, and securing the appliance to the front posts.
- 2 - four-hole mounting brackets
- 2 - rail-rods
- 2 - rail-slides
The rail-rods and rail-slides assemble into two identical slide-rails.
| 1 | Attachment Pin | 2 | Front Clip |
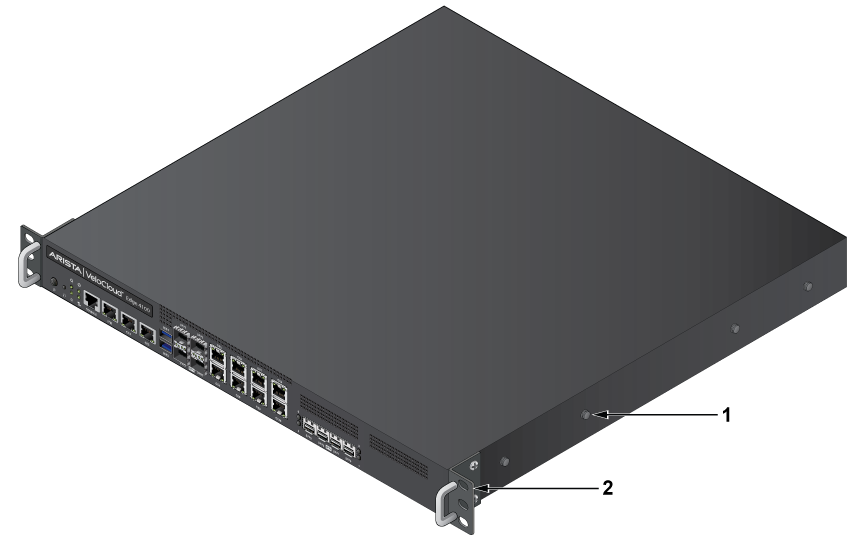
Attaching Mounting Brackets to the Chassis (Four-Post)
Extracting the Brackets and the Rails
- Pull the bracket flange away from the rail flange with your other hand until the bracket clip catches on the rail.
If the bracket flange resists initially, verify that the thumb screw on the bracket flange is not attached to the rail flange.
Figure 2. Extracting the Brackets 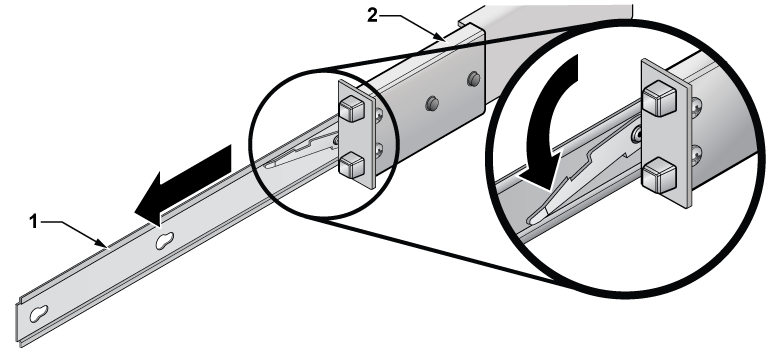
1 Rail 2 Exploded view of Rail
Attaching Mounting Brackets
- Slide the bracket toward the front flange until the bracket clip locks with an audible click.
Figure 3. Attaching the Mounting Brackets to the Appliance Chassis 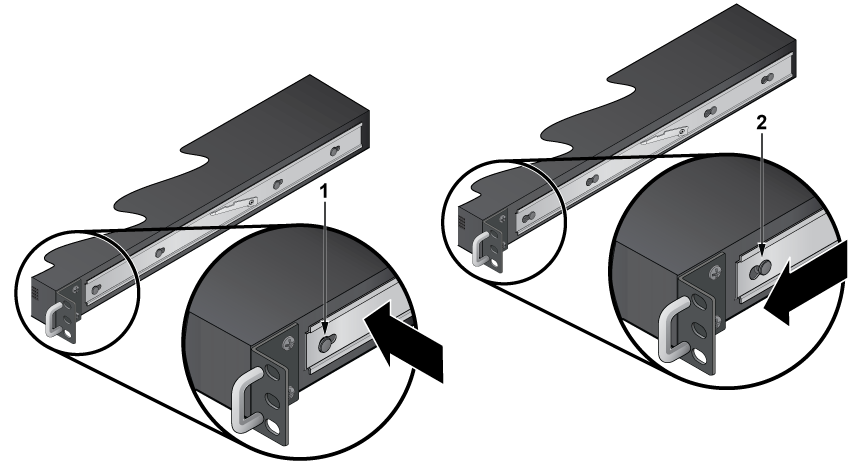
1 Attachment Pin 2 Key Opening To remove the mounting bracket from the chassis, lift the front edge of the mounting bracket clip with a flathead screwdriver and slide the bracket away from the front flange (opposite to the installation direction).
Assembling the Rails onto the Equipment Rack
Rail-rods and rail-slides assemble into two identical rails. Each rail connects a front post to a rear post. After installing the rails, the appliance slides on the rails into the rack. Each bracket includes a screw that attaches the appliance to the rail.
This procedure attaches the rails to a four-post rack:
- Slide a rail-rod into a rail-slide until the rail clip makes an audible click.
The rail clip prevents the extension of the rail beyond the maximum supported distance between the front and rear rack posts.
Figure 4. Assembling the Rails 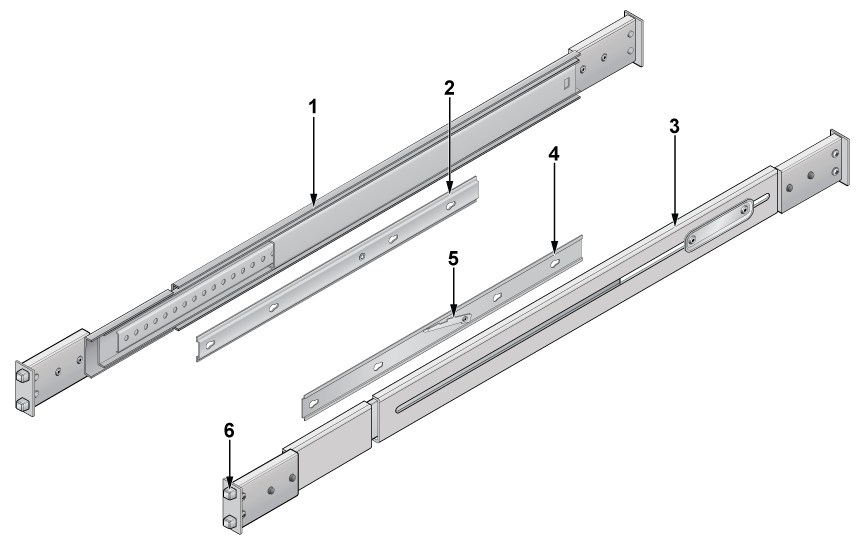
1 Left Rail-slide 4 Right Four-hole Rail-rod 2 Left Four-hole Rail-rod 5 Rail Locking Mechanism 3 Right Rail-slide 6 Mounting Bracket and Screw - Repeat Step 1 through Step 3 for the left posts.Make sure the rails are on the same horizontal level.
Figure 5. Attaching the Rails 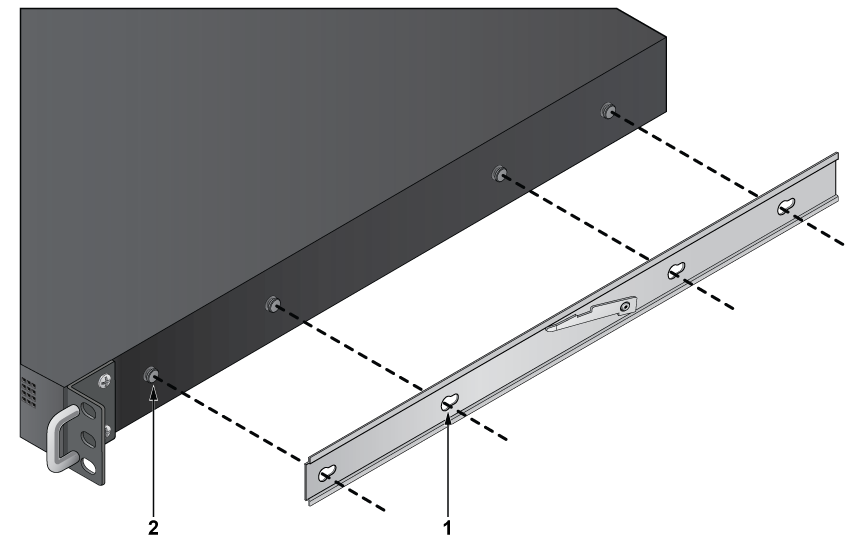
1 Rail Holes 2 Attachment Pin
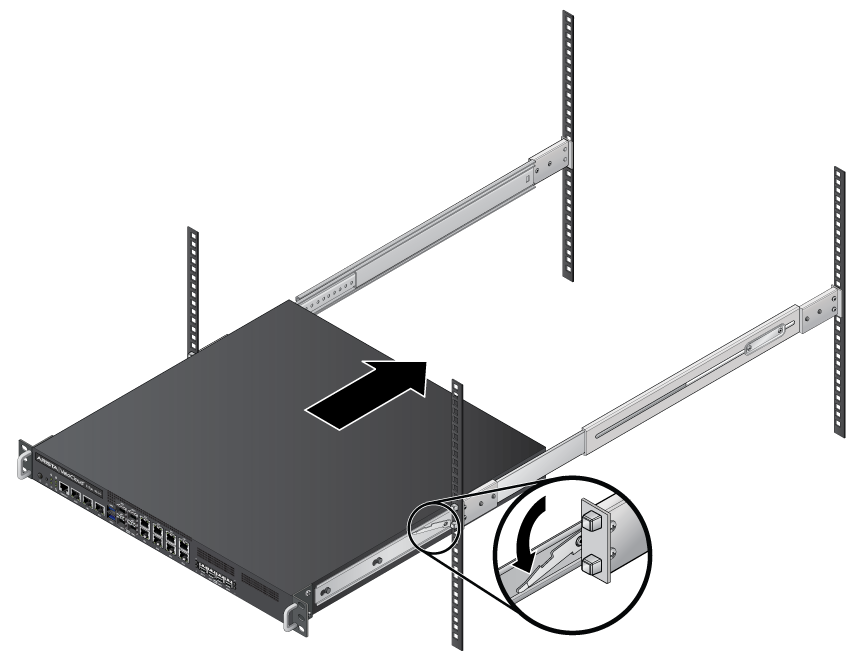
Attaching the Appliance to the Rack
After installing the rails, the appliance slides on the rails into the rack. Each bracket includes a thumb screw that attaches the appliance to the rail.
- Lift the appliance into the rack and insert the mounting brackets into the slide rails.
Figure 6. Inserting the Appliance onto the Rails