Manage Customers
The Manage Customers option allows you to create new Customers, configure the Customer capabilities, clone the existing configuration, and to configure other Customer settings.
- In the Operator portal, navigate to .
Figure 1. Displaying Manage Customers 
Creating a New Customer
In the Operator portal, you can create Customers and configure the Customer settings. Only Operator Super Users and Operator Standard Admins can create a new Customer. As an Operator Super User, you can temporarily deactivate creating new Customers by setting the system property session.options.disableCreateEnterprise to True. You can use this option when Orchestrator exceeds the usage capacity.
- In the Operator portal, go to , and then select New Customer. The New Customer page displays:
Customer Information:
Figure 2. Displaying Customer Information 
- The Administrative Account displays:
Figure 3. Configuring the Administrative Account 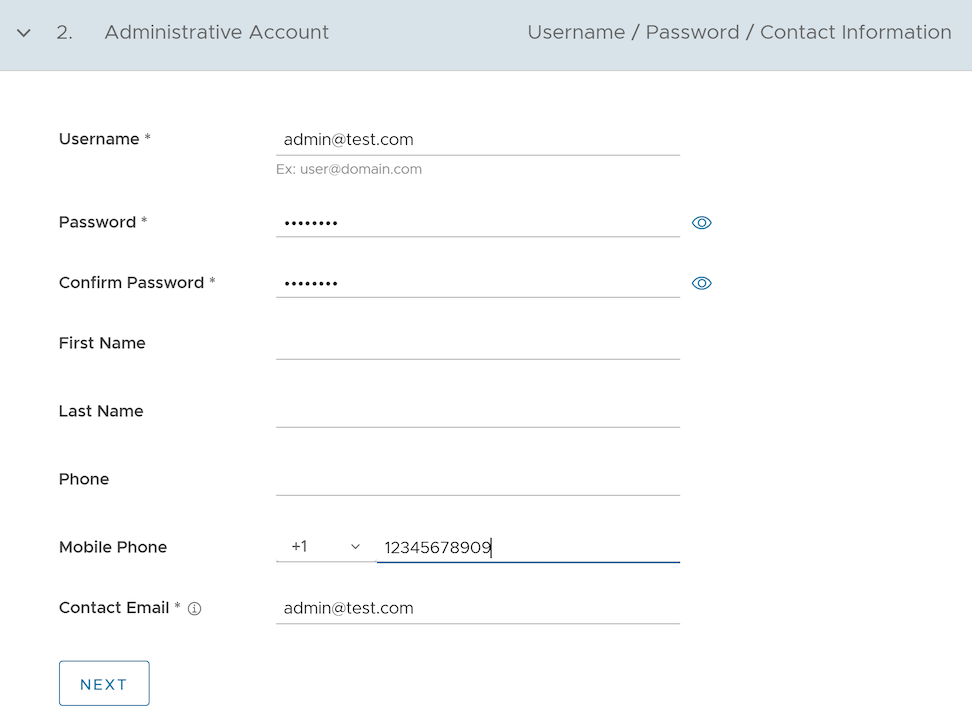
- Selecting Next displays the Services section:
Figure 4. Configuring the Services 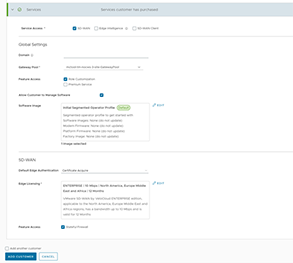
Cloning a Customer
Clone the configurations from an existing customer and create a new customer with the cloned settings.
Only Operator Super users and MSP Super users can clone a customer.
- Enterprise configuration profiles
- Enterprise network services and objects such as the following:
- DNS services
- Private network names
- Network Segments
- Customer capabilities
- Edge authentication scheme
- Address groups and Port groups
- Profile with Edge references such as hubs and clusters
- Profile containing Partner Gateway References
- Cloud Security Service enabled
- Non SD-WAN Destinations
- VNF or VNF licenses
- Authentication services
- NetFlow objects like collectors or filters
Log into the VeloCloud Edge Cloud Orchestrator as an Operator user. Navigate to .
- The Clone Customer page displays:
Figure 5. Cloning a Customer 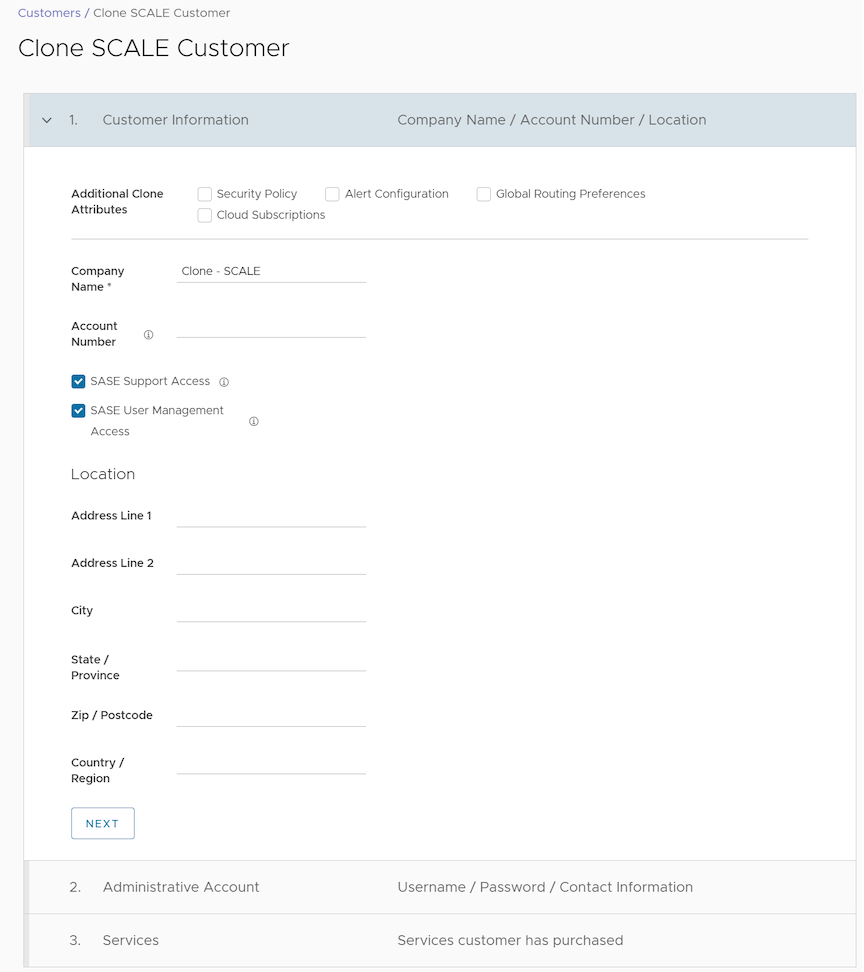
Configure Customers
After creating a Customer, configure the feature options and settings that the Customer can access. As an Operator, select the settings the Customer can modify.
When you create a new Customer, the page redirects you to Customer Configuration where youconfigure the Customer settings. You can also navigate to the Customer Configuration page directly from the Operator portal, by following the steps below:
- From the left menu, select Customer Configuration to display the page:
Figure 6. Displaying Customer Configuration 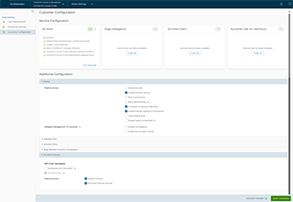
Configuring SD-WAN
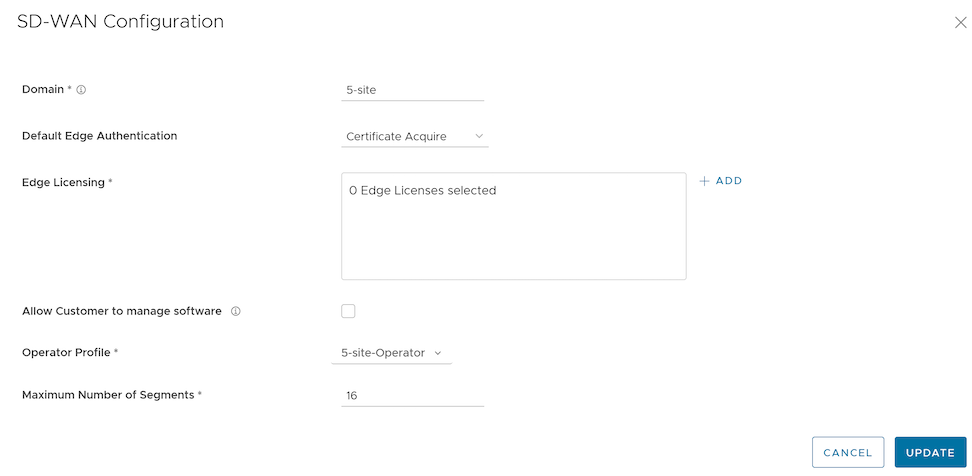
| Option | Description |
|---|---|
| Domain | Enter the domain name used to activate Single Sign On (SSO) authentication for the Orchestrator. |
| Default Edge Authentication | Choose the default option to authenticate the Edges associated to the Customer, from the menu.
|
| Edge Licensing | Displays the existing Edge Licenses. Select Add to add or remove the licenses.
Note: The license types can be used on multiple Edges. Arista Networks recommends providing your Customers with access to all types of licenses to match their edition and region. For more information, see Edge Licensing.
|
| Allow Customer to Manage Software | Select the check box to allow an Enterprise Superuser to manage the software images available for the Enterprise. For more information, see the topic Edge Image Management in the VeloCloud SD-WAN Administration Guide. |
| Operator Profile | Select an Operator profile from the menu to associate with the Customer. This field does not display if you select Allow Customer to Manage Software. For more information on Operator profiles, see Manage Operator Profiles. |
| Maximum Number of Segments | Enter the maximum number of segments that can be configured. The valid range is 1 to 16 with a default value of 16. |
Configuring Additional Settings
Configuring a Handoff Operator
You can configure a Gateway to hand off to Partners. The Gateway acts as a Partner Gateway that enables you to configure the Hand off Interface, Static Routes, BGP, and other settings.
Ensure that you assign the Gateway to hand off to the Partner Gateway Role. In the Orchestrator portal,Operator or Partner, select Gateways and select the link to an existing Gateway. In the Properties section of the selected Gateway Overview page, you can enable the Partner Gateway role.

To configure the handoff settings, perform the following steps:
- In Configure Hand Off, configure the following fields:
Figure 9. Configuring Hand Off 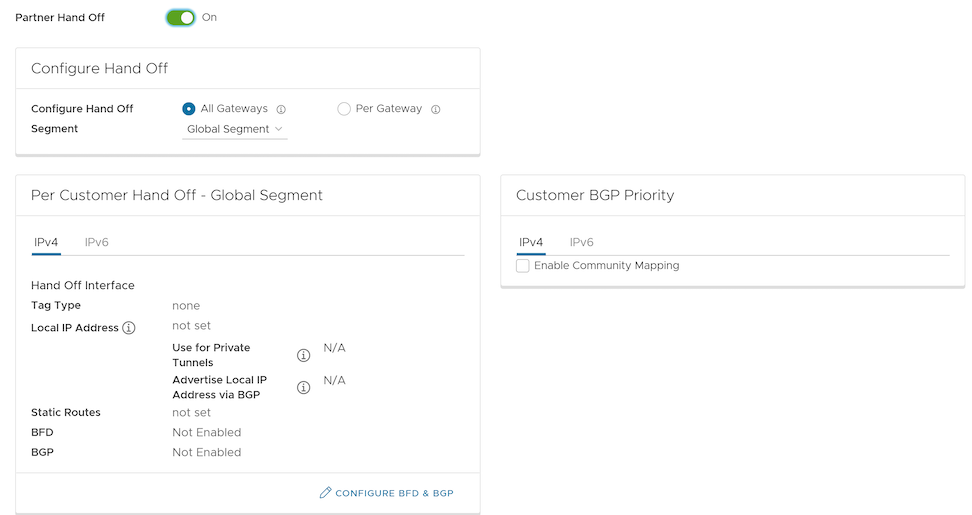
Table 9. Hands Off Option Descriptions Option Description Configure Hand Off By default, the hand off configuration applies to all the Gateways. If you want to configure a specific Gateway, choose Per Gateway, and then select the Gateway from the list. Segment By default, Global Segment is selected, which means that the hand off configuration applies to all of the segments. If you want to configure a specific segment, select the segment from the menu. Hand Off Interface This section displays the values configured on the Configure BGP and BFD page. Customer BGP Priority Select the check box and configure the Community Mapping details. - At the bottom of the Per Customer Hand Off – Global Segment area, select the Configure BFD & BGP link.
Figure 10. Per Customer Handoff with Global Segment 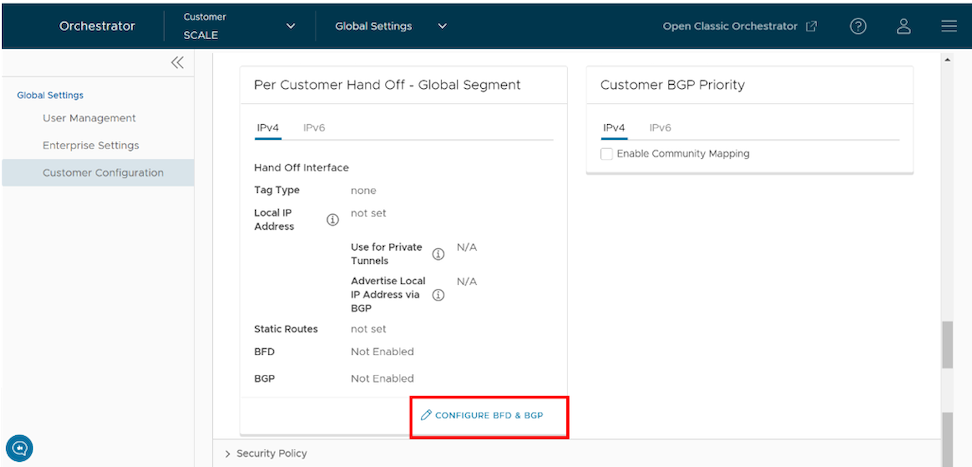
- Configure BGP and BFD displays:
Figure 11. Configuring BGP and BFD 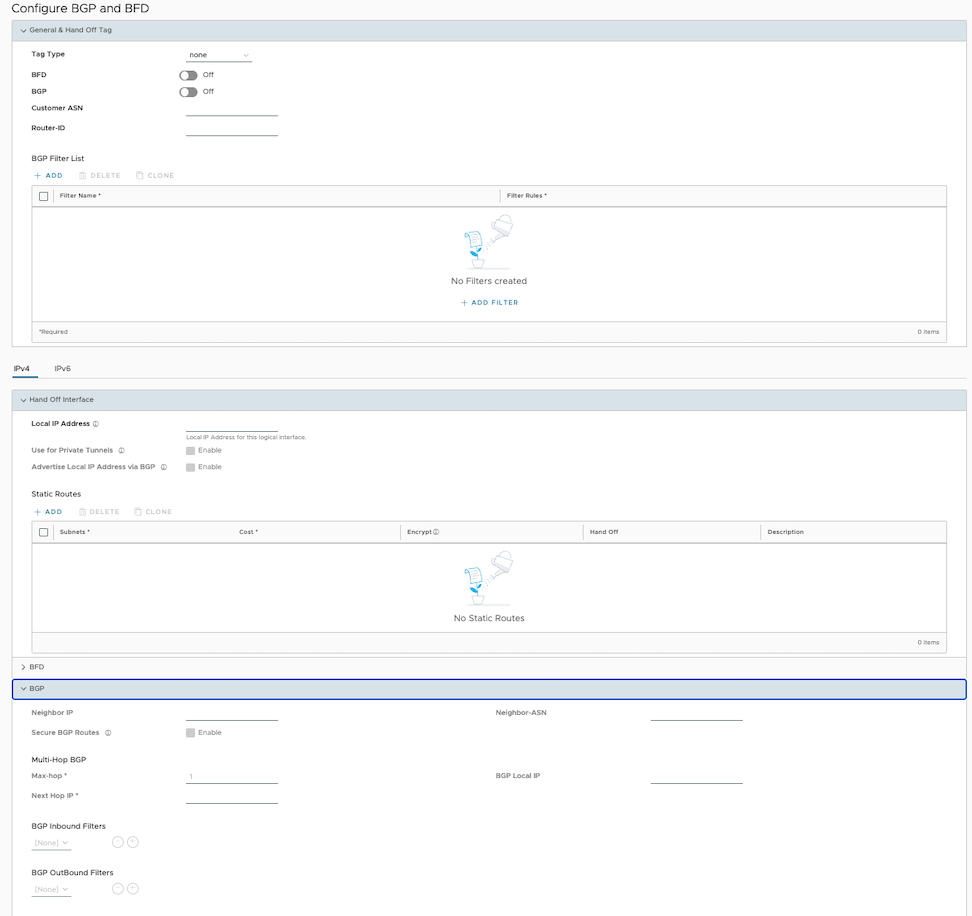
- Open the General & Hand Off Tag section and enable the BGP option.
Figure 12. Enabling BGP 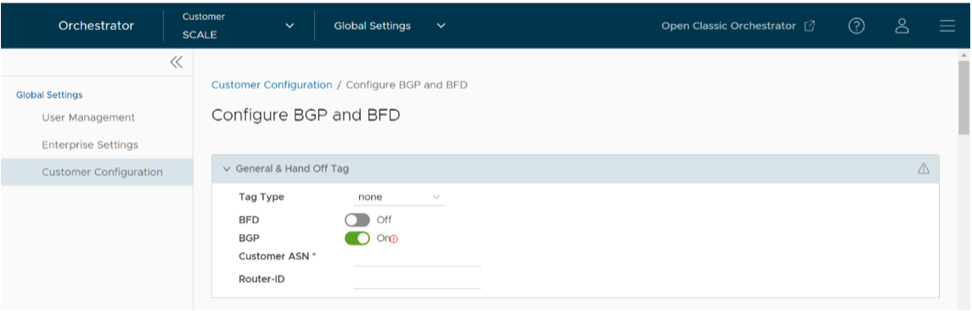
Configuring Route Summarization
- Navigate to the Route Summarization area in the BGP section.
Figure 13. Configuring Route Summarization 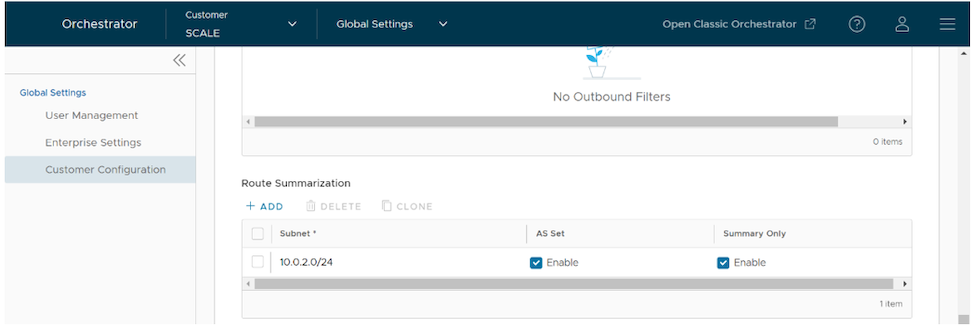
Configure Distributed Cost Calculation
By default, the Orchestrator actively learns the dynamic routes. VeloCloud SD-WAN Edges and Gateways rely on the Orchestrator to calculate initial route preferences and return them to the Edge and Gateway. The Distributed Cost Calculation feature enables you to distribute the route cost calculation to the Edges and Gateways. Only an Operator user can configure Customer settings, including Distributed Cost Calculation.
- All the Edges and Gateways must use software version 3.4.0 or later.
- The software image associated with the Operator Profile must use version 3.4.0 or later.
- If the Orchestrator a high load of network traffic, the route convergence time becomes significantly higher. For example, as much as 40 seconds for 2000+ routes, as the Orchestrator takes that time to calculate the preference for all the synchronized routes and returns those preferences to the Edges and Gateways.
- Using the Orchestrator for route calculation means that new dynamic routes learned while the Orchestrator became unreachable do not advertise until the Orchestrator becomes reachable again.
When a customer enterprise uses Distributed Cost Calculation, the Orchestrator does not actively involve in the route preference calculation and instead the Edge and Gateway properly insert routes in order instantly after learning them and then conveying these preferences to the Orchestrator.
- Minimizes the impact on route learning when an Orchestrator becomes unreachable.
- Reduces route convergence time from minutes to seconds in large networks with thousands of dynamic routes.
- Significantly reduces network delays.
- Provides instantaneous Data Plane convergence.
- Supports enhanced re-ordering and pinning of routes on the Overlay Flow Control.
- Provides an option to refresh routes in the Overlay Flow Control page. Whenever changes occur in the Overlay Flow Control policy, the Refresh Routes option applies the changes to the existing routes immediately, without the need to restart the Edge or Gateway.
- All the local dynamic routes refresh and the preference and advertise action of these routes updated. This updated information advertises to the Gateway, Orchestrator, and eventually across the Enterprise. The customer's network completely rebuilds the route table which for most customer deployments takes less than 5 seconds. A large scale customer deployment, such as 100,000+ routes, may take up to 2 minutes. During the time the route table rebuilds it has an impact on customer traffic for all sites.
- Any existing flow using these routes can potentially be affected due to the change in the routing entries.
To configure Distributed Cost Calculation for a customer, use the following steps:
- In the Enterprise portal, go to .
Figure 14. Configuring Distributed Cost Calculation 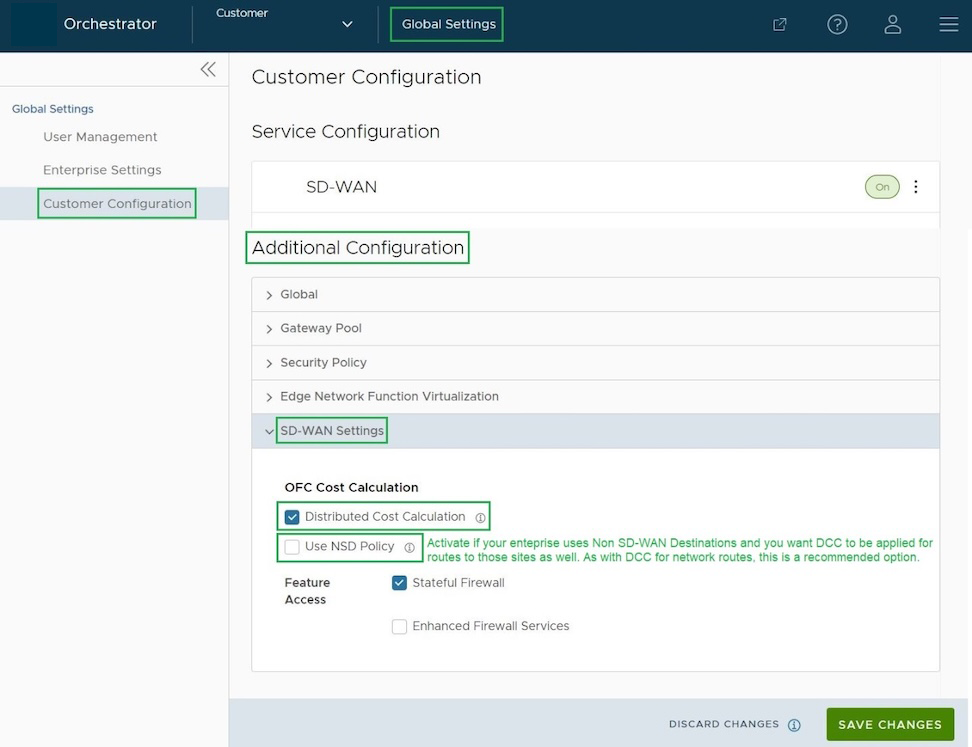
Configure Path Calculation with Multiple DSCP Labels per Flow
By default, an Edge classifies a traffic flow based on the first packets in the flow. You can create business policies with application based on Differentiated Service Code Point (DSCP) and with different DSCP markings to determine the flow treatment.
Business Policy and QoS marking determine the flow treatment. Once the flow receives classification, the flow cache table creates an entry with five tuple information of the flow. Subsequent packets in the flow use the five-tuple lookup against the flow cache table.
For network topologies with Layer 3 network devices doing encapsulation and/or encryption before the traffic arrives at the Edge, this creates a challenge for the Edge to forward traffic based on the Business Policy. The traffic from the end users multiplexes into a single flow with the same source and destination IP addresses and protocols by the Layer 3 encapsulation/encryption device, as illustrated in the following image.
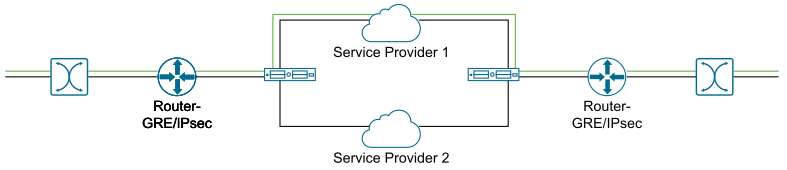
The impact of multiplexing end user flows into a single tunnel creates polarization of flow forwarding using the five tuples of flow cache table which results in WAN links not being utilized.
The Path Calculation with Multiple DSCP Labels per Flow allows the DSCP value to be included, in addition to the five tuples, as part of the flow cache table lookup. Use the path calculation with multiple DSCP tags when the original user traffic encapsulates in another tunnel such as GRE or IPsec, and the new IP header preserves the DSCP labels. This option enables path calculation for a single flow with multiple DSCP labels, which consists of same source and destination IP addresses, and offers path differentiations based on the DSCP labels in the flow.
When you enable the Multiple-DSCP tags per Flow Path Calculation, the Edges can differentiate the traffic flows based on the DSCP marked labels.
To enable Multiple-DSCP tags per Flow Path Calculation, use the following steps: