using cloudeos and veos router on the AWS Platform
the cloudeos and veos router, based on the Arista EOS, runs as a virtual machine instance on AWS EC2. Use the cloudeos and veos router to create the various types of virtual machine router instances for AWS deployment, for example, gateway routers and transit routers.
cloudeos and veos router Image Updates
the process to update cloudeos and veos router images is the standard update process used for EOS images.
For details on the steps to use, refer to the Arista EOS User Manual (see https://www.arista.com/en/support/product-documentation).
Amazon Machine Image (AMI) Specifications
the AMI provided by Arista utilizes the architecture, type of root device, virtualization type, and interface type required to configure the cloudeos and veos router for a robust AWS deployment.
the specifications of the Arista AMI are:
- Architecture: x86_64
- Virtualization type: HVM
- Root Device Type: EBS
- Network Interface type: SR-IOV, ENA (Elastic Network Adapter)
- Supported Region: All AWS regions except China and Osaka. Please consult the official listing for all AWS regions here: https://aws.amazon.com/about-aws/global-infrastructure/regions_az/
Methods for Launching cloudeos and veos router Instances
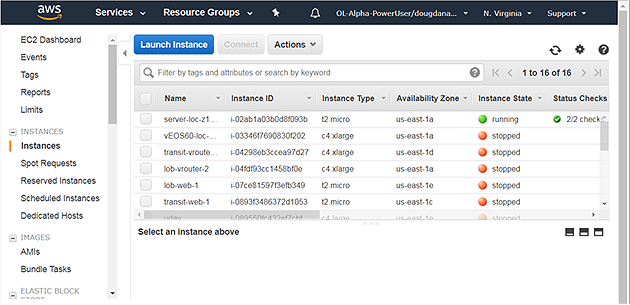
the cloudeos and veos router supports the use of various methods for launching router instances needed in a typical AWS deployment.
the supported methods are:
Launching cloudeos and veos router Instances using AWS CloudFormation
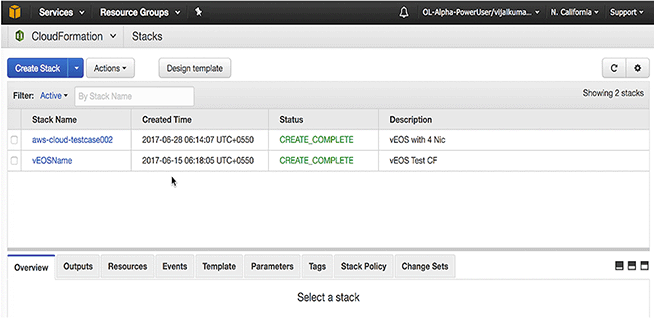
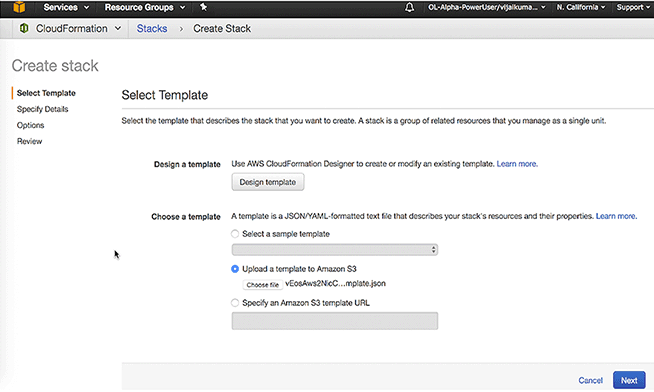
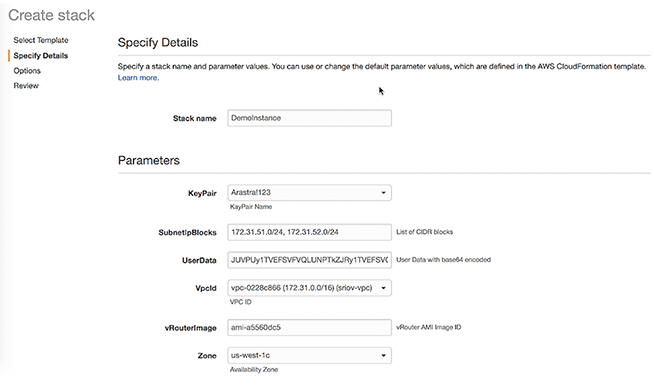
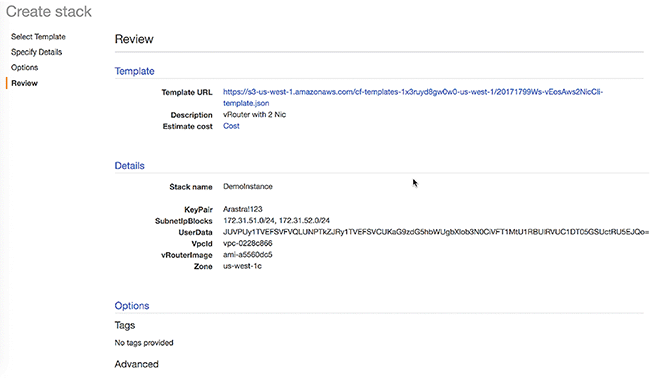
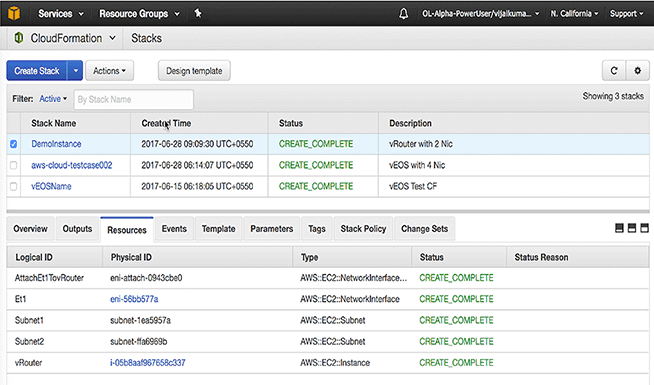
using AWS CloudFormation to launch cloudeos and veos router instances involves creating a CloudFormation stack to use to launch the instance. the created stack provides the base configuration for the instance. As part of this task, select a stack template, which defines the base configuration of the instance.
Make sure to select the stack template that provides the resources required for the instances that are launching. Templates can be obtained from https://github.com/aristanetworks. For more information about AWS CloudFormation stacks and using stack templates, refer to the AWS documentation (see https://aws.amazon.com/documentation/cloudformation/).Complete these steps to launch cloudeos and veos router instances using AWS CloudFormation.
Launching cloudeos and veos router Instances using EC2 AWS Marketplace
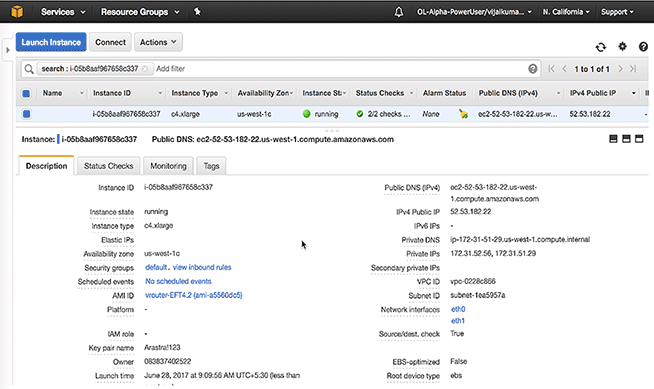
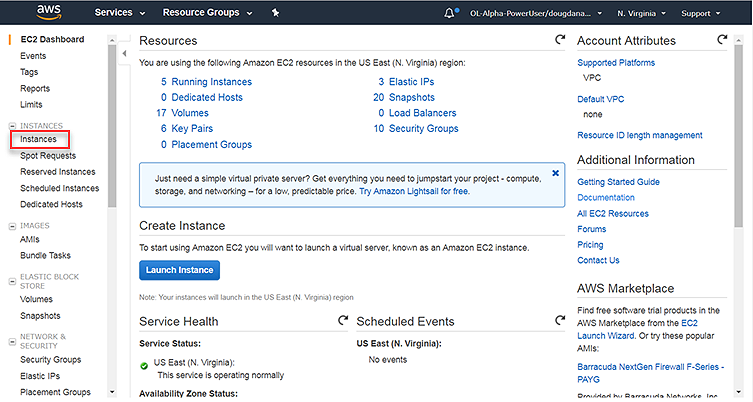
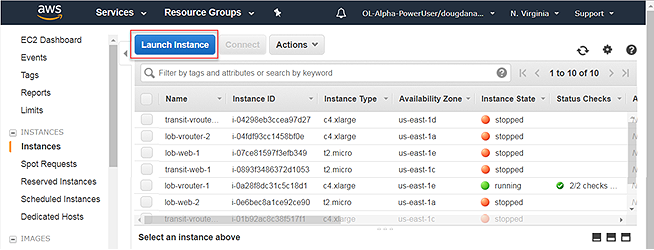
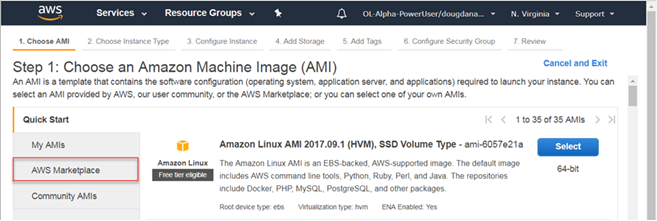
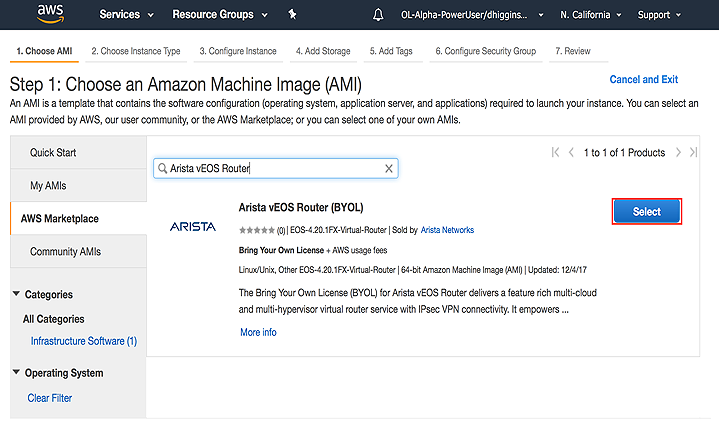
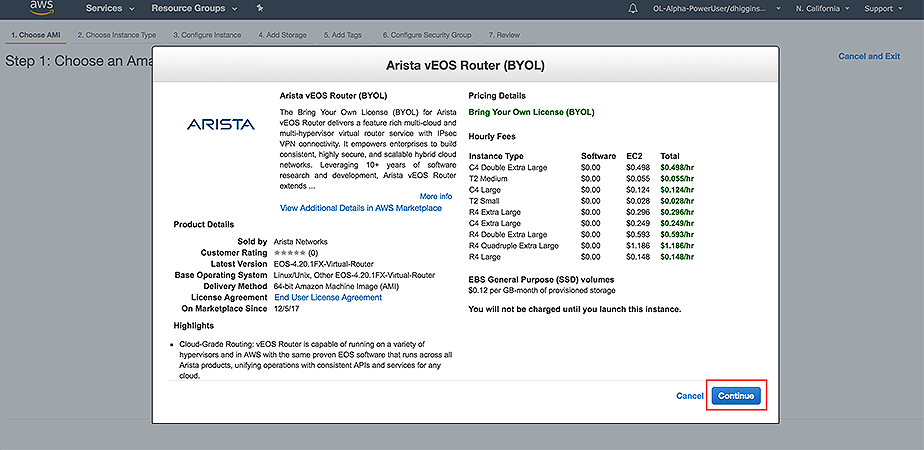
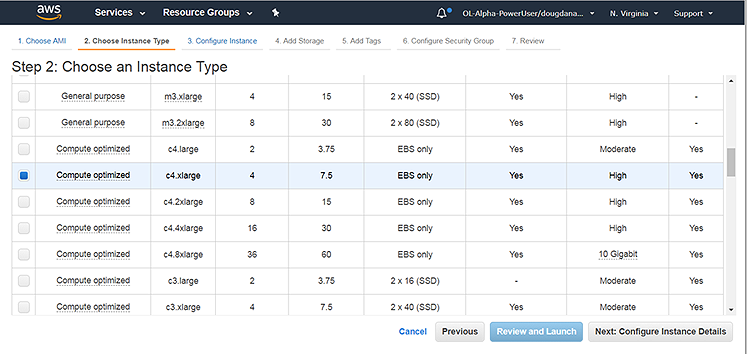
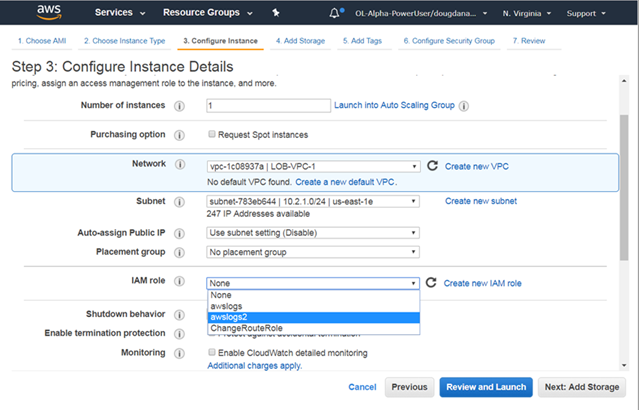
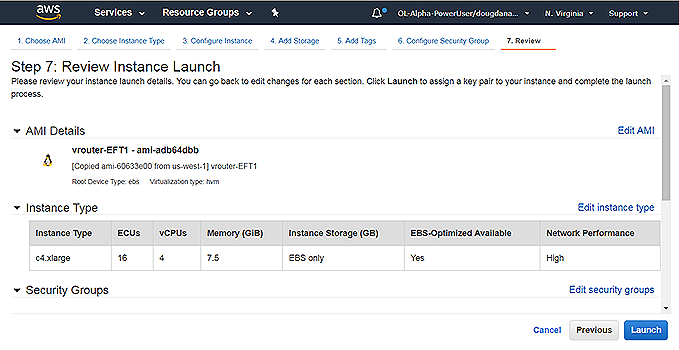
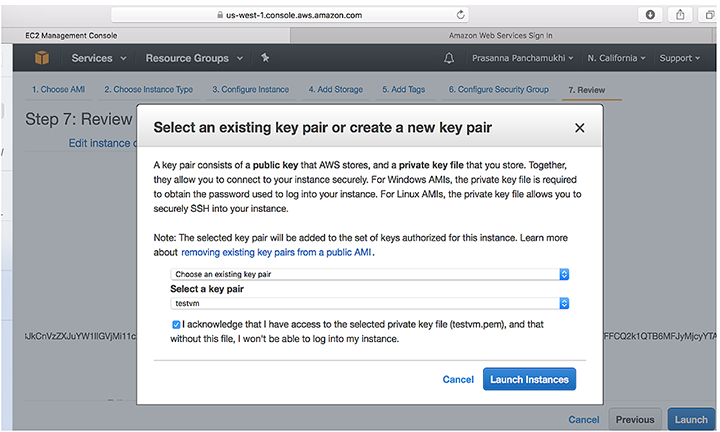
Launching cloudeos and veos router instances using the EC2 AWS Marketplace gives the ability to create and configure cloudeos and veos router instances in the VPCs of your AWS deployment. This method utilizes Amazon Machine Images (AMIs) to configure the operating system of the instance. Obtain the AMI needed for the instance from the AWS Marketplace. This task involves creating an EC2 key pair, selecting the AMI to configure the operating system of the instance, selecting the instance type, and if needed, configuring advanced details (options) for the instance.
Available Options
- Assigning an IAM role to the instance
To enable AWS services on the instance (for example, AWS CloudWatch logs) assign an IAM role to the instance during this procedure. Assign an IAM role to the instance by:
- Selecting an existing IAM role.
- Creating a new IAM role (an option is provided as part of the procedure to create a new IAM role).
Refer to the following AWS documentation for details about creating EC2 key pairs and creating IAM roles:
- Creating EC2 key pairs (https://docs.aws.amazon.com/AWSEC2/latest/UserGuide/ec2-key-pairs.html).
- Creating an IAM role (https://docs.aws.amazon.com/AmazonCloudWatch/latest/logs/QuickStartEC2Instance.html).
- using instance user-data to configure the instance
cloudeos and veos supports the use of cloudeos and veos router instance user-data to configure cloudeos and veos router instances at launch. This involves uploading instance user-data to the instance by way of the Advanced Details dialog. there is an option of copying and pasting a configuration into the dialog or attaching a configuration file.
For details on composing user data for cloudeos and veos router, see using User-data for Configuration of Entities and cloudeos and veos router Instances.
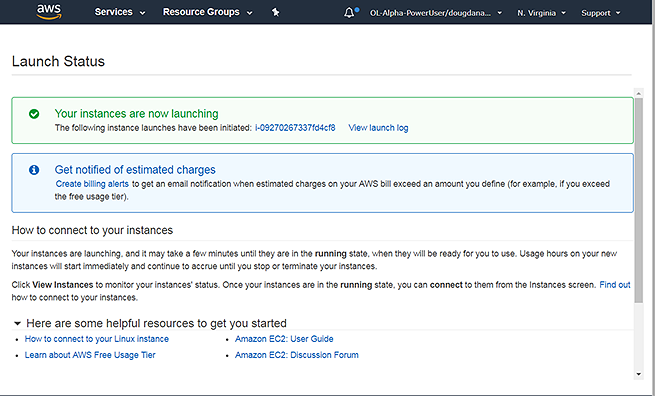
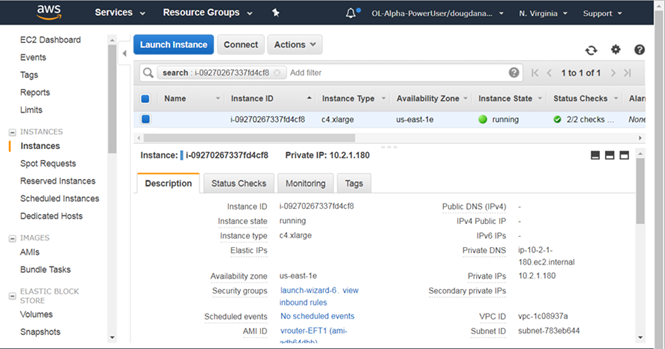
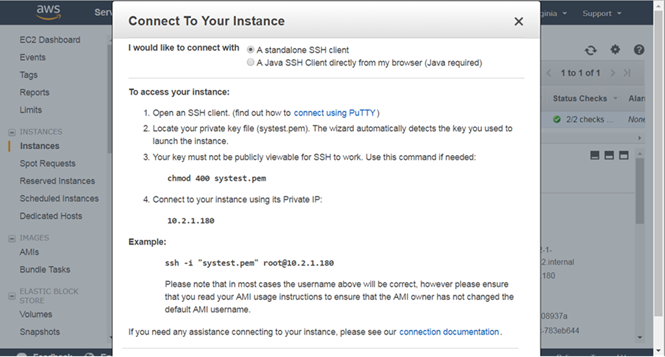
Complete the following steps to launch a cloudeos and veos router instances.
Complete the networking tasks for the cloudeos and veos router instances in the gateway topology (see Network Configuration Tasks for cloudeos and veos router Instances).
Configuring the AWS CloudWatch Logs Agent
the AWS CloudWatch Logs Agent is the mechanism that publishes cloudeos and veos router logs to AWS CloudWatch. Configuring the AWS CloudWatch Logs Agent ensures that the cloudeos and veos router logs published to AWS CloudWatch conform to the selected requirements. the AWS CloudWatch Logs Agent is packaged with the awslogs.swix cloudeos and veos extension, which is installed and enabled by default when the cloudeos and veos router instances launch through the AWS Marketplace.
Refer to the “AWS CloudWatch Quick Start Guide” to make sure that the cloudeos and veos router instance has the right credentials for logging in to AWS.
the location where cloudeos and veos router logs are published to depends on the AWS CloudWatch Logs configuration. By default, the logs are located under CloudWatch, "log group, name cloudeos and veoslogs.
- Editing configuration files under the /mnt/flash/awslogs/ directory.
- Passing instance user-data. Make sure to use the correct start and end markers, which are:
%AWSLOGS-CONFIG-START%
 #configuration here
 %AWSLOGS-CONFIG-END%
 %AWS-PROXY-START%
 #configuration here
 %AWS-PROXY-END%
Note: Restart awslogs using sudo systemctl restart awslogs under bash. the reconfiguration does not take effect until awslogs restarts.
By default, the hostname of the cloudeos and veos router instance is the filename of all cloudeos and veos router logs for that instance.
Network Configuration Tasks for cloudeos and veos router Instances
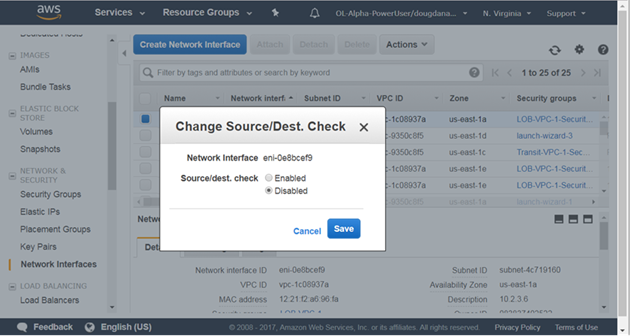
Complete additional configuration tasks to ensure that the cloudeos and veos router instances launched have the required networking configuration. the configuration tasks include creating the additional network interfaces required by the topology, attaching the new interfaces to cloudeos and veos router instances, and configuring the route table of the AWS Specific Cloud router.
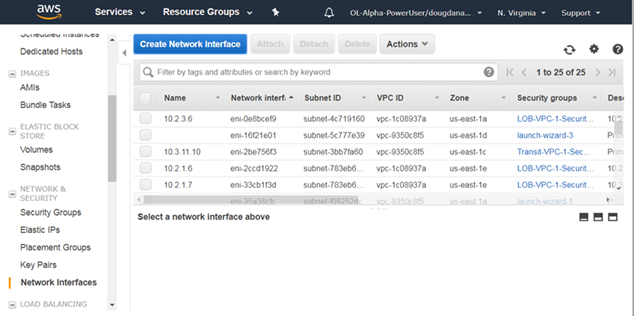
Creating the Additional Network Interfaces
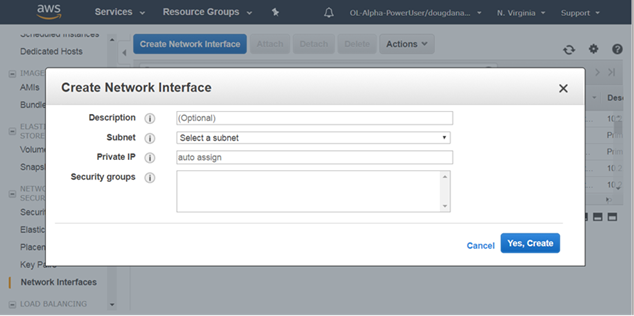
Creating the additional network interfaces required for the topology ensures that there are interfaces available to attach to cloudeos and veos router instances. When creating the new network interfaces, there is the option of using the subnet and security groups that were automatically assigned to the instance, or specify a different subnet and security groups for the instance.
Pre-requisites:
- Subnet ID
- Names of the security groups
Procedure
Complete these steps to create network interfaces.
Attach the new network interface to a cloudeos and veos router instance (see Attaching the New Network Interfaces to Instances).
Attaching the New Network Interfaces to Instances
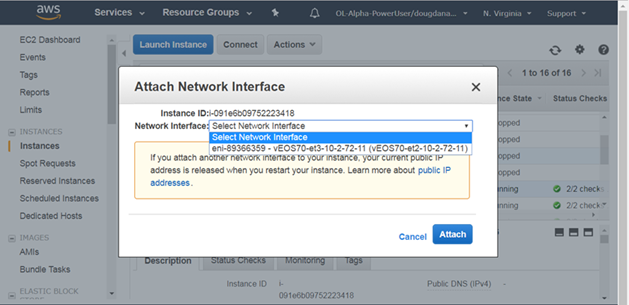
Attaching the new network interfaces to cloudeos and veos router instances is the second networking configuration task. This task involves selecting the new network interfaces created in the previous procedure and then attaching the interfaces to cloudeos and veos router instances.
Complete these steps to attach the new network interfaces to cloudeos and veos router instances.
Configure the route table of the AWS router (see Configuring the Route Table of the AWS router).
Configuring the Route Table of the AWS router
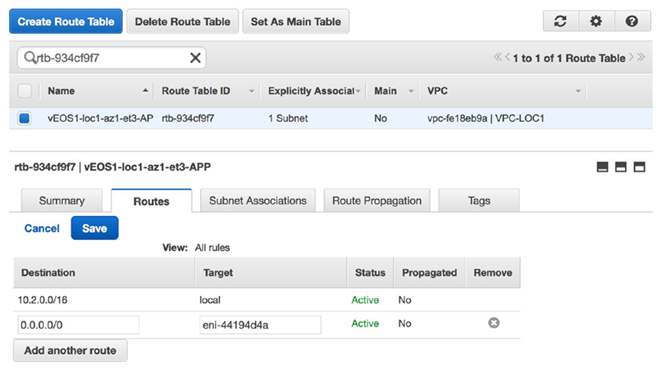
To take advantage of the advanced services provided by cloudeos and veos, configure the route table of the AWS router so that traffic is forwarded from the AWS router to cloudeos and veos router instances. This task involves logging into the AWS router and modifying route table entries for the cloudeos and veos router instances to which you want traffic forwarded.
Complete these steps to configure the route table of the AWS router.
Configure the AWS CloudWatch Logs Agent (see Configuring the AWS CloudWatch Logs Agent). Configuring the Agent ensures that the cloudeos and veos router logs publish to AWS.
cloudeos router Startup-Configuration using Instance Custom-Data
cloudeos and veos supports configuration of startup-configuration, AWS CloudWatch, and Cloud HA through the use of user-data. Because user-data can be used to pass in configurations; administrators can take advantage of this feature to quickly configure cloudeos and veos router instances, AWS CloudWatch, and Cloud HA.
To ensure that the user-data is accepted on upload, make sure the user-data meets the following requirements:
- the configuration must be separated by start and end markers.
- Markers are required at the beginning of the line.
- You must upload either text or configuration files (these are the types of files supported by cloudeos and veos router).
EOS configuration for all interfaces can be passed in during deployment. the configuration takes effect as new interfaces attach to the cloudeos and veos router.
This table lists the start and end markers to use when configuring the EOS, AWS, Cloudwatch, and Cloud HA entities. For each specific entity, the configuration file and the location (file path) of the configuration file are given.
| Entity / Configuration File / Use | Markers | File Path |
|---|---|---|
|
Entity: EOS File: EOS CLI configuration file Use: Configure cloudeos and veos router |
%EOS-STARTUP-CONFIG-START%
%EOS-STARTUP-CONFIG-END% |
N/A |
|
Entity: EOS File: EOS CLI configuration file Use: %FORCE_USER_DATA% will forcibly apply the Arista startup configs in the user custom data under the %EOS-STARTUP-CONFIG-START% and%EOS-STARTUP-CONFIG-END% ) even when it is not a first time boot of the instance. |
%FORCE_USER_DATA% |
N/A |
|
Entity: AWS Logs File: aws.conf Use: Set up AWS region |
%AWS-CONFIG-START%
%AWS-CONFIG-END% |
/mnt/flash/awslogs/aws.conf |
|
Entity: AWS Logs File: awslogs.conf Use: Configure logging parameters |
%AWSLOGS-CONFIG-START%
%AWSLOGS-CONFIG-END% |
/mnt/flash/awslogs/awsconf.conf |
|
Entity: AWS Logs File: proxy.conf Use: Configure proxy settings |
%AWS-PROXY-START%
%AWS-PROXY-END% |
/mnt/flash/awslogs/proxy.conf |
Sample Instance User-data
the following sample user-data contains lines to startup the instance and to configure various entities.
the sample contains lines to configure:
- AWS CloudWatch logs (for the us-east-1 region)
- AWS logging parameters
- AWS proxy settings
Sample
%EOS-STARTUP-CONFIG-START%
! EOS startup config
hostname my-veos
username admin nopassword
username admin sshkey file flash:key.pub
%EOS-STARTUP-CONFIG-END%

%AWS-CONFIG-START%
[plugins]
cwlogs = cwlogs
[default]
region = us-east-1
%AWS-CONFIG-END%

%AWSLOGS-CONFIG-START%
[general]
state_file = /var/awslogs/state/agent-state
[/var/log/messages]
datetime_format = %b %d %H:%M:%S
file = /var/log/messages
buffer_duration = 5000
log_group_name = veoslogs
log_stream_name = {hostname}
initial_position = start_of_file
%AWSLOGS-CONFIG-END%

%AWS-PROXY-START%
HTTP_PROXY=http://<your_proxy>:<your_proxy_port>
HTTPS_PROXY=http://<your_proxy>:<your_proxy_port>
NO_PROXY=169.254.169.254
%AWS-PROXY-END%
