VeloCloud Gateway Migration
The VeloCloud Orchestrator offers self-service migration functionality, enabling migration from an existing Gateway to a new Gateway without requiring the Operator’s support.
- Achieving operational efficiency.
- Decommissioning old Gateways.
Gateway configurations define specific roles. For example, a Gateway with a data plane role is used to forward data plane traffic from source to destination. Similarly, a Gateway with a Control Plane role is referred to as a Super Gateway for assignment to an Enterprise. The Super Gateway establishes connections with all Edges within the Enterprise. Additionally, a Gateway with the Secure Virtual Private Network (VPN) role establishes an Internet Protocol Security (IPsec) tunnel to a Non SD-WAN Destination (NSD). The migration steps may vary based on the role configured for the Gateway. For additional information about the Gateway roles, refer to the Configure Gateways section in the VeloCloud SD-WAN Operator Guide.
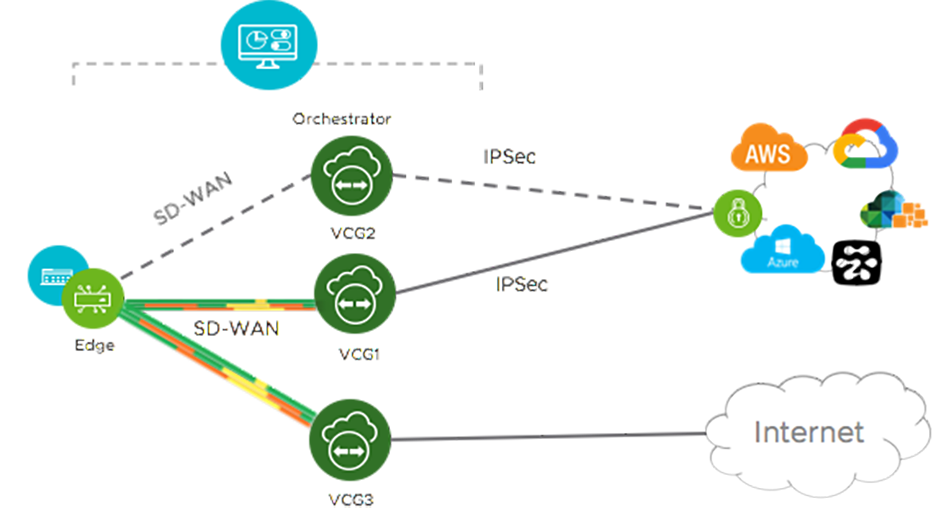
In this example, a VeloCloud Edge connects to an NSD through a Secure VPN Gateway, VCG1. The Orchestrator currently flags VCG1 for decommissioning. Before decommissioning, the administrator creates a new Gateway, VCG2, and assigns VCG2 the same role and attaches it to the same Gateway pool as VCG1, allowing VCG2 to replace the original Gateway. The administrator then changes the service state of VCG1 to "Quiesced," which prevents the system from adding new tunnels or NSDs to VCG1. However, VCG1 retains its existing assignments. After the administrator updates the VCG2 IP address configuration in the NSD, VCG2 establishes an IPsec tunnel to the NSD and switches the traffic from VCG1 to VCG2. The administrator decommissions VCG1 after confirming it contains no remaining sessions.
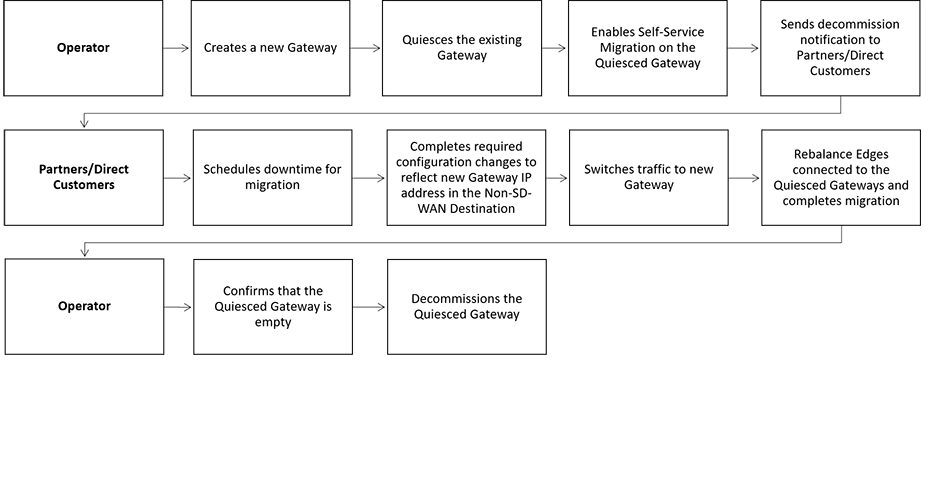
Limitations of VeloCloud Gateway Migration
- Partner Gateways do not support self-service migration.
- There will be a minimum service disruption based on the time taken to switch Non SD-WAN Destinations (NSDs) from the quiesced Gateway to the new Gateway and to rebalance the Edges connected to the quiesced Gateway.
-
If an NSD utilizes redundant Gateways and the administrator quiesces one Gateway, the remaining redundant Gateway cannot replace the quiesced Gateway.
- During self-service migration of a quiesced Gateway, the replacement Gateway must have the same Gateway Authentication mode as the quiesced Gateway.
- When a customer deploys an NSD via Gateway with Border Gateway Protocol (BGP) enabled, the Self-Service Gateway Migration feature does not migrate BGP configurations to the new Gateway. Consequently, the system drops all BGP sessions after the migration completes.
In this scenario, the existing Gateway assigned to the NSD is in a quiesced state and requires migration to another Gateway. The customer then navigates to on the Orchestrator and initiates the Gateway Migration process to move their NSD to a different Gateway. Post-migration, the new Gateway fails to populate the BGP Local ASN and Router ID information, which prevents NSD BGP sessions from establishing and causes the loss of all routes. Traffic remains disrupted until the administrator manually recreates all BGP settings.
This is a Day 1 issue and while the Gateway Migration feature accounts for many critical NSD settings, the NSD's BGP settings that are not accounted for, and their loss post-migration is an expected behavior.
Workaround: The migration of a Gateway should be done in a maintenance window only. Before the migration, the user should document all BGP settings and manually reconfigure these settings after the migration to minimize the impact on customer users.
Migrate Quiesced Gateways
Before you begin: Before migrating Edges and NSDs (if configured) from the quiesced Gateway to the new Gateway, the administrator must schedule a maintenance window, as the migration may disrupt traffic.
To avoid any service disruption, ensure that users migrate to the new Gateway within the Migration Deadline mentioned in the notification email.
To migrate from a quiesced Gateway to a new Gateway, perform the following steps:
- In the SD-WAN service of the Enterprise portal, go to .
The list of quiesced Gateways appears.
Figure 3. Quiesced Gateways 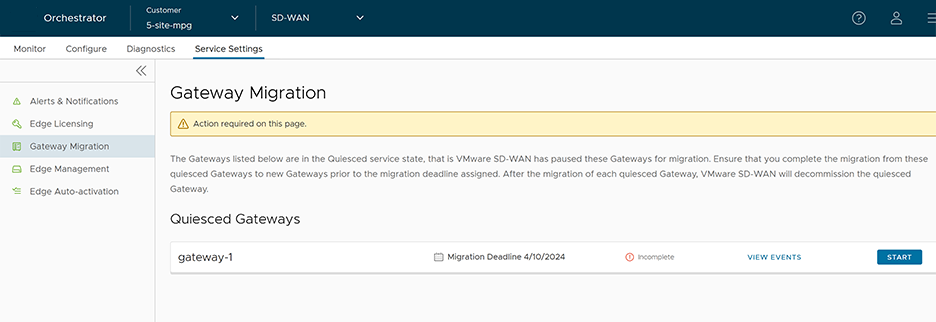
- Configure the required settings for all NSDs that route through the quiesced Gateway.
Figure 4. Configure NSD Site(s) 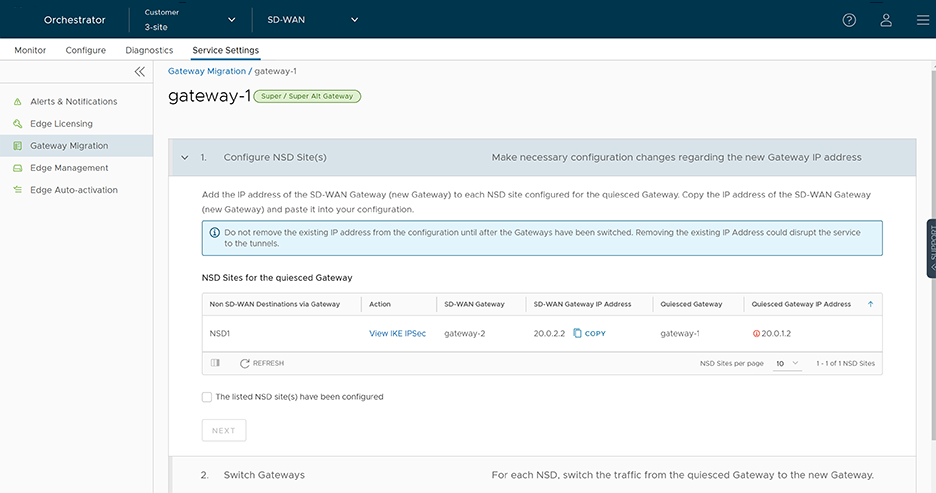
- Select the View IKE IPsec link to view a sample configuration for the NSD. Copy the template and customize it to suit user's deployment.
- Add the IP address of the SD-WAN Gateway (new Gateway IP) to each NSD configured for the quiesced Gateway. For example, if users have configured an NSD for AWS, users must add the IP address of the new Gateway to the NSD configuration in the AWS instance.
- After making the configuration changes to all the NSDs, select The listed NSD site(s) have been configured checkbox, then select Next.
Note: The Configure NSD Site(s) option is not available for NSDs configured automatically, and for Gateways with Data Plane role that are not attached to any NSDs. - Select each NSD then select Switch Gateway to switch the traffic from the quiesced Gateway to the new Gateway.
Figure 5. Switch Gateway 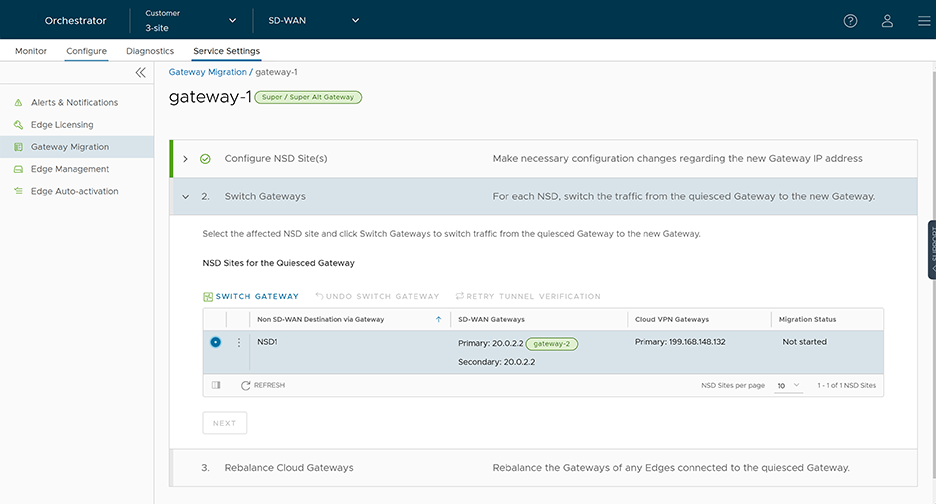
- In the Switch Gateways pop-up window, select The NSD site has been configured checkbox to confirm that users have made the required changes to the remote-end NSD configuration.
Figure 6. Switch Gateways 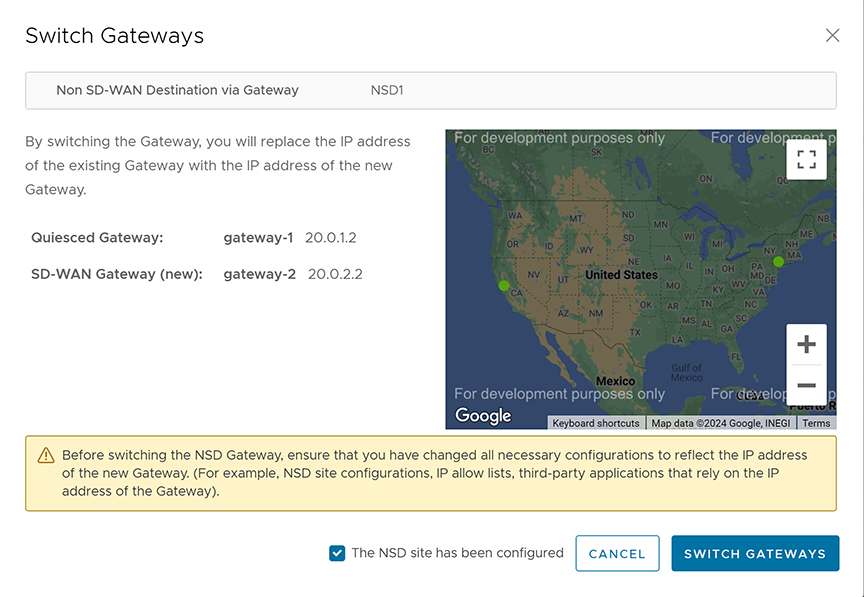 Note: This confirmation does not apply to NSDs configured automatically.
 - Select Switch Gateway.
It may take a few minutes to verify the tunnel status. The IP address of the quiesced Gateway is replaced with the IP address of the new Gateway, allowing traffic to switch to the new Gateway. The Migration Status changes to NSD Tunnels are up and running as shown in the following screenshot. If the Switch Gateway action fails, see What to do When Gateway Action Fails.
Figure 7. Migration Status 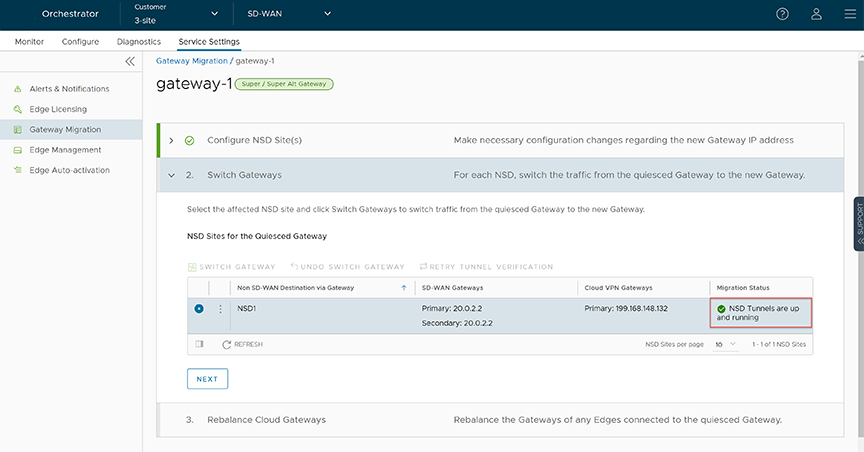
- Select Next.
Note: The Switch Gateway option is not available for Gateways with Data Plane role that are not attached to any NSDs.
- Rebalance the Cloud Gateways (Primary, Secondary, or Super Gateways) for all relevant Edges to reassign them from the quiesced Gateway to the new Gateway. Users can also rebalance Gateways from the page.
Figure 8. Rebalance Cloud Gateways 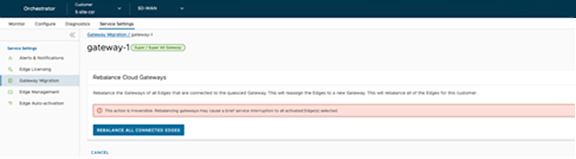 When rebalancing Super Gateways, all Edges connected to the quiesced Gateway get rebalanced. Rebalancing of selected Edges is not allowed.
Figure 9. Rebalance All Edges 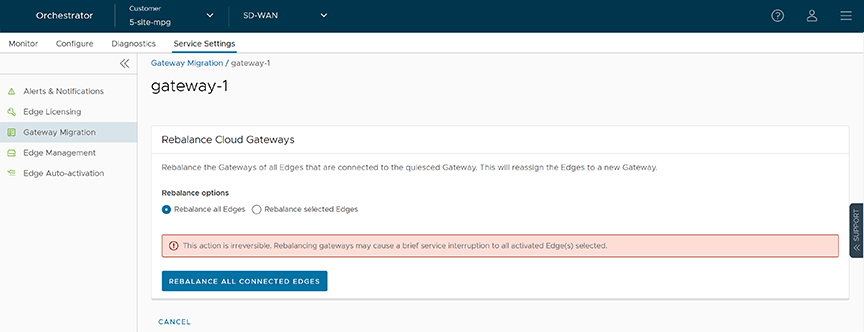
Figure 10. Rebalance Selected Edges 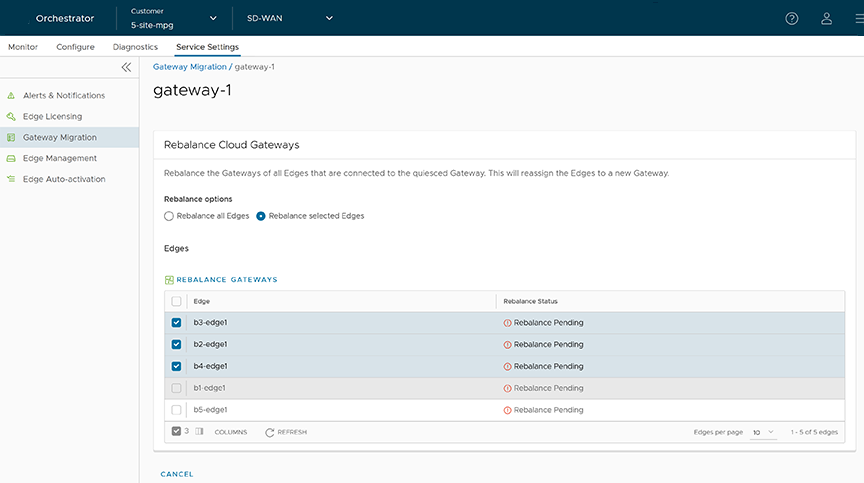 Select the Edges that connect to the quiesced Gateway, then select Rebalance Gateway to reassign them to the new Gateway.
Figure 11. Rebalance Gateways 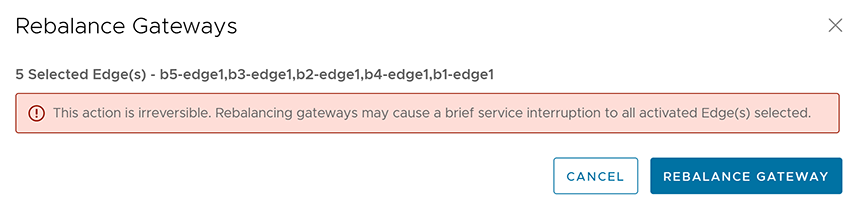
- In the Switch Gateways pop-up window, select The NSD site has been configured checkbox to confirm that users have made the required changes to the remote-end NSD configuration.
- Select Rebalance Gateway to complete the Gateway migration.
The Edges connected to the quiesced Gateway get migrated to the new Gateway.
Figure 12. Rebalance Cloud Gateways 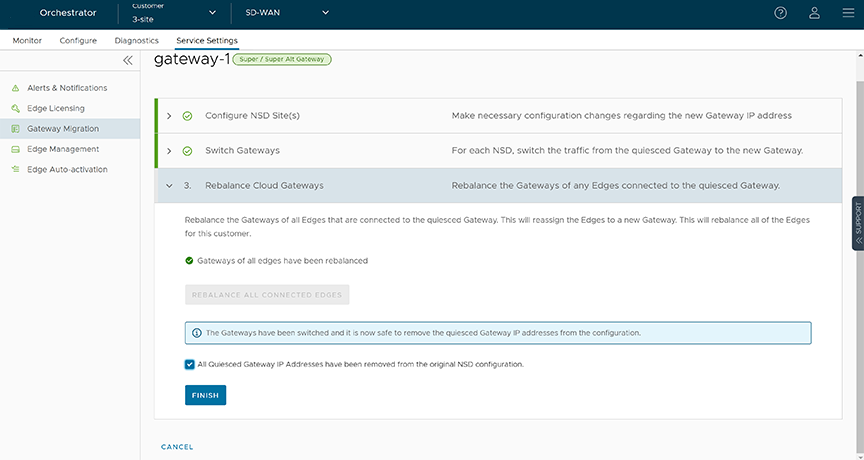
- Select Finish.
Go to the Gateway Migration page then select Review to review the migration steps, if necessary.
Figure 13. Gateway Migration 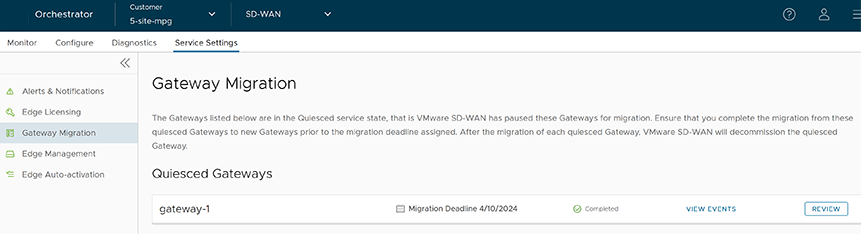
The migrated Gateways remain in this page until the Migration Deadline assigned for the quiesced Gateway. After the Migration Deadline, users can view the history of migration events in the page.
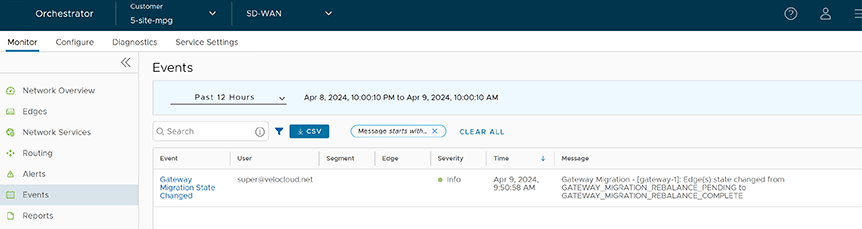
Figure 14. Monitor Events