Install the Access Point
This chapter contains the stepwise procedure to install the access point (AP).
Zero-Configuration of O-235 as Access Point
- The device is in AP mode with background scanning on and no SSID configured.
- A DNS entry wifi-security-server is set up on all the DNS servers. This entry should point to the IP address of the server. By default, the AP looks for the DNS entry wifi-security-server.
- The AP is on a subnet that is DHCP enabled.
Take a configured AP; that is, ensure that a static IP is assigned to the AP or the settings have been changed for DHCP. Before you install the AP in a hard-to-reach location, note the MAC address and the IP address of the AP for later use. The MAC address is printed on a label at the bottom of the AP.
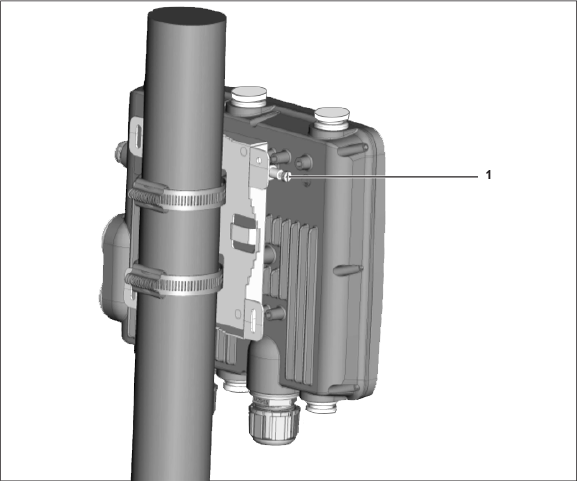
Pole Mount the AP
Use the mounting bracket and metal clamps to install the O-235 AP on a pole. Standard accessories include the mounting bracket and two metal clamps.
To mount the AP:
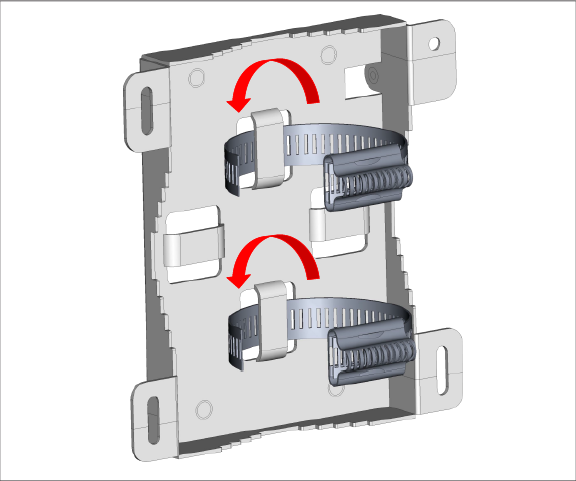
- Insert the two metal clamps into the bracket. You can insert the clams either in the horizontal or vertical slots depending on the position the pole-mount bracket for use on a vertical or horizontal pole.
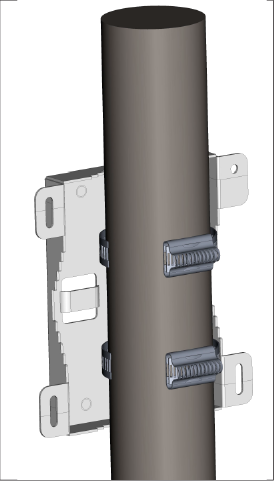
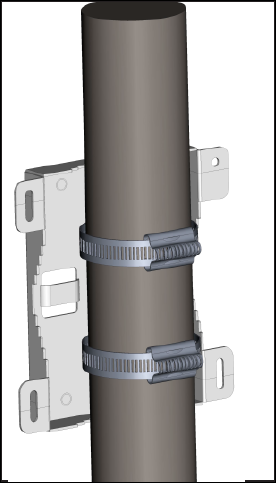
- Fix the bracket to a pole. You can position the pole-mount bracket for use on a vertical or horizontal pole.
- Fasten the two metal clamps into the slotted driver.
- Mount the AP to the bracket.
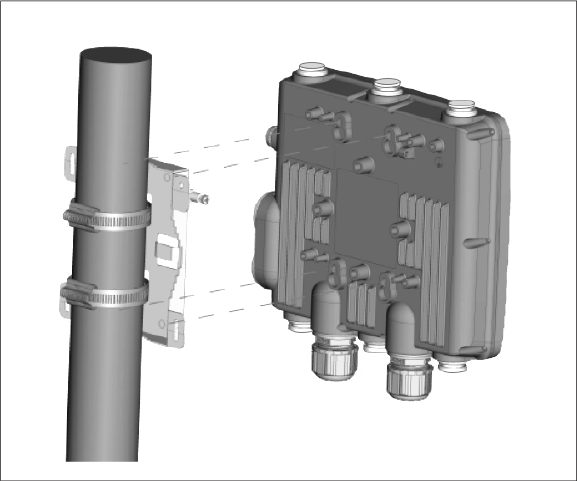
- Tighten the thumb screw using Philips# 2 screwdriver.
| Label | Description |
|---|---|
| 1 | Use a Philips #2 screwdriver to fasten the screw. |
Power On the AP
Plug one end of the Ethernet cable into the PoE+ switch or compatible PoE injector (a Single-port High Power Midspan, 802.3at compliant, up to Gigabit PoE with 30W minimum power output) and the other end into the LAN1 (PoE+) on the O-235. Make sure the PoE+ source you are using is turned ON.
Earthing or Grounding: The AP must be properly grounded using a copper earthing wire (12 ~ 10 AWG) and a tin-plated lug as shown in the following image. The wire and the lug must be tightened at the earthing screw on the AP.
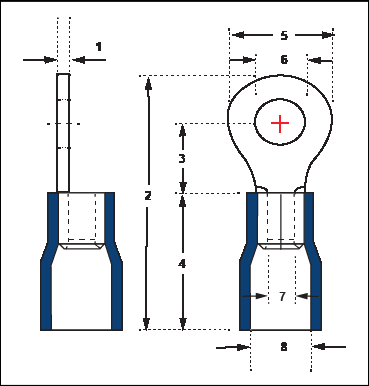
The following table shows the dimension of the earthing screw and lug.
| Item | 1 | 2 | 3 | 4 | 5 | 6 | 7 | 8 |
|---|---|---|---|---|---|---|---|---|
| Tolerance | ± 0.5 | ± 0.5 | ± 0.5 | ± 0.5 | ± 0.5 | ± 0.2 | ± 0.2 | ± 0.2 |
| Size | 1.0 | 21.50 | 5.90 | 13.0 | 7.20 | 4.30 | 3.40 | 6.70 |
Connect the AP to the Network
- Ensure that a DHCP server is available to enable the AP network configuration.
- Add the DNS entry and wifi-security-server to all DNS servers. This entry must point to the server's IP address.
- Ensure that DHCP runs on the subnet to which the AP is connected.
- Check the AP's LEDs to ensure they are connected to the server.
- Log on to the SSH server and run the get sensor list command.
The AP is connected and operational.
Connect the AP using PoE
If you are using a PoE injector, make sure the data connection is plugged into a suitable switch port with proper network connectivity.
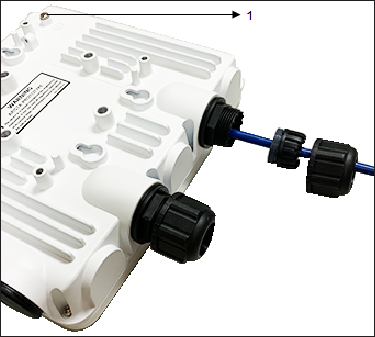
| 1 | Earthing screw |