Configure Alerts and Notifications
Orchestrator allows users to configure alerts that notify the Operators, Enterprise Administrators or other support users, whenever an event occurs.
In the SD-WAN service of the Enterprise portal, select . The Alert Configuration screen appears.
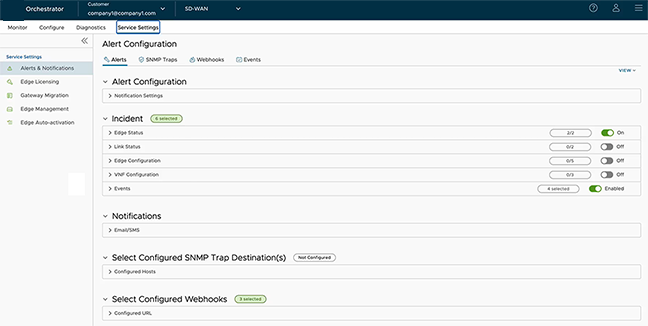
For information on how to configure Alerts, see Configure Alerts.
For information on how to configure SNMP Traps, see Configure SNMP Traps.
For information on how to configure Webhooks, see Configure Webhooks.
For information on how to configure Events to be delivered as Alerts, see Configure Events.
Configure Alerts
- The Orchestrator designates all alerts sent to Operators as Operator Alerts (formerly known as Pre-Notifications). The Orchestrator issues these alerts immediately upon the occurrence of an event.
- The Orchestrator designates all alerts sent to Customers as Enterprise Alerts. The Orchestrator activates these alerts only when a Customer turns on the Enable Enterprise Alerts option under Alert Configuration. Enterprise Admins may configure specific delays for the delivery of Enterprise Alerts.
For example, if a customer configures a 2-minute delay for the Link Down alert, the Orchestrator issues Operator Alerts immediately when a WAN link fails. However, the Orchestrator sends the Enterprise Alerts only after the specified 2-minute delay expires.
- The Alert Configuration window displays the Alerts tab by default.
Figure 2. Alerts Tab 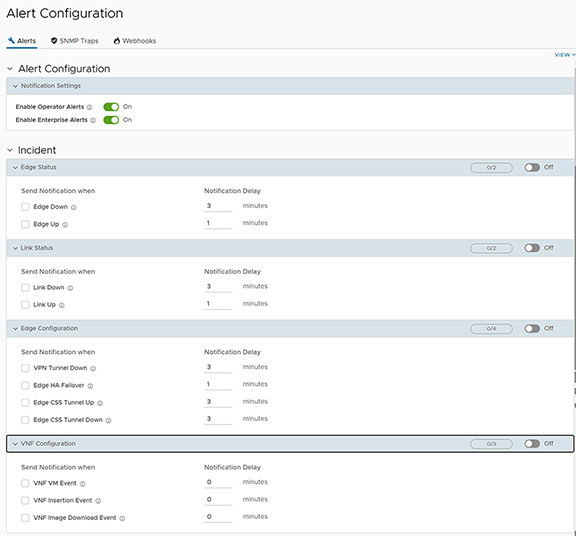
- Expand Email/SMS in the Notifications section to display the contact details of existing admin users.
Figure 3. Email/SMS 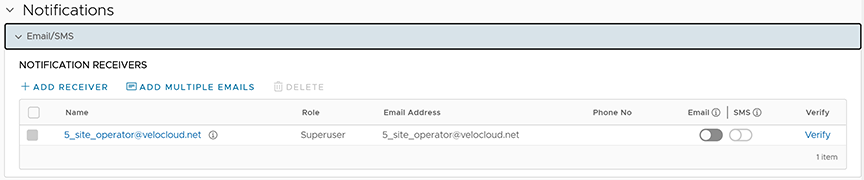 The screen displays the following contact details:
Table 1. Email/SMS - Options and Descriptions Option Description Name The Orchestrator auto-populates this field based on the configured administrators. Role Displays the role of the corresponding admin user. Email Address Displays the email address of the corresponding admin user. Phone No Displays the phone number of the corresponding admin user. Email Activate the toggle switch to send email notification to the admin user's email address. SMS Activate the toggle switch to send SMS notification to the admin user's mobile number. Note: This option is available only if the admin user has a valid phone number.Verify Select to validate the email address and/or phone number of the user. The screen displays the following additional options:Table 2. Additional Options and Descriptions Option Description Add Receiver Select this option to create a new row for the admin user. Enter the name and phone number. Add Multiple Emails Select this option to add multiple email addresses for the admin user. The email addresses must be added in a comma separated list. Delete Select this option to delete all the contact details of the selected admin user. - Expand Configured Hosts under Select Configured SNMP Trap Destination(s) to display the configured SNMP Traps. Users can select more than one trap using the drop-down menu.
Figure 4. Configured Hosts 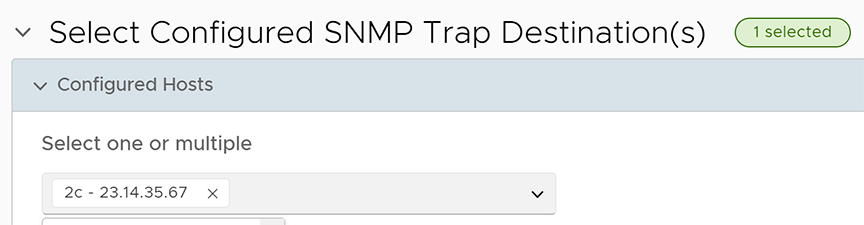 Note: The screen provides a link to the SNMP Traps page in the absence of a configured SNMP Trap.
 - Expand Configured URL under Select Configured Webhooks to display the configured webhooks. Users can select more than one webhook using the drop-down menu.
Figure 5. Configured URL 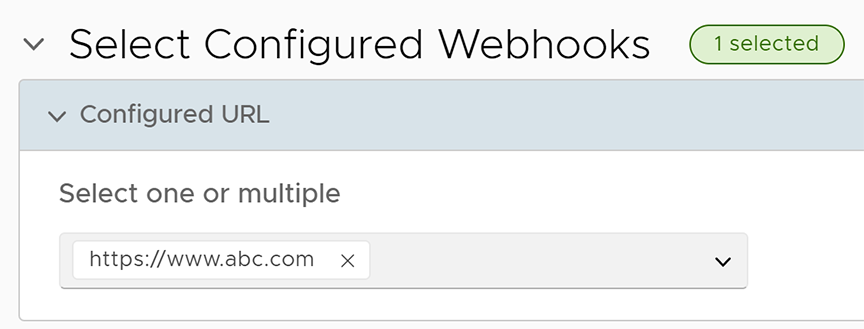 Note: The screen provides a link to the Webhooks page in the absence of a configured webhook.
Configure SNMP Traps
Simple Network Management Protocol (SNMP) Traps notify an SNMP Agent whenever a specific event occurs. Orchestrator sends SNMP Traps corresponding to the existing alerts like Edge Down and Edge Up.
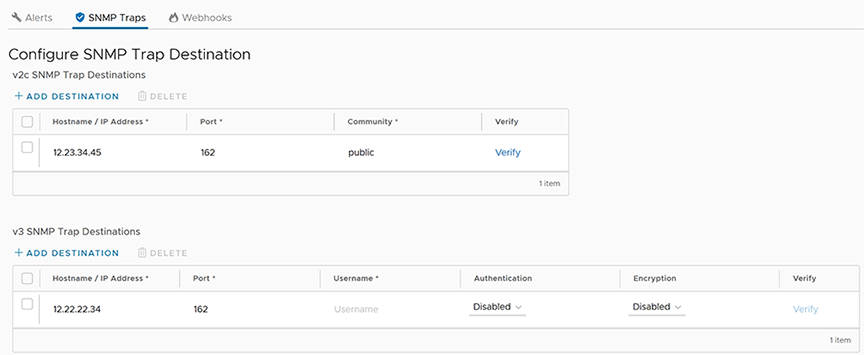
The SNMP Traps page in the Alert Configuration window allows configuration of v2c and v3 SNMP Trap Destinations.
| Option | Description |
|---|---|
| Hostname/IP Address | Enter the IP address. |
| Port | Enter the port number. |
| Community | Enter the community. Community can be private or public. |
| Verify | Select this option to validate the IP address. |
| Add Destination | Select this option to add a new v2c SNMP Trap Destination. |
| Delete | Select this option to remove the selected entry from the table. |
| Option | Description |
|---|---|
| Hostname/IP Address | Enter the IP address. |
| Port | Enter the port number. |
| Username | Enter the username. |
| Authentication | Select one of the following:
|
| Encryption | Select one of the following:
|
| Verify | Select this option to validate the IP address. |
Select Save Changes to save the configured SNMP Trap Destinations.
Configure Webhooks
Webhooks deliver data to other applications when an HTTP POST triggers certain alerts. Whenever an alert occurs, the source sends an HTTP request to the target application for the webhook configuration. Orchestrator supports Webhooks that automatically send messages through HTTP POST to target apps when an event occurs. Users can set the target URL in the Enterprise portal and automate actions in response to the Orchestrator-triggered alerts. The webhook recipients must support HTTPS and must have valid certificates to ensure the privacy of potentially sensitive alert payloads and prevent tampering with payloads. Any application that supports incoming webhooks with HTTPS can integrate with VeloCloud SD-WAN.

| Option | Description |
|---|---|
| URL | Enter a valid HTTPS URL. This serves as the target application for the webhooks. |
| Code | Enter an expected HTTP response status code for each webhook recipient. By default, the Orchestrator expects webhook recipients to respond to HTTP POST requests with a status code as HTTP 200.When Orchestrator receives an unexpected status code from a recipient server or a proxy server, it considers that the alert delivery has failed, and generates an ALERT_DELIVERY_FAILED customer event. This event helps to identify when a webhook recipient server may fail to function as expected. |
| Secret | This field is optional. Specify a secret token for each configured webhook recipient, which is used to compute an HMAC for each webhook request sent to the corresponding recipient. The Orchestrator embeds the HMAC in an X-Webhook-Signature HTTP header, alongside a version parameter that identifies the signature algorithm and a timestamp.
X-Webhook-Signature: v=<signature-version>&t=<timestamp>&s=<hmac>The recipient interprets the components as follows:
The system forms the message for the HMAC computation by concatenating the request body, a single period, and the timestamp parameter value from the signature header. Upon receiving a Webhook request, the listening server verifies the authenticity by computing its own signature and comparing it to the one that the Orchestrator generates. |
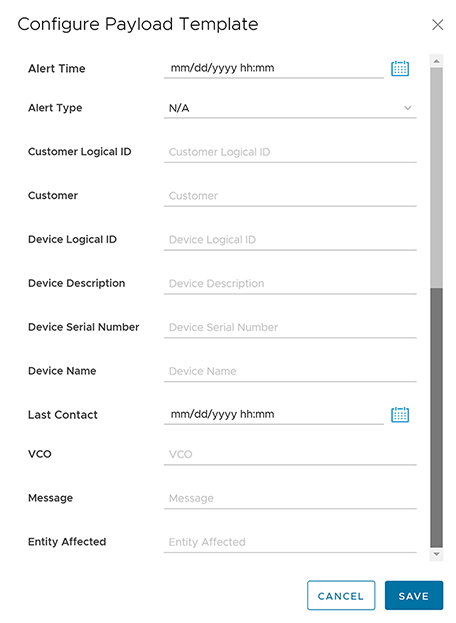
| JSON Payload Template | This is a mandatory field. The Orchestrator delivers alert notifications to each webhook recipient via a JSON payload in the body of an HTTP POST request. The Orchestrator dynamically generates payload content by performing variable interpolation as it sends notifications. The Orchestrator replaces supported placeholder variables in the user-configured payload template with alert-specific values. |
| Verify | Select this option to validate the entered details. |
| Option | Description |
|---|---|
| Alert Time | Enter the date and time to trigger the alert. |
| Alert Type | Select the type of alert from the drop-down menu. The default value is N/A. |
| Customer Logical ID | Enter the logical ID of the customer designated to receive the notification. |
| Customer | Enter the name of the customer designated to receive the notification. |
| Device Logical ID | Enter the logical ID of the Edge to which the alert must apply. |
| Device Description | Enter a brief message describing the Edge to which the alert must apply. |
| Device Serial Number | Enter the serial number of the Edge to which the alert must apply. |
| Device Name | Enter the name of the Edge to which the alert must apply. |
| Last Contact | Enter the date and time at which the affected Edge most recently communicated with the Orchestrator. This is applicable only for the Edge alerts. |
| VCO | Enter the Hostname or public IP of the Orchestrator to identify the origin of the notification. |
| Message | Enter a brief message describing the event that must trigger the alert. |
| Entity Affected | Enter the name of the entity: Edge or link or VNF, to which the alert must apply. |
{
  "alertTime": "alertTime",
  "alertType": "alertType",
  "customer": "customer",
  "customerLogicalId": "customerLogicalId",
  "entityAffected": "entityAffected",
  "deviceLogicalId": "deviceLogicalId",
  "lastContact": "lastContact",
  "message": "message",
  "vco": "vco",
  "deviceName": "deviceName",
  "deviceDescription": "deviceDescription",
  "deviceSerialNumber": "deviceSerialNumber"
}
Select Save, then select Save Changes on the Webhooks page to save the webhook configurations.
When an alert triggers, the Orchestrator transmits an alert message and all relevant information to the configured target URL.
Configure Events
The Orchestrator supports configuring custom events for alerts via Webhooks, SNMP, and email that automatically transmit notifications to target recipients upon the occurrence of a configured event. Alert notification via SMS is not supported.
- In the SD-WAN service of the Enterprise portal, select . The Alert Configuration screen appears.
Figure 9. Alert Configuration Events 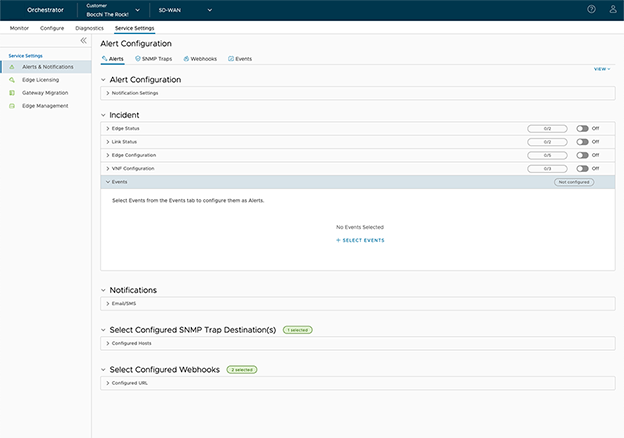
- Select . The Events page appears.
Figure 10. Events Tab 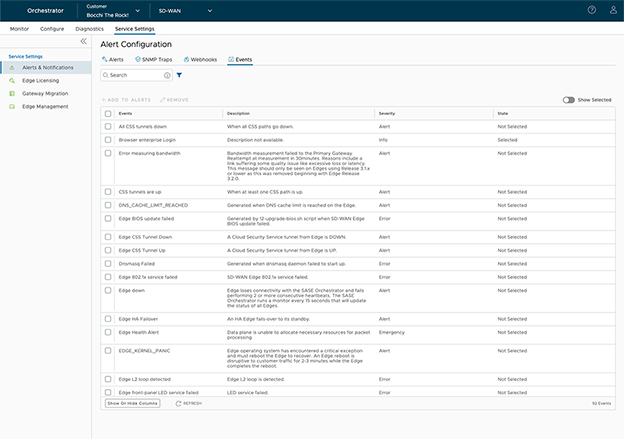
- In the Events page, use the Search filter to find the events for delivery as Alerts. Filter the events by Event Name and Severity. After users select the events, select the Show Selected toggle switch to preview the selected events, and then select +Add To Alerts.
The Orchestrator configures the selected events as Alerts using the existing configured Alert Notification method, and these events appear under the Events area of the Alert Configuration screen.
Figure 11. Events List - Select Save Changes.
On the Events page, select an event, and then select Remove to remove the event from the Events list. To add new custom events to the existing Events list, contact the Operator User.
Monitor Alert Notification Delivery Status
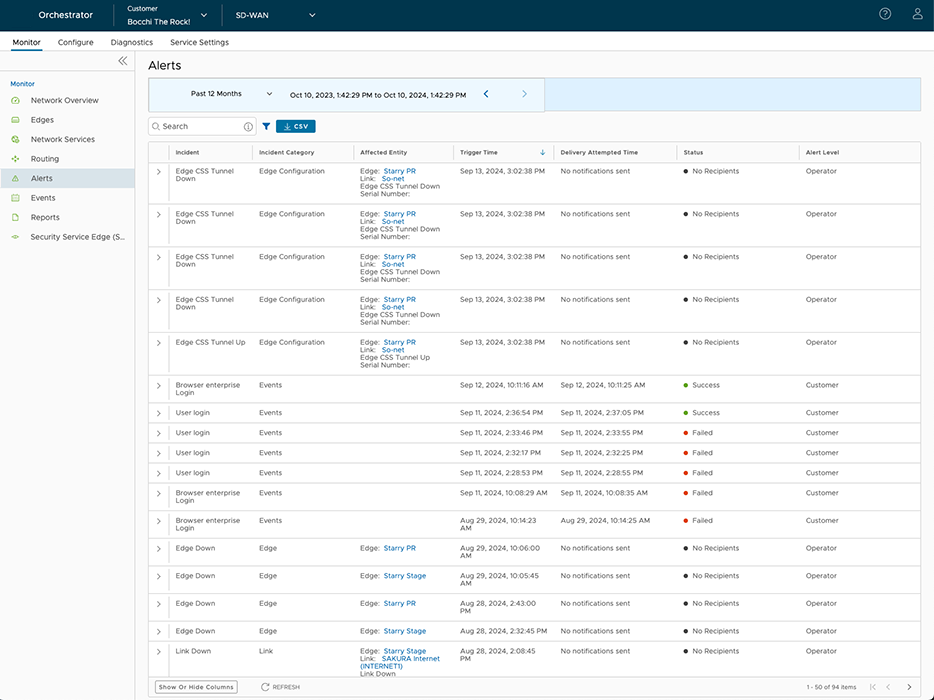
After the users configure the events to generate Alerts, they can view the Alert notification delivery status on the page.