Manage Partner Customers
- Select Manage Partner Customers. The Manage Customers page appears.
Note: You can also navigate to this page from the Operator portal, by selecting the link under the Partner column of a corresponding Customer. However, a Partner user does not have the same privileges as that of an Operator.
Figure 1. Manage Partner Customers 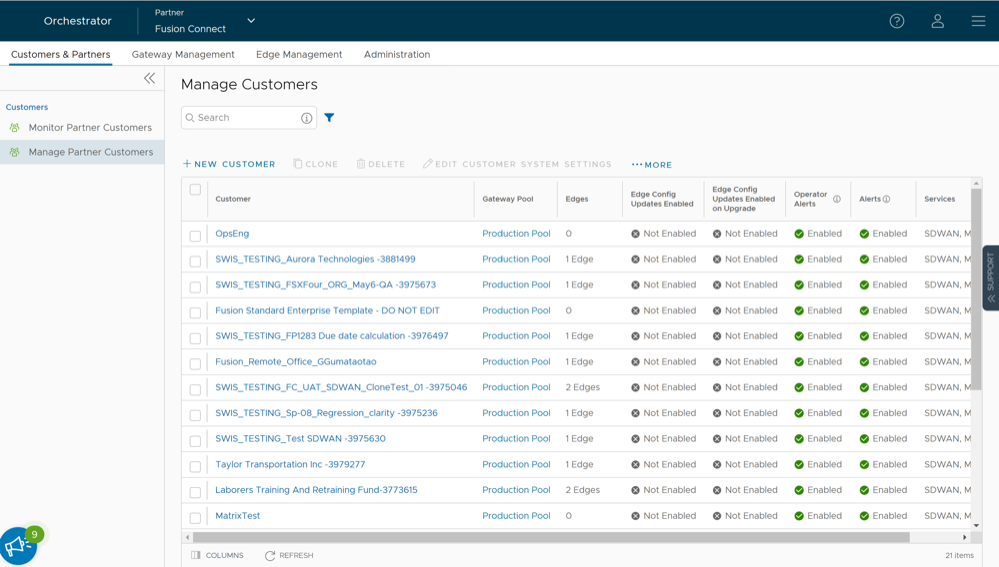
Create New Partner Customer
session.options.disableCreateEnterpriseProxy to True. You can use this option when Orchestrator exceeds the usage capacity.- Login to the Orchestrator as a Partner.
- In the Partner portal, go to and from the Manage Partners page, select a Partner.
- Select Manage Partner Customers. In the Manage Customers page appears, select New Customer.
- On the New Customer page, configure the following details:
- Enter the Customer Information details in the following fields and select Next.
Note: The Next button is activated only when you enter all the mandatory details.
Figure 2. Customer Information 
Table 4. Customer Information Option Descriptions Option Description Company Name Enter your company name. Account Number Enter a unique identifier for the Customer. New Partner Support Access Select the check box to allow the new Partner to view, configure, and troubleshoot the Customer's Edges. SASE Support Access This check box is selected by default, and grants access to the Arista Support to view, configure, and troubleshoot the Edges connected to the Customer. For security reasons, the Support cannot access or view the user identifiable information.
SASE User Management Access Select the check box to allow the Arista Support to assist in User Management. The User Management includes options to create users, reset password, and configure other settings. In this case, the Support has access to user identifiable information. Location Enter relevant address details in the respective fields. - Enter the Administrative Account details in the following fields and select Next.
Note: The Next button is activated only when you enter all the mandatory details.
Figure 3. Configure Administrative Account 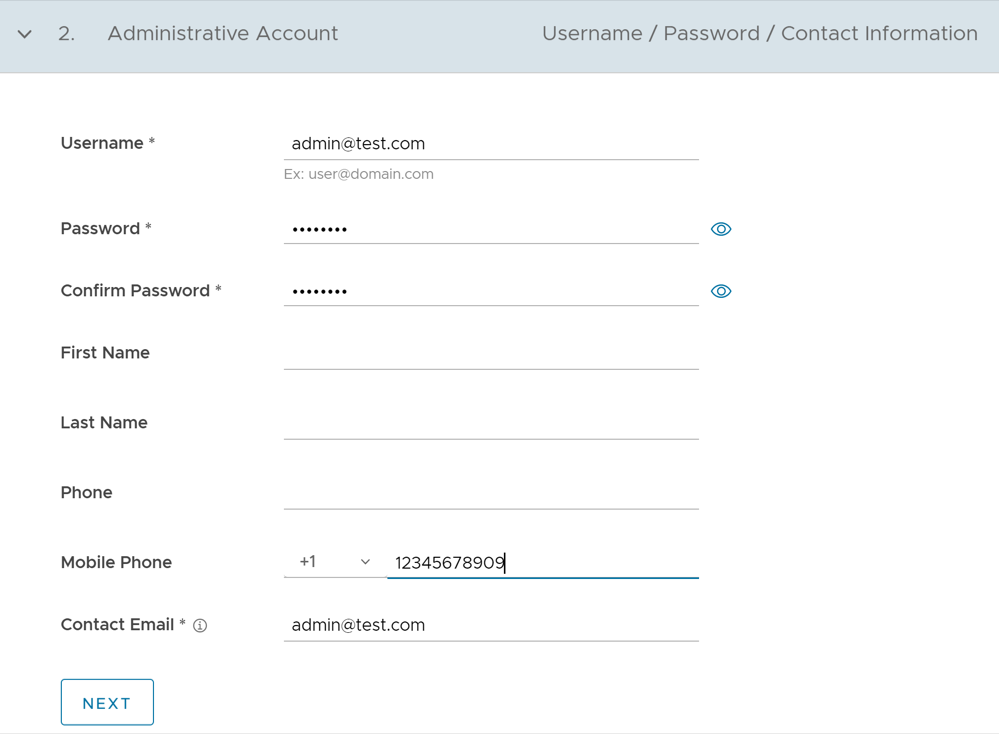
Table 5. Administrative Account Option Descriptions Option Description Username Enter the username in the このメールアドレスはスパムボットから保護されています。閲覧するにはJavaScriptを有効にする必要があります。 format. Password Enter a password for the Administrator. Note: Starting from the 4.5 release, the use of the special character "<" in the password is no longer supported. In cases where users have already used "<" in their passwords in previous releases, they must remove it to save any changes on the page.Confirm Password Re-enter the password. First Name Enter the first name. Last Name Enter the last name. Phone Enter a valid phone number. Mobile Phone Enter a valid mobile number. Contact Email Enter the email address. The alerts on service status are sent to this email address. - Under Global Settings, configure the Services as per your requirement:
Figure 4. Configure Services 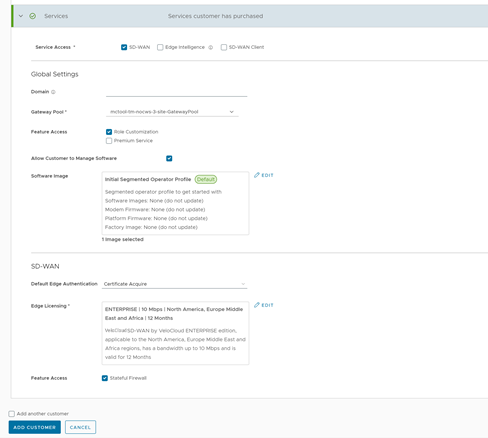
Table 6. Services Option Descriptions Option Description Domain Enter the domain name to be used to enable Single Sign On (SSO) authentication for the Orchestrator. This is also required to activate Edge Network Intelligence for the Customer. Gateway Pool Select an existing Gateway pool from the drop-down list. For additional information, see Manage Gateway Pools. Feature Access You can select either Role Customization or Premium Service, or both the check boxes. Allow Customer to Manage Software Select the check box if you want to allow an Enterprise Super User to manage the software images available for the Enterprise. Once selected, the Software Image filed is displayed. Select Add and in the Select Software/Firmware Images pop-up window, select and assign the software/firmware images from the available list for the Enterprise. Select Done to add the selected images to the Software Image list. Note: You can remove an assigned image from an Enterprise, only if the image is not currently used by any Edge within the Enterprise.Operator Profile Select an Operator profile to be associated with the Customer from the available drop-down list. This field is not available if Allow Customer to Manage Software is selected. For additional information on Operator profiles, see the "Manage Operator Profiles" section in the Arista VeloCloud SD-WAN Operator Guide. Service Access: This option is available above the global settings. You can choose the services that the Customer can access along with the roles and permissions available for the selected service.Note: This option is available only when the system propertysession.options.enableServiceLicensesis set asTrue.
- Enter the Customer Information details in the following fields and select Next.
- After entering all the details, select the Add Customer button. If you want to add another customer, you can select the Add another Customer check box before selecting Add Customer. The new Customer name is displayed on the Customers page. You can select the Customer name to navigate to the Enterprise portal and add configurations to the Customer.
Clone a Partner Customer
Note: Only Partner Super Users and Partner Standard Admins can clone a Partner customer.
By default, the following configurations are cloned from the selected customer:
- Enterprise configuration profiles
- Enterprise network services and objects like:
- DNS services
- Private network names
- Network Segments
- Edge authentication scheme
- Address groups and Port groups
Note: Distributed Cost Calculation is not copied to the cloned Enterprise.
You cannot clone an Enterprise if it consists of the following:
- Profile with Edge references like hubs, clusters, and so on
- Profile containing Partner Gateway References
- Cloud Security Service enabled
- Non SD-WAN Destinations
- VNF or VNF licenses
- Authentication services
- NetFlow objects like collectors or filters
- On the Manage Customers page, select the customer you want to clone, and then select .
The Clone Customer page appears.
Figure 5. Clone Customer 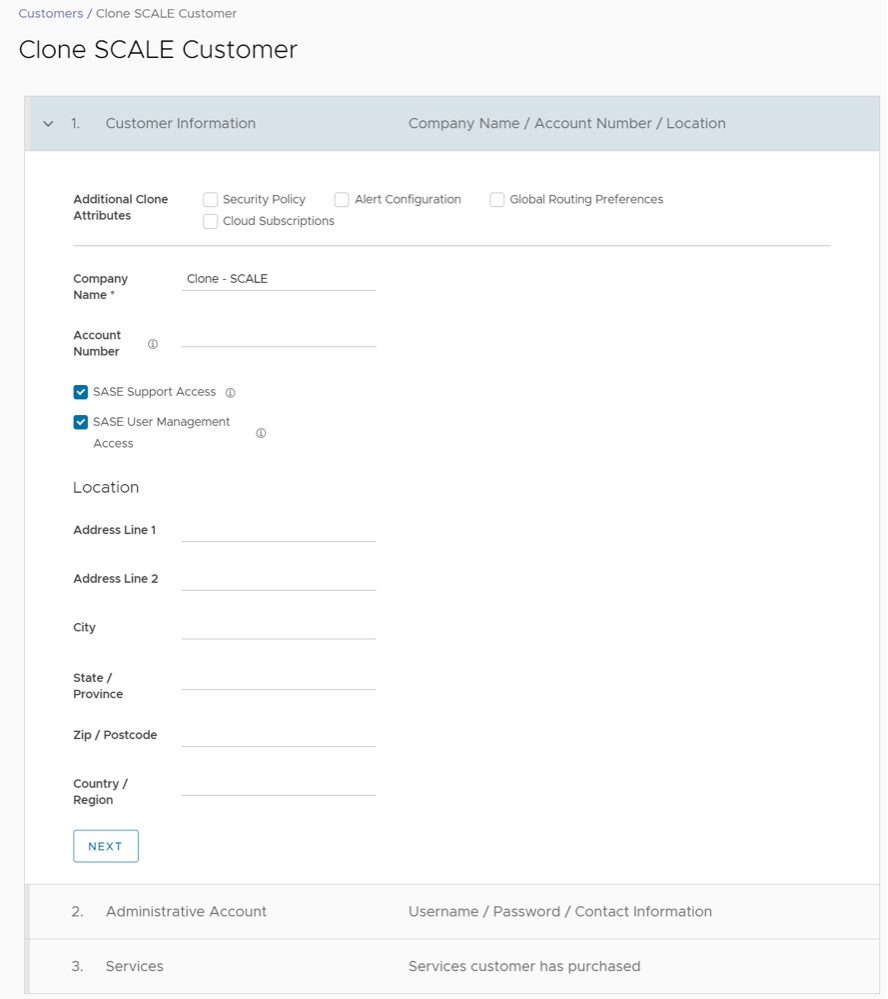
Configure Partner Customers
When you create a new Customer, you are redirected to the Customer Configuration page, where you can configure the Customer settings. You can also navigate to the Configuration page by following the below steps:
- From the left menu, select Customer Configuration.
Figure 6. Customer Configuration 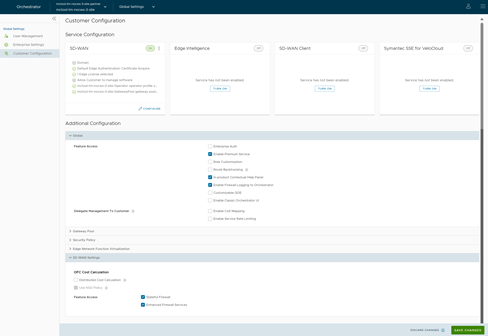
- In the Service Configuration section, under SD-WAN, select Configure to configure SD-WAN settings, and then select Update.
Figure 7. SD-WAN Configuration 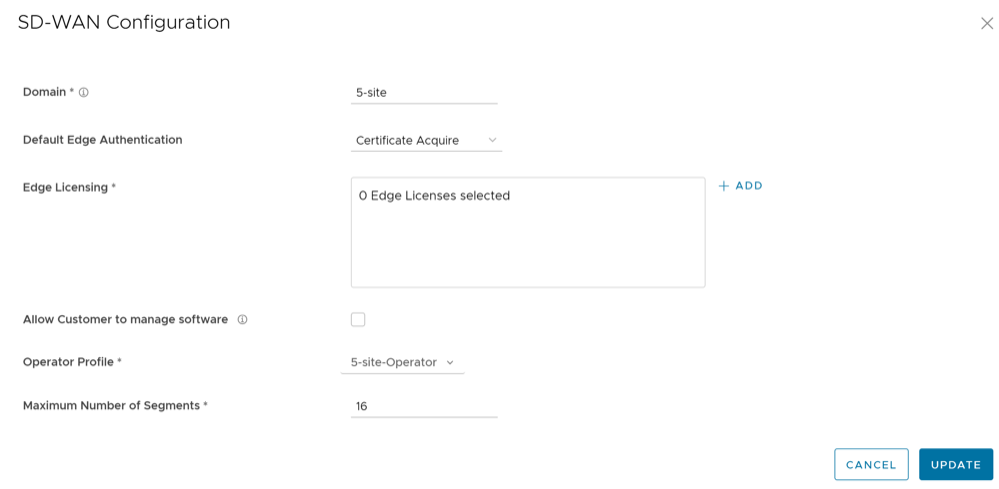
Table 8. SD-WAN Configuration Option Descriptions Option Description Domain Enter the domain name to be used to activate Single Sign On (SSO) authentication for the Orchestrator. This is also required to activate Edge Intelligence for the Customer. Default Edge Authentication Choose the default option to authenticate the Edges associated to the Customer, from the drop-down menu. - Certificate Deactivated: Edge uses a pre-shared key mode of authentication.
- Certificate Acquire: This option is selected by default and instructs the Edge to acquire a certificate from the certificate authority of the Orchestrator, by generating a key pair and sending a certificate signing request to the Orchestrator. Once acquired, the Edge uses the certificate for authentication to the Orchestrator and for establishment of VCMP tunnels.
Note: After acquiring the certificate, the option can be updated to Certificate Required.
- Certificate Required: Edge uses the PKI certificate. You can change the certificate renewal time window for Edges using the system property
edge.certificate.renewal.window.
Edge Licensing The existing Edge Licenses are displayed. Select Add to add or remove the licenses. Note: The license types can be used on multiple Edges. It is recommended to provide your Customers with access to all types of licenses to match their edition and region. For additional information, see Edge Licensing.Allow Customer to Manage Software Select the check box if you want to allow an Enterprise Super User to manage the software images available for the Enterprise. For additional information, see the topic Edge Image Management in the Arista VeloCloud SD-WAN Administration Guide. Operator Profile Select an Operator profile to be associated with the Customer from the available drop-down menu. This field is not available if Allow Customer to Manage Software is selected. For additional information on Operator profiles, see the "Manage Operator Profiles" section in the Arista VeloCloud SD-WAN Operator Guide. Maximum Number of Segments Enter the maximum number of segments that can be configured. The valid range is 1 to 16.The default value is 16.
Configure Partner Handoff
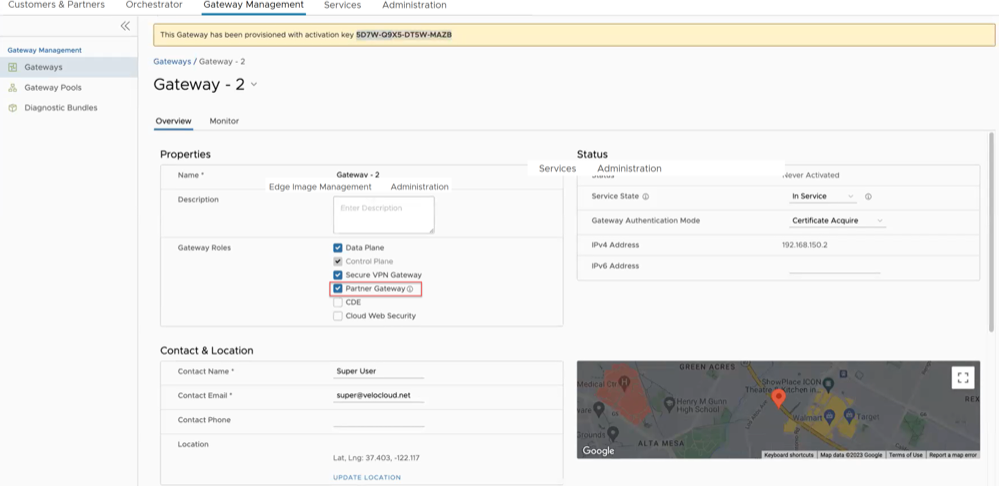
Ensure that the Gateway to be handed off is assigned with Partner Gateway Role. In the Orchestrator portal (Operator or Partner), select Gateways and select the link to an existing Gateway. In the Properties section of the selected Gateway's Overview page, you can enable the Partner Gateway role as shown in the following screenshot.
To configure the handoff settings, perform the following steps:
- In the Configure Hand Off area, configure the following fields:
Figure 9. Configure Partner Hand Off 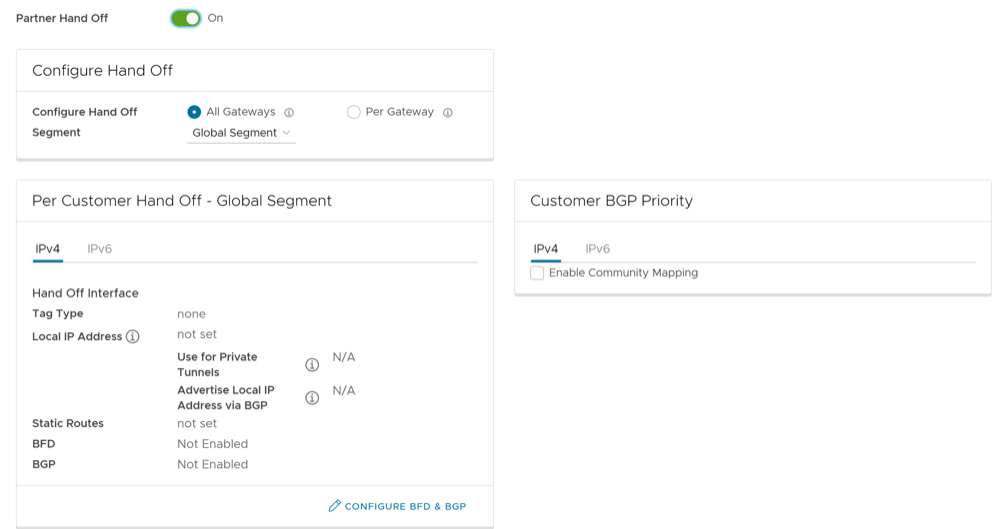
Table 10. Partner Hand Off Option Descriptions Option Description Configure Hand Off By default, the hand off configuration is applied to all the Gateways. If you want to configure a specific Gateway, choose Per Gateway, and then select the Gateway from the drop-down list. Segment By default, Global Segment is selected, which means that the hand off configuration is applied to all the segments. If you want to configure a specific segment, select the segment from the drop-down menu. Hand Off Interface This section displays the values that are configured on the Configure BGP and BFD page. Customer BGP Priority Select the check box and configure the Community Mapping details. - At the bottom of the Per Customer Hand Off – Global Segment area, select the Configure BFD & BGP link, as shown in the following image.
Figure 10. Configure BFD and BGP Settings for Handoff Interface 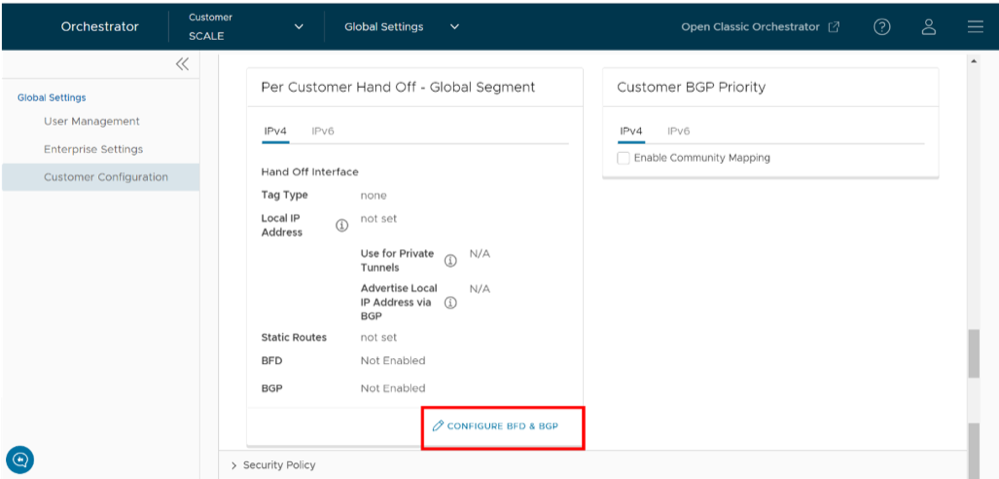
The Configure BGP and BFD screen displays.
Figure 11. Configure BGP and BFD 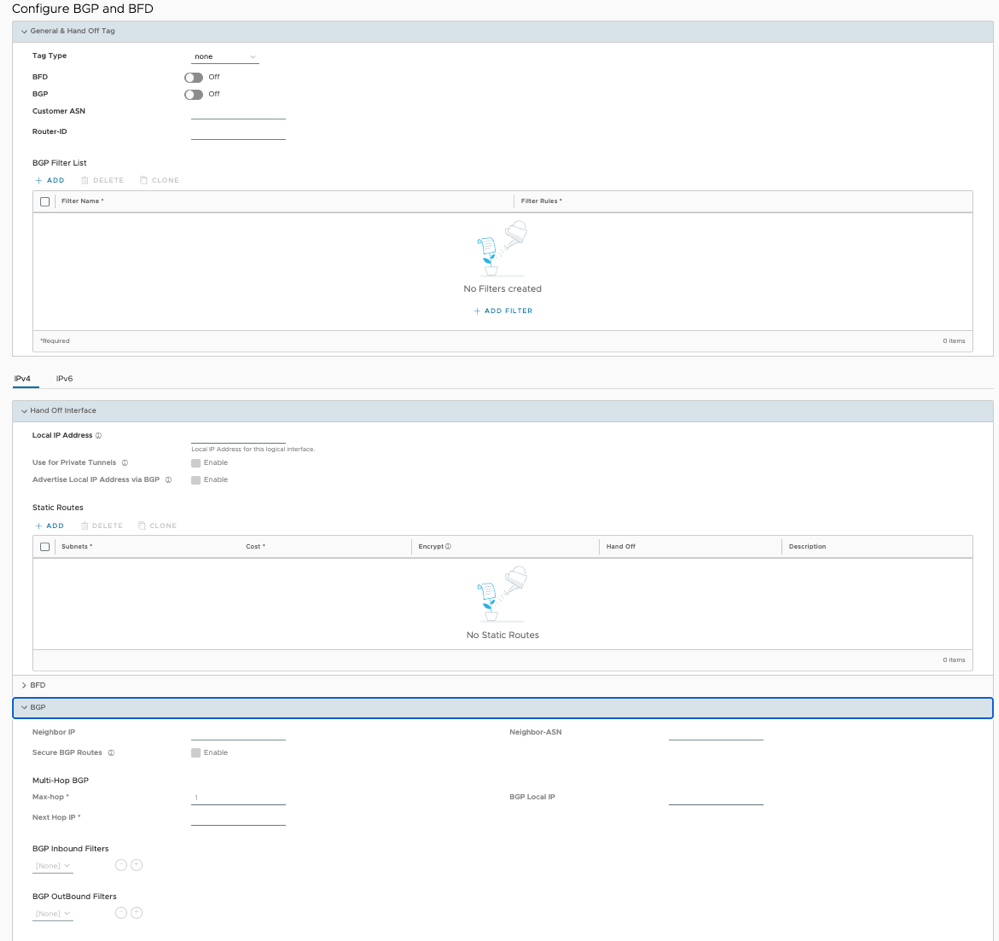
- Open the General & Hand Off Tag section and turn the BGP option to the On position.
Figure 12. General & Hand Off Tag Settings 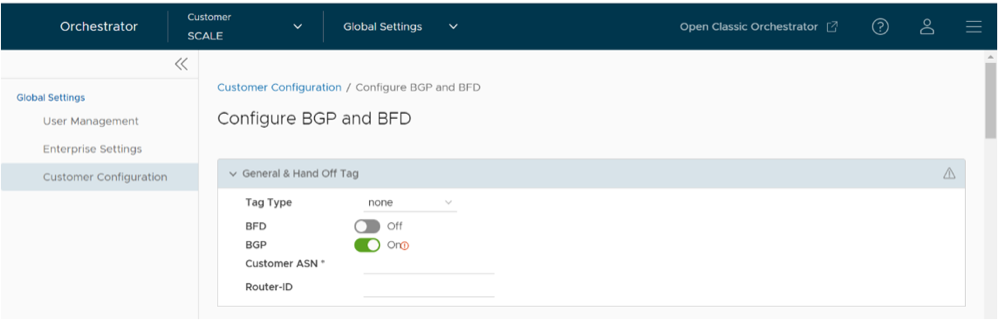
- If applicable, configure Route Summarization.
- Scroll down to the Route Summarization area in the BGP section.
Figure 13. Configure Route Summarization 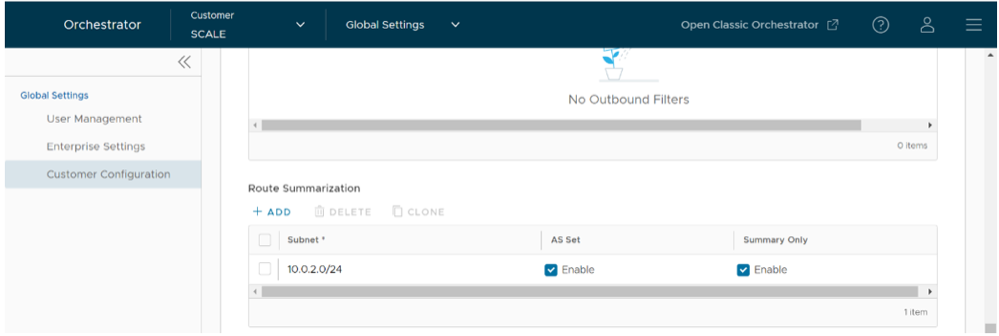
- Scroll down to the Route Summarization area in the BGP section.