Mounting the Appliance
The appliance is mounted onto a four-post rack by preparing the chassis for mounting, then securing the appliance to the front posts using the mounting brackets, followed by securing it to the rear posts.
The installation kit provides the following four-post mounting parts:
- Two front mounting brackets.
- Two rails.
- Two rail caps.
- Six screws for the front mounting brackets.
- Ten screws to attach the side rails to the chassis and the rail caps to the rails.
See illustration at Parts List.
Note: Each chassis side has holes that allow for the attachment of the slide rails. Ensure that the rails are attached symmetrically to the left and right sides of the chassis and the slides can be extended to connect with the rear rack posts. Depending on the depth of the rear rack, the number of screws required will vary.
Note: A minimum of three screws is recommended for each slide rail.
Rack Mounting the Appliance
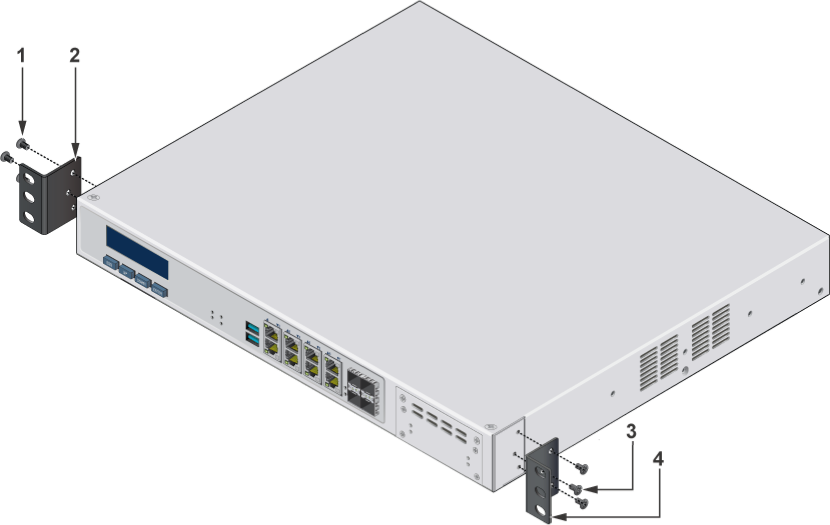
| 1 | Mounting screws | 3 | Mounting screws |
| 2 | Left bracket | 4 | Right bracket |
- Align the left bracket to the left face plate.
- Attach the left front mounting bracket using three mounting screws.
- Align the right bracket to the right face plate.
- Attach the right front mounting bracket using three mounting screws.
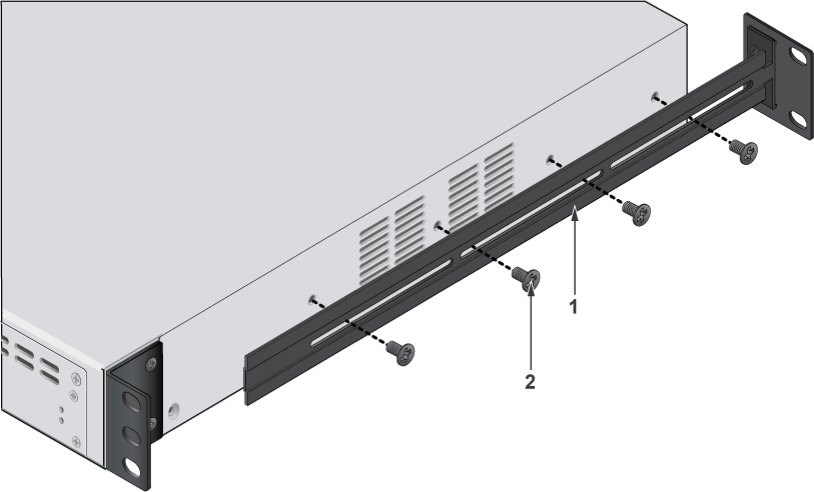
| 1 | Mounting rail | 2 | Mounting screws |
- Align the left rail to the four holes on the left side of the appliance.
- Attach the left rail using four mounting screws.
- Align the right rail to the four holes on the right side of the appliance.
- Attach the right rail using four mounting screws.
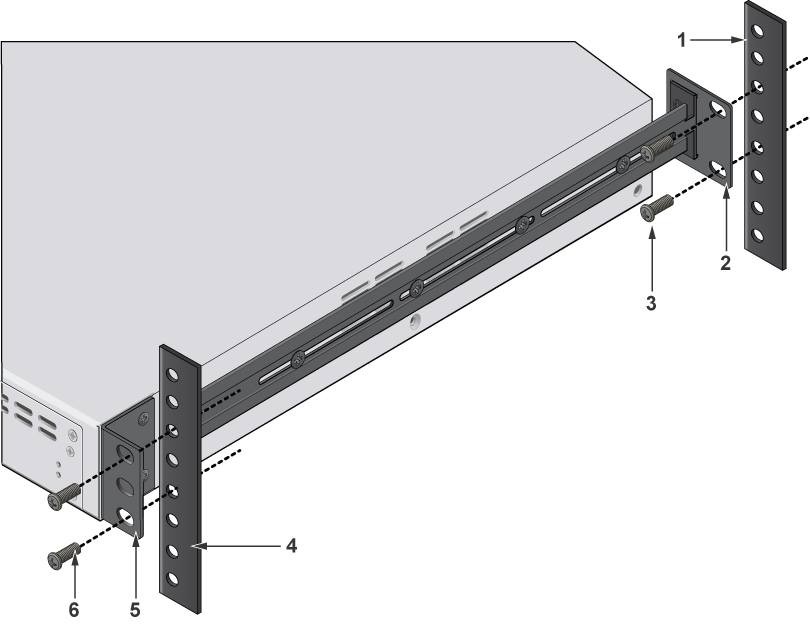
| 1 | Back rack post | 4 | Front rack post |
| 2 | Back bracket | 5 | Front bracket |
| 3 | Mounting screws | 6 | Mounting screws |
- Insert the appliance into the racking at the predetermined height within the left side of the rack.
- Attach the left rear mounting bracket using three mounting screws.
- Attach the left front mounting bracket using three mounting screws.
- Repeat Steps 2 and 3 for the right side appliance installation into the racking.