Configure Non SD-WAN Destination via Gateway
Configure a Non SD-WAN Destination via Gateway in Orchestrator to establish a secure IPSec tunnel to the Netskope portal through Gateway.
Ensure you have configured an IPsec tunnel in the Netskope NG SWG Portal. See Configure VPN Credentials on the Netskope Portal.
To configure a Non SD-WAN Destination via Gateway:
- Login to Orchestrator to verify the presence of customers instances and you have active Edges.
Figure 1. Verifying the Customer Instance 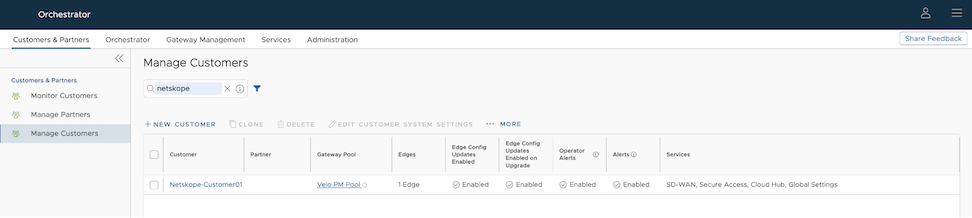
- In the Non SD-WAN Destinations via Gateway pane, select New to create a new Non SD-WAN Destination.
Figure 2. Configuring a New Non SD-WAN Destination via Gateway 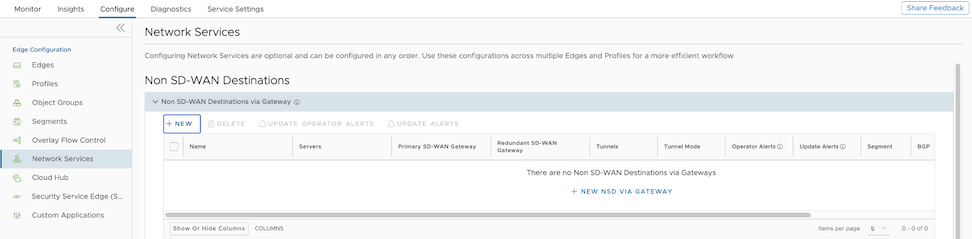
- In the New Non SD-WAN Destination via Gateway window, configure the following:
Figure 3. Adding a New Non SD-WAN Destination via Gateway Parameters 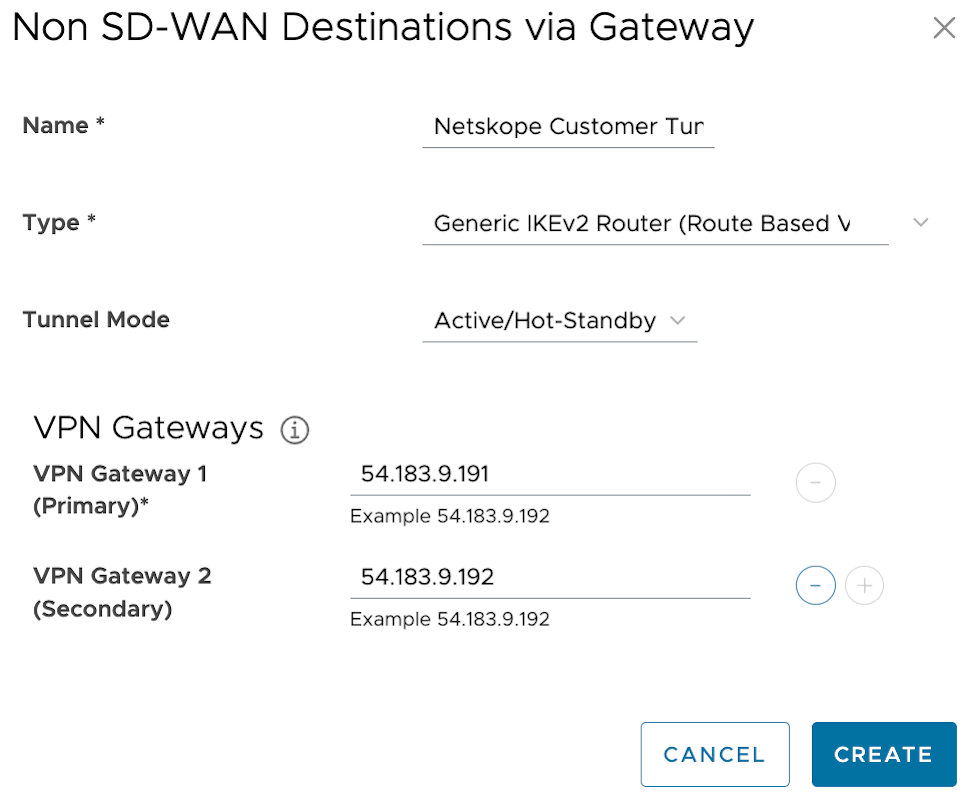
Table 1. New Non SD-WAN Destination via Gateway Option Descriptions Option Description Name Enter a descriptive name for the Non SD-WAN Destination. Type Select the type as Generic IKEv2 Router (Route Based VPN). Primary VPN Gateway Enter the IP address of the Primary POP used to setup the VPN tunnel in the Netskope portal. Secondary VPN Gateway Enter the IP address of the Secondary POP used to setup the VPN tunnel in the Netskope portal. - In the next window, configure the following settings:
Figure 4. Netskope Customer Tunnel 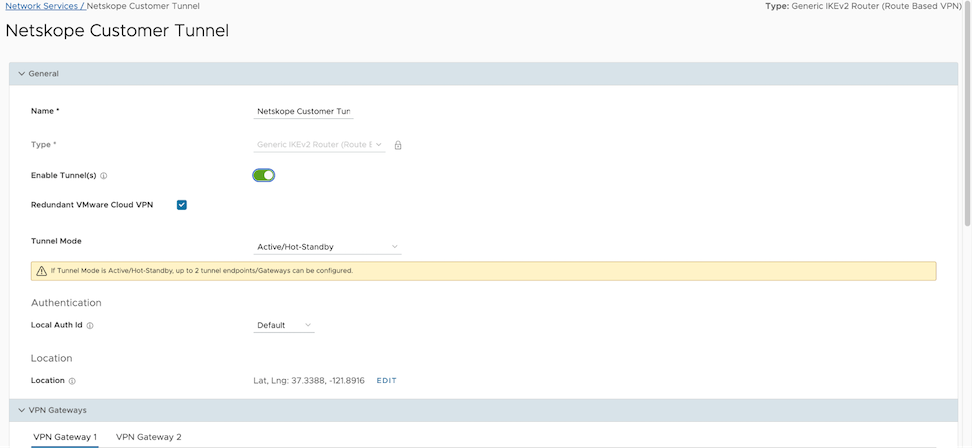
Figure 5. Netskope Customer Tunnel - VPN Gateway 1 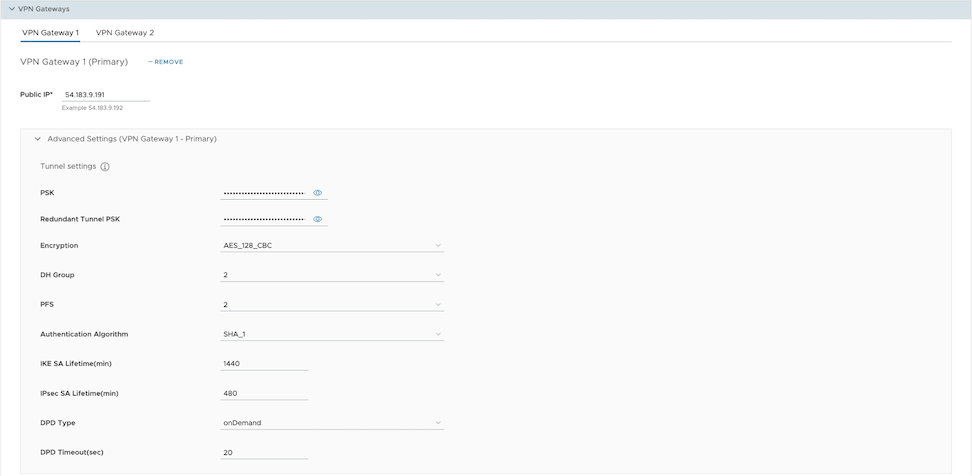
Figure 6. Netskope Customer Tunnel - VPN Gateway 2 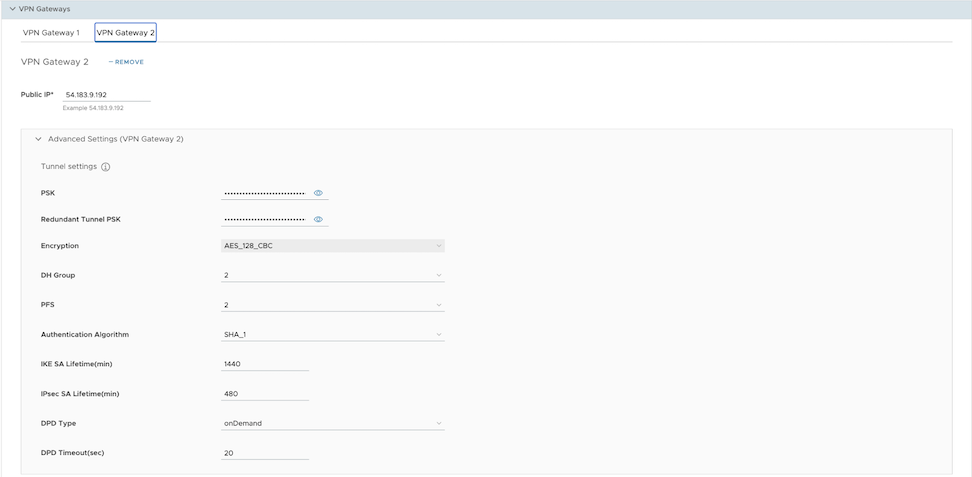
- Select Save Changes and close the window.
The new Non SD-WAN Destination via Gateway displays in the Network Services window.
Figure 7. Displaying the SD-WAN Destination 
Configure a profile to use the new Non SD-WAN Destination via Gateway. See Configure Profile with Non SD-WAN Destination via Gateway.
Configure Profile with Non SD-WAN Destination via Gateway
Configure the profile to establish a VPN connection between a branch and a Non SD-WAN Destination via Gateway.
Ensure that you have created a Non SD-WAN Destination via Gateway with the required IPsec tunnel parameters. To create a Non SD-WAN Destination via Gateway, see Configure Non SD-WAN Destination via Gateway.
- To establish a VPN connection between a Branch and Non SD-WAN Destination via Gateway, select Enable under Branch to Non SD-WAN Destinations via Gateway.
Figure 8. Enabling the VPN Connection 
Create a Business Policy to route the traffic from the Non SD-WAN Destination tunnel to Netskope portal. See Create Business Policy for Non SD-WAN Destination.
Create Business Policy for Non SD-WAN Destination
After you establish a VPN connection between a branch and a Non SD-WAN Destination via Gateway, create a Business Policy to route the traffic from the Non SD-WAN Destination tunnel.
Ensure that you have established the VPN connection between branch and Non SD-WAN Destination via Gateway. See Configure Profile with Non SD-WAN Destination via Gateway.
- Enter a name for the business rule.
Figure 9. Business Rule Name 
- In the Match area, select Define and choose Internet as the Destination.
Figure 10. Destination > Internet 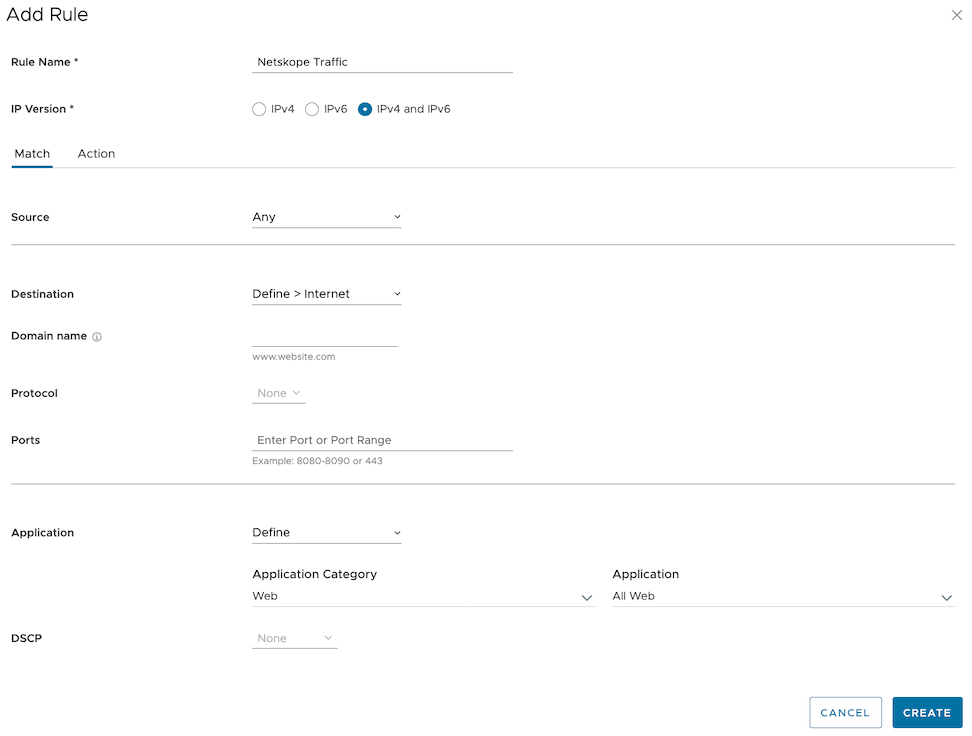
- In the Action area, select Internet Backhaul as the Network Service and choose Non SD-WAN Destination via Gateway and select the Non SD-WAN Destination service created with the Netskope tunnel parameters..
Figure 11. Internet Backhaul 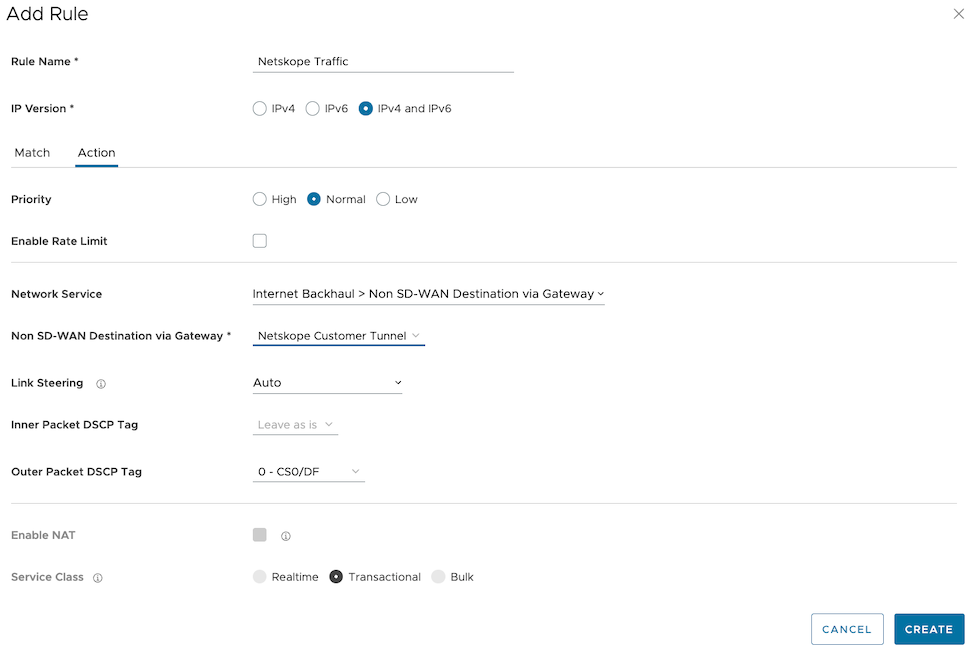
- Choose the other actions as required and select Create.
The Business Policy redirects the Internet destined HTTP/HTTPS traffic to Netskope POP using the IPSEC tunnel. The newly created policy installed at the top and inspected first.
Figure 12. Displaying the Business Rule 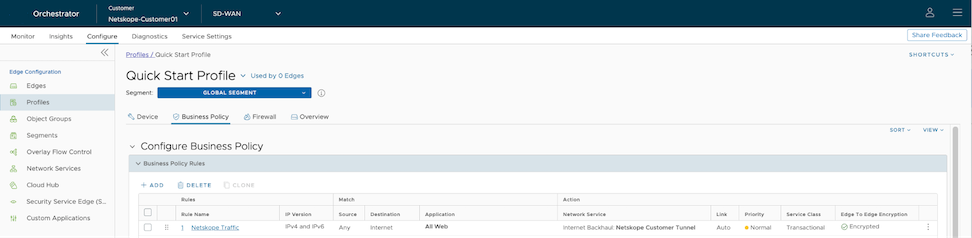
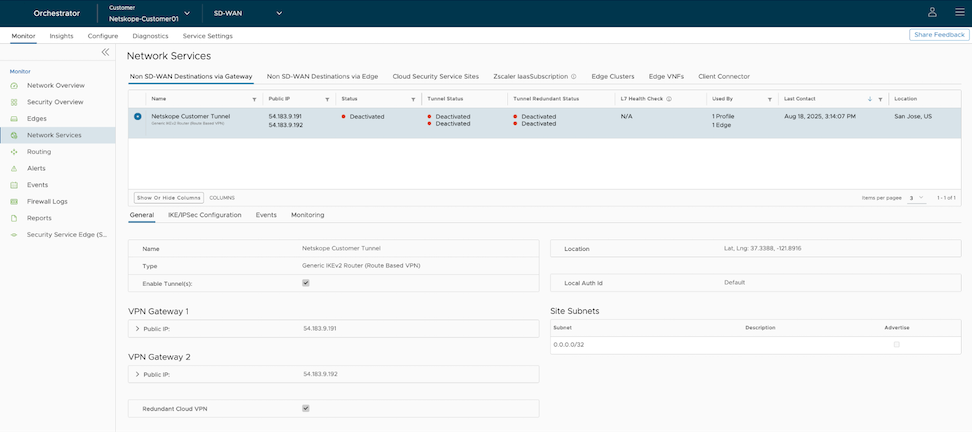
You can verify that the tunnel is online by monitoring the Network Services. See Monitor Non SD-WAN Destination via Gateway.
Monitor Non SD-WAN Destination via Gateway
You can monitor and verify the Non SD-WAN Destination Tunnel configuration using the Monitoring tab.
To monitor the Non SD-WAN Destination Tunnel configuration:
- The Non SD-WAN Destination via Gateway section displays the configured Non SD-WAN Destination along with the status.
Figure 13. Monitoring the Non SD-WAN Destination via Gateway