Setting Up CVP

Note: Single-Node is not recommended for production deployments.

Pre-installation Checklist

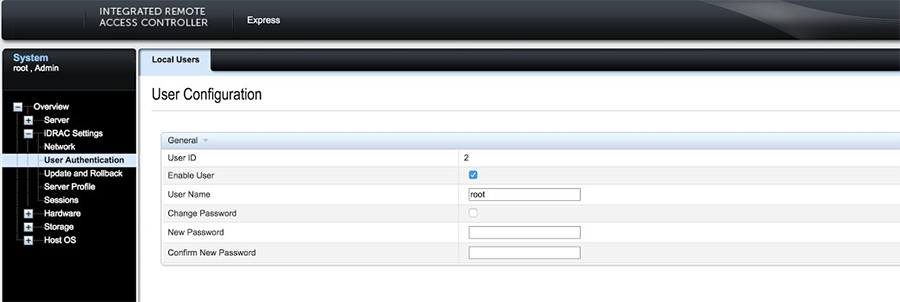
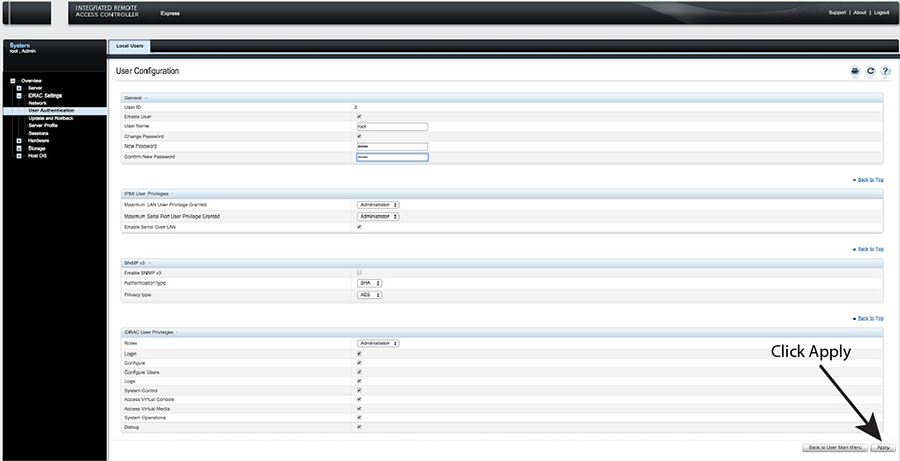
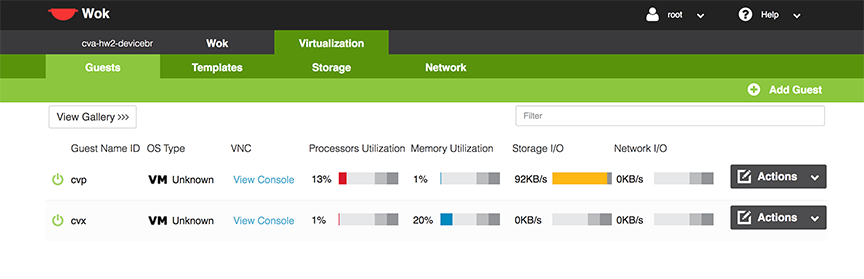
  • Ensure that you have console access to the CVP virtual machine on each appliance, via WOK web access. See Web Access into CVX and CVP Consoles via WOK.
  • Enter the CVP Console.
  • Ensure all configurations are done via console and not via SSH.
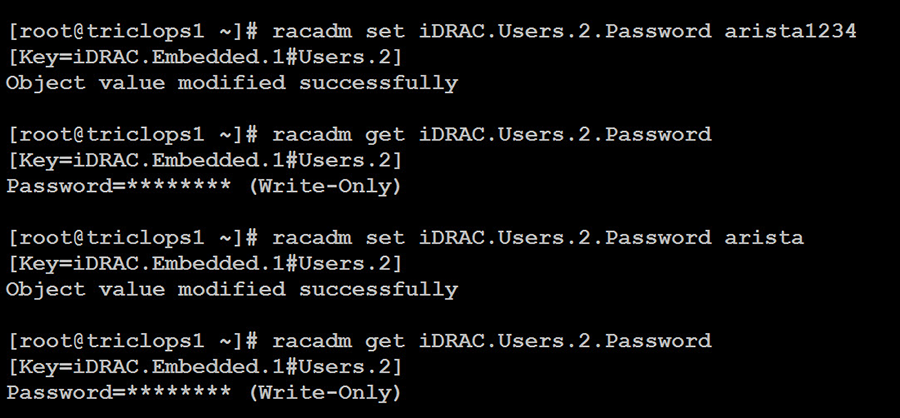
Note: This configuration will change the IPs and will drop connectivity if done over SSH.

Setup Steps for Single Node CVP

To set up single node CVP, complete the following steps.

  1. Access the primary CVP VM via WOK.
  2. Refer to the CloudVision Configuration Guide for the Shell-Based Configuration of a Single-Node.

Setup Steps for Multi-node CVP Cluster

Assign to each of the three CVP VMs a role (primary, secondary or tertiary).

  • The roles may be assigned in any way, but the roles must be kept consistent throughout the installation. No two nodes may share the same role.
  • Maintain the installation order starting with primary, then secondary, and finally tertiary.

To assign the roles, complete the following steps.

  1. Print the CloudVision Worksheet. Circle the role of each appliance: one primary (P), one secondary (S), and one tertiary (T).
  2. Access the primary, secondary, and tertiary CVP VMs on the respective appliance via WOK.
  3. Refer to the CloudVision Configuration Guide for the Shell-Based Configuration of Multi-Node.

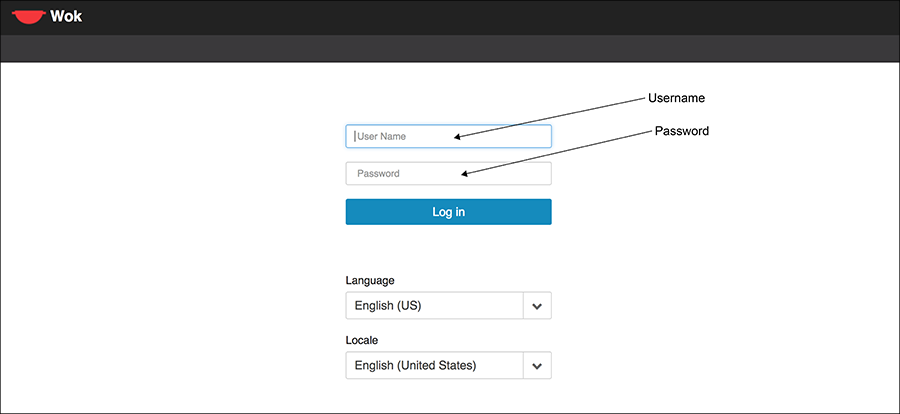
Log into the CVP Web Interface

After CVP is running on the multi-node appliance cluster, enter the CVP Web Interface of the primary node via its CVP IP/Hostname with default username/password of cvpadmin/cvpadmin to set the password.

For Multi-node clusters, setting the password only has to be done on one node, and is synced to other nodes so subsequently any node can be accessed via its web interface. Refer to the CloudVision Configuration Guide for instructions on using CVP.

Site Selection

Read the safety instructions in your Safety, Environmental, and Regulatory Information booklet before you begin.

The following criteria should be considered when selecting a site to install the appliance:

  • Before you begin, review the safety instructions located at https://www.arista.com/en/support/product-documentation.
  • Begin installing the rails in the allotted space that is closest to the bottom of the rack enclosure.
  • Other Requirements: Select a site where liquids or objects cannot fall onto the equipment and foreign objects are not drawn into the ventilation holes. Verify these guidelines are met:
    • Clearance areas to the front and rear panels allow for unrestricted cabling.
    • All front and rear panel indicators can be easily read.
    • Power cords can reach from the power outlet to the connector on the rear panel.
Note: All power connections must be removed to de-energize the unit.
Note: This unit is intended for installation in restricted access areas.

Operating System Installation and Application Setup

This chapter contains the following topics:

iDRAC

Web Access into iDRAC (System IPMI)

iDRAC is supported on the following browsers:

  • Mozilla Firefox
  • Google Chrome

On the management station, open the Web browser and connect to the iDRAC7 using: https://<hostname or IP of iDRAC>.

For example: https://192.168.0.120.

The Login page appears.

Figure 1: iDRAC Login Page


Login using the default username and password, which are:

  • Username: root
  • Password: arista
Note: Both the username and password are case sensitive.

Updating the Host Password

You can directly update or change a password using the following method.

  1. Enter your login credentials.

    Default Username: root

    Default Password: arista

  2. Running passwd with no options will change the password of the account running the command. You will first be prompted to enter the account's current password:
    [root@cv ~]# passwd
  3. You will be asked to enter a new password.
  4. Enter the same password again, to verify it.
  5. If the passwords match, the password will be changed.
    passwd: all authentication tokens updated successfully.
    [root@cv ~]#

Changing the iDRAC Password

Two options are available to change the iDRAC password:

Changing the Password through the iDRAC Web Interface

To change the password through the iDRAC web interface, complete the following steps.

  1. Under "iDRAC Settings", go to User Authentication. The User Authentication page appears.
    Figure 2: User Authentication Page

  2. Click the User ID number of the root account. The Configure User radio button should already be checked.
  3. Click Next. The page appears, showing options for changing passwords.
    Figure 3: Changing the Password

  4. Select the Change Password checkbox.
  5. Enter the new password in the New Password and Confirm New Password boxes.
  6. Click Apply to apply the password change.
    Figure 4: Apply the Password Change

  7. Logout, and then login through the iDRAC GUI to verify the change.

Changing the Password through the CLI

Complete the following steps to reset the iDRAC password using the racadm command line tool.

  1. Telnet or SSH into the Host IP.
  2. Execute the following commands to change the iDRAC password.

Web Access into CVX and CVP Consoles via WOK


Figure 5: Accessing the CVX and CVP Consoles
Note: If your web browser's popup blocker is turned on, it may prevent you from being able to view the page.


To access the console ports for your CVP and/or CVX applications:

  1. Open your browser to https://<CVA hostname or IP address>:8001.
  2. Enter in your login credentials.

    Default Username: root

    Default Password: arista

  3. Select the Guests tab in the GUI menu.
    Figure 6: Accessing the CVX and CVP Consoles via WOK
  4. Click on View Console to open the console for the respective CVP or CVX application.

Web Access into Host via WOK

On the management station, open your Web browser and connect to URL: https://<CVA hostname or IP address>:8001. Login through the Wok Login Page.

iDRAC is supported on the following browsers:

  • Mozilla Firefox
  • Google Chrome

Default username and password:

  • Username: root
  • Password: arista
Note: Both the username and password are case sensitive.
Figure 7: WOK Login Page


Web Access into CVX and CVP consoles via WOK.

Figure 8: Accessing the CVX and CVP Consoles via WOK

Using the CLI to Access the Appliance

To copy and paste a configuration, complete the following steps.

  1. Login to the appliance using ssh or console as root.
  2. Use the following commands.
    virsh console cvp --force
    virsh console cvx --force

CloudVision Appliance Access

This section contains the following topics:

CloudVision Appliance IP Configuration

The CloudVision Appliance Host and iDRAC IP addresses can be allocated in either of two ways:

Option 1: Using an available DHCP server

Option 2: Manual configuration (Requires terminal connected to VGA port)

DHCP Based IP Address Setup

iDRAC IP Address

Using the iDRAC MAC from Locate the MAC Addresses for the CloudVision Appliance, input an entry into the DHCP Server for the corresponding iDRAC IP address mapping to that MAC.


Host IP Address

Using the HOST NIC1 MAC from Locate the MAC Addresses for the CloudVision Appliance, input an entry into the DHCP Server for the corresponding HOST IP address mapping to that MAC.

Turn the system on by pressing the power button located on the front of the system.

Manual IP Address Setup

Note: Direct IP Address Setup requires a terminal connected to the VGA port of the appliance. This section can be skipped if the Host and iDRAC IP addresses have been configured with a DHCP server.

iDRAC IP Address

The iDRAC IP address can be manually configured via the host's bash shell using the racadm tool.

The racadm commands below are sequence dependent and must be entered in the following order.

  1. Using the attached terminal and keyboard, log in as user “root” and with default password “arista”.
  2. Disable all iDRAC related DHCP configuration.
    racadm set iDRAC.IPv4.DHCPEnable 0
    racadm set iDRAC.IPv4.DNSFromDHCP 0
    racadm set iDRAC.NIC.DNSDomainFromDHCP 0
  3. Configure the IP network settings for the iDRAC interface.
    racadm set iDRAC.NIC.Enable 1
    racadm set iDRAC.IPv4.Address <iDRAC-IP>
    racadm set iDRAC.IPv4.Netmask <iDRAC-MASK>
    racadm set iDRAC.IPv4.Gateway <iDRAC-GW>
  4. Configure the DNS settings for the iDRAC interface.
    racadm set iDRAC.IPv4.DNS1 <iDRAC-DNS1>
    racadm set iDRAC.IPv4.DNS2 <iDRAC-DNS2>
    racadm set iDRAC.NIC.DNSRacName <iDRAC-NAME>
    racadm set iDRAC.NIC.DNSDomainName <iDRAC-DOMAIN.NAME>
  5. Verify the configuration by running the following command.
    racadm getSysInfo

Host IP Address

The host IP address can be manually configured by using the host's bash shell. In order for the settings to be persistent, the following configuration must be completed.

  1. Configure the network settings by editing the /etc/sysconfig/network-scripts/ifcfg-devicebr file.
    DEVICE=devicebr
    NAME=devicebr
    TYPE=Bridge
    ONBOOT=yes
    BOOTPROTO=none
    IPADDR=<ip address here>
    NETMASK=<subnet mask here>
    GATEWAY=<gateway ip address here>
    DELAY=0
    USERCTL=yes
    NM_CONTROLLED=no
  2. Configure the DNS settings by editing the /etc/resolv.conf file.
    nameserver <dnsServerIP-1>
    nameserver <dnsServerIP-2>
    search <domain1> <domain2>
  3. Restart the networking service for the changes to take effect.
    service network restart

CloudVision Physical Appliance Setup

You may need the following items to perform the procedures in this section:

  • Key to the system key-lock.
  • #1 and #2 Phillips screwdriver.
  • Wrist grounding strap connected to ground.
  • Rack mount kit instructions located in the shipping box.

Before Working Inside your System

Follow these safety guidelines: Safety Information.

  1. Turn off the system, including all attached peripherals.
  2. Disconnect the system from the electrical outlet and disconnect the peripherals.
  3. Remove the system cover.

Front Bezel

Complete the following tasks to remove the front bezel.

Figure 1: Front Bezel

  1. Unlock the key-lock at the left end of the bezel.
  2. Lift the release latch next to the keylock.
  3. Rotate the left end of the bezel away from the front panel.
  4. Unhook the right end of the bezel and pull the bezel away from the system.

Locate the MAC Addresses for the CloudVision Appliance

The information tag is a slide-out label which contains system information such as Service Tag, NIC, MAC address for your reference. Record the MAC addresses in the CloudVision Worksheet.


Figure 2: Locating MAC Address of your System

 
1 - Information tag (front view) 2 - Information tag (back view)
3 - OpenManage Mobile (OMM) label 4 - iDRAC MAC address and iDRAC secure password label
5 - Service Tag  

Back Panel Ethernet Connections

On the back panel of the CloudVision appliance, locate the Ethernet Integrated 10/100/1000 Mbps NIC connectors.

Figure 3: Back Panel

Figure 4: Subnet 1 and Subnet 2 Configuration


iDRAC is an Intelligent Platform Management Interface (IPMI) that provides a GUI-based out-of-band interface for monitoring the hardware appliance.

Record the IP address and Hostname information in CloudVision Worksheet.

Note: iDRAC may also be referred to as Lifecycle Controller.

DNS Entries

In order to manage your CloudVision cluster, it is often easier to connect to them by hostname as opposed to IP address. Fully qualified domain names (FQDNs) should be allocated to:

  • Each of the CloudVision Appliance host machines.
  • Each of the CloudVision Appliance iDRAC interfaces.
  • Each of the CloudVision Portal (CVP) nodes.
  • Each of the CloudVision Server (CVX) nodes.

Contact your DNS zone administrator for assistance.

Setting up Your System

Complete the following steps to set up your system:

  1. Unpack the system.
  2. Remove the I/O connector cover from the system connectors.
    Note: While installing the system, ensure that it is properly aligned with the slot on the enclosure to prevent damage to the system connectors.
  3. Install the system in the enclosure.
  4. Turn on the enclosure.
    Note: Wait for the chassis to initialize before you press the power button.
  5. Press the power button on the system.

    Alternatively, you can also turn on the system by using:

    • The system iDRAC. For more information, see Web Access into iDRAC (System IPMI).
    • The enclosure Chassis Management Controller (CMC), after the system iDRAC (IPMI) is configured on the CMC.

Electrostatic Discharge (ESD) Precautions

Observe these guidelines to avoid ESD damage when installing or servicing the appliance.

  • Assemble or disassemble equipment only in a static-free work area.
  • Use a conductive work surface (such as an anti-static mat) to dissipate static charge.
  • Wear a conductive wrist strap to dissipate static charge accumulation.
  • Minimize handling of assemblies and components.
  • Keep replacement parts in their original static-free packaging.
  • Remove all plastic, foam, vinyl, paper, and other static-generating materials from the work area.
  • Use tools that do not create ESD.