Add a Custom Route Table Entry

Describes how to add a custom route entry in a custom route table.

Ensure you have created a VPC and VSwitches. For steps, see Create a Virtual Private Cloud and Create a VSwitch.

Ensure you have a custom route table associated with a VSwitch. For steps, see Create Custom Route Tables and Associate VSwitches.

  1. Log on to the VPC console.
  2. In the left-side navigation pane, select Route Tables.
  3. On the Route Tables page, find the target route table, and then select Manage in the Actions column.
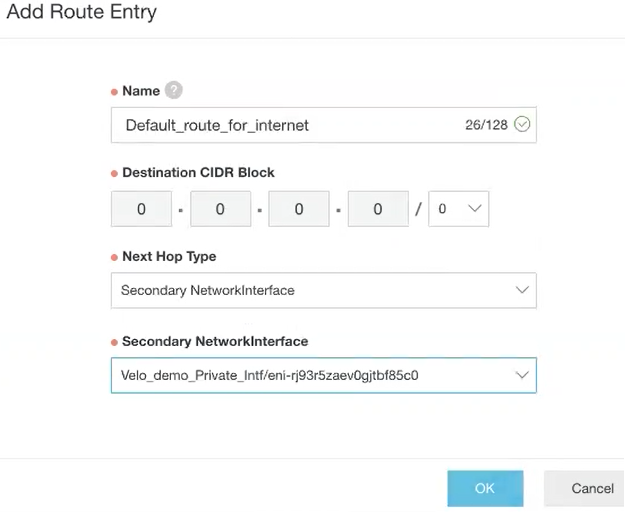
  4. In the Route Table Details area, select Route Entry List tab, and then select Add Route Entry. The Add Route Entry page appears.
    Figure 1. Add Route Entry
  5. In the Name text box, enter the unique name for the route entry.
  6. In Destination CIDR Block, specify the destination CIDR block address.
  7. From the Next Hop Type drop-down menu, select the next hop interface type, for example, Secondary Network Interface, and then select the interface.
  8. Select OK.