Management and Control Plane Security
This chapter describes options for increasing the security of management access to the DMF Controller node.
Management Plane Security
The management plane network is used by the administrator, whether locally or remotely, to reach the Controller management interfaces. DANZ Monitoring Fabric (DMF) uses standard, well-known cryptographic technology, such as RSA and AES. Still, system administrators must choose strong passwords and change them frequently, according to well-established security best practices.
All services the Controller uses are enabled by default except for SNMP, which is disabled by default. Refer to the Protocol Access Required to the DMF Controller section to block or permit specific protocols to the management interface.
For example, the control plane is the network between the Controllers and the switches to carry OpenFlow control traffic. The following are general requirements and recommendations for deployment:
- The Controller must be on the same Layer 2 network as the switches—physically isolated data, control, and management plane networks.
- The only devices on the control plane are switches and Controllers.
- Make the control plane network not routed or minimally IP access restricted via its egress router.
- Physically secure the management and data plane networks (for example, locks on the cage doors).
Many of the Zero-Touch Networking (ZTF) protocols (DHCP, Controller discovery, and image download) and the OpenFlow protocol are not authenticated. They are subject to spoofing in an untrusted network. The following are best practices regarding securing the control plane within the switched fabric.
- The control plane network is “Layer 2 trusted,” meaning the attacker cannot spoof Layer 2 messages on the control network. In practice, this means the control plane network should be an isolated VLAN, ideally containing only the Controller and switches.
- Harden the switch management interface against Layer 3 attacks (all services are authenticated, unnecessary services are turned off, and so forth).
- The network should not be reachable by Layer 3 protocols. If Layer 3 access is required, the administrator should maintain a Layer 3 allowlist of hosts that can access the control network, for example, using an ACL on the edge router.
Importing the Controller Private Key and Certificate
This section describes how to import a private key and a certificate to the Controller after copying it to the Controller using the copy command.
root@Ubuntu-12:~/openssl-ca/admin/pkcs1# openssl rsa -in ../pkcsl.key -out decrypt-pcsl.key
Enter pass phrase for ../pkcsl.key: ********
writing RSA key
root@Ubuntu-12:~/openssl-ca/admin/pkcs1#
private-key command in the config-controller submode:
[no] private-key <controller-key-name>
Replace controller-key-name with the name of the private key. Use the no version of the command to remove the private-key.
[no] certificate <name>
Replace the name with the name assigned to the Controller certificate. Use the no version of the command to remove the certificate.
Import the private key and certificate to the Controller using the copy command.
Using Certificates Signed by a CA for GUI Access to the Controller
Procedure
Replacing the Certificate
Scenario 1: Using the same CSR used to sign the current certificate.
Obtain a newly signed certificate from CA using the same CSR and copy it to the Controller using the following command:
# copy new certificate from the source cert://For example:
# copy scp://This email address is being protected from spambots. You need JavaScript enabled to view it./root/openssl-ca/certificate.pem cert:// This email address is being protected from spambots. You need JavaScript enabled to view it. password certificate.pem 6.49KB - 00:00 #No other action is needed as the current certificate will be overwritten when copying the new one.
Scenario 2: Does not have the same CSR for the current certificate.
- Generate a new CSR and the private key.
- Sign the CSR to get the new certificate.
- Import/copy the certificate to the Controller. The current certificate will be overwritten if the Common Name matches the new one.
- Import/copy the new private key to the Controller. The private key will be overwritten if the file name is the same as the old one. In that case, there is no need for any config changes.
C1(config)# controller
C1(config-controller)# no certificate certificate name
C1(config-controller)# no private-key private-key name
C1(config-controller)#
C1(config)# controller
C1(config-controller)# certificate new certificate name
C1(config-controller)# private-key new private-key name
C1(config-controller)#
Manage Certificates and Private Keys in the DMF UI
Please use the following steps to manage certificates and private keys in DMF.
Overview
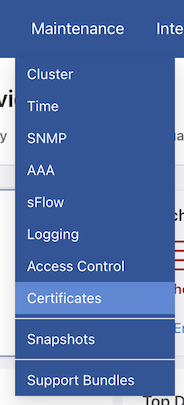
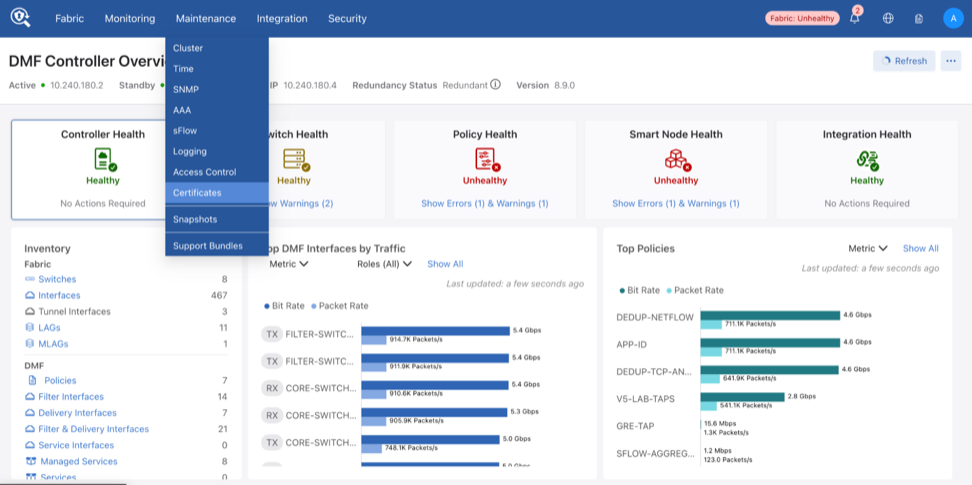
Navigate to Maintenance → Certificates and select Certificates.

Certificates
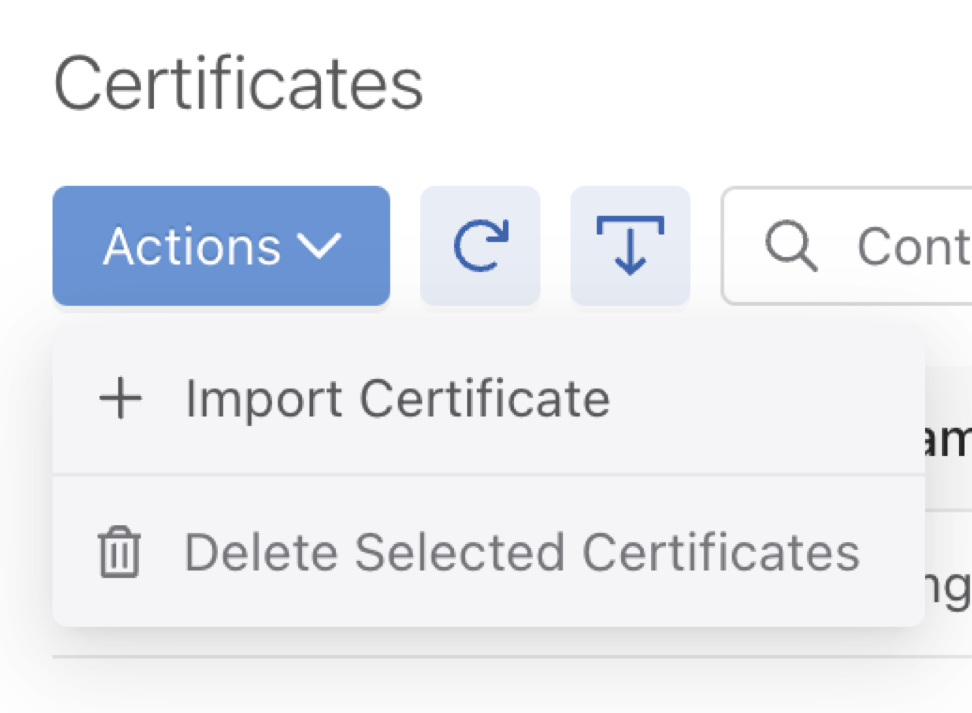
DMF displays a list of available certificates and features to manage the certificates, including search, certificate import, deletion, data export, and filtering by column.

To delete individual certificates, select Delete on the row action menu, followed by Yes.

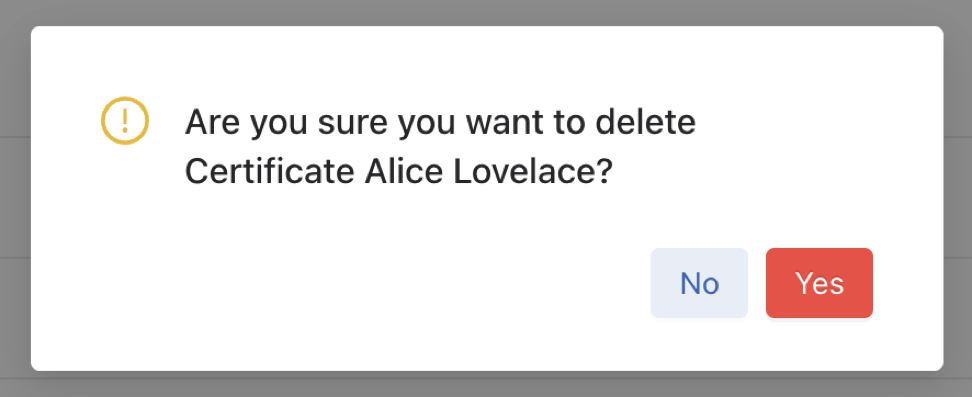
Table Actions:
-
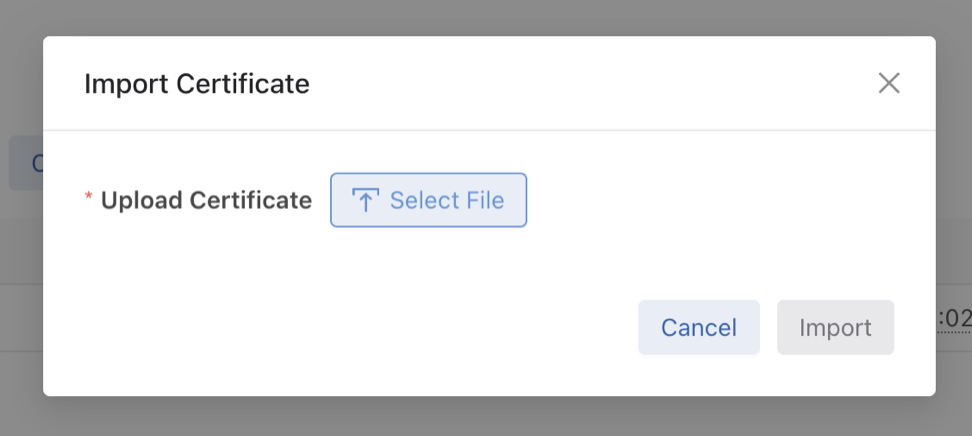
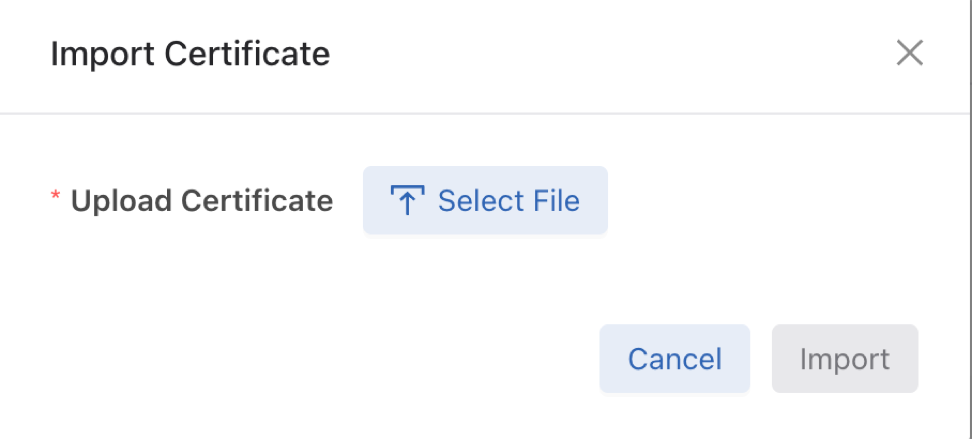
Import Certificate: To import a certificate, use Select File, choose the file, and click Import.
- Delete Selected Certificates: Select a table row checkbox to delete the specific certificates, followed by Yes to confirm the deletion.

Private Keys
DMF displays a list of available private keys and features to manage the private keys, including search, private key import, deletion, data export, and filtering by column.

To delete private keys, select Delete on the row action menu, followed by Yes.

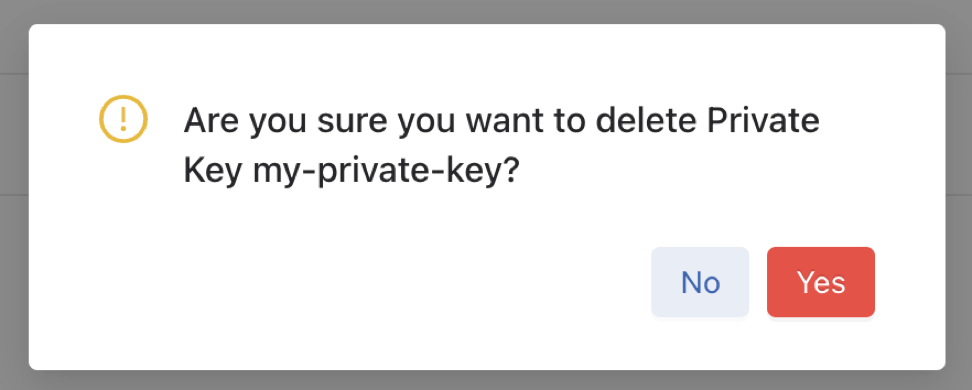
Table Actions:
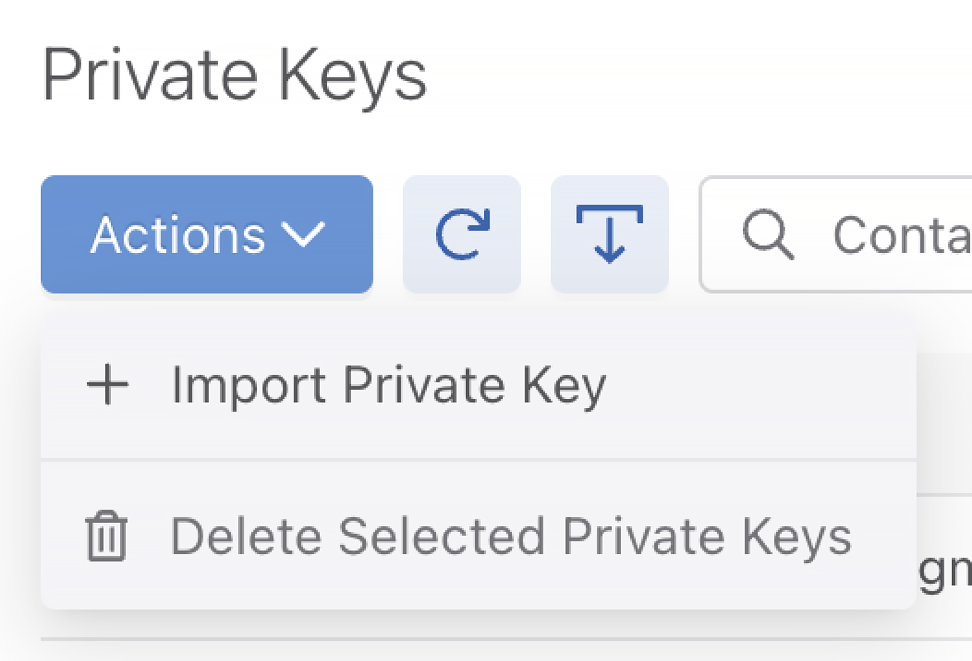
-
Import Private Key: To import a private key, use Select File, choose the file, enter the name, and click Import.
Figure 13. Import Private Key Window 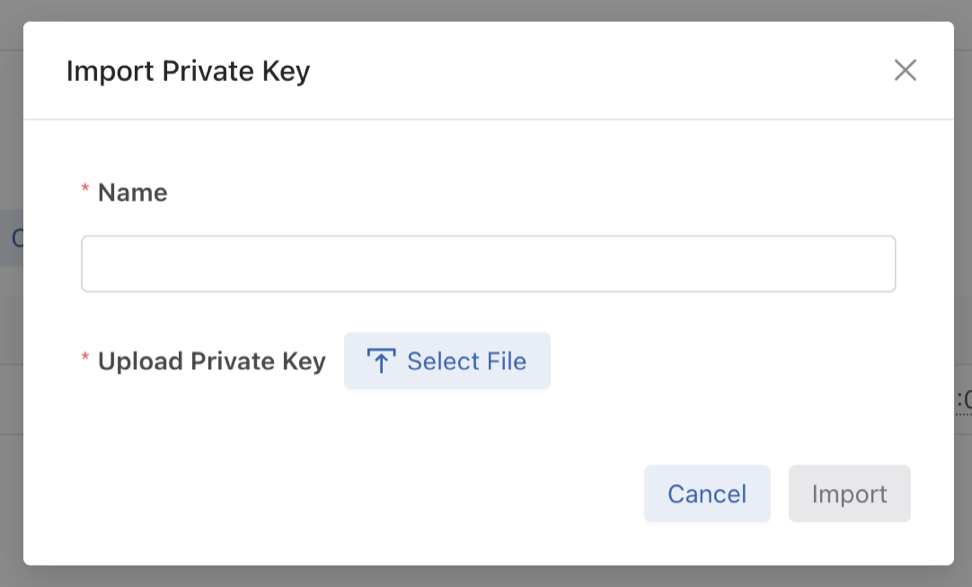
- Delete Selected Private Keys: Select a table row checkbox to delete the specific private keys, followed by Yes to confirm the deletion.
Figure 14. Confirmation Window 
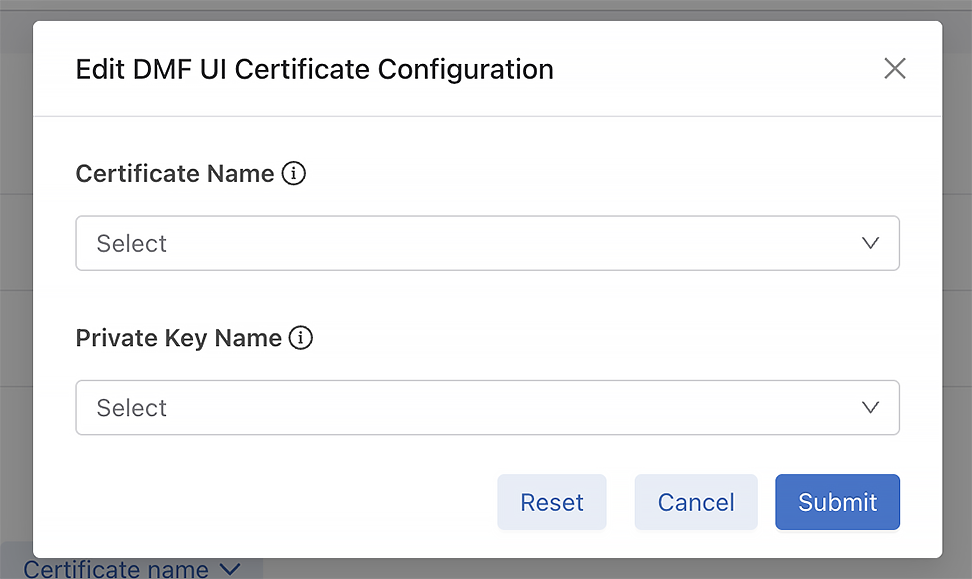
DMF UI Certificate

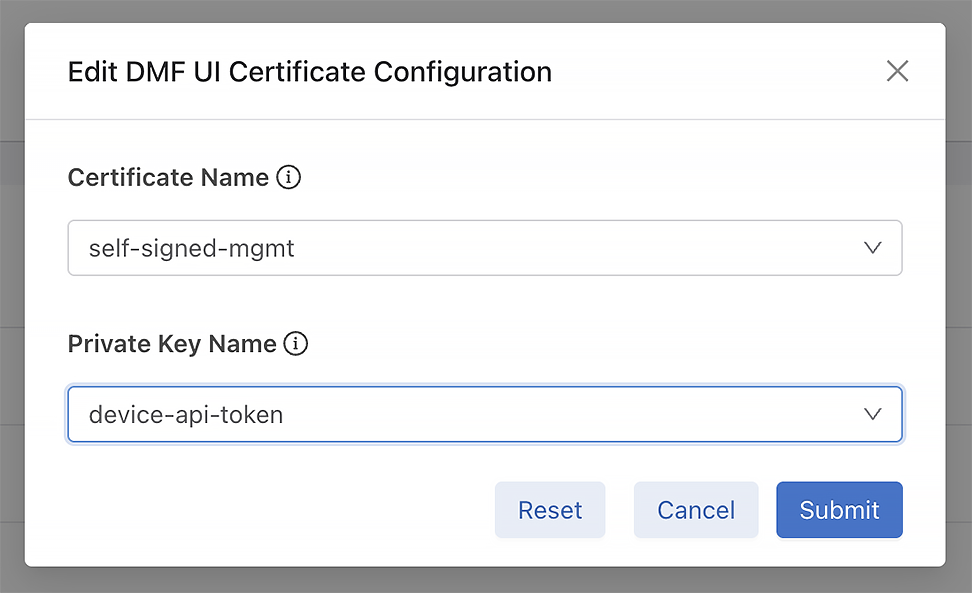
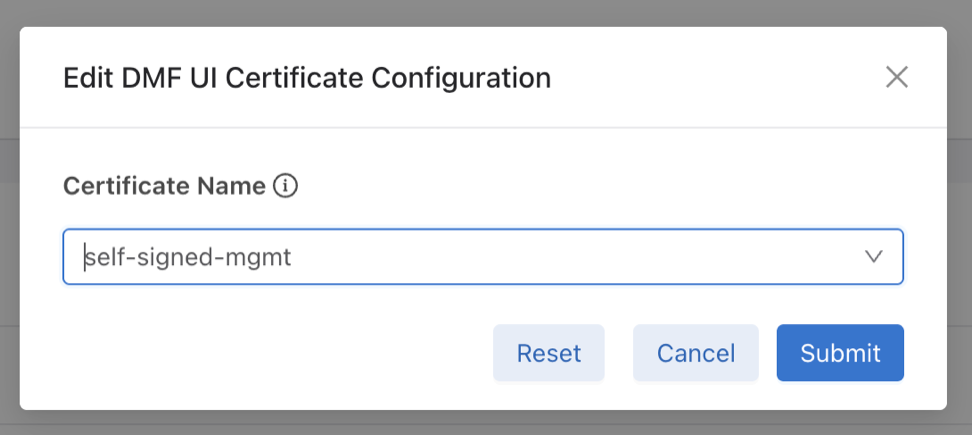
To configure DMF UI certificates, use the Edit button. Choose the Certificate Name and Private key Name, followed by Submit.

Generate Public/Private Keys and CSRs on DMF Appliances
Procedure
Install a new TLS certificate by following these steps:Securing DMF Appliance Communications Using Custom Certificates
Configuration Summary
To secure appliance communications using custom certificates, follow this general workflow:
-
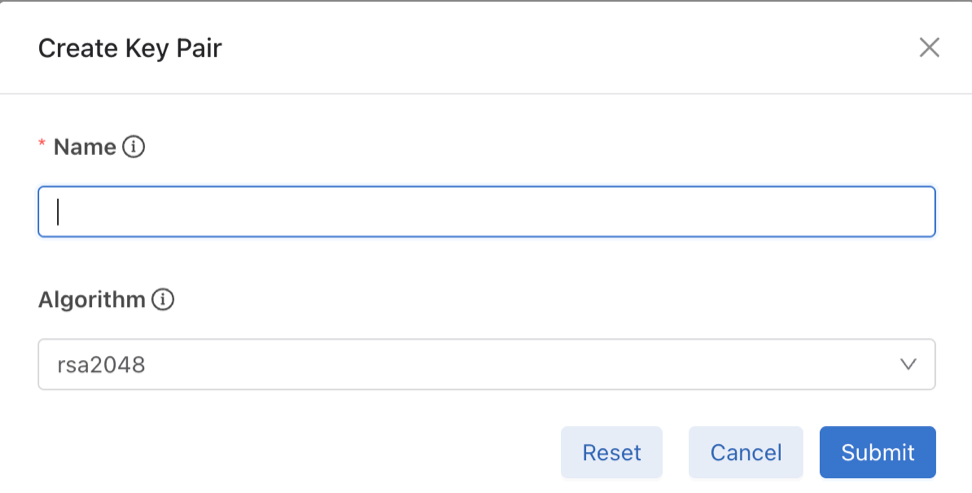
Generate Key Pair: Create a unique public/private key pair on the appliance.
-
Create CSR: Generate a Certificate Signing Request (CSR) linked to the generated public key.
-
Sign Certificate: Export the CSR content and submit it to the Certificate Authority (CA) for signing.
-
Import Certificate: Upload the signed certificate returned by the CA to the appliance.
-
Apply Configuration: Update specific system services (such as the Controller UI, Syslog, or RADIUS) to use the new certificate by referencing its SHA256 fingerprint.
CLI Configuration
Create Public/Private Key Pairs
Generate key pairs using the create key-pair command.
# create key-pair mykeyname rsa3072
Fingerprint           : 37:4E:2F:82:08:45:88:C6:2D:6B:43:FD:73:EC:9A:08:CF:8C:41:E2:62:1A:DB:3E:19:34:CB:18:7C:5B:07:F7
Fingerprint algorithm : sha256
Name                  : test-key
Parameters
-
Nickname (Required): A unique name associated with the key pair (e.g.,
mykeyname). Duplicate nicknames trigger an error. -
Algorithm (Optional): Specifies the encryption algorithm and key size. If omitted, the default is
rsa2048. -
RSA:
rsa2048,rsa3072,rsa4096 -
Elliptic-Curve DSA:
ecdsa256(P-256),ecdsa384(P-384),ecdsa521(P-521)
Example Output
Output Details
-
Fingerprint: The SHA256 hash of the newly created public key.
-
Fingerprint algorithm: Always displays
sha256. -
Name: The unique nickname assigned to the key pair.
self-signed-mgmt and device-api-token. Do not use these names for new key pairs.Show Public Keys
Display all public keys present on the appliance using the show
public-key command.
# show public-key # Name Algorithm Fingerprint -|----------------|---------|-----------------------------------------------------------------------------------------------| 1 self-signed-mgmt sha256 7A:9C:F3:BE:79:BB:A2:C1:9F:03:4C:BD:93:EA:12:9B:5A:6A:82:85:24:26:25:B7:F0:5F:B3:F6:B9:A5:90:48 2 test-key sha256 69:92:63:DA:C7:F9:B4:91:BD:92:3F:D3:87:14:4E:B0:88:DB:42:42:DF:0A:D5:33:3C:32:95:32:A7:78:E3:B0 # show public-key 7A:9C:F3:BE:79:BB:A2:C1:9F:03:4C:BD:93:EA:12:9B:5A:6A:82:85:24:26:25:B7:F0:5F:B3:F6:B9:A5:90:48 Name : self-signed-mgmt Algorithm : sha256 Fingerprint : 7A:9C:F3:BE:79:BB:A2:C1:9F:03:4C:BD:93:EA:12:9B:5A:6A:82:85:24:26:25:B7:F0:5F:B3:F6:B9:A5:90:48
Delete Private/Public Key Pair
Delete a key pair via the CLI using the delete
public-key command.
# delete public-key 37:4E:2F:82:08:45:88:C6:2D:6B:43:FD:73:EC:9A:08:CF:8C:41:E2:62:1A:DB:3E:19:34:CB:18:7C:5B:07:F7
Procedure
-
Retrieve Fingerprint: Identify the target key's SHA256 fingerprint using the
show
public-key
command. -
Execute Deletion: Run the delete public-key command with the specific fingerprint.
Create Certificate Signing Request
Generate the Certificate Signing Request (CSR) using the create
csr command.
# create csr mycn.com 37:4E:2F:82:08:45:88:C6:2D:6B:43:FD:73:EC:9A:08:CF:8C:41:E2:62:1A:DB:3E:19:34:CB:18:7C:“Arista Inc.” “Customer Service” “Santa Clara” California US san-ip “1.1.1.1,2.2.2.2” san-dns “cs.mycn.com,en.mycn.com” certificate-purpose webserver digest sha256
Content : -----BEGIN CERTIFICATE REQUEST-----
MIIEMDCCApgCAQAwfDERMA8GA1UEAwwIbXljbi5jb20xFDASBgNVBAoMC0FyaXN0
YSBJbmMuMRkwFwYDVQQLDBBDdXN0b21lciBTZXJ2aWNlMRQwEgYDVQQHDAtTYW50
YSBDbGFyYTETMBEGA1UECAwKQ2FsaWZvcm5pYTELMAkGA1UEBhMCVVMwggGiMA0G
CSqGSIb3DQEBAQUAA4IBjwAwggGKAoIBgQDzBygBEa30Zq0PywZmi+IQcNJ4I8IP
tJVMQxK0ynjqTWrDcjolIA9GuoFHEtIfA2+ja3xvoFRXIFMyVUuITLkwhhZeEOUP
kyD61WPNX+DUg4ANpYW/nu2LGjQtbz24iS6In3Udi2Nvh1pn+8uM3p//GsMy7kK0
jwRHKmB9UynXFoaVkMF6XjxAJ4/n4+ck2inP29BW+q1hPlpjiXwLVmVPTpDNvAXE
H/+3zk4t8PTUlMD7xoFHghx7moV3R5A6cIT21wFae9VjjY78B6PcaP4pzZ5VV05B
aJ89559W2Mzd0HjMEv8OhkNV+xFBy6eyh6tT/FgxR7PceNzt7BwkNQ/zCIgqDv+z
NqzymK+T96sXtxrywlyVJWJmNwilqJeYVcRQ7bqItzq59OS4g0m41hi4O6IBIbZG
ngKB9g6RdXjb5oN5XGfnilCCGkq6v3f75nkPhJB4fyVvkNJWy7svNxGEbgIRHXt8
xzrIy/Qy3i8nQMw3aPVarM2UhcYlwWT8e2UCAwEAAaBvMG0GCSqGSIb3DQEJDjFg
MF4wLwYDVR0RBCgwJocEAQEBAYcEAgICAoILY3MubXljbi5jb22CC2VuLm15Y24u
Y29tMAkGA1UdEwQCMAAwCwYDVR0PBAQDAgOoMBMGA1UdJQQMMAoGCCsGAQUFBwMB
MA0GCSqGSIb3DQEBCwUAA4IBgQBUMqrUgKw6pDK4uE8lhjSArdxx5QkRwJdvszWj
WS6Tb+p6qs5yDcp4KJyxcGoyn2tp33C06AhRvAZ+ZQgsz+4wHH06b5FxtDKVBLv5
SWR9GEn8u5ZOhACUNKNh1tAAQOyLyoFKwBvFQ6IaWP8YICeXO3Jg6+uzinpN3DQx
yS8Z1nJ6c2FkjiPYHWmAaWib7iBMEnFvqkrfoFXvZBIwLV4nFYq3ZfcRlL7oQFRg
hNougNuW/KKgJ+S95RJCLnqEgmm5XhIcgXTZU262wF0ctdt3Jzpwbwvf6VnMRjMr
whxt+2wsqqqWYty0MxgTbqpqjy4nSw6eSh36NvsdA9ExCxaj24LEHomfZlRHzLl/
C5HHAeplJ8l79cDlGThnjz1qU+iRfccuqw2JSCiqUo2zMy41y+Fr38jAF7vv4RwU
xC63pe+haiVcx1H6MNgHJgGTe+tjoPvo3wpQyt9W09vXwH9Y0j6/YAWH53qFz7El
rKLrNMjwaarJrE4hv+BUC1UV/ZQ=
-----END CERTIFICATE REQUEST-----
Fingerprint :
69:CB:DD:49:7D:64:FF:DE:EA:C4:C6:E2:C9:03:E6:ED:74:A
3:49:44:88:5E:98:0D:AE:C3:46:77:0F:8B:55:69
Fingerprint algorithm : sha256
Name : mycn.com
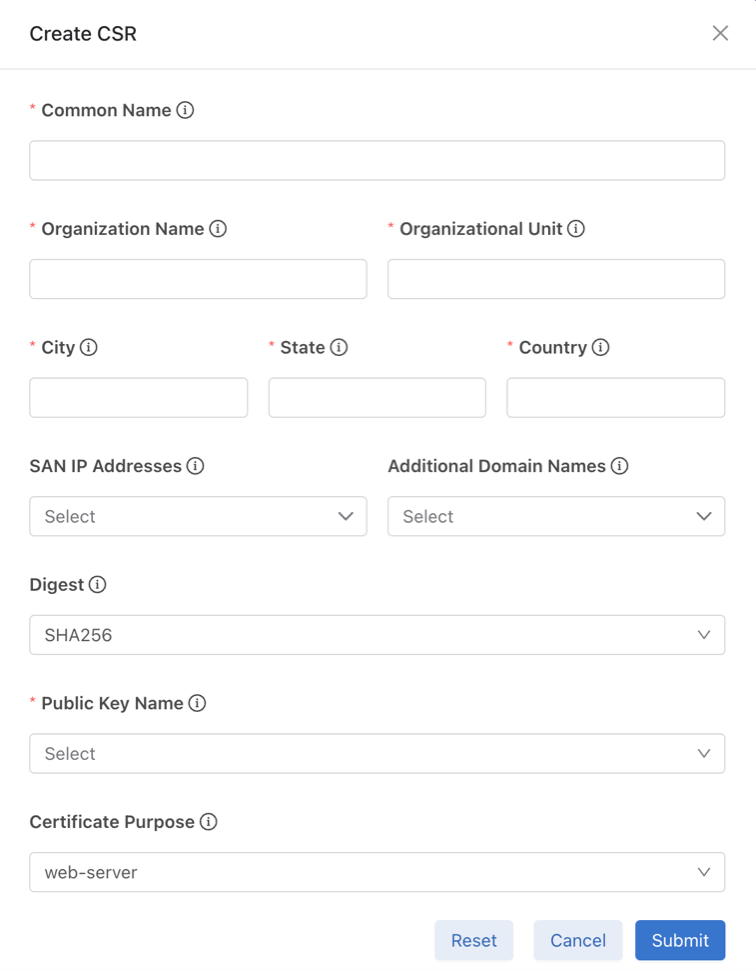
Input Parameters
The input requires a JSON object containing the following fields:
-
cn(Common Name): Requires a valid domain name. -
org(Organization): The legal name of the organization. -
ou(Organization Unit): The division or department within the organization. -
city: The city or locality name. -
state: The state or province name. -
country: The two-letter ISO country code. -
san-ip: A list of IPv4 or IPv6 addresses to use as Subject Alternative Names (SANs). -
san-dns: A list of domain names to use as Subject Alternative Names (SANs). -
public-key-fingerprint: The fingerprint of the previously created public key. -
certificate-purpose: Defines the Key Usage and Extended Key Usage for the certificate. The only supported value isweb-server. -
digest: The signature algorithm. Supported values include:-
sha256 -
sha384 -
sha512
-
Response Fields
The system returns a response with the following fields:
-
fingerprint-algorithm: Always returns sha256. -
fingerprint: The SHA256 fingerprint of the generated CSR. -
name: The Common Name (CN) of the CSR. -
content: The CSR content in PEM format. Copy this content to the Certificate Authority (CA) to request a signed certificate.
Show Certificate Signing Requests
Display all Certificate Signing Requests (CSRs) present on the appliance using the show csr command.
# show csr
# Name     Algorithm Fingerprint
-|--------|---------|-----------------------------------------------------------------------------------------------|
1 mycn.com sha256    69:CB:DD:49:7D:64:FF:DE:EA:C4:C6:E2:C9:03:E6:ED:74:A3:49:44:88:5E:98:0D:AE:C3:46:77:0F:8B:55:69

# show csr 69:CB:DD:49:7D:64:FF:DE:EA:C4:C6:E2:C9:03:E6:ED:74:A3:49:44:88:5E:98:0D:AE:C3:46:77:0F:8B:55:69
Name        : mycn.com
Algorithm   : sha256
Fingerprint : 69:CB:DD:49:7D:64:FF:DE:EA:C4:C6:E2:C9:03:E6:ED:74:A3:49:44:88:5E:98:0D:AE:C3:46:77:0F:8B:55:69
Content     : -----BEGIN CERTIFICATE REQUEST-----
MIIEMDCCApgCAQAwfDERMA8GA1UEAwwIbXljbi5jb20xFDASBgNVBAoMC0FyaXN0
YSBJbmMuMRkwFwYDVQQLDBBDdXN0b21lciBTZXJ2aWNlMRQwEgYDVQQHDAtTYW50
YSBDbGFyYTETMBEGA1UECAwKQ2FsaWZvcm5pYTELMAkGA1UEBhMCVVMwggGiMA0G
CSqGSIb3DQEBAQUAA4IBjwAwggGKAoIBgQDzBygBEa30Zq0PywZmi+IQcNJ4I8IP
tJVMQxK0ynjqTWrDcjolIA9GuoFHEtIfA2+ja3xvoFRXIFMyVUuITLkwhhZeEOUP
kyD61WPNX+DUg4ANpYW/nu2LGjQtbz24iS6In3Udi2Nvh1pn+8uM3p//GsMy7kK0
jwRHKmB9UynXFoaVkMF6XjxAJ4/n4+ck2inP29BW+q1hPlpjiXwLVmVPTpDNvAXE
H/+3zk4t8PTUlMD7xoFHghx7moV3R5A6cIT21wFae9VjjY78B6PcaP4pzZ5VV05B
aJ89559W2Mzd0HjMEv8OhkNV+xFBy6eyh6tT/FgxR7PceNzt7BwkNQ/zCIgqDv+z
NqzymK+T96sXtxrywlyVJWJmNwilqJeYVcRQ7bqItzq59OS4g0m41hi4O6IBIbZG
ngKB9g6RdXjb5oN5XGfnilCCGkq6v3f75nkPhJB4fyVvkNJWy7svNxGEbgIRHXt8
xzrIy/Qy3i8nQMw3aPVarM2UhcYlwWT8e2UCAwEAAaBvMG0GCSqGSIb3DQEJDjFg
MF4wLwYDVR0RBCgwJocEAQEBAYcEAgICAoILY3MubXljbi5jb22CC2VuLm15Y24u
Y29tMAkGA1UdEwQCMAAwCwYDVR0PBAQDAgOoMBMGA1UdJQQMMAoGCCsGAQUFBwMB
MA0GCSqGSIb3DQEBCwUAA4IBgQBUMqrUgKw6pDK4uE8lhjSArdxx5QkRwJdvszWj
WS6Tb+p6qs5yDcp4KJyxcGoyn2tp33C06AhRvAZ+ZQgsz+4wHH06b5FxtDKVBLv5
SWR9GEn8u5ZOhACUNKNh1tAAQOyLyoFKwBvFQ6IaWP8YICeXO3Jg6+uzinpN3DQx
yS8Z1nJ6c2FkjiPYHWmAaWib7iBMEnFvqkrfoFXvZBIwLV4nFYq3ZfcRlL7oQFRg
hNougNuW/KKgJ+S95RJCLnqEgmm5XhIcgXTZU262wF0ctdt3Jzpwbwvf6VnMRjMr
whxt+2wsqqqWYty0MxgTbqpqjy4nSw6eSh36NvsdA9ExCxaj24LEHomfZlRHzLl/
C5HHAeplJ8l79cDlGThnjz1qU+iRfccuqw2JSCiqUo2zMy41y+Fr38jAF7vv4RwU
xC63pe+haiVcx1H6MNgHJgGTe+tjoPvo3wpQyt9W09vXwH9Y0j6/YAWH53qFz7El
rKLrNMjwaarJrE4hv+BUC1UV/ZQ=
-----END CERTIFICATE REQUEST-----
Delete a CSR
Delete a Certificate Signing Request (CSR) via the CLI using the delete csr command.
# delete csr 37:4E:2F:82:08:45:88:C6:2D:6B:43:FD:73:EC:9A:08:CF:8C:41:E2:62:1A:DB:3E:19:34:CB:18:7C:5B:07:F7
-
Retrieve Fingerprint: Identify the target CSR's SHA256 fingerprint using the
show csrcommand. -
Execute Deletion: Run the
delete csrcommand with the specific fingerprint.
Import a Signed Certificate
After the Certificate Authority (CA) produces a signed certificate, import it onto the appliance using Secure Copy Protocol (SCP) from an external device.
(external)$ scp ./mycert.pem username@10.0.0.1://cert
Import Behavior and Constraints
-
CSR Cleanup: If the imported certificate matches an existing CSR's Common Name and Public Key, the system successfully imports the certificate and removes the pending CSR.
-
Partial Match Error: If an existing CSR matches only the Common Name or only the Public Key (but not both), the system rejects the import and raises an error.
-
Unique Public Keys: Every certificate must use a unique public key. If the imported certificate uses a public key already associated with an existing certificate, the system removes the older certificate.
Show Certificates
Display all certificates present on the appliance using the show certificate command.
# show certificate
# Certificate name Algorithm Fingerprint                                                                                     Not before              Not after
-|----------------|---------|-----------------------------------------------------------------------------------------------|-----------------------|-----------------------|
1 self-signed-mgmt sha256    BA:64:1A:5D:02:B1:3F:34:43:C1:02:B1:CF:7F:4C:7D:AF:99:65:E9:9C:68:75:FE:6A:57:1F:BF:43:42:6E:4C 2025-09-18 20:16:33 UTC 2027-12-18 20:16:33 UTC
2 test-certificate sha256    CA:FD:BF:AB:0D:54:25:59:7A:BE:28:33:A1:BE:B8:FC:0A:77:79:2B:85:97:46:D2:30:4D:C3:94:3B:1F:60:8D 2022-09-23 18:26:30 UTC 2027-09-22 18:26:30 UTC

# show certificate BA:64:1A:5D:02:B1:3F:34:43:C1:02:B1:CF:7F:4C:7D:AF:99:65:E9:9C:68:75:FE:6A:57:1F:BF:43:42:6E:4C
Certificate name : self-signed-mgmt
Algorithm        : sha256
Fingerprint      : BA:64:1A:5D:02:B1:3F:34:43:C1:02:B1:CF:7F:4C:7D:AF:99:65:E9:9C:68:75:FE:6A:57:1F:BF:43:42:6E:4C
Not before       : 2025-09-18 20:16:33 UTC
Not after        : 2027-12-18 20:16:33 UTC
Content          : -----BEGIN CERTIFICATE-----
MIIEtjCCAx6gAwIBAgIGAZljnxIAMA0GCSqGSIb3DQEBCwUAMIGGMRkwFwYDVQQD
DBBzZWxmLXNpZ25lZC1tZ210MREwDwYDVQQLDAhQbGF0Zm9ybTEeMBwGA1UECgwV
QXJpc3RhIE5ldHdvcmtzLCBJbmMuMRQwEgYDVQQHDAtTYW50YSBDbGFyYTETMBEG
A1UECAwKQ2FsaWZvcm5pYTELMAkGA1UEBhMCVVMwHhcNMjUwOTE4MjAxNjMzWhcN
MjcxMjE4MjAxNjMzWjCBhjEZMBcGA1UEAwwQc2VsZi1zaWduZWQtbWdtdDERMA8G
A1UECwwIUGxhdGZvcm0xHjAcBgNVBAoMFUFyaXN0YSBOZXR3b3JrcywgSW5jLjEU
MBIGA1UEBwwLU2FudGEgQ2xhcmExEzARBgNVBAgMCkNhbGlmb3JuaWExCzAJBgNV
BAYTAlVTMIIBojANBgkqhkiG9w0BAQEFAAOCAY8AMIIBigKCAYEAouf2xtJlWzMr
6rOJTInEip/qq7TAMLJtGT4d4yGx6t5PPIwAGZoVvwp7COg/nB6ZInlOIRTqbMCD
vv83cAV/P+e98BHQpBipQ2evp1QPZ0E9mI8+KuNtt+LryjHYrHgkyO2i7IIPgibB
+pftX9SjnZeqrq8ZkncMvLAVreKKSAHxkMXbkyxNfM0kGJGtmn4wwkqP2g8y39an
YPvXM+2CqRD716AQc3GPtUBLiQ3hzUA9fp9MlCGQBH++oDU8wV2HMNcY9KtjJz7G
+3sz6XIUgYSO9EjOmtAgyB3S5LwDrpctDhatFL/g70j06RtA/RvA/vxJXqd6wiqQ
n7ugC9JbqQFxzCbQlQZYT6QhD7A8T9tMeXMs0JRqQjqoUeDoLvTO9j4ILipY6EV/
iyiEgJwED7GA5ZGqqLvSHMaiG9KGjtL+oNavxpnLS04BvU3g7vuThdmfmXMIvKqI
PSMlw+RKXze+yigaQY34K3nVqS6JKNg4YH+wPrwXxvHqVxloUdo3AgMBAAGjKDAm
MA8GA1UdEQQIMAaHBArz/ZQwEwYDVR0lBAwwCgYIKwYBBQUHAwEwDQYJKoZIhvcN
AQELBQADggGBAGHeakL0sSZzgNTH77baC7LJBVfycIDOx4iD7HFOgy3C+ubi0JBM
Zg+OkEGkfrB3QQO6oEyDbMm4EfhjiqMAHjlifMLgsa0/W3dTBj6VWtAkT8Iad/6M
X1NeljmPop8nHVjUM+qDuRUbwFepdyMRcIuwhKeUAU++ZSpPey3+YyWQozecZND6
0f6iSaue2PN2zCvoV5S6v0GT3ywDQ3uKlnJpBfFSwVGYiPhjybNZf+CTeE1Gs+N5
uedJpsmOk1rF3UXRxbMhhj8EeuHDohxm7wc+pHHj3Kw5aj7FNP15fj4YJn8Ywf0+
c4IessbrdCJsOv6YRJX00tUX0+v+ZZv2TaYWdOLSCSLtngpebYdGCY5pLGUNZzmW
/zrvYptwuACuK92iy43wJmrsxskX9aoC+DzzpOllWuKE3dB3WKIwJF5cUIyQspQF
+CTqDCoD3mUl2aKXiSqEZq+2v+zh4ivq+k76aBg0LYP2gh26EHqxNKhvpnMLDubH
8nFnO+UT86NpzQ==
-----END CERTIFICATE-----
Delete a Certificate
Delete a certificate via the CLI using the delete cert command.
# delete cert CA:FD:BF:AB:0D:54:25:59:7A:BE:28:33:A1:BE:B8:FC:0A:77:79:2B:85:97:46:D2:30:4D:C3:94:3B:1F:60:8D
-
Retrieve Fingerprint: Identify the target certificate's SHA256 fingerprint using the
show certificatecommand. -
Execute Deletion: Run the
delete certcommand with the specific fingerprint.
Controller TLS Certificate Configuration
Configure the TLS certificate used for HTTPS access (GUI and REST API) within the DMF Controller configuration mode.
(config)# controller
(config-controller)# certificate CA:FD:BF:AB:0D:54:25:59:7A:BE:28:33:A1:BE:B8:FC:0A:77:79:2B:85:97:46:D2:30:4D:C3:94:3B:1F:60:8D
Configuration Behavior
-
Fingerprint: The command requires the SHA256 fingerprint of the target certificate.
-
Automatic Private Key Association: The system automatically infers the private key from the certificate’s public key. Consequently, the separate private key configuration command found in previous versions has been removed.
Other Configurations
This feature updated the CLI configuration commands described in the following sections. As a consequence, all those commands now reference certificates on the appliance using their SHA256 fingerprint.
Configure the certificate and CA for secure logging.
# TLS settings for syslog
(config)# logging secure cert CA:FD:BF:AB:0D:54:25:59:7A:BE:28:33:A1:BE:B8:FC:0A:77:79:2B:85:97:46:D2:30:4D:C3:94:3B:1F:60:8D
(config)# logging secure ca CA:FD:BF:AB:0D:54:25:59:7A:BE:28:33:A1:BE:B8:FC:0A:77:79:2B:85:97:46:D2:30:4D:C3:94:3B:1F:60:8D
Configure the CA certificate for RADIUS EAP-TLS/TTLS.
# CA certificate for RADIUS EAP-TLS/TTLS
(config)# radius ca-cert CA:FD:BF:AB:0D:54:25:59:7A:BE:28:33:A1:BE:B8:FC:0A:77:79:2B:85:97:46:D2:30:4D:C3:94:3B:1F:60:8D
Configure the secure control plane certificate.
# Secure control plane certificate
(config)# secure control plane CA:FD:BF:AB:0D:54:25:59:7A:BE:28:33:A1:BE:B8:FC:0A:77:79:2B:85:97:46:D2:30:4D:C3:94:3B:1F:60:8D
Configuration Notes
-
Fingerprint Reference: All commands referencing certificates now require the SHA256 fingerprint.
-
Private Key Removal: Configuration commands related specifically to private keys have been removed.
-
Key Requirement: Any non-CA certificate must have its associated private key present on the appliance for the configuration to function correctly.
Syslog Messages
| Level | Message | Situation |
|---|---|---|
| INFO | TLSMGR1030: Adding key pair <name> <information> | A new public/private key pair is being added to the appliance |
| ERROR | TLSSTR7002: Failed to sync a key pair update | The key pair hasn’t been synced to other nodes in the cluster |
| ERROR | TLSSTR7001: Failed to sync a key pair delete | The key pair deletion hasn’t been synced to other nodes in the cluster |
| INFO | TLSMGR1007: Adding a CSR <CN> <fingerprint> | A new CSR is being added to the appliance |
| WARNING | TLSMGR4002: Attempted to add CSR <fingerprint> but an existing CSR with that fingerprint exists. | An already existing CSR is being added to the appliance |
| WARNING | TLSMGR4009: Attempted to add CSR <fingerprint X> that was generated by the same key pair as existing CSR <fingerprint Y>. Removing CSR <fingerprint Y>. | A new CSR is being added, but an existing CSR uses the same public key. The existing CSR will be removed. |
| ERROR | TLSMGR7003: Failed to sync CSR | The new CSR hasn’t been synced to other nodes in the cluster |
| INFO | TLSMGR1009: Removing a CSR <fingerprint> | A CSR is being removed from the appliance |
| ERROR | TLSMGR7006: Failed to sync a CSR delete | The CSR deletion hasn’t been synced to other nodes in the cluster |
| ERROR | TLSMGR1008: Adding a certificate <CN> | A new certificate is being added to the appliance |
| WARNING | TLSMGR4003: Added certificate <CN X> (<fingerprint>) is overwriting certificate <CN Y> (<fingerprint>) | A new certificate is replacing another certificate with a matching public key |
| INFO | TLSMGR1006: CSR <fingerprint> has been satisfied by Cert <CN> | A CSR matching the imported certificate has been found and will be removed. |
| ERROR | TLSMGR7008: Failed to sync cert update | A new certificate hasn’t been synced to other nodes in the cluster |
| ERROR | TLSMGR7015: Failed to sync cert delete | The certificate deletion hasn’t been synced to other nodes in the cluster |
Troubleshooting
If certificate configurations do not take effect, verify the presence of certificates and matching public keys using the show public-key and show certificate commands.
-
Cluster Consistency: In clustered environments, ensure all nodes share the same certificates and public keys.
-
Persistent Issues: If problems persist or the system generates frequent syslog errors, create a support bundle and contact Arista TAC.
Limitations
-
The system supports Certificate Signing Requests (CSRs) only for web-server certificates.
DMF User Interface Configuration for Custom Certificates
Create CSRs and Public/Private Keys using the DMF GUI.
Navigate to Monitoring → Certificates.
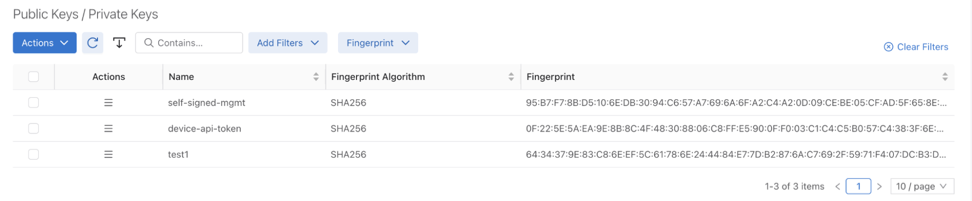
Public / Private Keys
The Public/Private Keys table displays existing keys, including the Name, Fingerprint Algorithm, and Fingerprint.
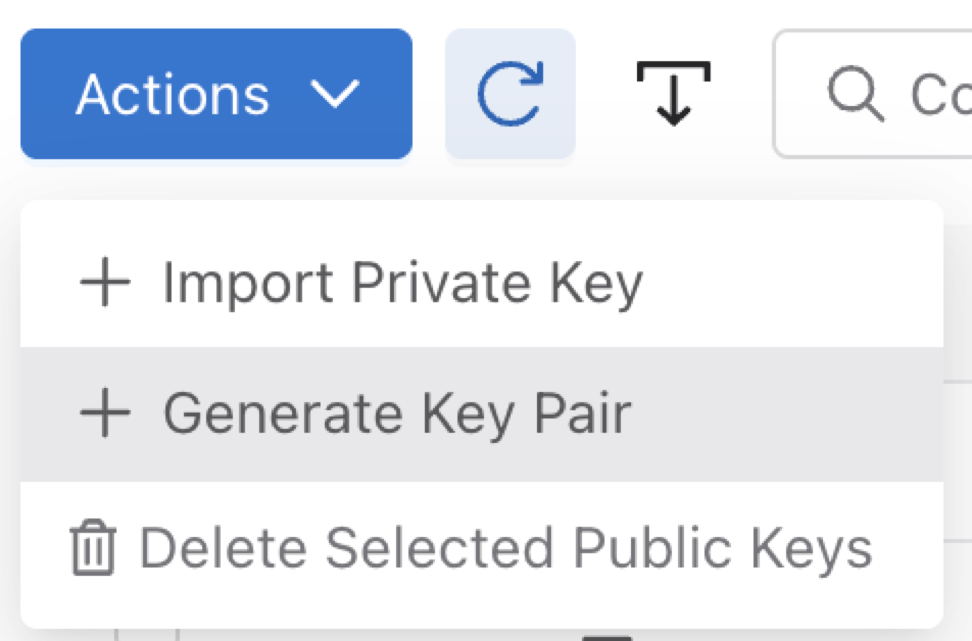
-
Import: Select Import Private key in the Actions drop-down menu to import the Public/Private Key if you have it.
-
Create: Select Generate Key Pair in the Actions drop-down menu to open the creation window.
-
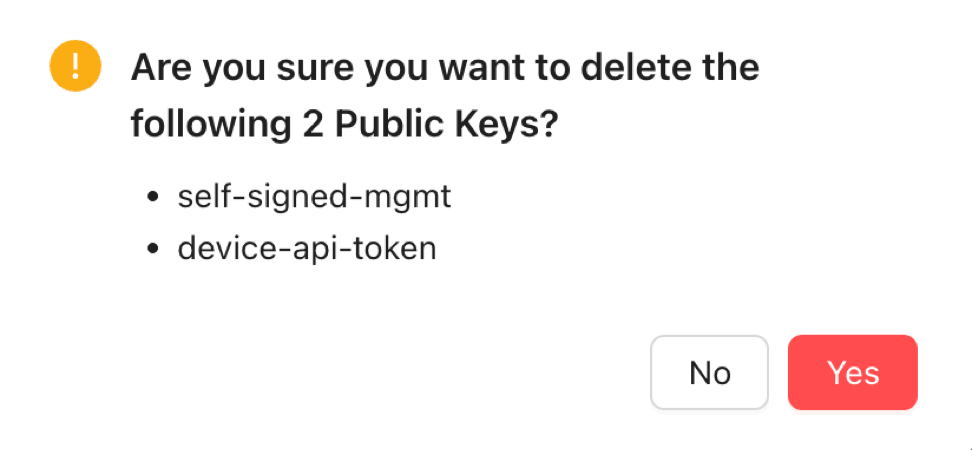
Delete: Select one or more keys using the table checkboxes, then Delete to remove them.
Create
Delete Action
Certificate Signing Requests
The Certificate Signing Requests table displays existing CSRs, including the Name, Fingerprint Algorithm, and Fingerprint.
-
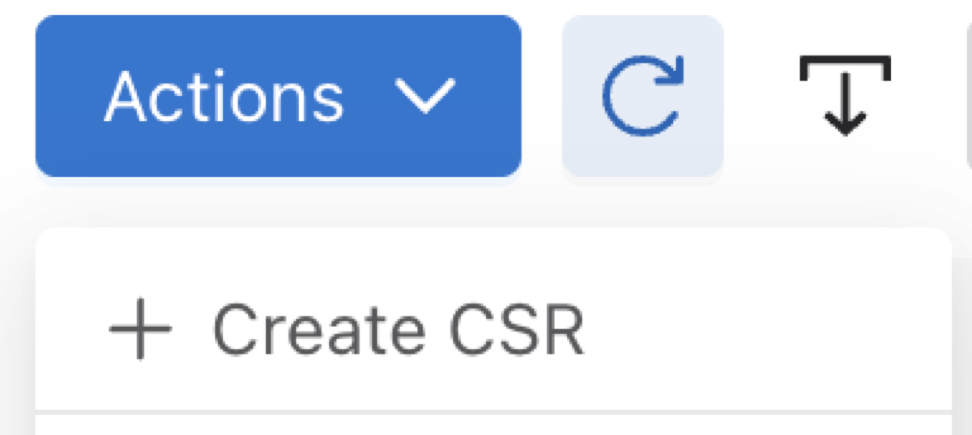
Create: Select Create CSR in the Actions drop-down menu to open the creation window.
-
Delete: Select one or more CSRs using the table checkboxes, then Delete to remove them.
-
Download: Click on the created CSR’s Actionscolumn and select the Download option to download the CSR file to a local downloads folder. Submit the CSR to the signing authority.

Create Action
Delete Action
Certificates
The Certificates table displays existing certificates, including the Name, Fingerprint Algorithm, and Fingerprint.
-
Import: Select Import Certificate (Import CA Signed Certificate) in the Actions drop-down menu to open the import window.
-
Delete: Select one or more certificates using the table checkboxes, then Delete to remove them.
- Download: Click on the certificate’s Actions column and select the Download option to download the certificate file to a local downloads folder, for backup purposes.

Import a Certificate

Delete Action
DMF UI Certificate
This section displays the active DMF UI certificate.

-
Add or Edit: Select Edit near the title to open the certificate list. Choose the desired certificate and select Submit to apply it.
-
Reset: Select Reset to revert the certificate configuration.
Managing the Controller HTTP and SSH Ciphers, Protocols, and Data Integrity Algorithms
Use the crypto command to enter the config-crypto submode to configure settings for HTTP and SSH. Use the http and ssh commands in the config-crypto submode to configure the ciphers and protocols. Configure the list of enabled ciphers, protocols, or algorithms by appending to the list.
Use the no version of this command with any keyword to remove the specific cipher, protocol, or algorithm. Use the no version of the command without a keyword to restore the list to the default value. Use the CLI help feature to identify the supported ciphers, protocols, or data integrity (MAC) algorithms.
Configuring HTTP Ciphers
controller-1(config)# crypto
controller-1(config-crypto)# http
controller-1(config-crypto-http)# cipher <index> <cipher-name>
controller-1(config)# crypto
controller-1(config-crypto)# http
controller-1(config-crypto-http)# cipher 1 <your choice of cipher-name>
controller-1(config-crypto-http)# cipher 2 <your choice of cipher-name>
controller-1(config-crypto-http)# cipher 3 <your choice of cipher-name>
controller-1(config-crypto-http)# cipher 21 ECDHE-RSA-CHACHA20-POLY1305
controller-1(config-crypto-http)# cipher 22 ECDHE-RSA-AES128-GCM-SHA256
controller-1(config-crypto-http)# cipher 23 ECDHE-RSA-AES256-GCM-SHA384
Configuring HTTP Protocols
Starting in the DANZ Monitoring Fabric 8.4 release, the TLSv1.3 HTTPS protocol is supported. DMF supports TLSv1.3 and TLSv1.2 by default, with the TLSv1.3 protocol preferred for TLS connections.
controller-1(config)# crypto
controller-1(config-crypto)# http
controller-1(config-crypto-http)# protocol <index> <protocol-name>
Configuring SSH Ciphers
Configured SSH ciphers and MAC algorithms on the Controller are pushed to the switches running Switch Light OS via ZTN. With this enhancement, users can also restrict the SSH ciphers and MAC algorithms on the switches.
controller-1(config)# crypto
controller-1(config-crypto)# ssh
controller-1(config-crypto-ssh)# cipher <index> <cipher-name>
Configuring SSH Data Integrity Algorithms
controller-1(config)# crypto
controller-1(config-crypto)# ssh
controller-1(config-crypto-ssh)# mac <index> <mac-name>
Configuring SSH Host Key Algorithms
Configuration of the SSH host key algorithm is optional.
DMF uses the built-in default set of algorithms if no host key algorithms are explicitly configured. The default set of host key algorithms does not contain any algorithms that use the SHA-1 hash algorithm.
Configuration of SSH host key algorithms follows the same pattern as the existing SSH MACs and cipher configuration under the crypto and ssh submodes.
While in the crypto-ssh submode, specify the host key algorithm to use after an index number.
controller-1> enable
controller-1# configure
controller-1(config)# crypto
controller-1(config-crypto)# ssh
controller-1(config-crypto-ssh)#
cipher host-key-algorithm mac
controller-1(config-crypto-ssh)# host-key-algorithm 1 rsa-sha2-512
controller-1(config-crypto-ssh)# host-key-algorithm 2 ssh-ed25519
Remove the SSH host key algorithm from the enabled algorithm using the no command option specifying the index number.
After removing all algorithms, DMF uses the default set of algorithms.
controller-1(config-crypto-ssh)# show this

! crypto
crypto
  !
  ssh
    host-key-algorithm 1 rsa-sha2-512
    host-key-algorithm 2 ssh-ed25519
controller-1(config-crypto-ssh)# no host-key-algorithm 2
controller-1(config-crypto-ssh)# show this

! crypto
crypto
  !
  ssh
    host-key-algorithm 1 rsa-sha2-512
controller-1(config-crypto-ssh)#
Show Commands
Specific CLI commands display explicitly configured SSH host key algorithms. These appear in the show running-config output in the crypto ssh section.
controller-1> show running-config crypto ssh
! crypto
crypto
  !
  ssh
    host-key-algorithm 1 rsa-sha2-512
    host-key-algorithm 2 ssh-ed25519
controller-1(config-crypto-ssh)#
In the absence of a host-key-algorithm in the running config, it is implied the default set of algorithms are in effect.
controller-1> show running-config crypto ssh
controller-1(config-crypto-ssh)#
When the CLI is in the crypto-ssh configuration submode, display the current configuration using the show this command:
controller-1(config-crypto-ssh)# show this
! crypto
crypto
  !
  ssh
    host-key-algorithm 1 rsa-sha2-512
    host-key-algorithm 2 ssh-ed25519
Troubleshooting
To troubleshoot issues connecting to DMF over SSH, enable the debug output of the SSH client to view the details.
For example, if using OpenSSH, adding the option ssh -vv displays information about the handshake process.
$ ssh -vv This email address is being protected from spambots. You need JavaScript enabled to view it.
…
debug2: local client KEXINIT proposal
…
debug2: host key algorithms: rsa-sha2-512
…
debug2: peer server KEXINIT proposal
…
debug2: host key algorithms: ssh-ed25519
…
debug1: kex: host key algorithm: (no match)
Unable to negotiate with 10.243.255.120 port 22: no matching host key type found.
Their offer: ssh-ed25519
Default SSH MACs, Ciphers, Keys, and TLS Ciphers
- Starting from DMF release 8.7.0, the default list of SSH MACs is:
This email address is being protected from spambots. You need JavaScript enabled to view it. This email address is being protected from spambots. You need JavaScript enabled to view it. This email address is being protected from spambots. You need JavaScript enabled to view it. hmac-sha2-512 hmac-sha2-256 This email address is being protected from spambots. You need JavaScript enabled to view it.
- Starting from DMF release 8.7.0, the SSH ciphers available by default are:
This email address is being protected from spambots. You need JavaScript enabled to view it. This email address is being protected from spambots. You need JavaScript enabled to view it. This email address is being protected from spambots. You need JavaScript enabled to view it. aes256-ctr aes192-ctr aes128-ctr
- Starting from DMF release 8.7.0, the default list of SSH host-key algorithms is:
This email address is being protected from spambots. You need JavaScript enabled to view it. This email address is being protected from spambots. You need JavaScript enabled to view it. This email address is being protected from spambots. You need JavaScript enabled to view it. This email address is being protected from spambots. You need JavaScript enabled to view it. This email address is being protected from spambots. You need JavaScript enabled to view it. This email address is being protected from spambots. You need JavaScript enabled to view it. This email address is being protected from spambots. You need JavaScript enabled to view it. This email address is being protected from spambots. You need JavaScript enabled to view it. This email address is being protected from spambots. You need JavaScript enabled to view it. ecdsa-sha2-nistp256 ecdsa-sha2-nistp384 ecdsa-sha2-nistp521 This email address is being protected from spambots. You need JavaScript enabled to view it. ssh-ed25519 This email address is being protected from spambots. You need JavaScript enabled to view it. rsa-sha2-512 rsa-sha2-256
- Starting from DMF release 8.7.0, the default set of supported TLS versions is:
TLSv1.2
TLSv1.3
- Starting from DMF release 8.8.0, the default list of supported TLS ciphers is:
TLS_AES_256_GCM_SHA384         TLSv1.3  Kx=any   Au=any   Enc=AESGCM(256)            Mac=AEAD
TLS_CHACHA20_POLY1305_SHA256   TLSv1.3  Kx=any   Au=any   Enc=CHACHA20/POLY1305(256) Mac=AEAD
TLS_AES_128_GCM_SHA256         TLSv1.3  Kx=any   Au=any   Enc=AESGCM(128)            Mac=AEAD
TLS_AES_128_CCM_SHA256         TLSv1.3  Kx=any   Au=any   Enc=AESCCM(128)            Mac=AEAD
ECDHE-ECDSA-CHACHA20-POLY1305  TLSv1.2  Kx=ECDH  Au=ECDSA Enc=CHACHA20/POLY1305(256) Mac=AEAD
ECDHE-RSA-CHACHA20-POLY1305    TLSv1.2  Kx=ECDH  Au=RSA   Enc=CHACHA20/POLY1305(256) Mac=AEAD
ECDHE-ECDSA-AES256-GCM-SHA384  TLSv1.2  Kx=ECDH  Au=ECDSA Enc=AESGCM(256)            Mac=AEAD
ECDHE-RSA-AES256-GCM-SHA384    TLSv1.2  Kx=ECDH  Au=RSA   Enc=AESGCM(256)            Mac=AEAD
ECDHE-ECDSA-AES128-GCM-SHA256  TLSv1.2  Kx=ECDH  Au=ECDSA Enc=AESGCM(128)            Mac=AEAD
ECDHE-RSA-AES128-GCM-SHA256    TLSv1.2  Kx=ECDH  Au=RSA   Enc=AESGCM(128)            Mac=AEAD
Note: The following ciphers have been removed from the default list but are still available for configuration if needed:ECDHE-ECDSA-AES128-SHA256 TLSv1.2 ECDHE-RSA-AES128-SHA256 TLSv1.2 AES128-GCM-SHA256 TLSv1.2 AES128-SHA256 TLSv1.2 ECDHE-ECDSA-AES256-SHA384 TLSv1.2 ECDHE-RSA-AES256-SHA384 TLSv1.2 AES256-GCM-SHA384 TLSv1.2 AES256-SHA256 TLSv1.2
Inherit MAC and Cipher Configuration
This feature provides the ability to mirror the SSH/HTTPS cryptographic configuration of the DMF Controller to the managed appliances (i.e., service nodes and recorder nodes) and the SSH cryptographic configuration of the Controller to the EOS switches.
Using the CLI to Configure SSH and HTTPS
The configuration that a managed appliance or EOS/Switch Light OS switch receives is intended for the Controller itself. Configuring a cipher or message authentication code (MAC) on the Controller will automatically be reflected onto a managed appliance or EOS/Switch Light OS switch.
SSH and HTTPS Cryptographic Configuration Syntax
(config)# crypto
(config-crypto)# ssh
(config-crypto-ssh)# cipher number algorithm
(config-crypto-ssh)# mac number algorithm
(config-crypto-ssh)# http
(config-crypto-http)# cipher number algorithm
(config-crypto-http)# protocol number algorithm
The following is a configuration example using common algorithms.
(config)# crypto
(config-crypto)# ssh
(config-crypto-ssh)# cipher 1 aes256-cbc
(config-crypto-ssh)# mac 1 hmac-sha2-512
(config-crypto-ssh)# http
(config-crypto-http)# cipher 1 AES128-GCM-SHA256
(config-crypto-http)# cipher 2 ECDHE-RSA-CHACHA20-POLY1305
(config-crypto-http)# protocol 2 TLSv1.2
Verify the Cryptographic Configuration
Check the cryptographic configuration of the Controller using the show
running-config command, as shown in the example below, and verify the settings in the crypto section.
# show running-config
.
.
.
! crypto
crypto
!
ssh
cipher 1 3des-cbc
mac 1 hmac-md5
.
.
.
All ciphers/protocols/MACs of the HTTPS/SSH cryptographic configuration supported on the Controller are supported on the managed appliances, with one caveat listed in the Limitations section below. Check the HTTPS/SSH cryptographic configuration by reviewing the running-config of a managed appliance, as shown below for a Recorder Node.
# show recorder-node device rn1 running-config
.
.
.
! crypto
crypto
!
ssh
cipher 1 3des-cbc
mac 1 hmac-md5
.
.
.
- This email address is being protected from spambots. You need JavaScript enabled to view it. (HMAC-MD5 in “encrypt-then-mac” mode)
- This email address is being protected from spambots. You need JavaScript enabled to view it. (HMAC-MD5 in “encrypt-then-mac” mode)
- This email address is being protected from spambots. You need JavaScript enabled to view it. (HMAC-SHA1 in “encrypt-then-mac” mode)
- This email address is being protected from spambots. You need JavaScript enabled to view it. (message authentication code based on universal hashing (UMAC) in “encrypt-then-mac” mode)
- This email address is being protected from spambots. You need JavaScript enabled to view it. (UMAC)
The following SSH cipher algorithm supported by the Controller is not supported by EOS:
- This email address is being protected from spambots. You need JavaScript enabled to view it. (Rijndael in CBC mode)
This difference can be seen when reviewing the running-config of the Controller and the ZTN-generated running-config of an EOS switch:
# show running-config . . . . ! crypto crypto ! ssh cipher 1 This email address is being protected from spambots. You need JavaScript enabled to view it. cipher 2 3des-cbc mac 1 This email address is being protected from spambots. You need JavaScript enabled to view it. mac 2 This email address is being protected from spambots. You need JavaScript enabled to view it. . . . .
# show switch switch-name running-config
.
.
.
cipher 3des-cbc
mac This email address is being protected from spambots. You need JavaScript enabled to view it.
.
.
.
Only the ciphers/MACs that are supported get added to the running-config of the EOS switch. To review the disallowed MACs/ciphers when generating the running-config of the switch, use the following show command:
# show fabric warnings feature-unsupported-on-device # Name Warning -|-----|---------------------------------------------------------------------| 1 core1 This email address is being protected from spambots. You need JavaScript enabled to view it. is not a supported cipher on EOS switches 2 core1 This email address is being protected from spambots. You need JavaScript enabled to view it. is not a supported mac on EOS switches
Syslog Messages
No syslog messages are generated when the DMF Controller’s cryptographic configuration is mirrored to the managed appliances and EOS switches.
Limitations
- There are limitations to the HTTPS configuration (some options may cause ZTN protocol/communication and controller-to-controller communication failures). The following HTTPS protocol versions are required to be used to avoid communication failures:
- TLSv1.2
- TLSv1.3
- It is not apparent when a cipher/MAC is not reflected onto an EOS switch (due to it being unsupported). To ascertain this scenario,check the Controller's running-config and the switch's ZTN-generated running-config and compare them (alternatively, check the “show fabric warnings” command output to review any generated warnings).
- An ECDSA-based cryptographic cipher configuration inherited by the managed appliances will cause a failure in communication with the Controller.
Protocol Access Required to the DMF Controller
Management Plane Access
You can control access to the DMF Controller for specific protocols, and in the case of SSH, you can allow access only from specific IP addresses or subnetworks. The following table summarizes the TCP/UDP protocol ports that DMF uses. The CLI access-list option column shows the options for the ports that can be enabled or disabled using the CLI access-list command (config-controller-access submode). The ports listed are open by default on the Controller, except for SNMP, which is disabled by default.
| Protocol | Port | Application |
CLI access-list option |
Match criteria |
|---|---|---|---|---|
| HTTP | TCP 80 | GUI auto-redirect | ||
| HTTPS | TCP 443 | GUI remote access | gui, applicable to Controller, Service Node, Recorder Node, Analytics Node |
Default any, configurable |
| HTTPS | TCP 8443 | REST API | api, applicable to Controller, Service Node, Recorder Node, Analytics Node |
Default any, configurable |
| ICMP/ICMPv6 | ICMP/ICMPv6 | selected ICMP types | ||
| ICMP/ICMPv6 | ICMP/ICMPv6 | selected ICMP types | ||
| SNMP | UDP 161, 162 | SNMP, applicable to Controller, Service Node, Analytics Node | snmp |
Default none, configurable |
| SSH | TCP 22 | CLI remote access | ssh, applicable to Controller, Service Node, Recorder Node, Analytics Node |
Default any, configurable |
| syslog | UDP 514 | |||
| vce-api | UDP 7443 | vCenter integration | vce-api | Enabled by default |
Control Plane Access for DMF Controller
| Protocol | Port | Direction | Application | In Flows | Out Flows |
|---|---|---|---|---|---|
| TCP | 22 | Both Directions | SSH | Customer |
Switches, managed appliances |
| TCP | 49 | Out | TACACS+ |
Customer TACACS+ server |
|
| TCP | 53 | Out | DNS | Customer DNS server | |
| UDP | 53 | Out | DNS | Customer DNS server | |
| UDP | 67 | Out | DHCP | Customer DHCP server | |
| UDP | 68 | In | DHCP | Customer DHCP server | |
| TCP | 80 | In | HTTP | Switches | |
| UDP | 123 | Both Directions | NTP |
Switches, Service Node, Recorder Node, Analytics Node |
Customer NTP server |
| UDP | 161 | In | SNMP | Customer | |
| UDP | 162 | Out | SNMP Traps | Customer | |
| TCP | 443 | In | GUI | Customer | |
| UDP | 514 | Out | Syslog | Customer Syslog server | |
| UDP | 1813 | Out | RADIUS |
Default RADIUS accounting port |
|
| UDP | 5353 | In | ZTN MDNS |
Switches, Service Node, Recorder Node |
|
| TCP | 6379 | Out | Controller Stats | Analytics Nodes | |
| TCP | 6642 | Both Directions | Cluster Sync | Controller HA | Controller HA |
| TCP | 6653 | In | OpenFlow |
Switches, Recorder Node, Service Node |
|
| TCP | 7443 | In | VCE API | vCenter API | |
| TCP | 8443 | Both Directions |
Floodlight REST API |
Customer, Recorder Node |
Recorder Node, Service Node |
| TCP | 8443 | Out | Controller-to-switch traffic | Fabric switches using the Switch Light OS | |
| TCP | 8843 | In | ZTN |
Switches, Service Node, Recorder Node |
|
| TCP | 9379 | Out |
Analytics Node Replicated Redis |
Analytics Node |
Procedure
Protocol Access Required to the DMF Controller - Sync
Procedure
Control Plane Access for DMF Switches
| Protocol | Port | Direction | Application | In Flows | Out Flows |
|---|---|---|---|---|---|
| TCP | 22 | In | SSH | Customer, DMF Controller | |
| TCP/UDP | 53 | Out | DNS | Customer DNS Server | |
| UDP | 67 | Out | DHCP | Customer DHCP Server | |
| UDP | 68 | In | DHCP | Customer DHCP Server | |
|
TCP |
443* |
In |
cAPI* |
DMF Controller |
|
| UDP | 123 | Out | NTP | Customer NTP Server | |
| UDP | 161 | In | SNMP | Customer | |
| UDP | 162 | Out | SNMP Trap | Customer | |
| UDP | 514 | Out | Syslog | Customer Syslog Server | |
| UDP | 5353 | Out | ZTN MDNS | DMF Controller | |
|
TCP |
6030 |
In |
Telemetry* |
||
|
UDP |
6343 |
Out |
sFlow®* |
Analytics Node |
|
| UDP | 6380 | Out | Control Packets | Analytics Nodes | |
| TCP | 6653 | Out | OpenFlow | DMF Controller | |
| TCP | 8443 | In | BigDB | DMF Controller | |
| TCP | 8843 | Out | ZTN | DMF Controller |
Use Port 443 as Default cAPI Port
Starting from DMF Release 8.9.0, the Command-API (cAPI) client on the DMF Controller utilizes port 443 for EOS connectivity. Follow the procedure below when upgrading from using port 80.
Show Commands
Verify the HTTPS protocol and the port assignment on core switches by executing the following command:
dmf-controller-1# show switch core1 running-config | grep https
protocol https port 443
Pre-upgrade Validation
Upgrading from previous DMF versions that depend on port 80 requires configuring HTTPS on port 443 on EOS switches to maintain the ZTN functionality. A cAPI client can use port 443 for connectivity after the upgrade.
The bigtap_eos_https_port_validate utility validates this configuration as a pre-upgrade step, ensuring port availability before the upgrade rather than after it:
-
Action: Verifies port 443's availability on EOS switches.
-
Reason: Necessary for post-upgrade cAPI client connectivity.
-
Impact: Inaccessible ports result in ZTN initialization failure.
A pre-validation failure triggers the following upgrade launch error:
POST /api/v1/rpc/controller/os/upgrade/launch
Response
{
   "description": "Error launching upgrade: launch aborted:
validation failed: EOS devices:   <switch_names> cannot be
upgraded, the https port 443 is not open for connection, fix
and retry the upgrade- Completed upgrade state cleanup on
exception",
   "error-code": 500
}
Troubleshooting
Perform the following validation procedures to resolve ZTN state issues:
-
Verify ZTN Configuration Synchronization - Confirm the configuration sync status on managed devices by executing the following command:
dmf-controller-1# show managed-devices all zerotouch
# Name  Device                        Ip address     Platform                   Serial number                    Last update                    Zerotouch state
-|-----|-----------------------------|--------------|--------------------------|--------------------------------|------------------------------|---------------
1 core1 52:54:00:58:86:3a (Linux KVM) 10.243.254.71  x86-64-bigswitch-bs3240-r0 SN-MAC-5c:16:c7:1d:bb:97         2025-09-19 12:19:37.455000 UTC ok
2 core2 52:54:00:5f:f9:a8 (Linux KVM) 10.243.254.214 x86_64-cloudeos-eos        49E66AEBA5054CA1D825B37D5B534FF6 2025-09-19 12:19:48.985000 UTC ok
3 rn1   52:54:00:88:17:cc (Linux KVM) 10.243.254.38                             Not Specified                    2025-09-19 12:19:33.533000 UTC ok
4 sn1   52:54:00:c6:66:a7 (Linux KVM) 10.243.253.62                             Not Specified                    2025-09-19 12:19:32.534000 UTC ok
-
Verify the EOS HTTPS Server Status - Validate that the HTTPS server on an EOS switch is active and listening on port 443 using the following command:
core1(config)# show management api http-commands
Enabled: Yes
HTTPS server: running, set to use port 443
HTTP server: running, set to use port 80
Local HTTP server: shutdown, no authentication, set to use port 8080
Unix Socket server: shutdown, no authentication
VRFs: default
Hits: 62
Last hit: 0:00:10 ago
Bytes in: 11775
Bytes out: 9785
Requests: 58
Commands: 86
Duration: 8.851 seconds
SSL Profile: none
FIPS Mode: No
QoS DSCP: 0
Session Timeout: 1440 minutes
Log Level: none
CSP Frame Ancestor: None
TLS Protocols: 1.0 1.1 1.2 1.3
Control Plane Access for DMF Service Node
The following ports must be open for the DMF Service Node to communicate with the DMF Controller, Analytics Node, and other services (e.g., NTP, DHCP, etc.). No further configuration is required if all devices are in the same Layer 2 network as the DMF Controller. However, if the DMF Controller and Service Nodes connect over a Layer 3 network, these ports must be open on any firewalls or routers.
| Protocol | Port | Direction | Application | In Flows | Out Flows |
|---|---|---|---|---|---|
| TCP | 22 | In | SSH | Customer, DMF Controller | |
| TCP | 49 | Out | TACACS+ |
Customer TACACS+ Server |
|
| TCP/UDP | 53 | Out | DNS | Customer DNS Server | |
| UDP | 67 | Out | DHCP | Customer DHCP Server | |
| UDP | 68 | In | DHCP | Customer DHCP | |
| UDP | 123 | Out | NTP | Customer NTP Server | |
| UDP | 161 | In | SNMP | Customer | |
| UDP | 162 | Out | SNMP Trap |
Customer SNMP Trap Server |
|
| UDP | 514 | Out | Syslog | Customer Syslog Server | |
| UDP | 1812 | Out |
Default RADIUS Authentication port |
Customer RADIUS Server | |
| UDP | 1813 | Out |
Default RADIUS Accounting port |
Customer RADIUS Server | |
| UDP | 5353 | Out | ZTN MDNS | DMF Controller | |
| TCP | 6030 | In | Telemetry | ||
| TCP | 6634 | In | Telemetry | ||
| TCP | 6653 | Out | OpenFlow | DMF Controller | |
| TCP | 8443 | Both Direction |
Floodlight REST API |
DMF Controller | DMF Controller |
| TCP | 8843 | Out | ZTN | DMF Controller |
Control Plane Access for DMF Recorder Node
The following ports must be open between the DMF Recorder Node and any connected devices. No further configuration is required if all devices are in the same Layer 2 network as the DMF Recorder Node. However, if the DMF Controller, Analytics Node, or fabric switches connect over a Layer 3 network, these ports must be open on any firewalls or routers that connect the devices to the DMF Recorder Node.
| Protocol | Port | Direction | Application | In Flows | Out Flows |
|---|---|---|---|---|---|
| TCP | 22 | In | SSH | Customer, DMF Controller | |
| TCP | 49 | Out | TACACS+ |
Customer TACACS+ Server |
|
| TCP/UDP | 53 | Out | DNS | Customer DNS Server | |
| UDP | 67 | Out | DHCP | Customer DHCP Server | |
| UDP | 68 | In | DHCP | Customer DHCP Server | |
| UDP | 123 | Out | NTP | Customer NTP Server | |
| UDP | 161 | In | SNMP | Customer | |
| UDP | 162 | Out | SNMP Trap |
Customer SNMP Trap Server |
|
| TCP | 443 | In |
Stenographer Query API |
Customer, DMF Controller | |
| UDP | 514 | Out | Syslog | Customer Syslog Server | |
| UDP | 1812 | Out |
Default RADIUS Authentication port |
Customer RADIUS Server | |
| UDP | 1813 | Out |
Default RADIUS Accounting port |
Customer RADIUS Server | |
| TCP | 2049 | Both | NFS | Customer NSF Server | |
| UDP | 2049 | Both | NFS | Customer NFS Server | |
| UDP | 5353 | Out | ZTN MDNS | DMF Controller | |
| TCP | 6653 | Out | OpenFlow | DMF Controller | |
| TCP | 8443 | Both Direction |
Floodlight REST API |
DMF Controller | DMF Controller |
| TCP | 8843 | Out | ZTN | DMF Controller |
Control Plane Access for Analytics Node
The following ports must be open between the Analytics Node and any connected devices. No further configuration is required if all devices are in the same Layer 2 network as the Analytics Node. However, if the Analytics Node connects over a Layer 3 network, these ports must be open on any firewall or router.
| Protocol | Port | Direction | Application | In Flows | Out Flows |
|---|---|---|---|---|---|
| TCP | 22 | In | SSH | Customer | |
| TCP | 25 | SMTP |
Analytics Nodes to Mail Server |
||
| TCP | 49 | Out | TACACS+ |
Customer TACACS+ Server |
|
| TCP/UDP | 53 | Out | DNS | Customer DNS Server | |
| UDP | 67 | Out | DHCP | Customer DHCP Server | |
| UDP | 68 | In | DHCP | Customer DHCP Server | |
| UDP | 123 | Out | NTP | Customer NTP Server | |
| UDP | 161 | In | SNMP | Customer | |
| UDP | 161 | In | SNMP |
from Analytics Nodes to DMF switch |
|
| UDP | 162 | Out | SNMP Trap | Customer | |
| UDP | 162 | Out | SNMP Trap | From Analytics Nodes to DMF switch | |
| TCP | 443 | In | GUI | Customer | |
| TCP | 467 | SMTP | Analytics to Mail Server | ||
| UDP | 514 | Out | Syslog | Customer Syslog Server | |
| UDP | 1812 | Out |
Default RADIUS Authentication port |
Customer RADIUS Server | |
| UDP | 1813 | Out |
Default RADIUS Accounting port |
Customer RADIUS Server | |
| UDP | 2055 | In | NetFlow v5 |
DMF Service Nodes and Switches |
|
| UDP | 4739 | In |
IPFIX & NetFlow v9 |
DMF Service Nodes and Switches |
|
| TCP | 5043 | Both Direction | Active Directory |
Customer Active Directory Server |
Customer Active Directory Server |
| UDP | 6343 | In |
sFlow®* |
DMF Switches | |
| TCP | 6379 | Both Direction | Controller Stats |
Controller to Analytics VIP |
|
| UDP | 6380 | In | Control Packets | DMF Switches | |
| TCP | 6642 | Both Direction |
Analytics Cluster sync |
HA controller | HA controller |
| TCP | 8443 | Both Direction |
Floodlight REST API |
Customer | Managed Appliances |
| TCP | 9379 | Both Direction | Replicated Redis |
DMF Controller to Analytics Node VIP |
|
| TCP | 9379 | Out | Analytics Node
Replicated Re- dis Server (for dpid.port -> Filter Name) |
Analytics Node |