The configuration guide is no longer being updated. Please refer to the CloudVision Help Center going forward.
Service Accounts
The service accounts in CloudVision access APIs in a controlled manner. You must create
authentication tokens for service accounts to validate APIs.
To access the Service Accounts screen, navigate to the Settings screen (Click the gear
icon at the upper right corner of the screen) > Access Control > Service
Accounts.
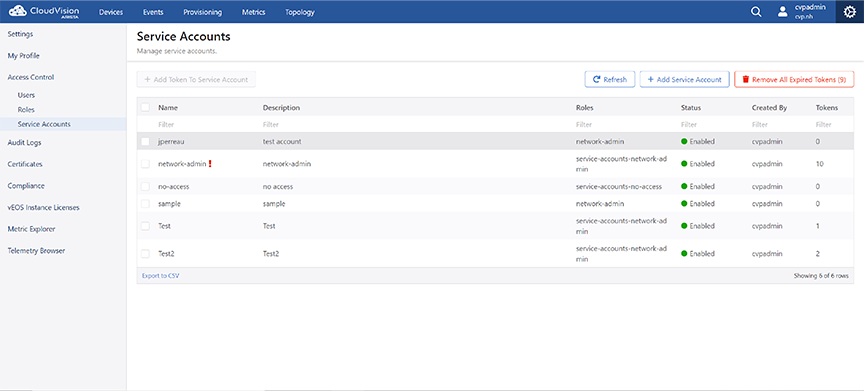
The Service Accounts screen provides brief information of all service accounts in a
tabular format. See the figure below.Figure 1. Service Accounts Screen
Note: The red exclamation mark on service accounts indicates expired tokens.
Hovering the cursor on the red exclamation mark displays the count of expired
tokens.
You can perform the following tasks from this screen:
Perform the following steps to add a service account:
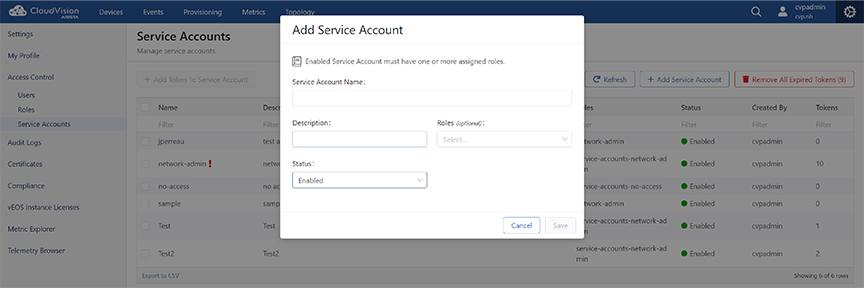
On the Service Accounts screen, click + Add Service Account.
The system displays the Add Service Account screen.Figure 2. Add Service Account Screen
Type the service account name and description in respective fields.
Select preferred roles (optional) and status from respective dropdown
menus.
Note:
Enabled service accounts must have one or more roles assigned to it.
Disabled service accounts may not have any roles assigned to
it.
Click Save.
Note: If the Service Accounts screen does not display the new service account,
Click Refresh.
Editing Service Accounts
Perform the following steps to edit a service account:
On the Service Accounts screen, click the required service account listed in
the table.
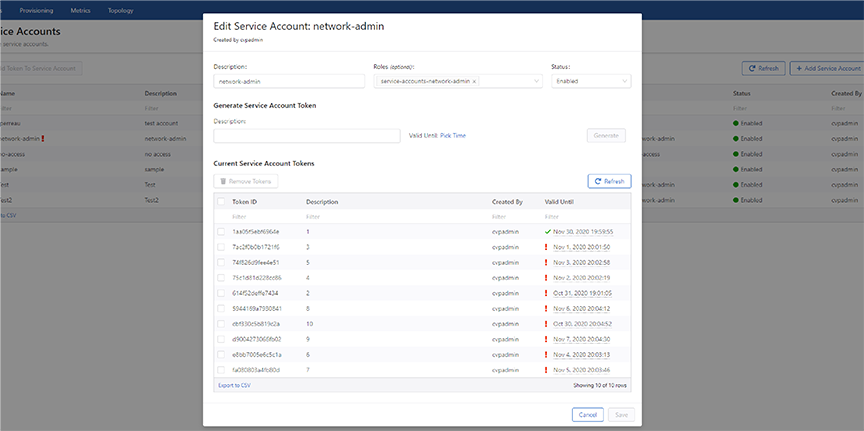
CVP opens the Edit Service Account: service_name
screen.Figure 3. Edit Service Account Screen
Note: Alternatively, select the checkbox of required service account and
click + Add Token to Service Account.
Update required changes in the Description field, Roles dropdown
and Status dropdown.
Note:
Enabled service accounts must have one or more roles assigned to it.
Disabled service accounts may not have any roles assigned to
it.
Click Save.
Adding Tokens to Service Accounts
Perform the following steps to create a token for service accounts:
On the Service Accounts screen, click the required service account listed in
the table.
CVP opens the Edit Service Account: service_name
screen.
Note: Alternatively, select the checkbox of required service account
and click + Add Token to Service Account.
Under Generate Service Account Token, type brief summary in the
Description field.
See the figure below. Figure 4. Generate Service Account Token
Click Pick Time and select the expiry date.
Note: The maximum duration for validity is one year.
Click Generate.
Note: If the table under Current Service Account Tokens does not display
the new token, click Refresh. The new token gets access to APIs based
on roles selected for the service account.
Deleting Service Account Tokens
Perform the following steps to delete a service account:
On the Service Accounts screen, click the required service account listed in
the table.
CVP opens the Edit Service Account: service_name screen.
Tokens associated to this service accounts are listed in the table under
Current Service Account Tokens.
Note: Alternatively, select the
checkbox of the required service account and click + Add Token to Service
Account.
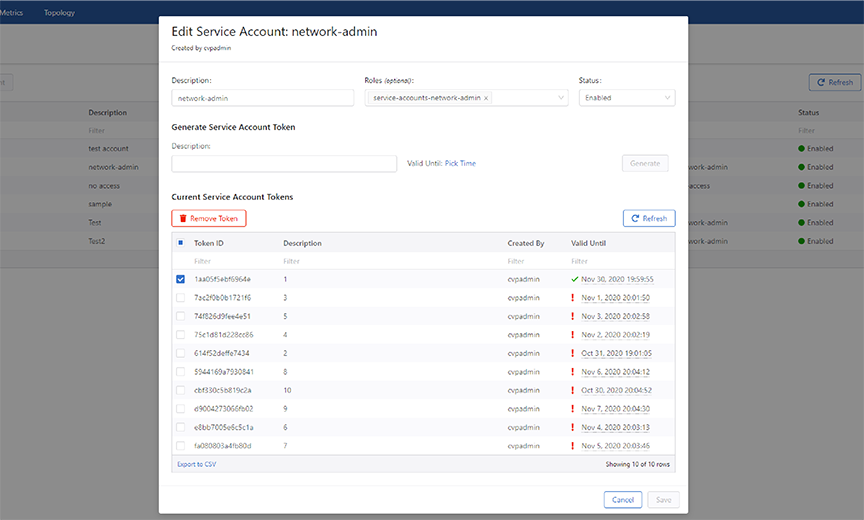
Select token(s) to be deleted.
Click Remove Token(s).
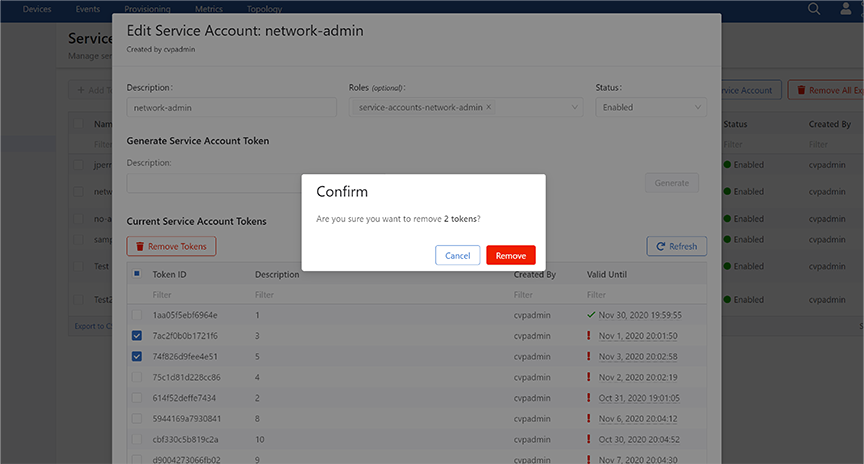
See the figure below. Figure 5. Delete Service Account Tokens
CVP prompts to confirm the initiated task.
Click Remove on the confirmation box.
See the figure below.Figure 6. CVP Confirmation to Delete Tokens
Click Save.
Note:
If the table continues to display deleted token(s), click
Refresh.
To simultaneously delete all expired tokens across all service
accounts, click Remove all Expired tokens (n) on the
Service Accounts screen where n stands for the number of
expired tokens.
 Note: Alternatively, select the checkbox of required service account and click + Add Token to Service Account.
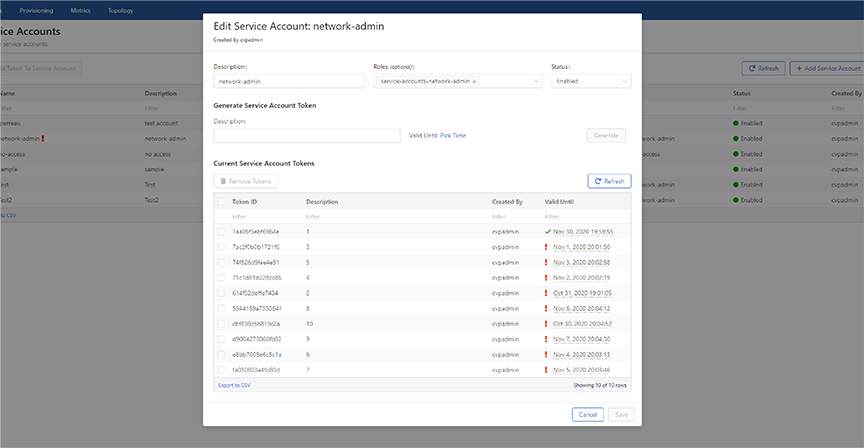
 CVP prompts to confirm the initiated task.