Change Control Template
Change Control Template allows you to build and structure common change control operations, and to repeat them without having to rebuild or re-specify the actions and sequences. The template is easily modified which enables you to execute evolving change control operations quickly and efficiently.
To configure a Change Control Template, use the Action Bundle and Stage Rule tools. Each Stage Rule depends on an Action Bundle for its content, so at least one Action Bundle must be created before you can start using Change Control Templates.
Stage Rules
A Template is defined by a list of Stage Rules. Stage Rules can be executed in Series or Parallel at the root of the change control. Each Stage Rule is linked to one Action Bundle, which supplies the content for that stage.
Action Bundles
An Action Bundle is a specific sequence of actions that contain up to one task action and a limitless number of non-task actions. Action Bundles are reusable across multiple Templates and allow you to construct a specific sequence of actions without defining the tasks or devices that they will be applied to.
Workflow
- Create or select one or more Action Bundles.
- Assign each Action Bundle to a Stage Rule.
- Configure the Stage Rules of the Template.
- Save the Template.
- Apply the Template in Change Control.
Once the Template has been saved, it will be available to apply repeatedly. For future change control operations with the same actions and sequence, you will only need to follow Step 5.
Action Bundles
Action Bundles are a determined sequence of actions that can include up to one task action and an unlimited number of non-task actions. The Action Bundles are assigned them to the Stage Rules of a Template, which means that you will want to create, edit, and delete Action Bundles.
Accessing Action Bundles
You can manage Action Bundles by selecting Provisioning in the navigation bar and then selecting Action Bundles.

Creating a New Action Bundle
When creating a new Action Bundle, one task action and unlimited non-task actions can be added.
-
Select an action from the available list.
Figure 2. Select an Action  Note: Every action except for Execute Task is a non-task action. You can only add one task action for each Action Bundle.
Editing an Action Bundle
To edit an Action Bundle.
-
Click Edit on the Action Bundle to be modified.
Figure 3. Editing an Action Bundle 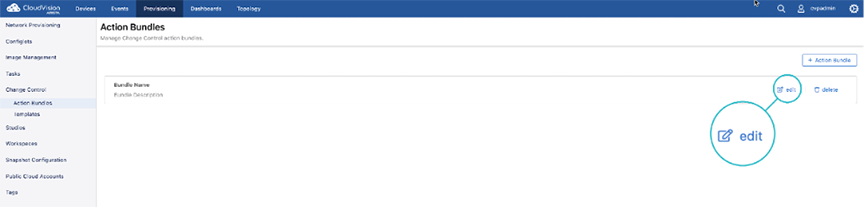
Deleting an Action Bundle
-
Select Delete.
Figure 4. Deleting an Action Bundle 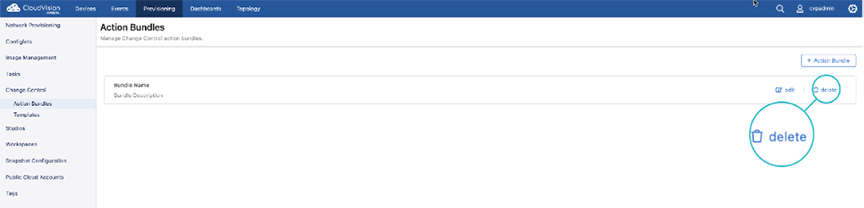
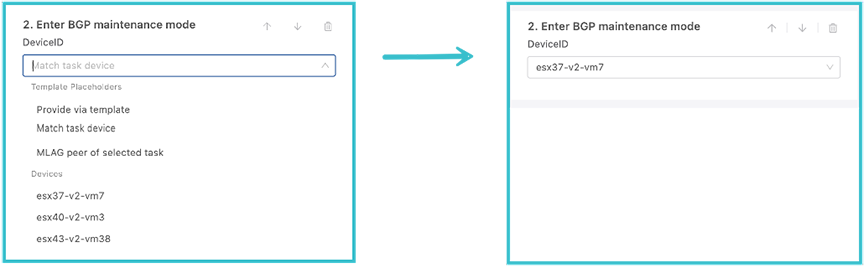
Device Placeholders and Static Arguments
When creating or editing the actions of an Action Bundle, you can assign device placeholders instead of specific devices to the action. These placeholders are then defined when the Action Bundle is added to the Stage Rule of a Template. This gives you the flexibility to assign the same Action Bundle to multiple Templates.
The following is a complete list of device placeholders, along with a sample list of devices you can statically apply the action to:

The placeholders available to you vary based upon the combination of action types that you have already selected. Consequently, additional placeholders may become available for an action after you have added more actions to the Action Bundle. Specifically, ‘Match task device’ and ‘MLAG peer of selected task’ only appear when the Action Bundle contains a task.
Provide via Template
When this action is assigned as a placeholder, you will configure it when building the Template. You can use the Device Filter field in the Stage Rule that the Action Bundle is applied to.

-
All Devices in Change Control: This option matches all devices associated with the change control (defined by which tasks are linked to the change control)
-
Regular Expression: This option allows you to select certain devices from Change Control by defining a regular expression to evaluate against the device hostname
Match Task Device
An Action Bundle can contain a maximum of one task action. The device of the task is assigned in the Template using the Device Filter field.
When configuring the Action Bundle, a non-task action with the placeholder Match Task Device can be assigned. This means that the device associated with the task will be applied to the non-task action.
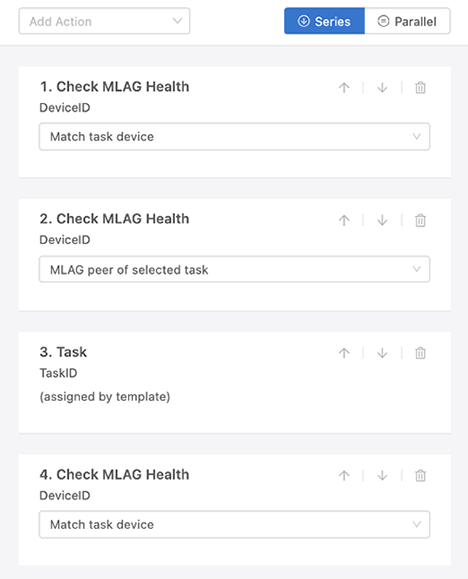
MLAG Peer of Selected Task
This placeholder enables you to sequence MLAG upgrades. You can run non-task actions on the MLAG peer of the device that the task in the Action Bundle is assigned to.
By using this placeholder, the MLAG Health Check can be run against the MLAG peer before running the task.
The following figure is an example of how actions can be arranged so that the MLAG health of both the task device and the task device’s MLAG peer are checked before running the task. The last action checks the MLAG health of the task device after the task has been performed.
Static Action Arguments
Static arguments can be applied in an Action Bundle by assigning certain non-task actions with a specific device. This enables you to always have a particular action run against a specific device when the Action Bundle is applied to a Stage Rule in a template.
Templates
Action Bundles will be assigned to a Template. With the Template you will bundle and sequence specific actions and group those action bundles into stages to define the upgrade sequence.
- A Template can be applied multiple times. Each time the existing structure will be completely overwritten, and only the tasks will remain as the sole input to the Template.
- This feature cannot be used to craft arbitrarily complex change controls, and advanced users may want to leverage the Change Control API to construct custom layouts.
Accessing Templates
Select Provisioning and select Templates. The following screen will be displayed.
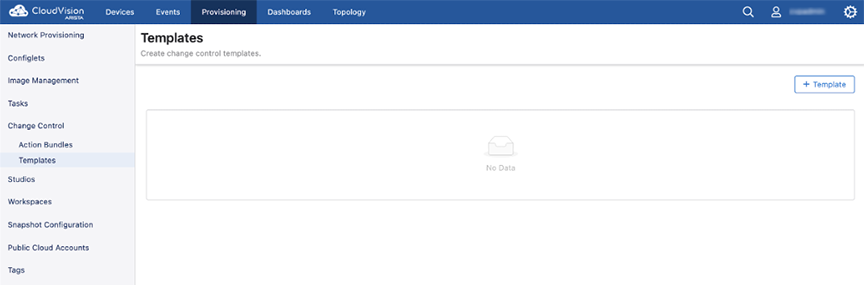
Create a New Template
When creating a new Template, an unlimited number of Stages Rules can be added using at least one Action Bundle.
-
Each Stage Rule is associated with a single Action Bundle.Select an Action
Bundle from themenu or create a new one.
Figure 10. Create a New Template 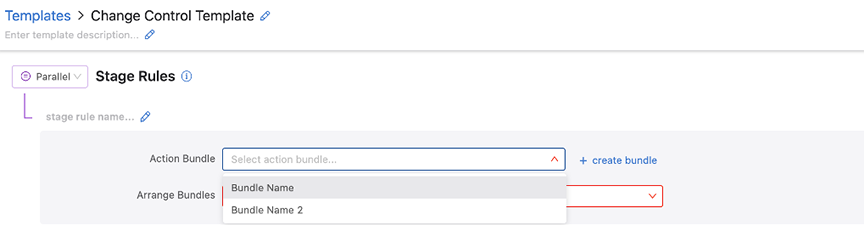
-
A sub-stage will be created for every populated Action Bundle. Arrange the
sub-stages in Series or Parallel.
Figure 11. Stage Rule 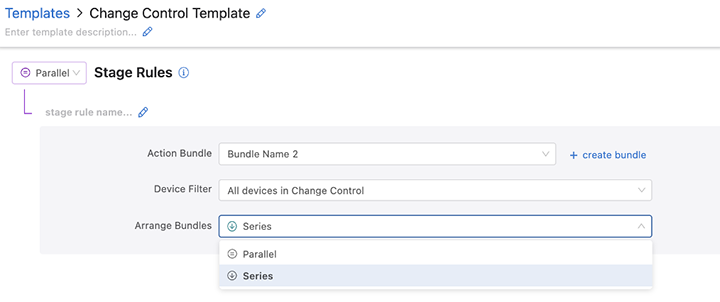
-
You can repeat Steps 2-4 to create a Stage Rule for each Action Bundle to be
added to the Template, and then arrange the order of the Stage Rules.
Figure 12. OrderStage Rules 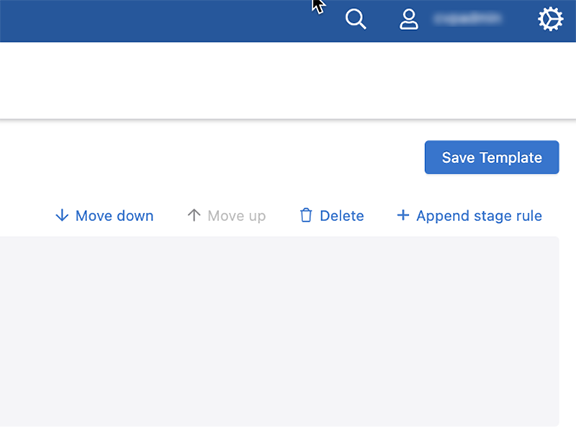 Note: The same Action Bundle can be applied to multiple stages, each with a unique Device Filter.
 -
Set the Stage Rules to execute in Series or Parallel.
Figure 13. Set Stage Rule 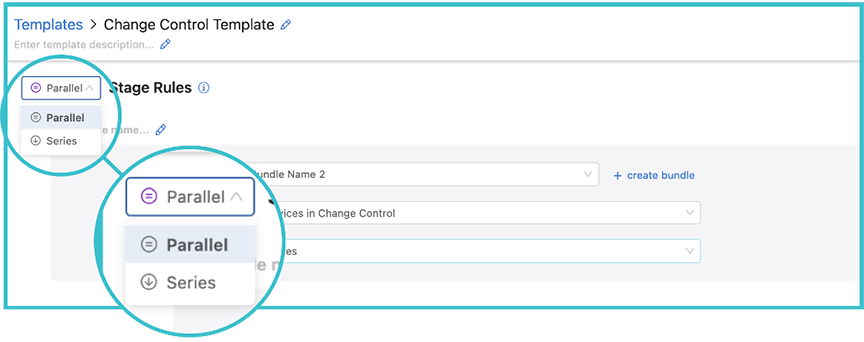
Edit a Template
-
Click Edit on the Template to modify. The Template screen will display
its current Stage Rules and details, how they are ordered, and the manner in
which they will be executed.
Figure 14. Edit a Template 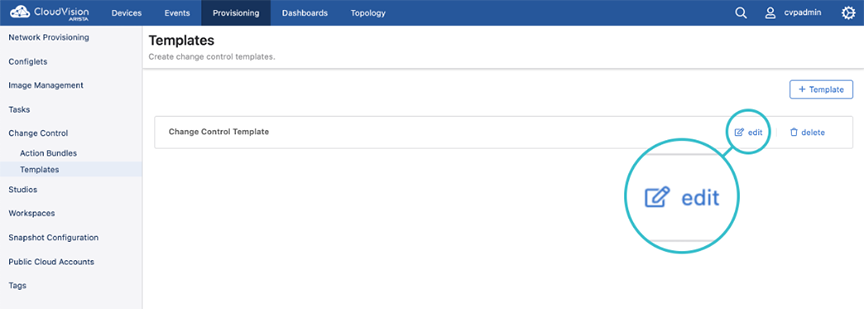
Delete a Template

Creating a New Change Control with a Template
Follow these instructions to create a change control and apply a Template at the same time.
-
To build the change control with a Template, click Template.
Figure 16. Creating a New Change Control with a Template 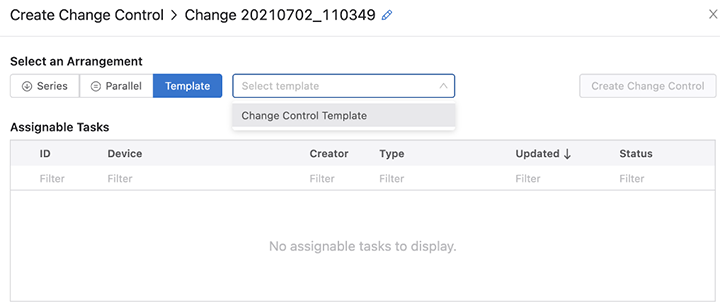
Applying a Template to an Existing Change Control
If a change control has been created but not approved or executed, you can apply a Template to it.