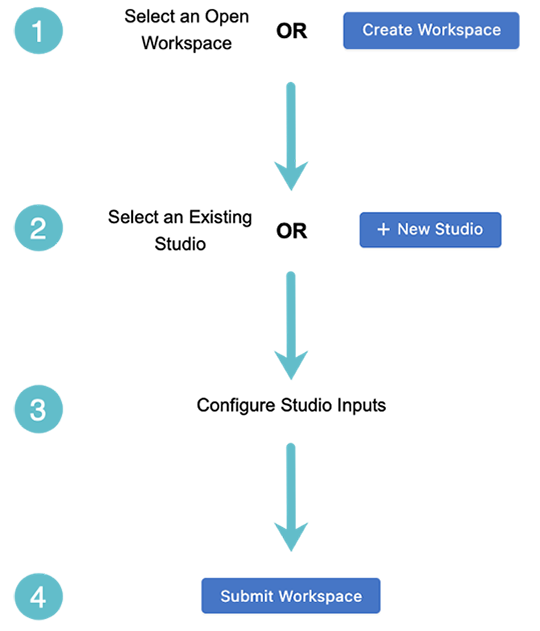
Workflow Overview
Whenever you use Studios, you will begin by either creating a new Workspace or selecting an open Workspace. You will use a Workspace to implement any changes you want to make to one or more Studios. Once you have configured the changes, you will submit the Workspace. It will then be available in Change Control for the relevant user to approve or reject.
Commissioning Devices for Use in Studios
To configure any devices in Studios and Workspaces, you will first need to commission them for use in Studios. This is the purpose of the Inventory and Topology Studio.
To commission devices, you will first create a Workspace and then select the Inventory and Topology Studio. There you will add devices and configure their interface connections. These devices can then be assigned to another Studio using tags.
Creating a Workspace
-
Click Create Workspace, which will bring up the Create New Workspace
modal.
Figure 2. Create a Workspace 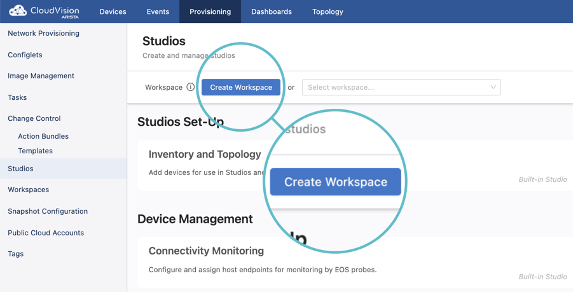
-
Give your new Workspace a name and a description, and then click
Create.
Figure 3. Name and Describe the Workspace 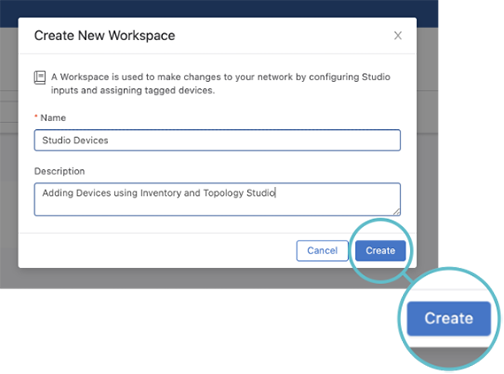
The Workplace you have created can now be used to manage the configuration of one or more Studios. It will be available for use in the Workspace dropdown menu.
Configuring an Existing Studio
To begin the process of configuring a Studio, you will need to either create a Workspace or already have an open Workspace available for use.
-
Create a Workspace or click the Workspace dropdown menu and select the open
Workspace that you want to configure the Studio inputs with.
Figure 4. Selecting a Workspace 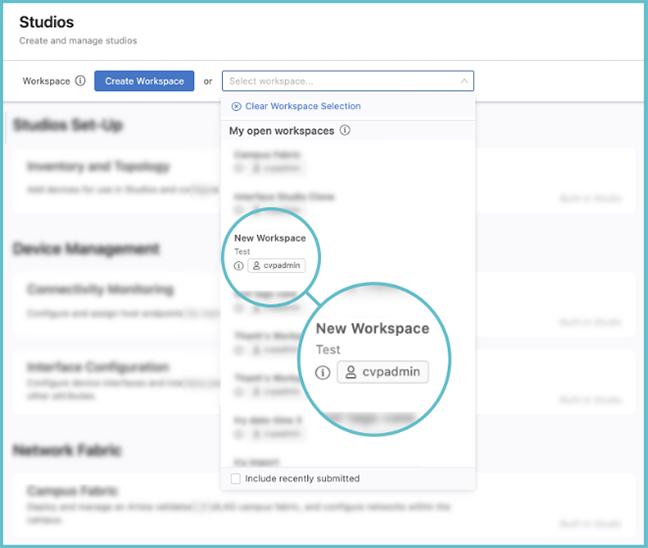
-
Manage the devices the Studio is assigned to by clicking Tag Assignment
and selecting Assign Tags.
Figure 5. Tag Assignment 
For more information on how to use Tags, see Tags.
Note:If the devices you wish to use for the Studio are not available for selection, you will need to commission them for Studios with the Inventory and Topology Studio. -
Once all the changes have been made, you can click Review Workspace.
Figure 6. Review Workspace 
You will now be brought to the Build Screen that forms part of the Workspace submission process.
Note: If you want to make changes to multiple Studios with the same Workspace, do not click Review Workspace at Step 4. Return to the Studios home screen and repeat Steps 1-3, selecting the same Workspace for each Studio you want to configure.
Creating a New Studio
A new Studio will add a custom network feature to your Studio Suite, which you can then configure by defining its inputs. When creating a new Studio, you select these inputs and build its interface with the use of Schema.
-
Click the Workspace menu and select the Workspace you want to use to
create the new Studio.
Figure 7. Select Workspace 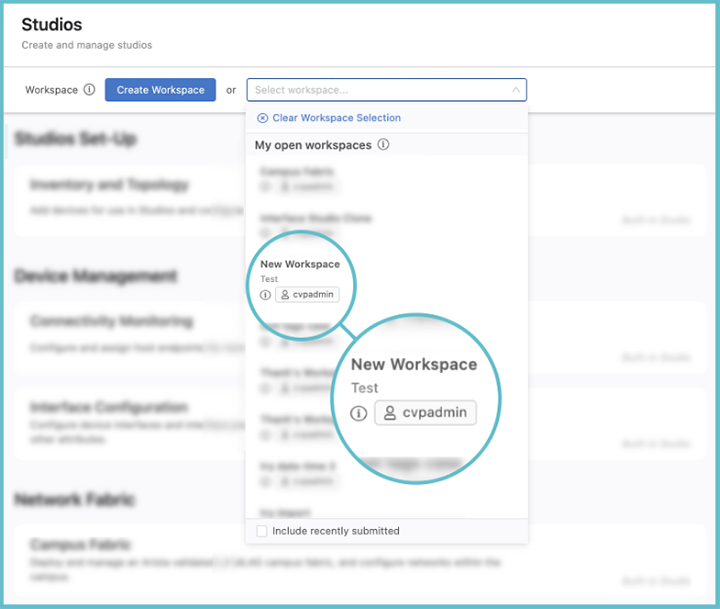
-
Click the New Studio button in the header.
Figure 8. Create New Studio 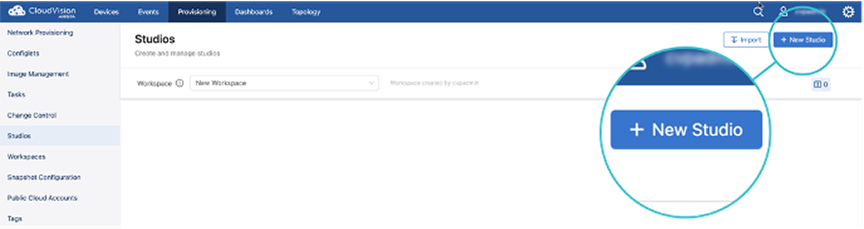
-
After providing the Studio a name and description, you can configure the data
that the Studio will collect as inputs. First click Schema then click
Add Root Input.
Figure 9. Add Root Input 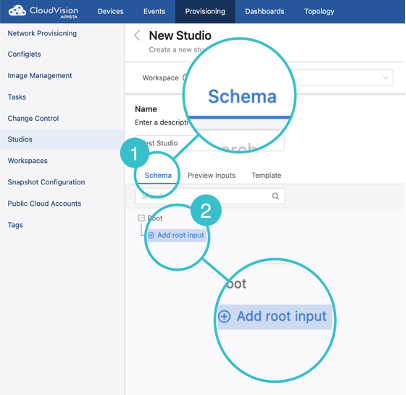
-
Select one of the inputs to configure a variable of the Studio from the
section labelled Add New Input.For an explanation of schema inputs, see Input
Types.
Figure 10. Add New Input 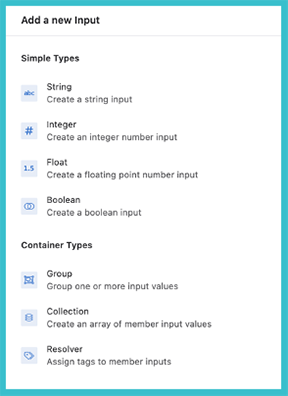 Note: You can configure the Schema input as a CLI configuration by using the Template function once you have created the new input with Schema.
Submitting a Workspace
-
Click the Review Workspace button in the header.
Figure 11. Review Workspace 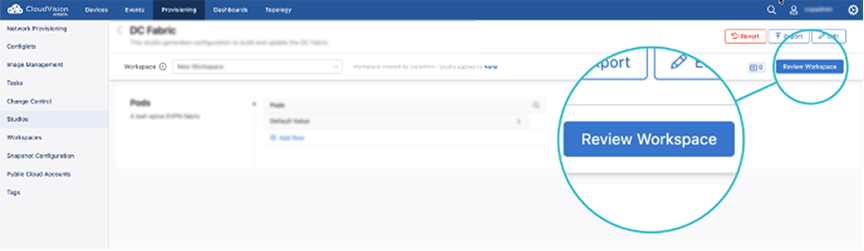
-
Once satisfied, you can click Submit Workspace.
Figure 12. Submit Workspace 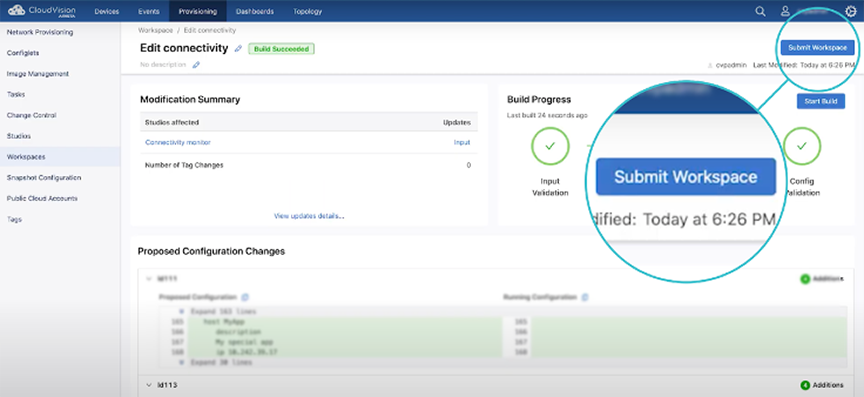
-
You will be presented with a modal that will bring you to Change Control.
Figure 13. Workspace Submitted 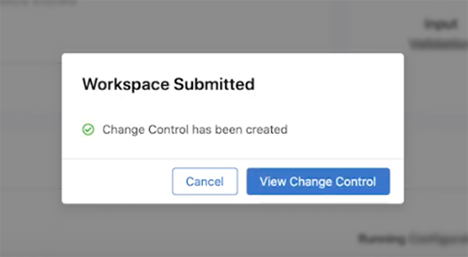
The relevant user will then be able to approve the Workspace, and its configuration will then become part of the mainline configuration of your network.