Onboarding Procedures
- Onboarding Authentication Providers
- Onboarding Devices: Token-Based Authentication
- Subscribing to CloudVision as-a-Service updates
Onboarding Authentication Providers
Once the CloudVision as-a-Service instance is set up, use the following procedure to add a preferred authentication provider.
To add a preferred authentication provider:
-
Navigate to Settings using the gear icon.Verify under the
Features section OAuth Providers is toggled on.
Figure 1. OAuth Providers 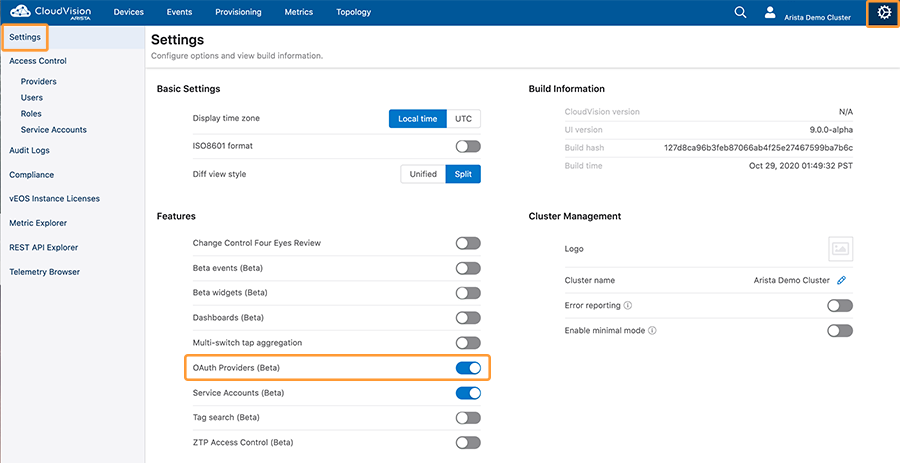
-
Navigate to Access Control and then Providers. To add a new
authentication provider, click the 'Add Provider' button.
Figure 2. Add Provider 
-
Select a provider that your organization uses.
Figure 3. Shared Provider 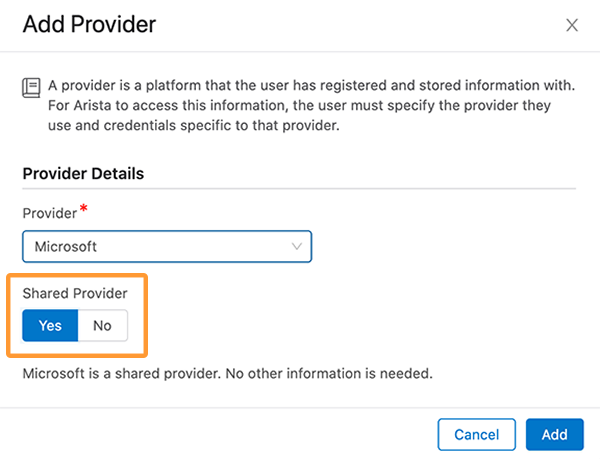
Note that currently Google and Microsoft are supported as a Shared Providers. Shared Providers use an Arista-provided set of credentials so no other information is required from the customer for the onboarding.
Other providers are currently supported as non-shared providers. Additional required form fields will appear upon selecting these providers. These fields will need to be filled out with credentials specific to your account with that provider.
Figure 4. Non-shared Provider 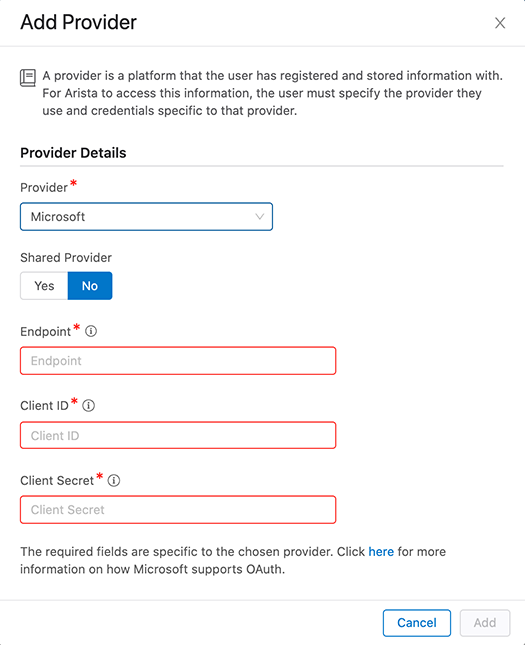
-
Once the authentication provider is set up, make sure to add the admin email
address and verify the login process before the Invitation URL expires. To add a
user account navigate to Users and then the Add Userscreen.
Figure 5. Add User 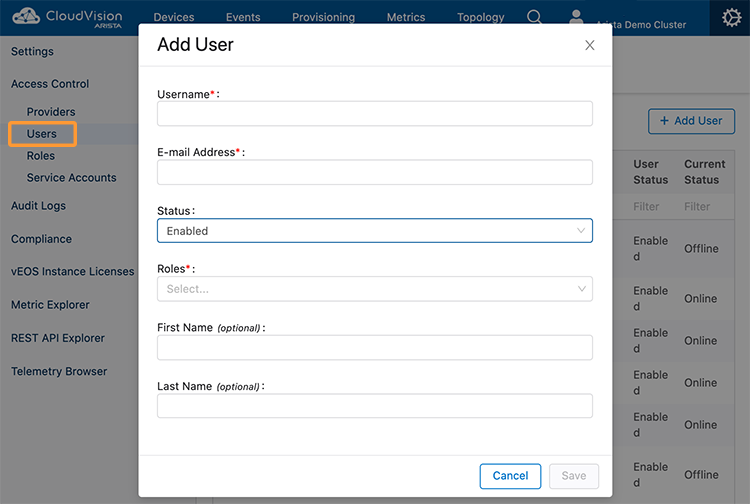
Onboarding Devices: Token-Based Authentication
To onboard the devices using token-based authentication.
-
To onboard the devices navigate to Devices and then Inventory
and thenAdd Devicesand thenOnboard Devices.
Figure 6. Onboarding Devices 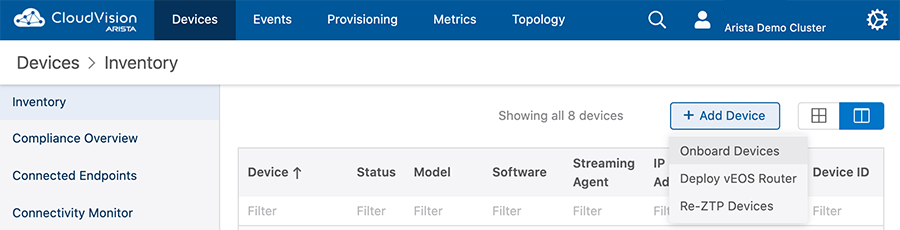
-
Details on how to create a token, and using that token to onboard the devices
are listed under the Onboard Devices. Please follow the directions to
create a token and onboard your devices to CloudVision Service.
Note: You can use the same token to onboard multiple devices. CloudVision Service will use the device serial number to identify a device.
Figure 7. Onboarding Devices 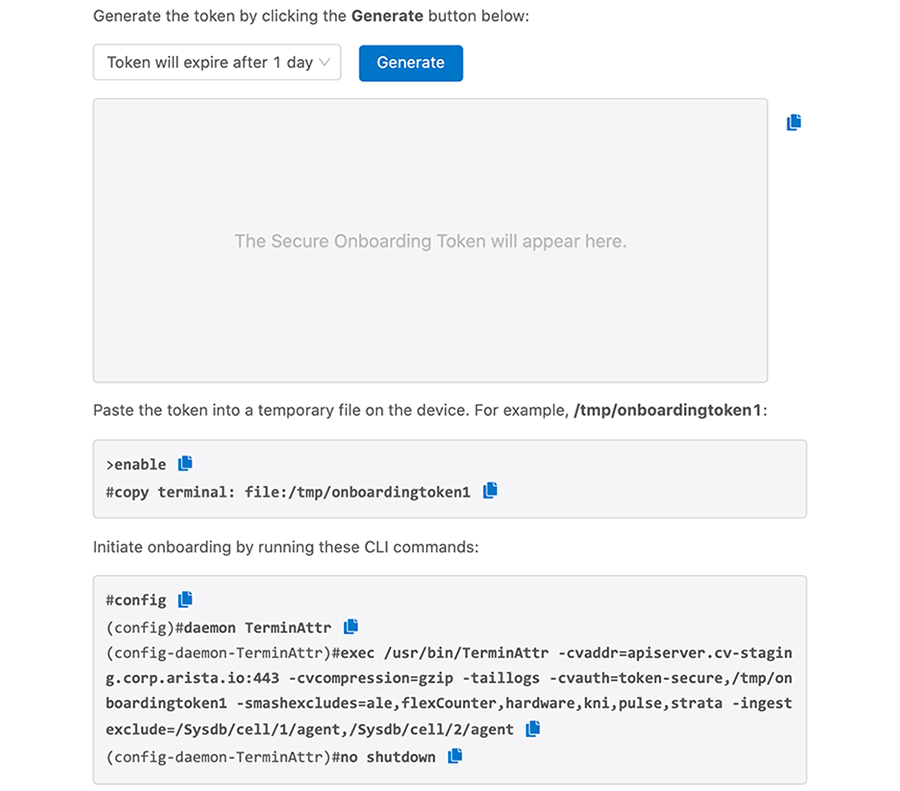
-
Once you successfully onboard the devices you should be able to see them under
the Devices tab.
Figure 8. Device Inventory Screen 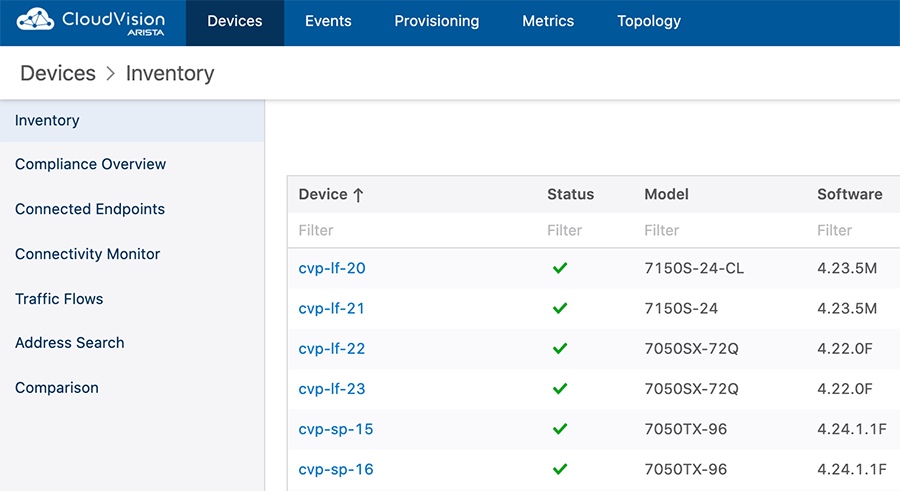
-
Click on the wrench icon () to provision the device. This will take you to
the device-specific page. Selectthe Device Overview tab and then select
Provision Device to provision the device in CloudVision Service.
Figure 9. Device Overview 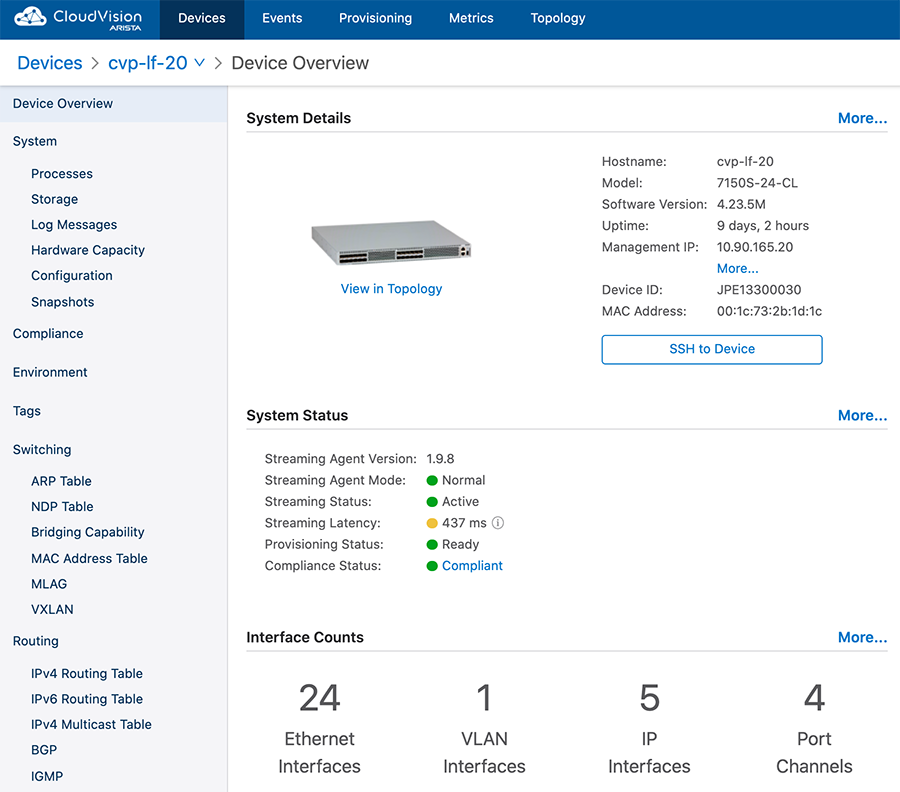 Note: Prior to Provision Device make sure the user account exists in the EOS device. For example:Assuming This email address is being protected from spambots. You need JavaScript enabled to view it. is the email address used for OAuth authentication you need to have john.smith as a user (for Arista Demo you will need to use
This email address is being protected from spambots. You need JavaScript enabled to view it.): sw(config)#username john.smith privilege 15 <nopassword/secret>If you have TACACS+ configured for authentication, in order for CloudVision as-a-Service to properly provision the device, the exact user account should already exist in the TACACS+ Server.
If you have a Radius server for EOS authentication, you need to add the
--disableaaaargument into the TerminaAttr config.For additional information on migrating an EOS device with a TACACS+/Radius authentication to the CloudVision Service, please refer to Authentication Requirements.
Subscribing to CloudVision as-a-Service updates
You can monitor CloudVision Service live status through https://status.arista.io . You can also subscribe to CloudVision Service notification via email/text using Subscribe to CloudVision.
Bearer Token Login
Use bearer tokens to provide custom applications or third-party applications login access to CloudVision. This will allow the application to make configuration changes to EOS devices. Bearer token login can be used with identity providers that issue bearer tokens and have an introspection endpoint.
Login via bearer token involves communication between the application, the identity provider, and CloudVision.
To allow an application to log in via bearer token, ensure that both the Roles Mapping for Providers and the Allow Bearer Token Login toggles are enabled under Cluster Management in General Settings.
- Make sure that the identity provider has been properly set up in Providers.
- Request a bearer token from the identity provider for the application.
In generating the bearer token, you willneed to make sure that the user exists in CloudVision and that the token has the required fields for the relevant role, username, and optionally email address. Depending on the application, this may require you to log in to the identity provider, create a bearer token, and then program the token in the application.
For more information on creating a bearer token, or access token, with Okta, see Get an Access Token and Make a Request: https://developer.okta.com/docs/guides/implement-oauth-for-okta/main/#get-an-access-token-and-make-a-request.
For documentation on getting a bearer token, or access token, with PingIdentity, see Getting an Access Token: https://docs.pingidentity.com/r/en-us/pingone/p1_t_getaccesstoken.
Alternatively, you may be able to log in to the application and request a bearer token from the identity provider via script that is then returned directly to the application.
To complete this process in Ansible, see Token-Based Authentication: https://docs.ansible.com/ansible-tower/latest/html/administration/oauth2_token_auth.html
- Once the application has the bearer token, you willprovide it with the login URL
as a bearer header in the request:
https://<cv-domain>/api/v1/oauth/bearer?org=<org>&provider=<provider>
The URL includes the following components, which must match the details in CloudVision for the bearer token to be verified and the access token returned to the application:
-
<CV-domain>: Enter the domain of your CloudVision cluster
-
<Org>: Enter Default
-
<Provider>: Enter the name of the provider in CloudVision that issued the bearer token
The application then makes an API call to CloudVision using the access token to complete the login process.
-