Topology Hierarchy Manager
Using Topology Hierarchy Manager you can construct a custom topology frameworks for your network.This allows you to customize the topology layout and how devices are mapped. A custom hierarchy is constructed in a tree-like formation consisting of layers. Each layer is associated with a tag label or value, which can be assigned in Topology using Topology Tags and Hints. Multiple hierarchies can be used in the same CloudVision cluster, so you can display different areas of your network differently.
Accessing Topology Hierarchy Manager
To Access Topology Hierarchy Manager go to the Topologoly tab.
- Click the Topology Settings icon.
Figure 1. Accessing Topology Hierarchy Manager 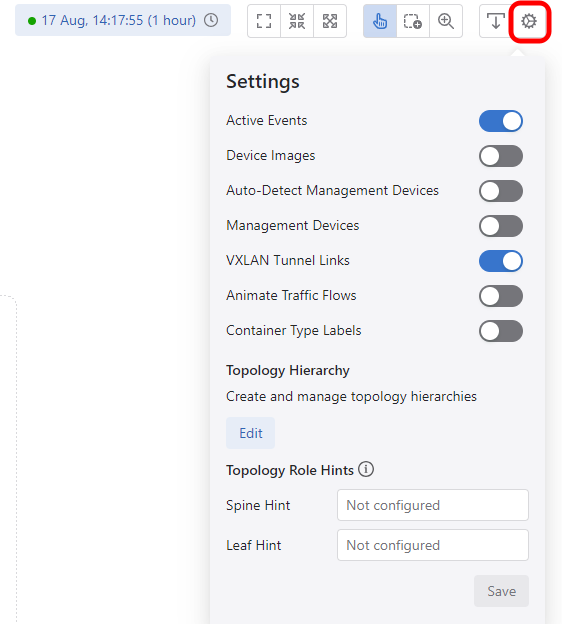
- Click Edit under Topology Hierarchy.The Topology Hierarchy Manager opens.
Figure 2. Topology Hierarchy Manager 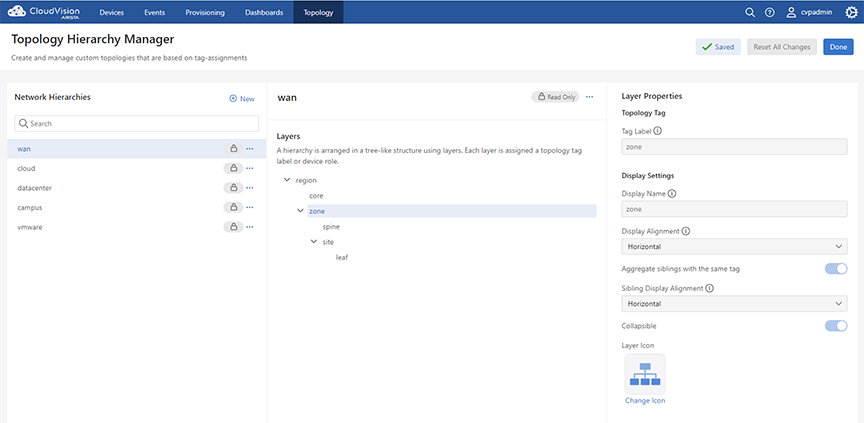
Topology Hierarchy Manager Layout
The Topology Hierarchy Manager has three key areas, which perform different functions when configuring a custom topology hierarchy.
- Network Hierarchies: Lists all hierarchies available to use. Those with lock icons are built-in hierarchies and cannot be edited.
- Selected Hierarchy: The center panel displays the layers of a selected hierarchy, which can be edited when it is a custom hierarchy.
- Layer Properties: The third panel displays the properties of a selected layer.
Configuring a Topology Hierarchy
- Click New.
Figure 3. Topology Hierarchy Manager 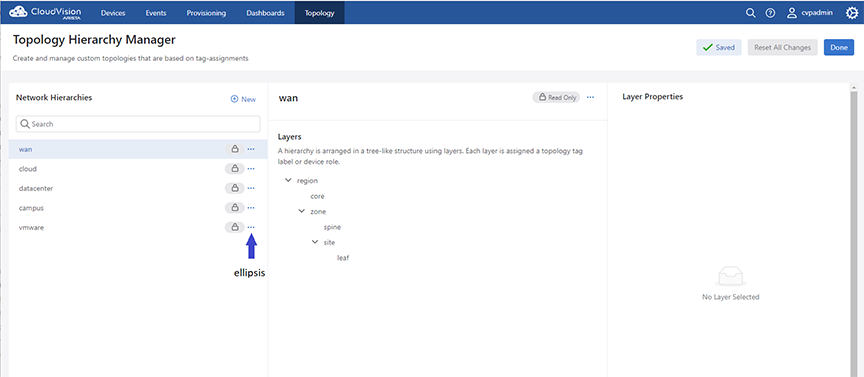
- Enter the hierarchy details.
Figure 4. Topology Hierarchy Manager - New Network 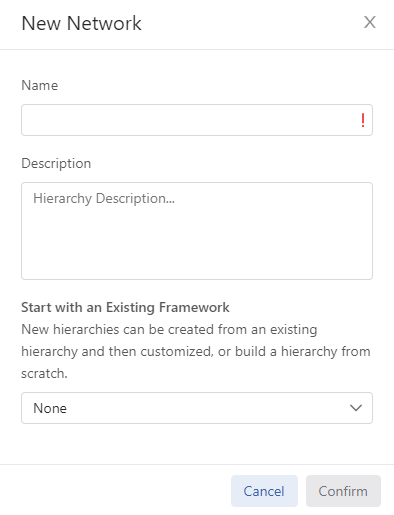
- Name: Enter a name for the hierarchy.
- Description: Add a description to explain the purpose of this hierarchy.
- Existing Framework: You can duplicate an existing hierarchy or set this option to None to start with a blank hierarchy.
- Click … (ellipsis) on the root layer and select Add Sublayer.Note: You must hover over the layer name before you will see the Options …
Figure 5. Add Sublayer 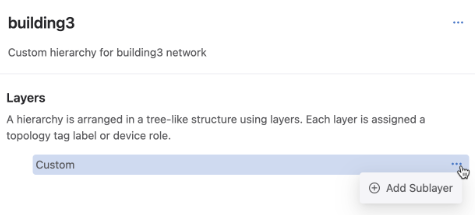
The root layer is the top layer of the hierarchy. You can change its name by configuring its layer properties.
- Continue to add layers to match the layout of the hierarchy.
Figure 6. Continue to Add Layers 
Layer names and their display managed and when configuring a layer’s properties. When your topology is mapped out and each layer’s properties configured, you can use the custom hierarchy.
Configuring Layer Properties
The properties of a layer determine how devices map to it and how it is displayed in the topology.
- Enter a tag label or device role.
Figure 7. Enter a Tag Label 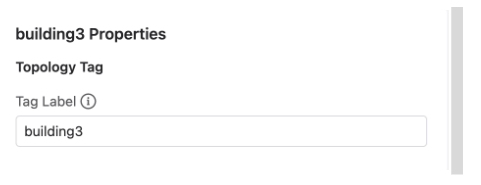
The name of this input dynamically changes depending on whether it has children or not. A layer without children will accept a device role, which is a tag value. Any parent layer will accept a tag label. Tag labels are used to provide hints, which will map devices with device tags that match. A tag is a label:value pair. So assigning a tag label to a parent layer and a device role to child will create a label:value pair, like DC1:leaf.
- Enter an optional display name.
Figure 8. Enter an Optional Display Name 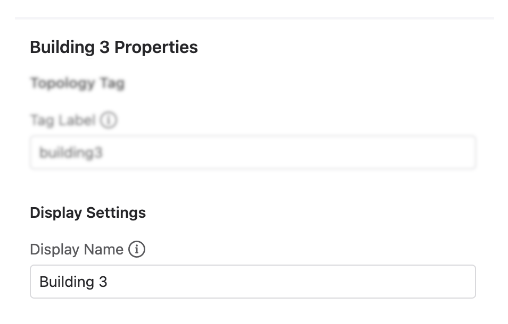
The default display name is the tag name or device role.
- Select a display alignment.
Figure 9. Select a Display Alignment 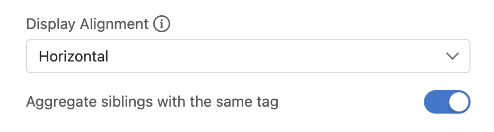
- Enable or disable Aggregate Siblings with the Same Tag.
Option only available on parent layers..
- Select a sibling display alignment.
Figure 10. Select Sibling Display Alignment 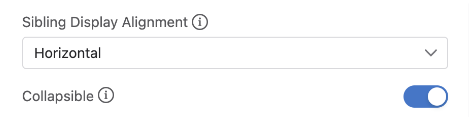
- Enable or disable Collapsible.
- Select a cluster icon.
Figure 11. Select a Cluster Icon 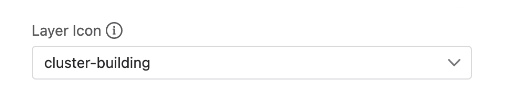
The layer icon is displayed for the container or devices matching this layer. Once the hierarchy layers have been arranged and their properties configured, you can use the custom hierarchy for your topology.
Using a Custom Topology Hierarchy
Custom hierarchies can be used with Topology Tags and Hints to configure your network. Topology Tags are used to assign and match existing devices and containers with child layers in the custom hierarchy. Hints use the parent’s tag label and child’s device role to automatically assign devices with matching user tags.
- Click Topology Tags.
Figure 12. Click Topology Tags 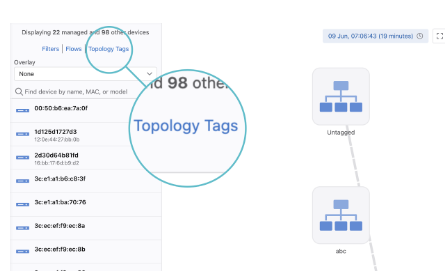
- Select one or more devices or containers.
Figure 13. Select One or More Devices or Containers 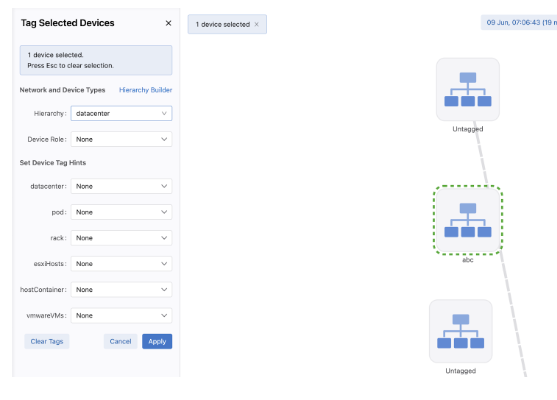
- Select the custom hierarchy from the Hierarchy dropdown.
Figure 14. Select the Custom Hierarchy 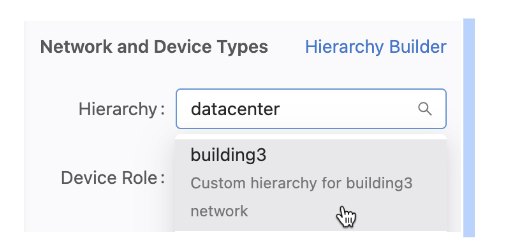
- Select a device role in the Device Role dropdown.
Figure 15. Select a Device Role 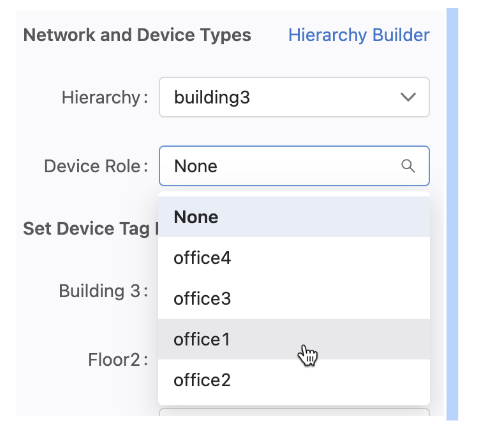
Devices in this selected container are now assigned the layer properties of office1 in hierarchy building3..
- Optionally provide tag hints for parent layers.
Figure 16. Provide Tag Hints 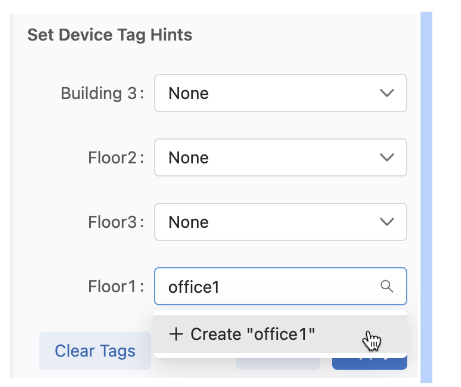
When a device with a user tag matching the parent layer tag label and one of that parent’s children’s device roles, it will be automatically positioned in the topology. In this example, if a device has the tag Floor1:office1 it will occupy the same position in the topology as what we assigned to the above container.
- Click Apply.
The selected devices or containers will now apply the layer properties to all affected devices.