The configuration guide is no longer being updated. Please refer to the CloudVision Help Center going forward.
Filter Management
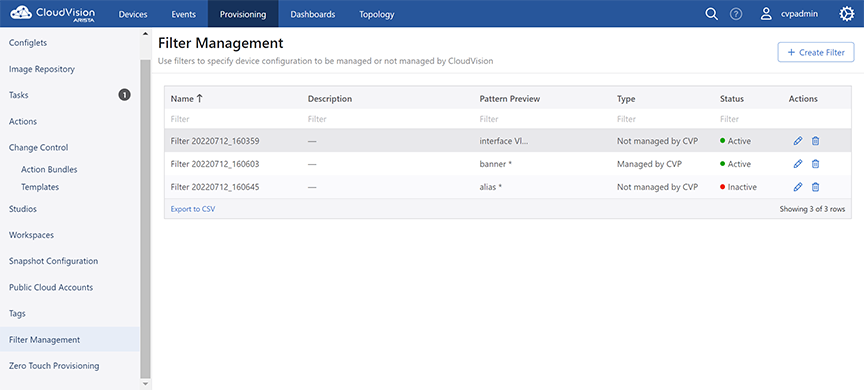
The Filter Management screen lists all existing filters with all the fields associated
with a filter. See the figure below.Figure 1. Filter Management Screen
It provides options to perform the following tasks:
Creating a filter
Updating a filter
Deleting a filter
Enabling or disabling a filter
Customizing the partial configuration management
To open the Filter Management screen, navigate to Provisioning >
Filter Management. This screen provides brief information of
current filters with the associated fields in a tabular format. See the following
figure.
You can perform the following actions on this screen:
On the upper right corner of the screen, click + Create
Filter to create a new filter. See Creating a New Filter.
Under the Pattern Preview column, hover the cursor on the
exclamatory mark to view the number of lines in the filter pattern.
Under the Status column, green dots signify active
filters and red dots signify inactive filters.
Under the Actions column:
Click the edit icon to edit the corresponding filter.
CVP opens the
filter details screen for editing a filter. See Creating a New
Filter.
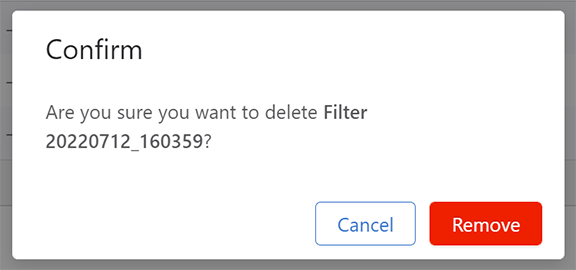
Click the delete icon to delete the corresponding filter.
Click
Confirm when CVP opens the
Confirm dialog box prompting to confirm the
deletion.Figure 2. Delete Filter Confirmation Dialog Box
Note: Only inactive filters can be deleted.
Click Export to CSV for downloading the table contents to
your local drive.
 Note: Only inactive filters can be deleted.