Studio Elements and Functions
To make the most of Studios, you will need to know a little more about the tools you have control over. This section explains the full use of the different components that make up the Studios interface, which all either form a part of or enhance the workflows.
Reviewing a Workspace
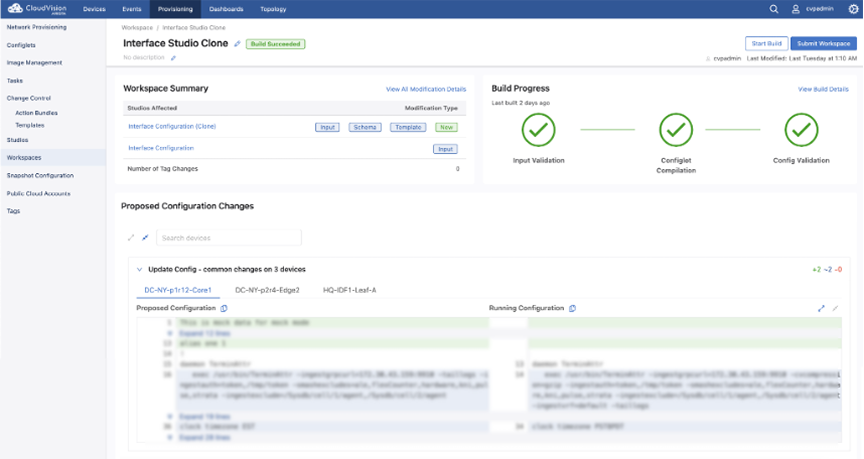
The Workspace build screen appears after you have clicked Review Workspace. It provides you with important information on the Workspace’s configuration before submitting to Change Control for approval.
There are several elements in the screen.
Build Progress
- Input Validation: Checks whether the values of the inputs follow the schema rules.
- Configlet Compilation: Identifies any coding errors.
- Config Validation: Determines whether the affected devices can support the proposed configuration.
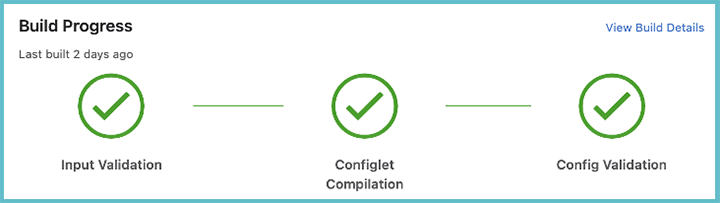
By clicking View Build Details, you can see each of these components for the individual devices that the configuration affects.
This shows you the build progress for each device, and it helps you identify the devices the build progress has failed on.
Workspace Summary
The Workspace Summary table provides a brief overview of the type of modifications that a Workspace will make.
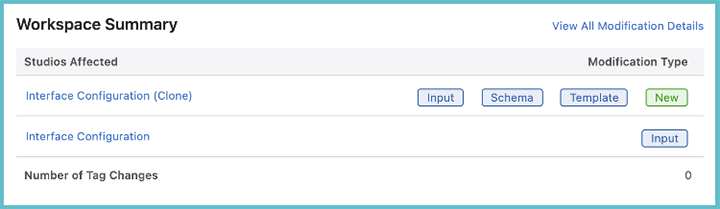
On the left-hand side, you can see each of the Studios that the configuration affects. On the right is displayed the type of change that has been made with the Workspace. By clicking on the type of configuration change, you will be brought to the screen in which that change was implemented.
Click View All Modification Details, to view all the configuration changes displayed together in the manner of Schema inputs.
Proposed Configuration Changes
Review the Proposed Configuration Changes to compare the Workspace configuration changes with what currently exists in the network.
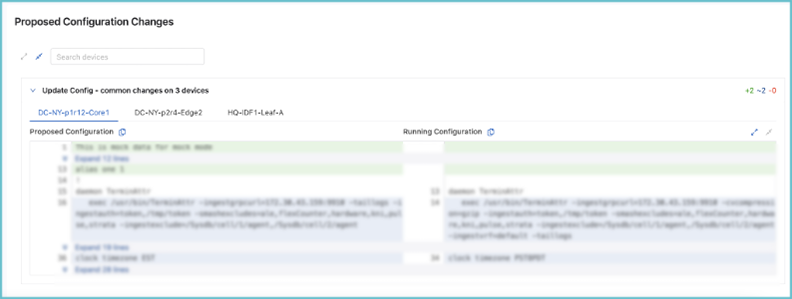
This is shown for each individual device, and clicking on the device name will show you its proposed configuration.
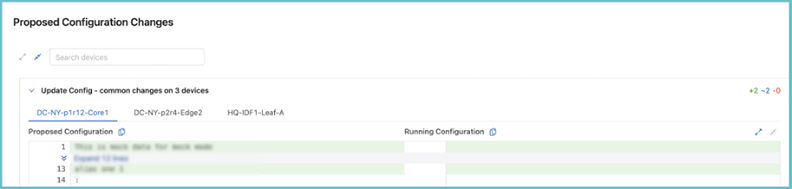
- Green = additions
- Blue = modifications
- Red = deletion
Tags
A tag is a value-label pair that you apply to a device or an interface. User Tags allows you to group devices or interfaces that share a common characteristic under a tag. By way of example, you could have:
Role: Spine or DC: New York
With Studios, you can then use these User Tags to create a separate configuration for different groups of devices. For instance, if you wish to separately configure the spines and leafs of a data center fabric, you can do so by tagging the relevant devices as spines or leafs.
User Tags and System Tags
Only User Tags are supported in Studios, which are tags created and defined by a user of CloudVision through the following process.
System Tags are created by CloudVision and based upon characteristics or attributes of devices.These tags cannot be created or edited by you or any other CloudVision user. System tags are not static and could affect the stability of any Workspace configurations you create. For this reason, only User Tags are available in Studios.
Any changes made to User Tags can impact the configuration of devices. For this reason, User Tags can only be deployed inside a Workspace. When you build the Workspace and review its changes, you will then see any impact the tags have on the Workspace proposed configuration and can rectify it accordingly.
Creating Tags
To tag devices with User Tags, you will need to leave the Studios environment:
-
Click on the Provisioning tab, if necessary.
Figure 6. Provisioning Tab 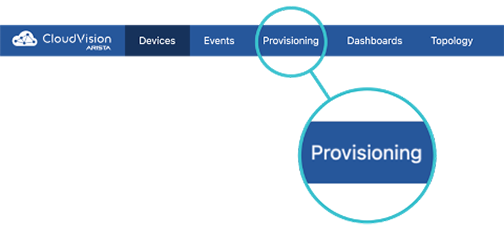
-
Click on Tags.
Figure 7. Tags 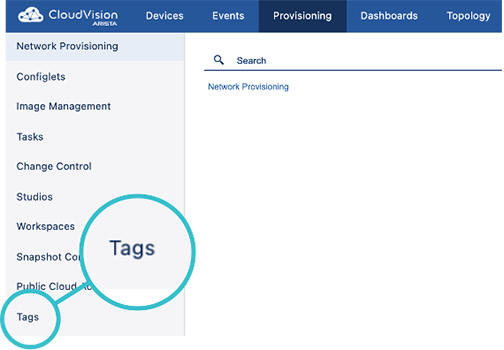
-
Click Create Workspace or select an open Workspace from the dropdown
menu.
Figure 8. Create Workspace 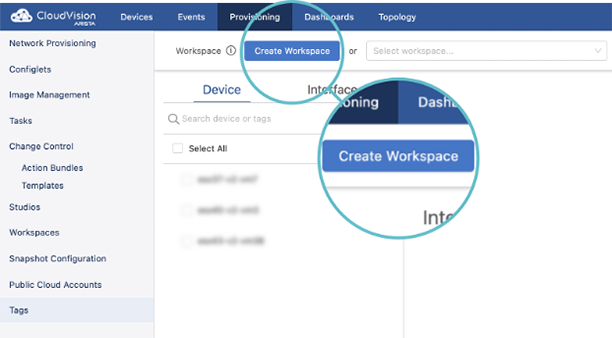
-
Select one or more devices or interfaces, and then enter a value under Add
or Create Tags.
Figure 9. Add or Create Tags 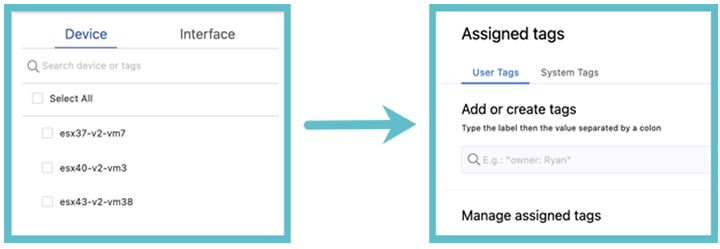
Applying Tags in Studios
You will use User Tags in two places in Studios: as the field data for a resolver input, and when assigning a Studio to devices.
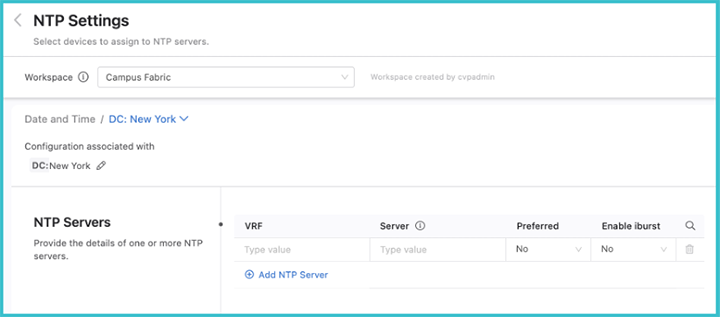
Resolver Input
Resolver Input is a Container Type that allows you to apply the input variables associated with it to a selection of devices. The following is an example of a resolver input, which, in this case, allows you to select tagged devices that you will assign to an NTP server.
Studio Tag Assignment
Within each Studio, with the exception of Inventory and Topology, there is a Tag Assignment option.
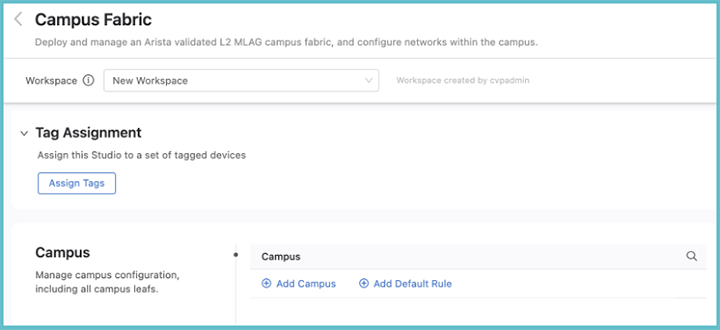
You will use Tag Assignment to specify the devices that any given Studio configuration affects. All of the tagged devices you select must already have been commissioned for use in Studios with the Inventory and Topology Studio. In order to assign devices, click Assign Tags and then enter a device tag query.

You can edit these tagged devices at any point with a Workspace by clicking the pencil icon to the right of the last tag.
You can use tags to apply an entire Studio to a selected group of devices. For example, you may want the configuration of a Studio to relate only to devices in a particular data center. All devices in that data center can be tagged under a label, and you can assign that Studio to that tag label.
Schema
Schema are the input variables of a Studio and are used to collect data from a CloudVision User. They are defined when either Creating a New Studio or editing an existing Studio. You do this by selecting an input type in the Studio Edit screen and then completing a form.
Editing a Studio Schema
Only custom Studios can be edited.
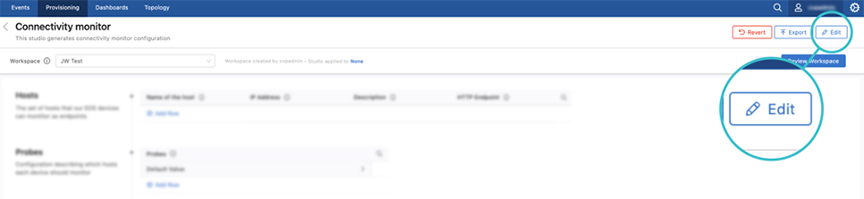
To edit a custom Studio Schema, create a new Workspace or select an open Workspace and then click the Edit button within a Studio.
At the Studio Edit screen, you can select Schema and the process will be the same as creating a new Studio.
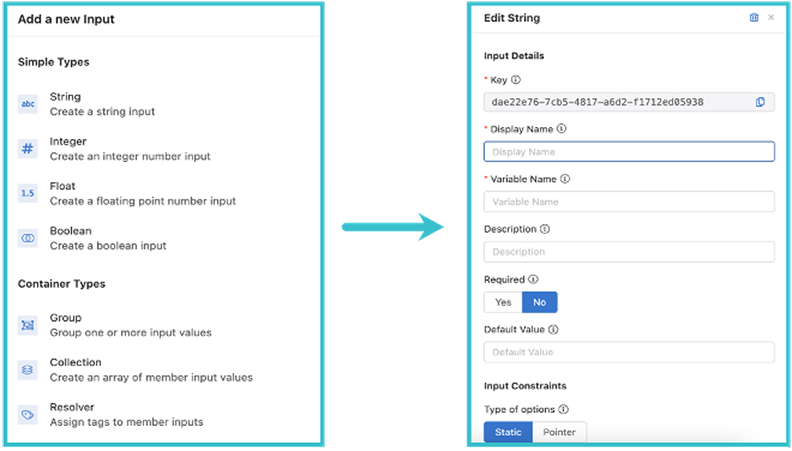
Input Types
Schema inputs can be broadly classified into two categories:Base Types and Container Types.
Base Types are inputs that hold a real value and have a defined format. In general, these inputs can be validated to ensure that their value matches the defined format. You can also add constraints that restrict the values that can be entered in their fields.
Container Types are inputs that group one or more Base Types into a unit. They can be used to assign a set of inputs to a specific group of devices, allow a Studio to provide multiple values for a given input, or to group multiple Base Types and make them into an input unit.
Each input type is further divided into different data types:
- String
- Integer
- Float
- Boolean
- Resolver
- Collection
- Group
You can find a full description of each data type in Appendix 2: Schema Input Types.
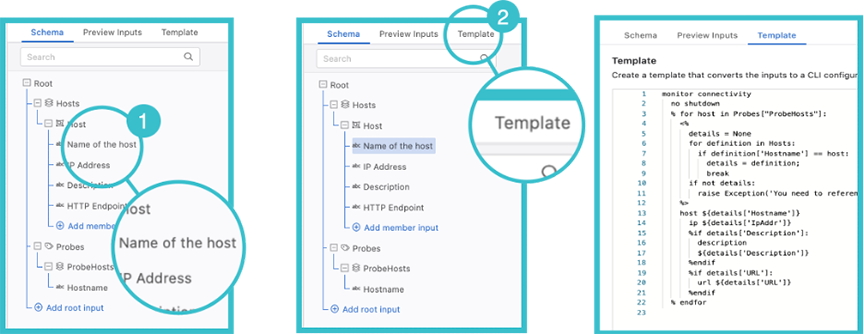
Template
Once you have defined an the variables for an input under Schema, you can use Template to convert the input into a CLI configuration. You can click on the input you want to configure, and then click Template.
For more information, refer to Mark-Up Language.
Mark-Up Language
You have a choice of two languages when writing a Template, Mako or Jinja2. The default setting is Mako, but you can select Jinja2 or change back to Mako by using the below toggle:
Both Mako and Jinja2 have a lightweight syntax that allows you to leverage the underlying Python of Studios to create an effective Template.
You can find a primer on Mako syntax here and for Jinja2 here. There is also a short guide for using Mako for Template in Appendix 1: Mako Syntax.
Importing and Exporting Studios
Studios are saved and distributed as .yaml files. The file contains the entire schema definition, template, and input values. You can easily import and export Studios using CloudVision.
Importing
- Click Create Workspace or select an open Workspace from the dropdown menu.
- Click Import.
Figure 16. Import 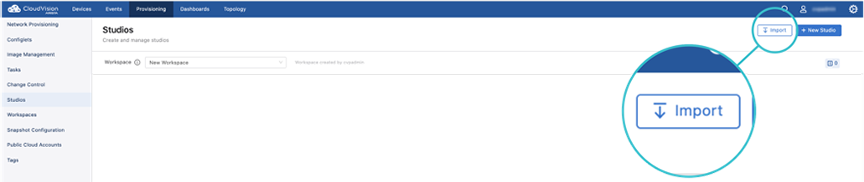
- On the Import Studio modal, select the Studio file and then click Import.
The imported Studio will now be part of your Studio Suite.
Exporting
- From your Studio Suite, select the Studio you wish to export.
- Within the Studio screen, click Export.
Figure 17. Export 
- A pop-up box will appear, which will ask you the details for downloading the file. Enter the details and click Download or Save.