Using the Tasks Module
This module covers the following sections:
Accessing the Tasks Summary Screen
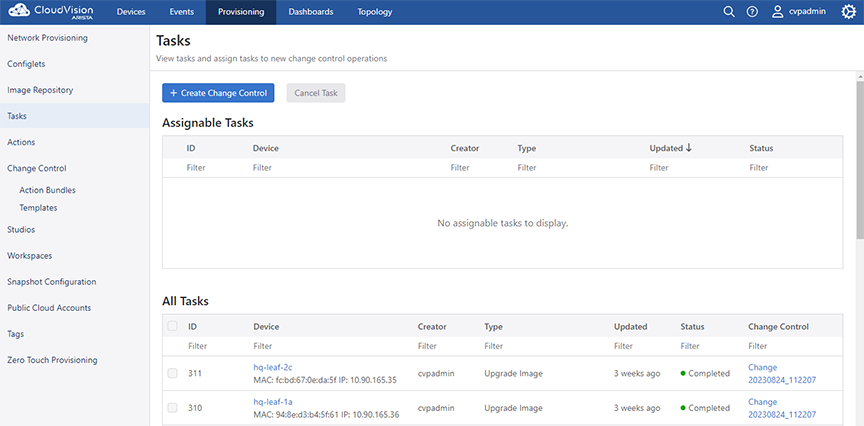
Use the Tasks Summary screen to create Change Controls, cancel tasks, view assignable and assigned tasks, navigate to the appropriate task details screen, and navigate to the device overview screen. See Task Screen below.
To access the Tasks Summary screen, go to the Provisioning screen and click Tasks in the left menu.
The Tasks Summary screen consists of the following entities:
- + Create Change Control button - Click this button to create a Change Control
- Cancel Task(s) button - Click this button to cancel selected assignable tasks
- Assignable Tasks
Table - Lists assignable tasks with the following information:
- Task ID - Displays the task ID.
Click the Task ID go to the appropriate task details screen.
- Device
- Displays the device name on which this task is performed.
Click the device name to open the appropriate Device Overview screen.
- Created By - Displays who created the task.
- Type - Displays the task type.
- Last Updated - Displays when the task was last updated.
- Status - Displays the task status.
- Task ID - Displays the task ID.
- Assigned Tasks Table
- Lists assigned tasks with the following information:
- Task ID - Displays the task ID.
Click the task ID go to the appropriate task details screen.
- Device
- Displays the device name on which this task is performed.
Click the device name to open the appropriate Device Overview screen.
- Created By - Displays who created the task.
- Type - Displays the task type.
- Last Updated - Displays when the task was last updated.
- Status - Displays the task status.
- Change Control - Displays the Change Control
name.
Click the Change Control name to go to the appropriate Change Control Details screen.
- Task ID - Displays the task ID.
Creating Change Controls from the Tasks Summary Screen
The Change Control module selects and executes a group of tasks that you want to process simultaneously. While creating a Change Control, you add tasks with pending or failed status to the Change Control.
Complete the following steps to create a Change Control from the tasks summary screen:
-
Click
+ Create Change Control with
n tasks where n is the count of selected tasks.
Figure 2. Create Change Control Button
The system displays the appropriate Change Control details screen.
Figure 3. Create a Change Control 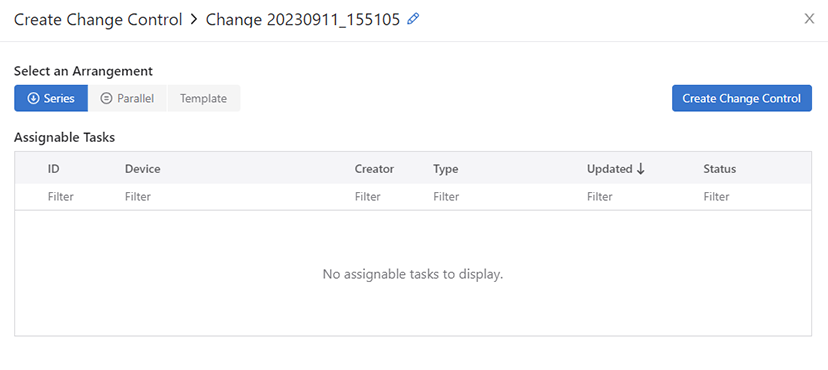
Creating Change Controls from the Change Controls Summary Screen
The first step involved in using the Change Control module to manage tasks is to create a Change Control. While creating a Change Control, you add tasks with pending or failed status to the Change Control. By default, all tasks in the same Change Control are added in parallel. If you want to change the execution order, you can drag and drop the action cards on the Change Control Details screen. You can execute grouped tasks after a Change Control is created, reviewed, and approved.
Complete the following steps to create a Change Control from the Change Control Summary screen:
-
On the CloudVision Portal, click
Provisioning > Change Control.
The system displays the Change Control Summary screen.
Figure 4. Change Control Summary Screen 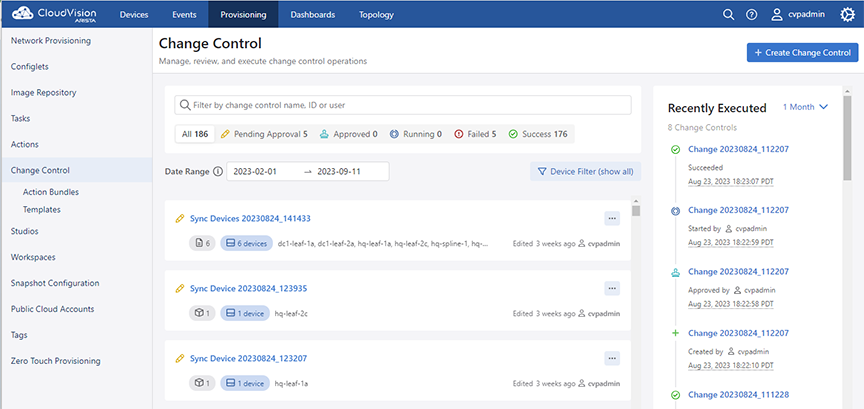
-
Click
+ Create Change Control button at the upper right corner.
The system displays the Assignable Tasks dialog box.
Figure 5. Assignable Tasks Dialog Box with No Tasks Selected 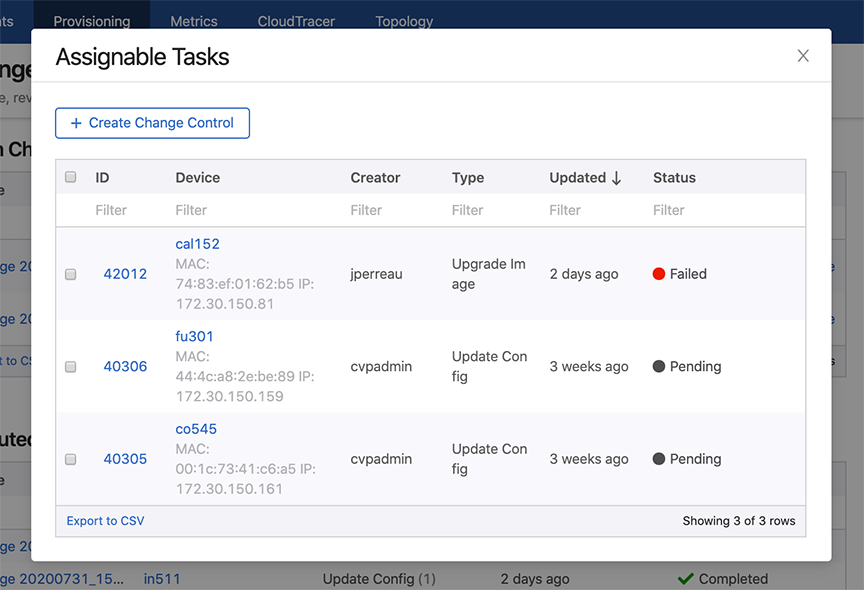
-
Click
+ Create Change Control with n tasks where n is the count of
selected tasks.
Figure 6. Assignable Tasks Dialog Box with Tasks Selected 
The system displays the appropriate Change Control Details screen.
Accessing the Tasks Details Screen
The Tasks details screen provides detailed information for any given task. To access the Tasks details screen, click the task ID under the Task ID column in the Tasks summary screen.
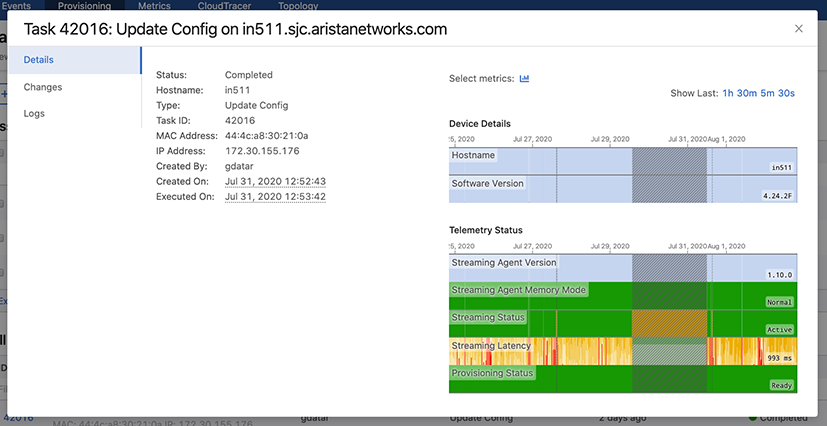
The Tasks Details screen provides the specified information in following tabs:
- Pending tasks icon - Displays the count of pending tasks
- Notifications - Displays the count of unread notifications.
- Logs tab - Displays
logs of the appropriate task.
Note: This tab is displayed only for completed tasks.
- View Image tab - Provides detailed information
on image changes.
Figure 8. View Image Tab 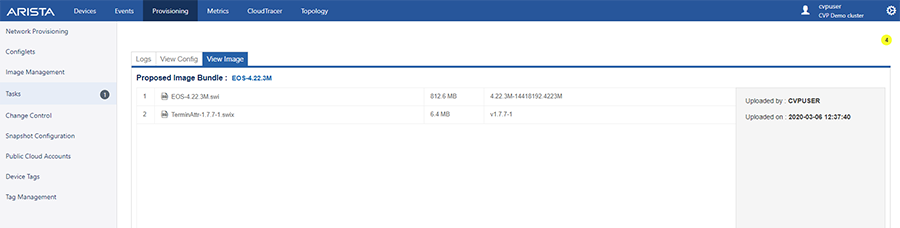
- View Config tab - Displays provisioned,
designed, and running configuration changes.
Figure 9. View Config Tab 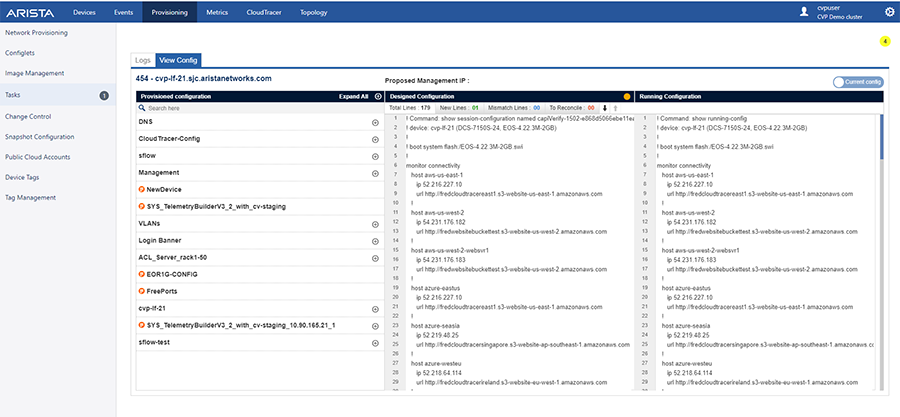
Task Status
All CloudVision Portal (CVP) tasks are automatically assigned a specific status by the system. The system automatically updates tasks status to indicate the current status of a task.
The task statuses are:
Pending
Any new task is generated with a 'Pending' status. This means that the task has been generated but not executed. You can execute a pending task at any time. Once the task is successfully executed (completed without failure), the status of the task changes to Completed.
In-Progress
A task being executed moves to “In-progress” state.
- Config assign, pushes the configuration on the device.
- Image assign, copies the image from CloudVision to the device.
- In-Progress tasks can be canceled.
- Execution In Progress
- Device Reboot In Progress
- Task Update In Progress
- Configlet Push In Progress
- Image Push In Progress
- Rollback Config Push In Progress
- Rollback Image Push In Progress
- Cancel In Progress
- ZTR Replacement In Progress
Completed
A task that has been completed. Upon completion, the status changes to Completed. Tasks with Completed status can't be executed or canceled.
Failed
- Device not reachable
- Wrong configuration
- Application problem
Canceled
A task that is removed from the queue of pending tasks. Tasks with the status of Completed or tasks that have already been canceled, cannot be canceled. Tasks with any status other than Canceled or Completed can be selected and canceled.