AAA Providers
Authentication, authorization, and accounting (AAA) providers create and log in to CloudVision through any provider. The OAuth and SAMLproviders are pre-configured buts require additional information to create the provider.
The following sections describe procedures to configure AAA providers:
Requirements
Pre-requisites:
- The device must have internet access.
- To create the OAuth or SAML provider, you must be registered with and have access to the Service Provider (SP) credentials.
Perform the following steps to create and edit SAML Providers:
-
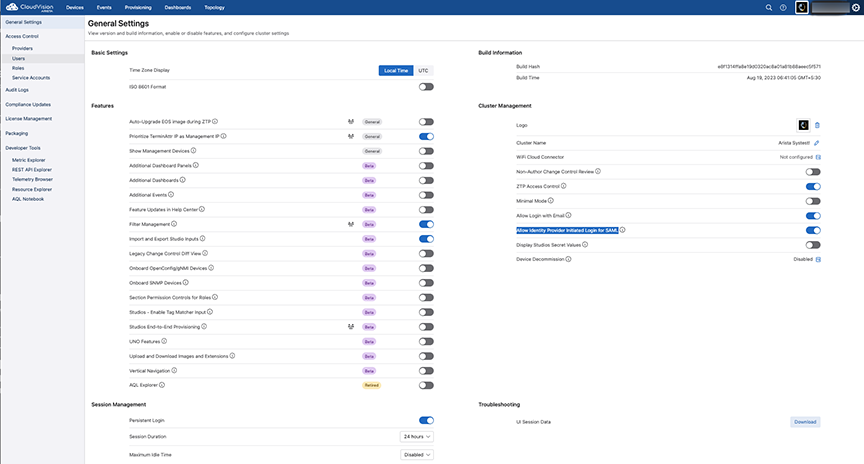
Click on the gear icon.
Figure 1. General Settings Screen 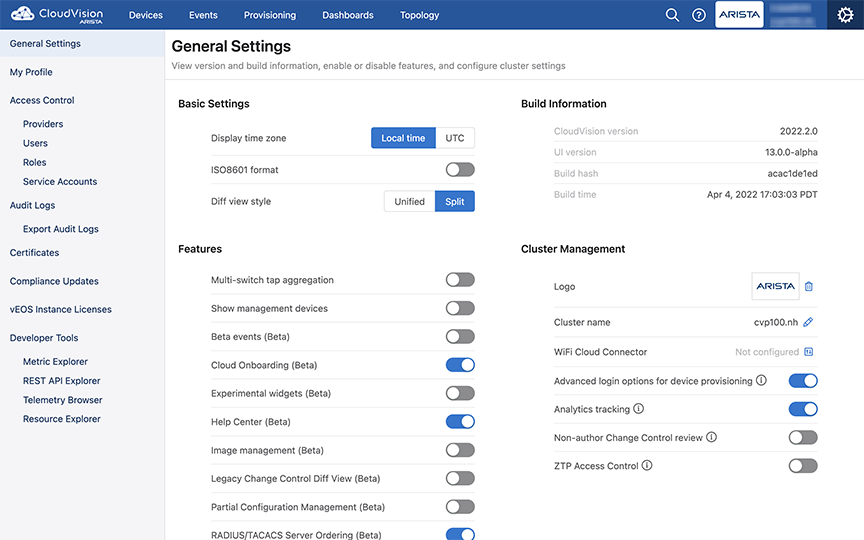
Setting up OAuth and SAML Providers in CloudVision
Adding OAuth Providers
Pre-requisites:
- Shared providers does not require the additional information like endpoint, client ID, and client secret. This functionality is not supported on-prem or on the custom providers.
- The link at the bottom of the Add OAuth Providers window explains how the selected provider uses OAuth and where you can find the information required by the form.
- You can use the Custom OAuth option if your provider is not listed under the Provider drop-down menu.
-
Click the + Add OAuth Provider tab.
The system opens the Add OAuth Provider screen.
Figure 2. Add OAuth Provider Screen 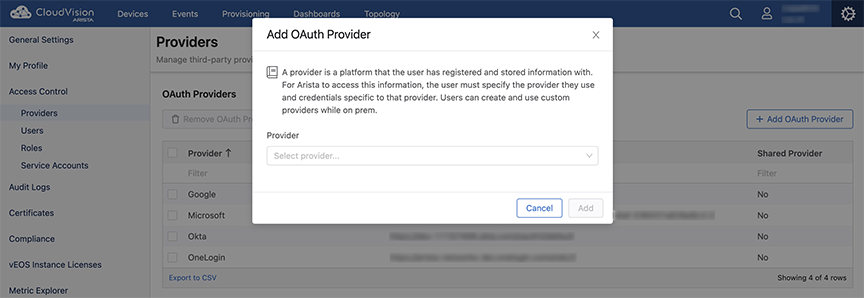
-
Select the required OAuth provider from the Provider drop-down
menu.
Figure 3. Add OAuth Provider Screen to Configure a Provider 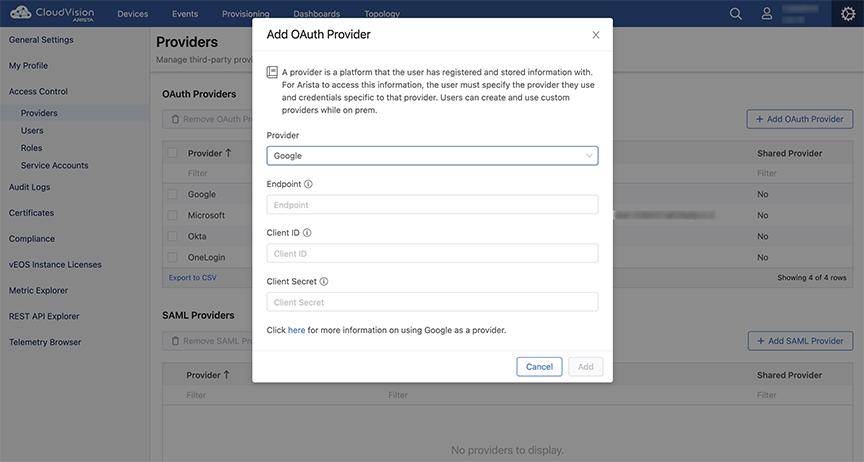
Adding SAML Providers
Pre-requisites:
- The link at the bottom of the Add SAML Providers window explains how the selected provider uses SAML and where you can find the information required by the form. The only provider that does not have this information is Launchpad.
- You can use the Custom SAML option if your provider is not listed under the Provider drop-down menu.
-
Click the + Add SAML Provider tab.
The system opens the Add SAML Provider window.
Figure 4. Add SAML Provider Screen 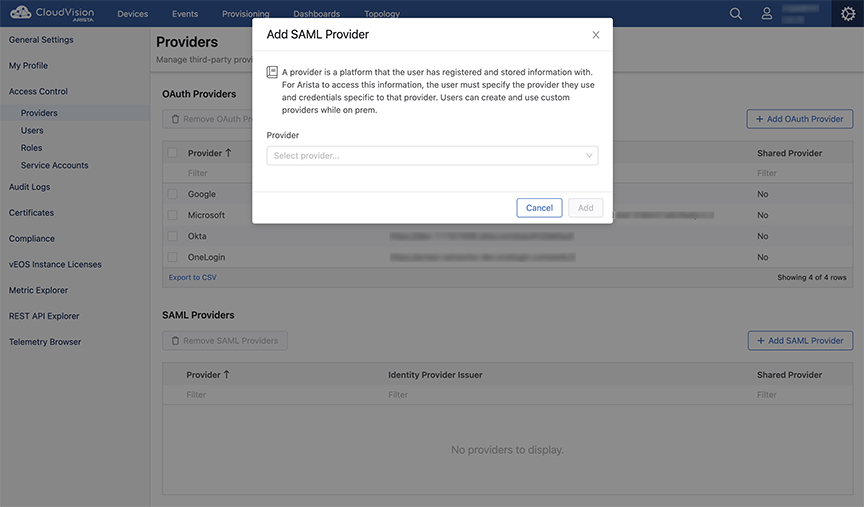
-
Select the required SAML provider from the Provider drop-down
menu.
Figure 5. Add SAML Provider Screen to Configure a Provider 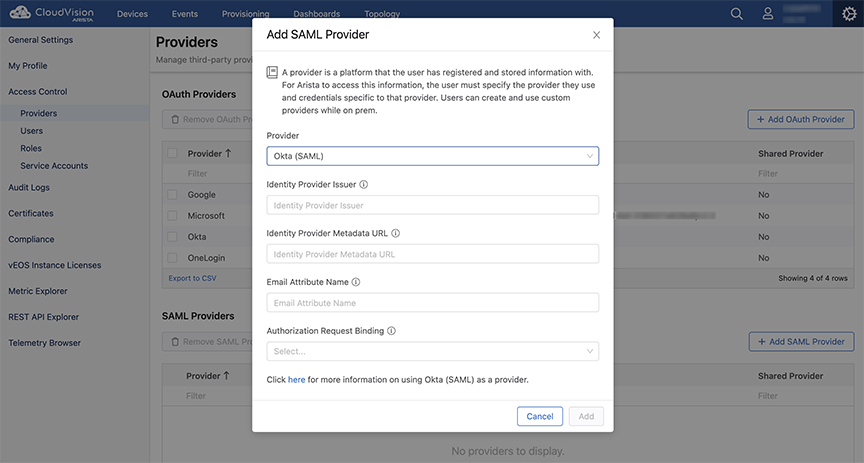
Removing OAuth Providers
-
On the Providers screen, under OAuth Providers, select the
redundant provider from the OAuth provider table.
Figure 6. Removing OAuth Provider(s) .png)
-
Click the Remove OAuth Provider button.
The system opens the Confirm screen.
Figure 7. Remove OAuth Provider(s) Confirm Screen 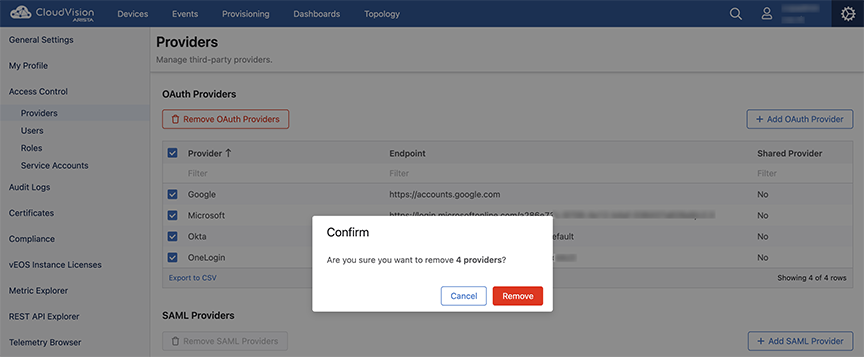
Removing SAML Providers
-
On the Providers screen, under SAML Providers, select the
redundant provider from the SAML provider table.
Figure 8. Removing SAML Provider(s) 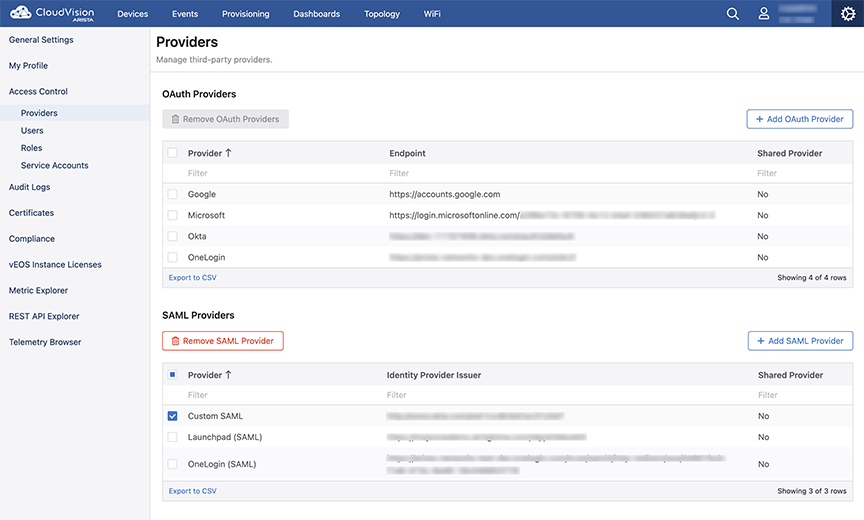
-
Click the Remove SAML Provider button.
The system opens the Confirm screen.
Figure 9. Remove SAML Provider(s) Confirm Screen %20Confirm%20Screen.png)
Setting up CloudVision with Identity Provider
You must setup CloudVision with your Identity Provider.
For instructions on setting up CloudVision with identity providers, refer to the CloudVision as a Service (CVaaS) Quick Start Guide at https://www.arista.com/en/support/product-documentation or reference documentation at https://www.arista.com/en/support/toi/cvp-2021-2-0/14834-aaa-providers-oauth-and-saml-support.
Logging in Using SAML IDP
Starting with the 2023.2.0 release, you can login to CloudVision through an Identity Provider (IDP) instead of directly through the CloudVision application. When you log in to the IDP and your identity is verified, then, that verification process is used to access the CloudVision portal.
Enabling SAML IDP Login
Setting SAML IDP Login
For SAML IDP initiated login to function with CloudVision, you should define a default relay state value while setting up the SAML provider in your IDP. It is expected that your IDP should have an optional field to configure the default relay state.
For example, while configuring IDP, enter the details in the Relay State (Optional) field in the following format:
<ProviderID>:<OrgName>:<NextURL>, where:
- ProviderID: is the provider identifier that has been set up on CloudVision.
Append “saml” to the name of the provider as below:
- Okta: Use oktasaml as the ProviderID
- OneLogin: Use oneloginsaml as the ProviderID
- Microsoft: Use microsoftsaml as the ProviderID
- Launchpad: Use launchpadsaml as the ProviderID
- Custom SAML Provider: Use the ProviderID entered while setting up CloudVision
- OrgName: For On-prem users, the organization name is always the default value. This is the value that you have entered as your organization name. You can overwrite this value with a custom value later.For CVaaS users, this is the name of the organization entered at login time.
- NextURL: This is the URL that gets redirected to after logging in. This can be the Entity ID on the IDP followed by /settings/aaa-providers. This value must be base 64 RawURL encoded.
For example, if the URL is https://www.cvp.arista.io the base 64 RawURL encoding is, aHR0cHM6Ly93d3cuY3ZwLmFyaXN0YS5pby9zZXR0aW5ncy9hYWEtcHJvdmlkZXJz and this encoded value gets included in the Relay State field. You can leave the URL empty, in which case you are redirected to a default URL, which is the Entity ID followed by /cv.
For Example, if a user from the organization, Foo is setting up a Microsoft Provider and wants to be redirected to https://www.cloudvision.domain/settings/aaa-providers, then the Relay State should be, microsoftsaml:Foo:aHR0cHM6Ly93d3cuY3ZwLmFyaXN0YS5pby9zZXR0aW5ncy9hYWEtcHJvdmlkZXJz. You can also enter the Relay State without the NextURL details as microsoftsaml:Foo:, where you will be redirected to https://<your FQDN>/cv, where <your FQDN> is the DNS name you configured for the cluster.
Logging in with a Provider
You can use your registered providers on the CloudVision login screen to log in to cloud and on-premise CloudVision deployments. Click on the provider that has been created to log in through that provider.
Adding Launchpad as a Provider
You can add a launchpad using one of the following methods as per your requirement:
Adding a Launchpad for CVaaS Deployments
This section applies to non-CV-CUE customers who want to use launchpad as an identity provider.
To add launchpad as a shared provider for CVaas deployments, request the list of users to be created in launchpad by emailing to wifi-cloudops-tickets@
- For cv-dev and cv-play, use the following information to configure Launchpad
in Cloudvision:
Provider: launchpad Identity Provider Issuer: https://mojoonedemo.airtightnw.com/idp/shibboleth Identity Provider Metadata URL: https://mojoonedemo.airtightnw.com/idp/shibboleth Email Attribute Name: User.email Authorization Request Binding: HTTP-Redirect SAML protocol binding
- For cv-staging and production, use the following information to configure
Launchpad in Cloudvision:
Provider: launchpad Identity Provider Issuer: https://login.mojonetworks.com/idp/shibboleth Identity Provider Metadata URL: https://login.wifi.arista.com/casui/idp-metadata.xml Email Attribute Name: User.email Authorization Request Binding: HTTP-Redirect SAML protocol binding
Adding a Launchpad for On-Premise Deployments
Perform the following steps to add a launchpad for on-premise deployments:
Adding a Launchpad for CVaaS and On-Premise Deployments
Perform the following steps to add a launchpad for CVaaS and on-premise deployments:
-
Select Launchpad (SAML) from the Provider drop-down menu.
Figure 11. Add SAML Provider Screen to Configure Launchpad 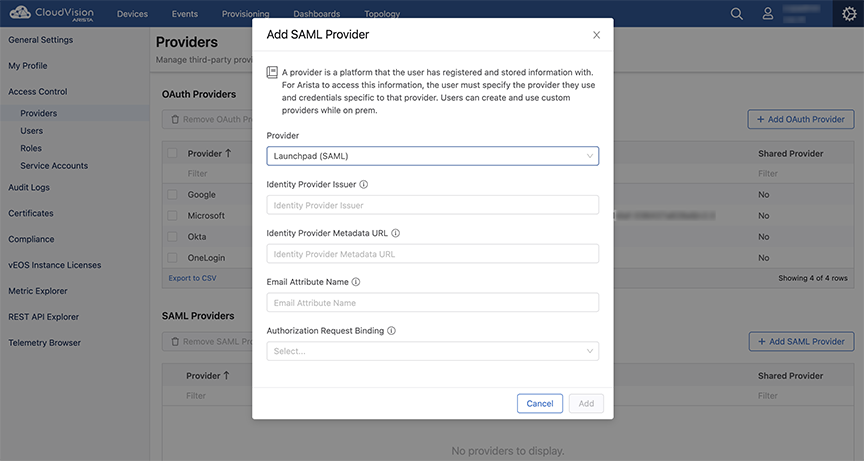
-
Under Access Control in the left pane, click Users.
The system opens the Users screen.
Figure 12. Users Screen 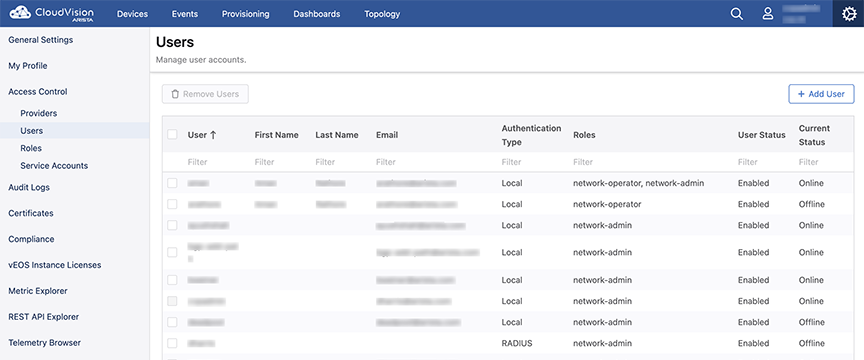
-
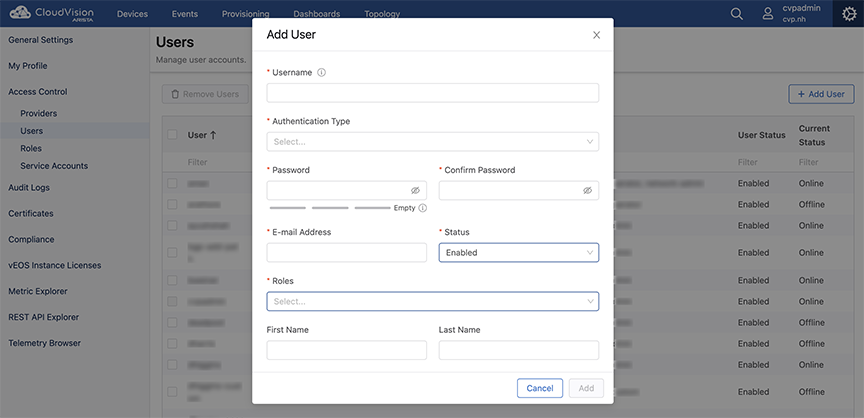
On the Users screen, click + Add User.
The system opens the Add User screen.
Figure 13. Add User Screen