LAN Port Profile
You can configure LAN Port Profile from tab.
You can authenticate wired hosts connected to the LAN ports of access points (W-118 and W-318) using 802.1X or MAC-based authentication. You can configure the authentication parameters for each downlink port on the access point (AP) using the LAN Port profile in CV-CUE. The communication happens either through a bridged network or transferred using L2 tunnels.
Use Case
Consider a home office or a remote office with APs such as W-318 and W-118. Earlier, whatever wired hosts were connected to the AP through the downlink port, they were onboarded to the network without any authentication. It was a security loophole as these external devices could breach into the corporate network as the downlink ports were not secure. Now, the entire office L2 network, including the security perimeter, extends to your AP using VXLAN over IPSec. The network configuration in your office is broadcast in the same VLAN through the internet to your AP. You will have access to the same VLAN and resources that you had in the office. Devices are first authenticated, given a respective VLAN, and then connected to the network.
APs support 802.1x and MAC-based authentication. Administrators can configure each port and control which device gets connected to each port and which authentication will happen on each port.
If users connect any unauthorized device to the downlink port, such devices will not be onboarded to the network. Also, the entire traffic is bridged through the same tunnel to the corporate data center. For example, if you connect a laptop to Port 1 and that port in the AP is configured for a printer, then you cannot connect a laptop to that port. The AP will onboard only the printer through that port.
Configure Wired LAN Ports
Configure LAN ports to authenticate and manage wired hosts connected through W-118 and W-318 access points. You can create multiple port profiles with different configurations and apply one profile per port. You can apply one profile to one port and another profile to another port in the same AP.
Administrators can manage per-port configuration and shut down each port remotely when needed. CV-CUE displays a view-only information for all the devices connected to the downlink ports in the AP. Only one wired host can connect per port. The wired ports support CoA.
Follow these steps to configure the LAN port profile:
- Go to .
- Click Add LAN Ports.
- Provide a profile name in the Basic tab.
- Click the Security tab and select the port security
type.
Figure 1. LAN Port Security 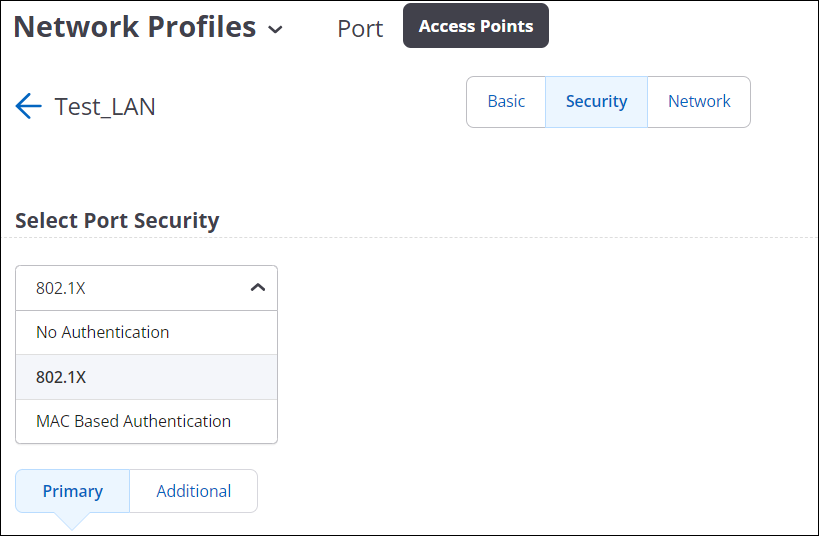
- For MAC Based Authentication, provide the username and password.
- Provide the details of the RADIUS server. You can add one Primary RADIUS server and three additional servers.
- Configure the other parameters in the Security tab:
- Retry Parameters: Indicates the frequency of retries to establish
connection with a server before switching to the alternative (secondary)
server.
- Attempts
- Timeout
- Dynamic VLAN: Indicates the VLAN assigned by the RADIUS server. Specify the VLAN name or VLAN ID.
- Change of Authorization (CoA): Indicates the IP addresses of the CoA servers in load-balancer deployments. Specify the IP address of the CoA servers.
- Prefer Primary RADIUS Server: Indicates the fallback to Primary RADIUS
Server when it’s detected in the network.
- Dead Time — The time interval for which the primary RADIUS
server is marked unreachable after a failover. For example, if
the dead time is 30 minutes, the AP will not try to connect with
the primary RADIUS server for 30 minutes after failover. The AP
will try to connect with the primary RADIUS server after the 30
minutes dead time is over.
Figure 2. VLAN Assignment 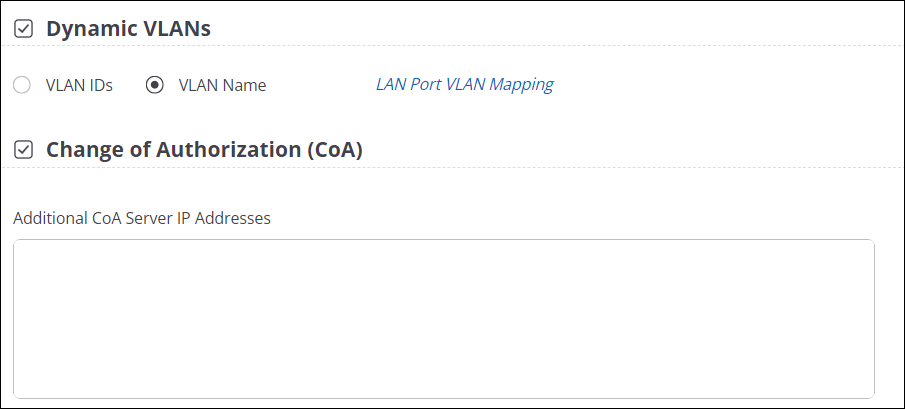
- Dead Time — The time interval for which the primary RADIUS
server is marked unreachable after a failover. For example, if
the dead time is 30 minutes, the AP will not try to connect with
the primary RADIUS server for 30 minutes after failover. The AP
will try to connect with the primary RADIUS server after the 30
minutes dead time is over.
- Retry Parameters: Indicates the frequency of retries to establish
connection with a server before switching to the alternative (secondary)
server.
- Click the Network tab and provide the VLAN details and the network mode.
Figure 3. Network tab configuration 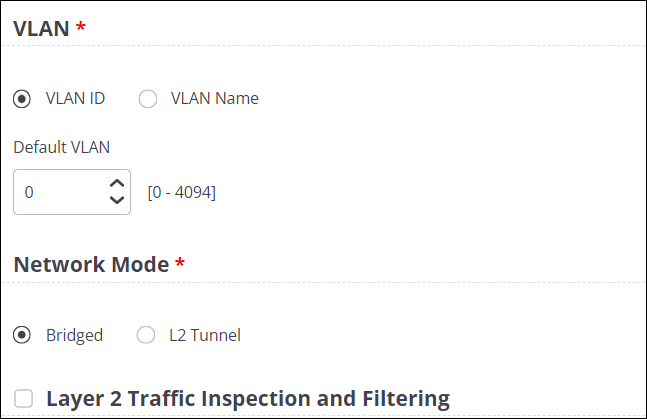
- Save the settings.
Assign Port Profile to Ports
After you configure the port profile, you need to manually apply the port profile to each port. Although you can create multiple port profiles, you can apply only one profile per port.
- Go to .
- Click the LAN Ports tab and then select the
Configure LAN Ports check box.
Figure 4. Assign LAN port profile 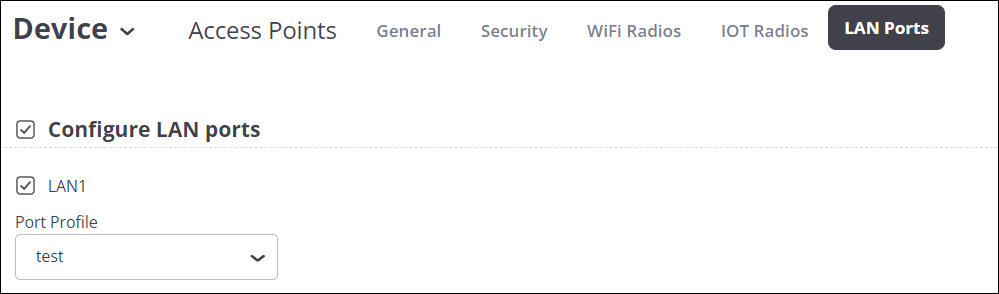
- Select a port number and apply a profile from the dropdown list.