Third-Party Servers
Integration of third-party servers with CV-CUE is a system-level operation; it applies to the entire network.
Google Integration
You can integrate Google for Work with your network using CV-CUE.
- Go to
- Click Upload JSON Key File.
- Select the JSON key file you have downloaded from Google and click Open.
- Enter the Admin Email Address.This is the email address associated with the service account JSON key created in Google.
- Click Sync Client List to sync the list of clients with the Google server.
ArcSight Integration
Integration with ArcSight’s Enterprise Security Management (ESM) enables CV-CUE to send events to the designated ArcSight server. The ArcSight server is configured to accept messages containing detailed event information in ArcSight’s Common Event Format (CEF). CV-CUE needs the IP Address or the hostname and the port on which the ArcSight server receives events. Apart from events, you can also send audit logs from CV-CUE to an ArcSight server.
- Go to
- Select Enable ArcSight Servers.
- Click Add in the ArcSight Servers table to add an ArcSight server.
- Enter the IP address or hostname of the Arcsight server.
- Enter the port number to be used for communication between CV-CUE and ArcSight.
- Click Select next to the Primary Cloud Integration
Point (CIP) and select the Access Point (AP) you want to designate as the
primary CIP.Note: Only CIP-enabled APs appear in the list. Make sure that you enable CIP mode on the APs you want to use as CIPs.
- If you want to add a secondary CIP, click Select next to the Secondary Cloud Integration Point (CIP) and select the AP you want to designate as the secondary CIP.
- Enable Forward Events and Forward Audit Logs to forward events and audit logs respectively from CV-CUE to ArcSight servers.
- Click Done.
- Save the settings by clicking Save on the ArcSight Integration tab.
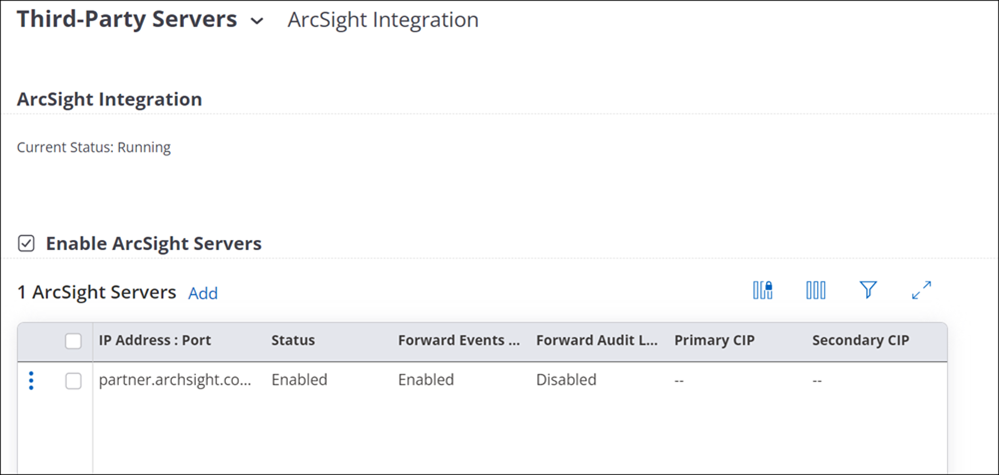
You can also enable and disable individual ArcSight servers using the three-dot menu in the table.
SMTP
The SMTP settings will be generic for the system and will be used for any email functionality. Although currently it is used for alerts, it will not be restricted for this use only. We must state that the SMTP settings will be used by CV-CUE to notify users through email, for example notification of alerts.
- Go to
- Configure the following parameters:
Option Description SMTP Server IP Address/Hostname IP Address or the host name of the SMTP server used by the system for sending e-mails. Default : 127.0.0.1
Port Port number of the SMTP server. Default : 25
"From" Email Address The source address from which e-mails are sent. Default : 该邮件地址已受到反垃圾邮件插件保护。要显示它需要在浏览器中启用 JavaScript。
- Select Enforce use of StartTLS (TLSv1) to enforce the
use of STARTTLS to send e-mails in an encrypted
format.
Info:STARTTLS is an extension to plain text communication protocols like SMTP that offers a way to upgrade a plain text connection to an encrypted (TLS or SSL) connection instead of using a separate port for encrypted communication.
- Select Verify SMTP Server's Certificate to verify the
certificate of SMTP server against a default built-in self signed CA
certificate located on WM server or an uploaded CA certificate. If selected,
and no certificate is uploaded then the certificate of SMTP server is
verified against the built in certificate.
- Click Set Certificate.
- Browse and select the required certificate file, and click
Open.
Info:If the certificate is imported successfully, the certificate file name and certificate details can be seen on the page.
Note: If Verify SMTP Server's Certificate is selected, e-mails are sent only if the uploaded certificate matches with that on the SMTP server.
- To authenticate with the SMTP sever, select Authentication Required, and enter the Username and Password.
- Click Save.
SNMP
- For a cloud-based Wi-Fi deployment, CV-CUE can send alerts to your SNMP servers.
- For an on-premises Wi-Fi server, CV-CUE can send alerts and system health metrics to your SNMP servers.
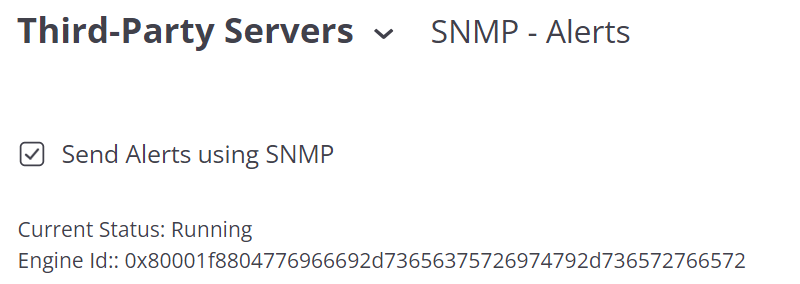
SNMP - Alerts
To add an SNMP server for alerts, go to and click Add on the Destination SNMP Servers table. The SNMP server settings panel opens up.
The settings are described in the table below.
| Setting | Description |
|---|---|
| Enabled | Select to enable communication between CV-CUE and this SNMP server. |
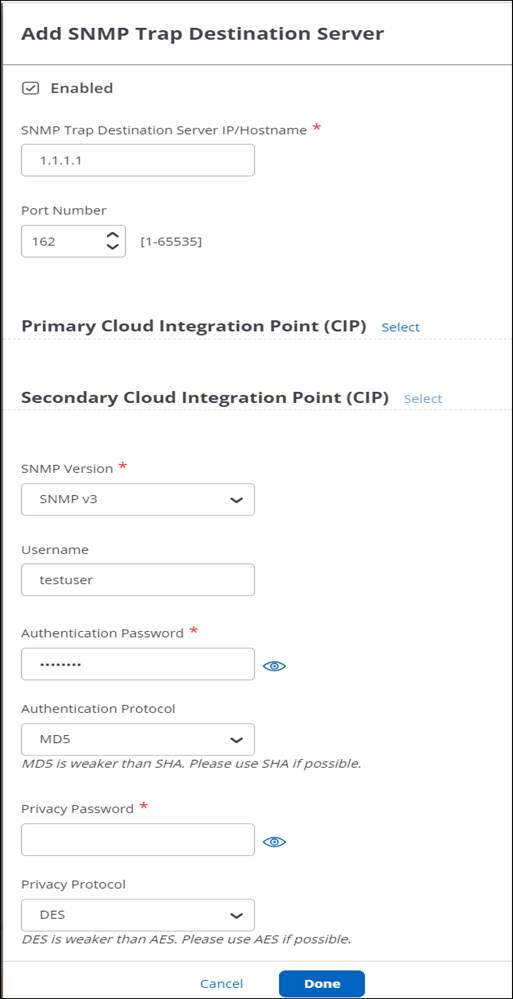
| SNMP Trap Destination Server IP/Hostname | Enter the IP
address or hostname of the SNMP server. Note: For a cloud-based Arista Wi-Fi deployment, if the SNMP server uses a private IP address, you need to select a Cloud Integration Point. |
| Port Number | The port number for the SNMP server-CV-CUE communication. |
| Primary Cloud Integration Point (CIP) | Note: This
field does not appear for an on-premises Arista Wi-Fi server because
it is needed only to integrate a cloud-based Wi-Fi server. From the drop-down list, select an Arista device that you want to use as the primary Cloud Integration Point (CIP) for the SNMP server. Important: You must open port number 3852 in your network from the CIP to Arista cloud. |
| Secondary Cloud Integration Point (CIP) | From the drop-down list, select an Arista device that you want to use as the secondary Cloud Integration Point (CIP) for the SNMP server. If the primary CIP goes down, the secondary one ensures connectivity of your service to the cloud. |
| SNMP Version | Select SNMP V2 or V3 for the Arista server communication with the controller. |
| Community String | For SNMP v2, define a custom community string to authenticate with the SNMP server. The default value is "public". Ensure that you change this community string. |
| Username | For SNMP V3, an auto-generated username for CV-CUE to log in to the SNMP server. |
| Authentication Password | The password to authenticate with the SNMP v3 server. |
| Authentication Protocol | The authentication protocol used for SNMP v3. The options are MD5 (default) and SHA. |
| Privacy Password | The private key used to encrypt SNMP v3-based traps. |
| Privacy Protocol | The method used to encrypt SNMP v3-based traps. The options are DES (default) and AES. |
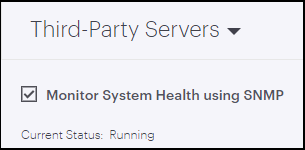
SNMP - Server Health
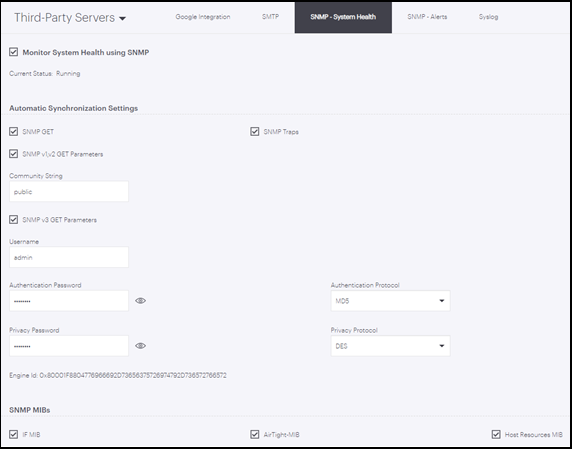
An SNMP Management Information Base (MIB) is a collection of definitions that define the properties of a managed object in a managed device. For example, the Arista Wi-Fi server is a managed device, its disk memory is a managed object, and the Host Resource MIB contains information about the disk memory of the Wi-Fi server.
| MIB | Description |
|---|---|
| IF MIB | Select to send information about network interfaces such as eth0 and eth1. |
| AirTight MIB | Select to send information about the Wi-Fi management specific processes running on the server. |
| Host Resource MIB | Select to send host resource information such as memory and CPU. |
| MIB-II | Select to send operational information such as System name, contact, and location. On the SNMP server, these fields are used to verify if the "SNMP GETs" option works. |
| Setting | Description |
|---|---|
| Enabled | Select to enable communication between CV-CUE and this SNMP server. |
| SNMP Trap Destination Server IP/Hostname | Enter the IP address or hostname of the SNMP server. |
| Port Number | The port number for the SNMP server-CV-CUE communication. |
| SNMP Version | Select one of the two options: a) SNMP V1,V2 or b) SNMP V3 for the the SNMP server-CV-CUE communication. |
| Username | For SNMP V3, an auto-generated username for CV-CUE to log in to the SNMP server. |
| Authentication Password | The password to authenticate with the SNMP v3 server. |
| Authentication Protocol | The authentication protocol used for SNMP v3. The options are MD5 (default) and SHA |
| Privacy Password | The private key used to encrypt SNMP v3-based traps. |
| Privacy Protocol | The method used to encrypt SNMP v3-based traps. The options are DES (default) and AES. |
Syslog
You can configure a Syslog server from CV-CUE and it sends messages to be logged in the Syslog server.
To configure a Syslog server, perform the following steps:
- Go to
- The Syslog Integration Status indicates the status of the Syslog server. Info: The Current Status displays the current status of the SNMP server. The applicable values are Running, Stopped and Error.
- Select Enable Syslog Servers to enable integration of CV-CUE with Syslog server.
- Click Add
- UnderAdd Syslog Servers window, enter the following
details:
Option Description Syslog Server IP/Hostname Specifies the IP address or the hostname of the Syslog server. Port Number Specify the port number of the Syslog server to which the system sends alerts. Default : 514
Primary Cloud Integration Point (CIP) Note: This field does not appear for an on-premises Arista Wi-Fi server because it is needed only to integrate a cloud-based Wi-Fi server. Select a primary CIP to enable the integration of Arista Cloud with Syslog.
The syslog server on which a CIP device is selected is termed as CIP destination and is listed as a CIP destination for the CIP enabled Arista device.
Secondary Cloud Integration Point (CIP) From the drop-down list, select an Arista device that you want to use as the secondary Cloud Integration Point (CIP) for the Syslog server. If the primary CIP goes down, the secondary one ensures connectivity of your service to the cloud.
Message Format Specify the format in which an alert is sent. Available options are: - PLAIN
- Intrusion Detection Message Exchange Format (IDMEF).
Enabled Sends the alerts to the Syslog server. Append BOM Header Appends the byte order mark to the syslog server entry. This is relevant in case of plain text files. Forward Events Forwards the main events to the Syslog server. Forward Sub-events Forwards the sub-events along with the main events. Forward Audit Logs Sends audit logs to the Syslog server. You can forward audit logs in plain text format only.
Webhooks
Webhooks let you send alert notifications in real time to third-party applications. By configuring a webhook, you can share content and notifications with external applications such as Microsoft Teams, ServiceNow, Slack, GSpace, etc.
Configuring a webhook is a two-step process. You need to create a webhook endpoint in your external application and configure that endpoint in CV-CUE. For information on creating webhook endpoints, refer to https://arista.my.site.com/AristaCommunity/s/article/Webhooks-in-CV-CUE
To configure a webhook in CV-CUE:
- Go to SYSTEM > Third-Party Servers > Webhook.
- Select Enable Webhook.
- Click Add Endpoint. Note:
You can configure a maximum of 4 webhooks.
- Provide the following details under the Basic tab:
- Name: A unique name for the webhook.
- Endpoint URL: The URL of the Webhook Endpoint.Note: HTTP URLs and IPv6 addresses are not supported. Ensure that you use a HTTPS URL.
- Select the Method Type from the following:
- POST - This is the default method for sending alerts.
- PUT
- GET
- Request Headers: To add a request header, click Add New Row. A Request Header contains a set of inputs in the key-value pairs format. For example, Key is Content-Type and Value is application/JSON. You can add a maximum of 10 rows.
- Provide the following details under the More Settings tab:
- Description of the webhook.
- Select SSL Certificate Verification. SSL Certificate Verification is enabled by default and Arista recommends that you keep it enabled.
- Response Timeout: After the specified time if no response is received from the webhook endpoint, the current request expires, and a new request is raised for the same alert.
- Retry Count: Number of times a request is retried for the alert.
- Fixed Query Parameters: Query Parameters, such as token or key, to send as a part of the Webhook request. You can add up to 10 Query Parameters.
- Request Data Type: Using this field, you can set the response
parameters of the Webhook and set the data fields that you want to receive
in Webhook messages.Note: GET Method supports the Form Data option only. With POST and PUT methods, you can select Form Data or Raw Body request data type.
- Form Data: Using Form Data, you can set response parameters as key-value pairs.
- Raw Body: You can customize the text message along with the fields that you want to send in webhook messages. Raw Data can be in the plain text format, JSON, or XML with the field in double curly braces[{{field_name}}].
- Primary Cloud Integration Point (CIP): Select the Access Point (AP)
you want to designate as the primary CIP.Note: Only CIP-enabled APs appear in the list. Ensure to enable CIP mode on the APs you want to use as CIPs.
- Secondary Cloud Integration Point (CIP): If you want to add a secondary CIP, click Select next to the Secondary Cloud Integration Point (CIP) and select the AP you want to designate as the secondary CIP. For on-premises deployments, CIP configuration is needed if you are using a firewall. CIP configuration is optional for cloud deployments.
-
Important: You must open port number 3852 in your network from the CIP to Arista cloud.
After you have configured your webhook, you can check the Notification Preview from the Basic tab to verify the alert message format that would be sent to your webhook URL.
- Click Done.
To send alerts using Webhooks, ensure that you select Alert Notification Type as Notify while configuring alerts.