Managing Navigator
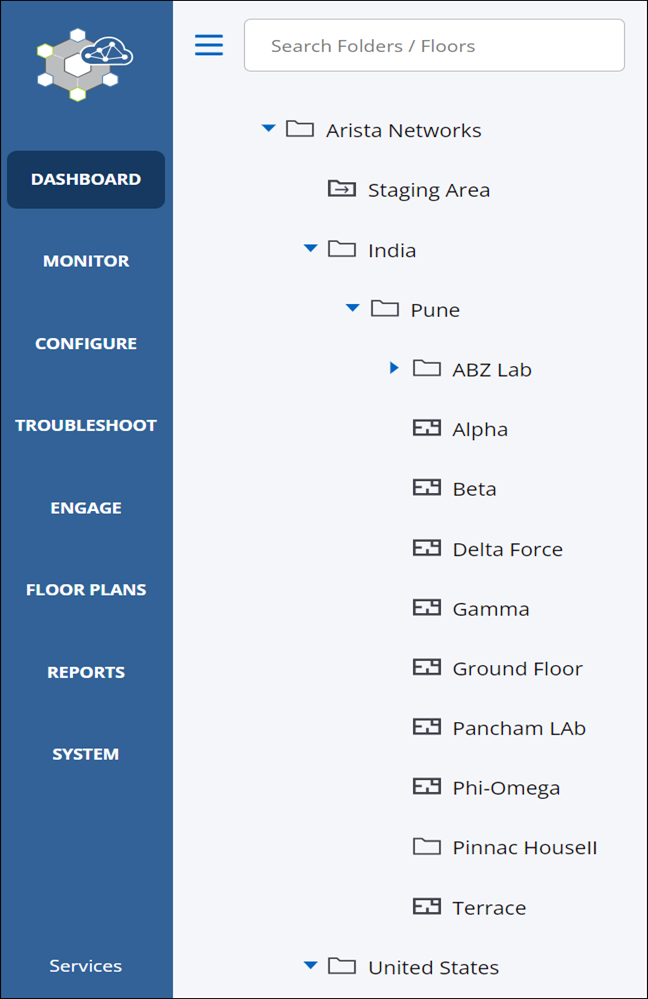
Navigator enables you to define a hierarchical structure to organize how your WLAN network is deployed. This hierarchical structure can be based on any criteria, such as the location where the APs are deployed, the organizational departments using a set of APs, Test vs Production network, and so on.
Navigator comprises folders and floors. Folders can represent any logical grouping such as departments of an organization, business units, physical locations such as country, city, and building, and so on. Floors can represent a more granular level of deployment such as a group using a common set of access points, or a physical location such as a floor in a building where the access points are deployed. For example, Hawaii Conference Room, Building 15-Cubicle G2, or Executive Area.
Click System to view, edit and manage the hierarchy of folders and floors. Only a Superuser, Administrator, and Operator user can edit Navigator. Users with the Viewer role can only view the Navigator.
Add a Folder or Floor
You can add one or more folders under the root folder or under other folders. You cannot add a folder or a floor to the Unknown folder. Only Superuser, Administrator, and Operator can add a folder or a floor. A Viewer can only view the Arista Navigator.
- Click System.
- Select a folder under which you want to add a new folder or floor. Right-click and select Add a Folder/Floor.
- Select Folder to add a folder or select Floor to add a floor.
- Type the name of the folder or floor and click
Add.Important: You cannot add a folder or floor under a floor.
Add Multiple Folders or Floors
You can add multiple folders and floors at the same time. You can add multiple folders under the root folder or other folders. You can add multiple floors under a folder. You cannot add folders or floors under the Unknown folder.
- Click System.
- Right-click a folder under which you want to add multiple folders and floors and select Add Multiple Folders/Floors.
- Type the folder and floor names in the given text area that you want to add. You can have only one name per line.
- To create a hierarchy of folders and floors, use the
Tab key. A sample hierarchy of folders and floors
would look like this:
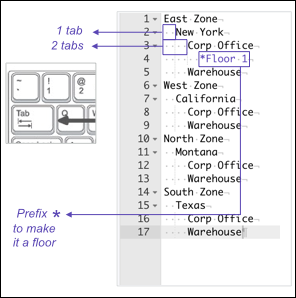 Important: Prefix * to make a floor. You cannot add a folder or floor under a floor.
 - Click Add.
Delete Folders and Floors
Use this feature to get rid of unwanted and redundant folders and floors that are not applicable.
- Click System.
- Select the folders and floors that you want to delete.
- Right-click any of the selected folder or floor and select Delete.
- Click Delete to confirm the deletion.
Rename Folder or Floor
Use this feature to change the name of a single or multiple folders or floors.
- Click System.
- Select the folders and floors that you want to rename.
- Right-click any of the selected folder or floor and select Rename.
- Do the required changes and click Rename to save the changes.
Search Folder or Floor
You can type a string of letters or the name of a folder or floor to locate it on the Navigator.
- Click System.
- Enter the text substring matching the name of the folder or floor in Search Folders/Floors text box. The folders or floors matching the pattern of the text string or substring is displayed along with the parent folder.
Set Timezone for Folders
Set the appropriate time zone for the selected folder using the System > Navigator page. Only a Superuser, Administrator, and Operator user can configure the location time zone for a location.
- Go to System > Navigator.
- On the Navigator page, right-click the folder name and select Set Timezone.
- Select the appropriate timezone from the drop-down list and click Set.
Set Location Tag
- Go to System > Navigator > Folders/Floors.
- Right-click the folder or floor to which you want to assign the tag.
- On the right-click menu, select Location Properties > Location Tag.
- In the Location Tag window, enter the location tag and click Set.
- Select Apply recursively to subfolders if you want the same
location tag to be used by child locations. When selecting this option, keep in mind
that mDNS gateways return devices based on the location tag.Note: mDNS Packet Tagging uses the location tag to help Wi-Fi clients locate network services such as printers. When assigning the location tag, note the following:
- Arista mDNS gateways truncate the location tag to the first 128 characters.
- We recommend that you use only numbers, letters, and hyphens in the location tag because Arista switches do not support special characters in mDNS tags.
Introduction to Groups
Until now CV-CUE allowed users to configure only the Wi-Fi configuration for a selected location. You could not do custom configuration on a device or a set of devices. To overcome this restriction, Groups have been introduced in CV-CUE.
Groups will facilitate faster customization of Arista APs by allowing you to apply custom configuration (for example, SSIDs, Radio Settings, and Device Settings) to APs located across different branches of a hierarchical location tree. A group will always have a unique name. You can access a group only if you can access the folder where the group was created. A user who does not have access to a group can view devices in that group but cannot perform actions such as rename or delete.
After the group is created, you can configure it. You can configure a group either by turning an SSID ON at the folder where the group was created, or by modifying the Device Settings or Radio Settings.
Add a Group
- Go to .
- Click the Plus Icon to add a group.
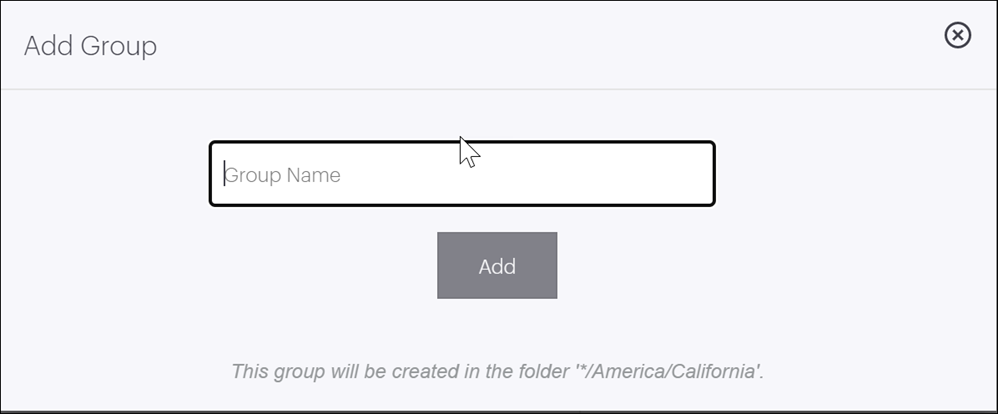
- Type a unique name for the group and click Add.Note: The group name should be unique across all the available groups and folders. CV-CUE searches for a common root folder (Root) for all the locations that a user can access and accordingly creates a group at that folder. If a user does not have permissions on the root folder, then the group will be created at the next topmost folder to which a user has access.
Groups Actions
Show Assigned Devices
- Go to .
- Select on the three vertical dots next to the group for which you choose to see the device list.
- Select the Show Assigned Devices option.
Rename a Group
You can change the name of a group, if required.
- Go to System > Navigator > Groups.
- Right-click on the name of the group you want to rename or click on the menu icon (three vertical dots) and click Rename.
- Change the name of the group and click Rename to save the changes.
Delete a Group
- If a group is deleted, devices assigned to that group will start using the default Wi-Fi configuration of their respective folders
- Similarly, if you delete a folder, then the groups created under it will also get deleted. And the devices will start using the default Wi-Fi configuration of their respective folders.
- Go to System > Navigator > Groups.
- Right-click on the name of the group you want to delete or click on the menu icon (three vertical dots) and click Delete.
- Click Yes.
API Sandbox
API Sandbox allows you to try and test out APIs in the API sandbox without altering the data in your production environment. API Sandbox allows you to test the features programmatically by invoking APIs in a test environment for the selected location.
You can create an API sandbox for any location. The API sandbox provides an environment that is a clone of the selected folder location.
Creating an API Sandbox
- Navigate to
- Provide a name and description for the API Sandbox and click Create.
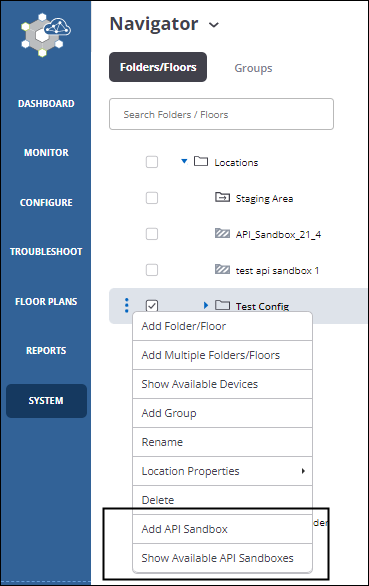
Executing APIs in the Sandbox
- Navigate to your location and click Show Available API Sandboxes.
- Click your API sandbox. The API Sandbox portal opens.
- Select your module and the API version number.
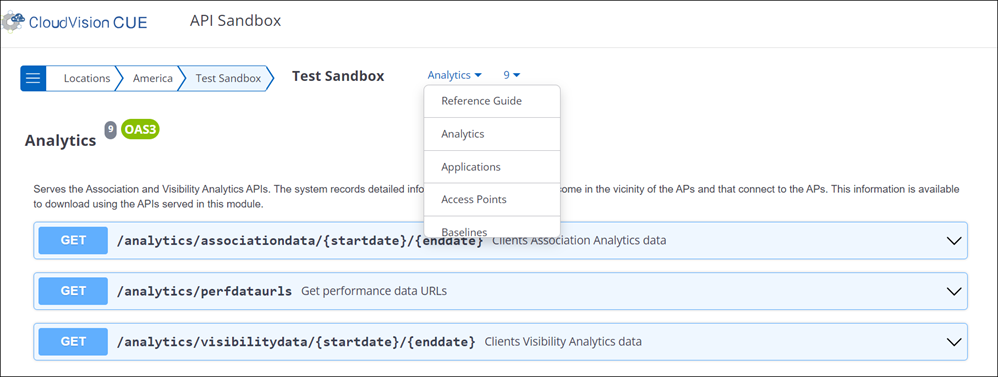
- Click the Try it Out button next to the API you want to try.
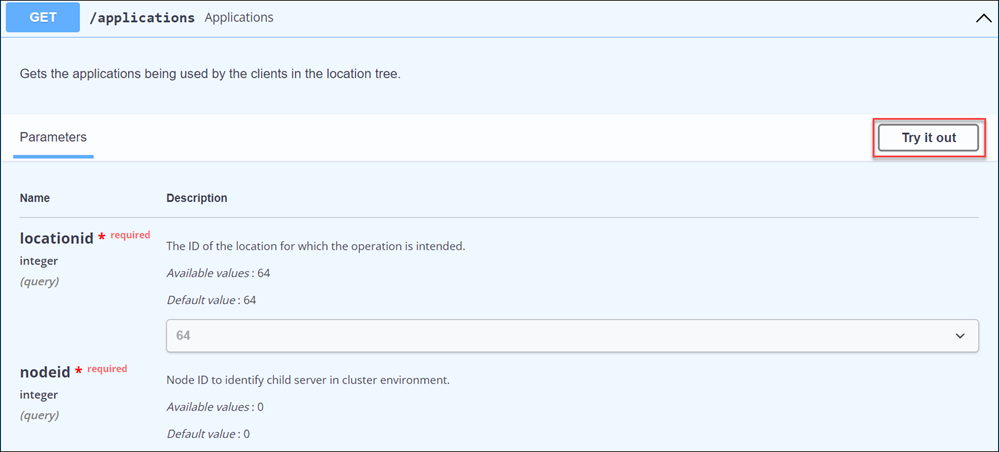
- Provide the required request parameters and click Execute.