Manage Guest Users
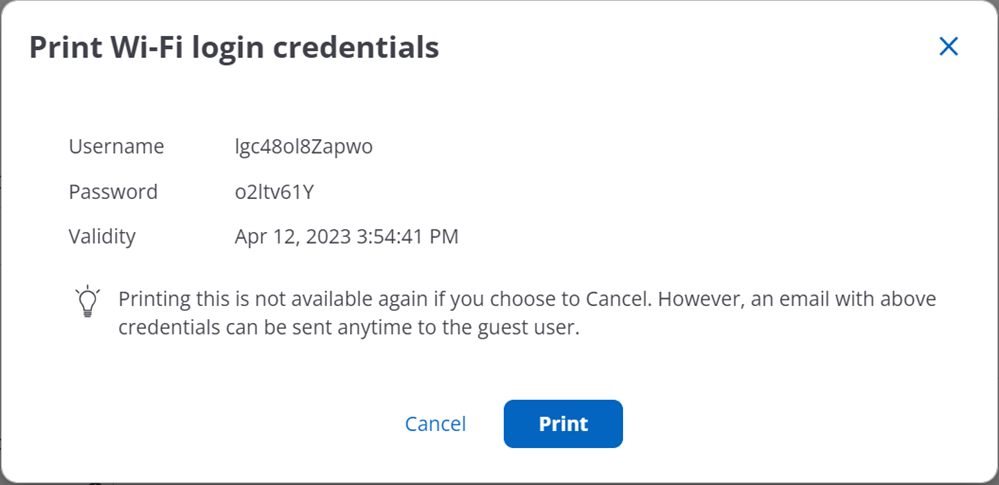
Network administrators or Guestbook operators can configure and manage guest user accounts using the Engage tab. As a network administrator, you can create multiple user accounts, set their credentials, and share the account details with the guest users over email. You can create individual user accounts or create user accounts in bulk. Guest users can use these administrator-generated credentials to access the internet through your Wi-Fi setup.
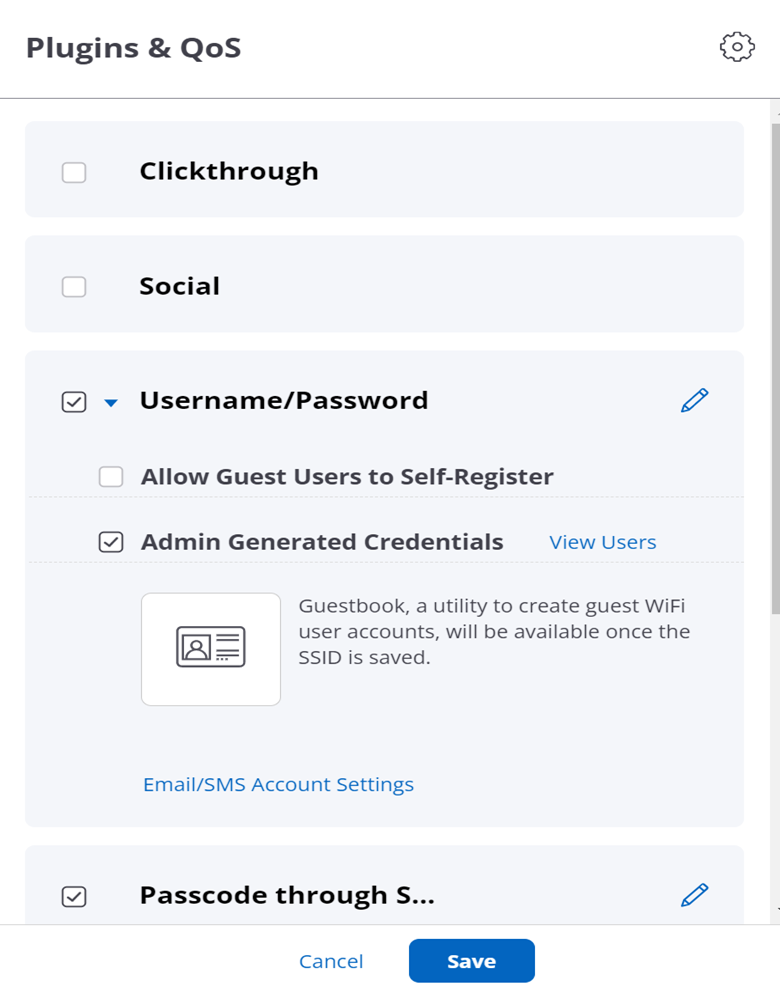
- Allow Guest Users to Self-Register: Users can self-register directly from the splash page. Administrators can modify the user account settings once the user successfully registers.
- Admin Generated Credentials:Administrators can create users or user batches and share the account credentials and details with the guest users.
Use Case
Consider a scenario where you are conducting a seminar or an event for a large number of users. You want to allow these users to access your Wi-Fi network for a short period of time and once the event is done, you need to revoke the access. You can achieve this by creating a batch of users or by importing a large number of users. You can set the validity of the user accounts, login-limits, device limits, and also specify Quality of Service Setting parameters to ensure smooth connectivity.
Creating Users
To create a user account:
- Go to
- From the drop-down menu, select the SSID profile with the configured captive portal.
- Click Add and provide the following details:
Table 1. Field Description User Name Name of the guest user account. Password Password for the guest user account. Email Email address of the guest user to send notifications. User Status Set it as Unlocked to enable the user to access the network. Validity Set the time duration for which you want the user to be able to access the network. Guest users will not be able to access the network once the validity expires. SSID Name SSID Name on which the user is available. SSID Key SSID Key to get access to the SSID on which the user is available. Device Limit The maximum number of devices a guest user can simultaneously log in. Login Limit The number of times the guest user can log-in from the splash page using these credentials. If the account is valid and the user has crossed the login count limit,the user will not be allowed to log-in. Quality of service settings Login Timeout The time period after which the guest user session expires. The user must re-authenticate with their login credentials to continue using the Wi-Fi service. If you leave this setting blank, the user session does not timeout and the user must explicitly log out from the portal. Blackout Time The time period during which a user cannot log in to the portal after the last successful login has timed out. Max Download Bandwidth The maximum download bandwidth, in Kbps, for the guest user. Max Upload Bandwidth The maximum upload bandwidth, in Kbps, for the guest user. - Save the settings.
Importing Users
You can also import multiple users by providing the user details in a .csv file.
To import Users,
- Go toand click Import Users.
- Upload a .csv file with the user details.

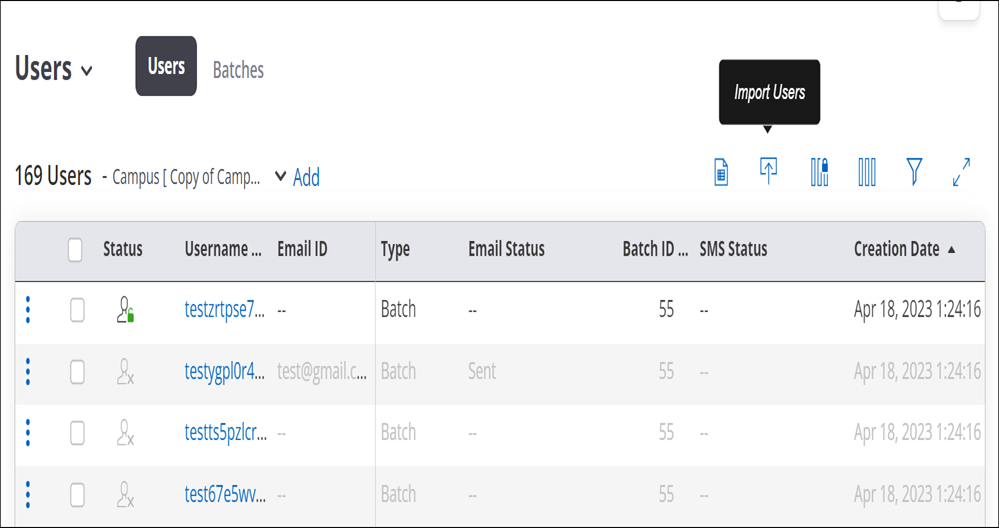
You can view the imported users in the User tab. Users imported from .csv file are tagged as batch users and a batch is created for every imported .csv file. The username prefix is left blank for imported users.
Creating User Batches
You can also create multiple users simultaneously by creating a batch of users. Creating a batch of users is useful when you need to create a large number of guest user accounts.
To create a user batch:
- Go to
- From the drop-down menu, select the SSID Profile with the configured captive portal.
- Click Add and provide the following details:
Table 2. Field Description Username Prefix Prefix for the guest user accounts batch. This is applied to all the users in the batch. Batch Type - Select Random Users to generate users with random user names with the specified prefix in the guest user batch.
- Select Incrementing Users to generate usernames with the specified prefix and an incremental index in the batch.
Username Length The length of the user name. This setting is available only for Random Users. Start Index The numerical index to start the user names. This setting is available only for Incrementing Users. Password Length Length of the password. Number of Users The number of users to create in this batch. Expires At Set the time to expire the validity of all the users in this batch. - Specify the Login Limit, Device Limit, and Quality of service setting parameters applicable to all users in this batch.
- Save the settings.
You can export the created user batch to retrieve the usernames and passwords and share them with your guest users.