HTTPS Certificates Setup
CVP uses nginx to front and terminate all HTTPS connections. To support HTTPS, the server must be configured with a certificate. A self-signed certificate is generated at first bootup.
The guidelines to import a certificate are:
- Correctly fill the Subject Alternate Name (SAN) IP and DNS fields in both signed and
self-signed certificates:
-
The SAN IP field must contain the IP addresses of all CVP cluster nodes; and the IP address of any IP load balancer used in front of CVP.
-
The SAN DNS field must contain the Fully Qualified Domain Name (FQDN) of the following elements:
- All CVP cluster nodes
- Any Canonical Names (CNAMES) and round-robin DNS names
- Any IP load balancer used in front of CVP
Note: Zerotouch Provisioning (ZTP) and REST API calls can fail if signed certificates are uploaded without appropriate data in SAN fields. -
- When importing a CVP certificate signed by an internal Certificate Authority (CA), the uploaded file must sequentially contain the full trust chain of PEM-encoded certificates like a server certificate, all intermediate certificates (if available), and a root certificate.
- Leave an empty line between every two certificates when importing multiple
certificates into a single file. Note: Do not leave an empty line at the end of the file.
- If the server certificate is self-signed then the server and root certificates are one-and-the-same, so only that single certificate is required.
- CVP does not support wildcard certificates.
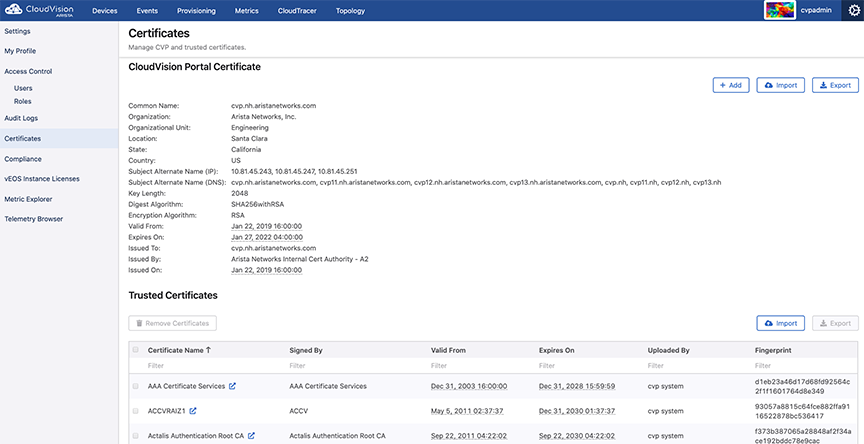
To install an HTTPS certificate, navigate to the Settings page (Click on the gear icon) > Certificates (See the figure below).
Install the certificate using one of the following methods:
Generating and Installing Self-Signed Certificate
-
On the Certificates page, click + Add.
CVP opens the Add CVP Certificate pop-up window. See the figure below.
Figure 2. Add CVP Certificate Pop-Up Window 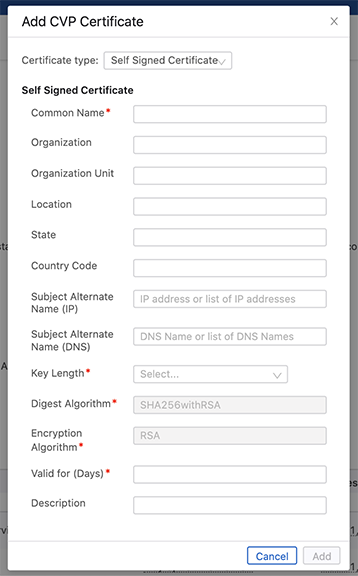
-
Click Add.
CVP opens the Confirm pop-up window informing that the existing certificate will be replaced. See the figure below.
Figure 3. Confirm Pop-Up Window 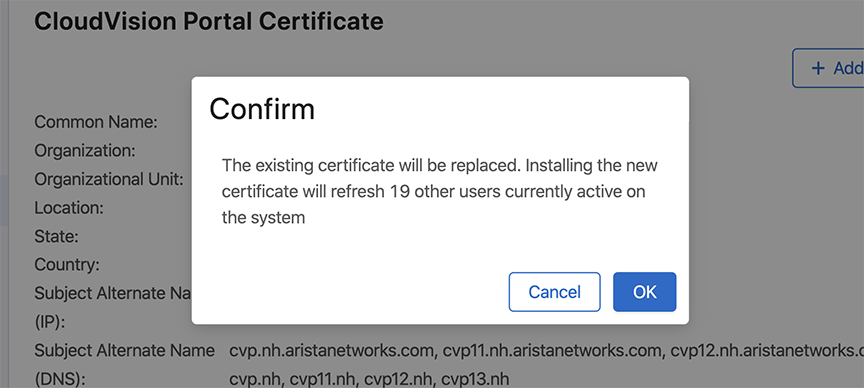
Installing Public Certificate
-
On the Certificates page, click Import.
CVP opens the Import CVP Certificate pop-up window. See the figure below.
Figure 4. Import CVP Certificate Pop-Up Window 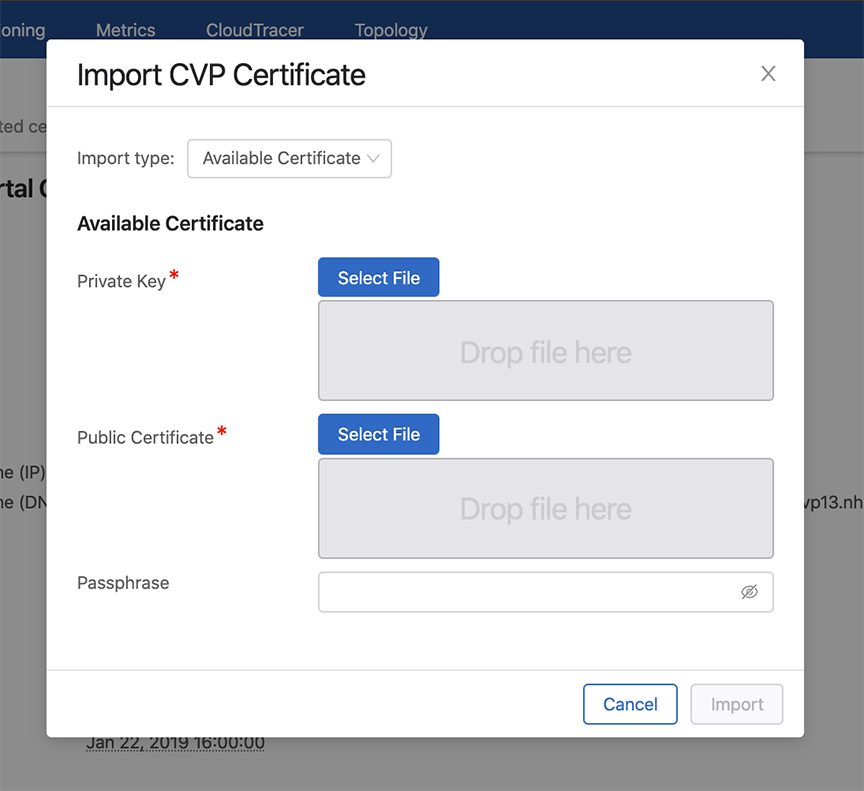
Creating a CSR
A server Certificate Signing Request (CSR) file can be created by either your internal CA (along with an associated server key) or via CVP.
-
Select Certificate Signing Request from the Certificate Type
drop-down menu.
See the figure below.
Figure 5. Add CVP Certificate Dialogbox for CSR
-
Click Add.
CVP opens the Add CVP Certificate dialog box displaying the complete CSR information. See the figure below.
Figure 6. Add CVP Certificate Dialogbox with CSR Details 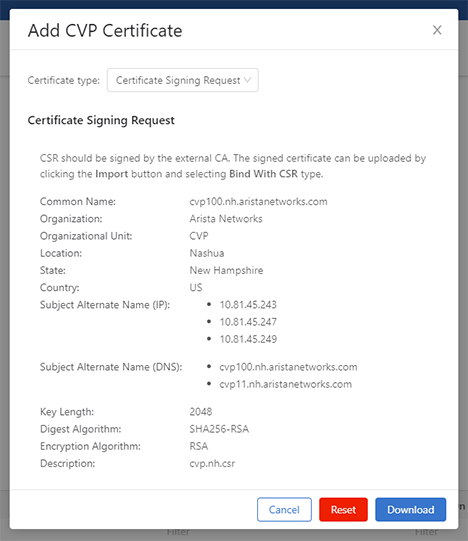
-
Click Import.
CVP opens the Import CVP Certificate dialog box.
Figure 7. Import CVP Certificate to Bind with CSR 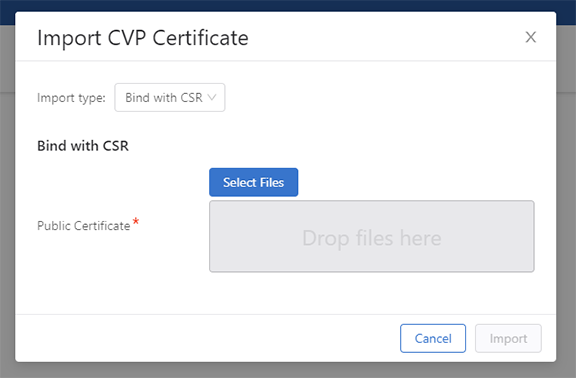
Renewing the Certificate Authority
The Certificate Authority (CA) in the on-premise CVP can be renewed with the following steps:
- SSH into the primary.
- Reset the Certificate Authority (CA) and stop apiserver and ingest with the
following
commands.
yes | cvpi reset ca-init-v1 cvpi stop ingest cvpi stop apiserver - Renew CA and aeris admin certificates with the following commands.
cvpi init ca-init-v1 /cvpi/apps/aeris/bin/create-admin-cert.sh - Restart all stopped components.
cvpi start all - Re-onboard all devices from the Device Onboarding page.